
Nginx实现七层负载均衡
Nginx实现七层负载均衡
1.负载均衡的作用
1.解决web服务器的单点故障,让web服务器做成一个集群
2.将请求平均下发给后端的web服务器
2.负载均衡的各种叫法
LB(Load Balance)
阿里云:SLB(Server Load Balance)
腾讯云:CLB
青云:LB
ucloud:ULB
AWS:ELB
3.负载均衡产品
软件:
	Nginx
	HAproxy
	LVS
硬件
	F5
4.四层负载均衡和七层负载均衡的区别
1.四层负载在传输层,七层负载在应用层
2.四层负载传输速度比七层负载快
3.四层负载无法识别域名,七层负载可以识别域名
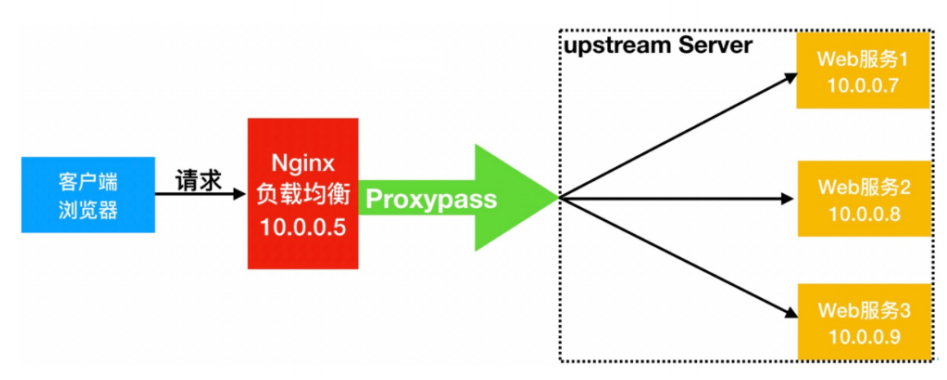
5.负载均衡实现场景
	Nginx要实现负载均衡需要用到 proxy_pass 代理模块配置。
	Nginx负载均衡与Nginx代理不同地方在于,Nginx的一个 location仅能代理一台服务器,而Nginx负载均衡则是将客户端请求代理转发至一组upstream虚拟服务池
6.负载均衡配置语法
Syntax:	upstream name { ... }
Default:	—
Context:	http

upstream name {
	server xxx;
	server xxx;
}
配置负载均衡
环境准备
| 主机名 | WanIP | LanIP | 角色 | 安装应用 |
|---|---|---|---|---|
| lb01 | 10.0.0.5 | 172.16.1.5 | 负载均衡 | nginx |
| web01 | 10.0.0.7 | 172.16.1.7 | web网站 | nginx |
| web02 | 10.0.0.8 | 172.16.1.8 | web网站 | nginx |
编写nginx配置文件(web01,web02)
[root@web01 ~]# vim /etc/nginx/conf.d/www.jl.com.conf
server{
listen 8000;
server_name www.jl.com;
root /code;
index index.html;
}
[root@web02 ~]# vim /etc/nginx/conf.d/www.jl.com.conf
server{
listen 8000;
server_name www.jl.com;
root /code;
index index.html;
}
2.创建站点目录
[root@web02 ~]# mkdir /code
3.将测试内容写进index.html文件中
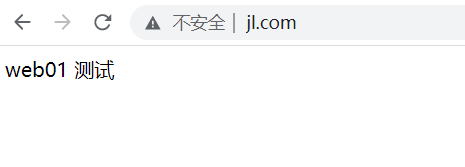
[root@web01 ~]# echo 'web01 测试' > /code/index.html
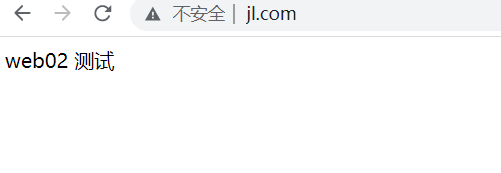
[root@web02 ~]# echo 'web02 测试' > /code/index.html
4.启动nginx
systemctl start nginx
配置负载均衡(lb01)
1.配置nginx配置文件
[root@lb01 ~]# vim /etc/nginx/conf.d/lb.jl.com.conf
# 模块名 后端主机池名字(根据网站域名来起名)
upstream www.jl.com {
        server 172.16.1.7:8000;
        server 172.16.1.8:8000;
}
server{
        listen 80;
        server_name www.jl.com;

        location /{
                proxy_pass http://www.jl.com;
                # 遇到如下状态码的机器跳过请求的下发,直接下发到其他正常的服务器
                proxy_next_upstream error timeout http_500 http_502 http_503 http_504;
                include proxy_params;
        }
}
## 如果后台服务连接超时,Nginx是本身是有机制的,如果出现一个节点down掉的时候,Nginx会更据你具体负载均衡的设置,将请求转移到其他的节点上,但是,如果后台服务连接没有down掉,但是返回错误异常码如:504、502、500,这个时候你需要加一个负载均衡的设置,如上:proxy_next_upstream http_500 | http_502 | http_503| http_504 |http_404;意思是,当其中一台返回错误码404,500...等错误时,可以分配到下一台服务器程序继续处理,提高平台访问成功率。
2.在windows中解析域名
10.0.0.5 www.jl.com
3.浏览器访问
7.负载均衡调度算法
| 调度算法 | 概述 |
|---|---|
| 轮询(rr) | nginx做负载默认使用轮询的调度算法,将请求平均下发到后端的服务器上 |
| 加权轮询(wrr) | 增加权重,根据服务器的配置给轮询加上权重 |
| 源IP(ip_hash) | 根据用户的ip,将同一ip地址的请求下发到同一web服务器上 |
| 源url(url_hash) | 根据用户访问的URL,将同一URL的请求下发到同一的web服务器上 |
| 最小连接数(least_conn) | 哪台服务器的连接数量最少,那么就将请求下发到该web服务器上 |
8.调度算法配置语法
# 加权轮询
upstream name {
	server xxx  weight=2;
	server xxx;
}
# ip_hash
upstream name {
	ip_hash;
	server xxx;
	server xxx;
}
9.负载均衡后端状态
down:负载均衡不对该标识的web服务器下发请求
	语法
		upstream name {
			server xxx down;
			server xxx;
		}
backup:备份,当其它没有backup标识的机器都宕机时,才会给该web服务器下发请求
语法
	upstream name {
		server xxx backup;
		server xxx;
	}

## 额外参数
1.max_fails:负载均衡访问后端最大错误次数,到该制度次数后,不给该服务器发送请求
2.fail_timeout:配合max_fails使用,规定不发请求的时间段
语法
	upstream name {
		server xxx max_fails=3, fails_timeout=10s;
		server xxx;
	}
3.max_conn:限制该后端web服务器的最大连接数
语法
	upstream name {
		server xxx max_conns=1024;
		server xxx;
	}
10.配置nginx负载均衡健康检查模块
作用:检查后端web健康状态
项目地址:https://github.com/yaoweibin/nginx_upstream_check_module
# 使用该模块必须要用源码安装nginx
1.安装nginx的依赖包
yum install -y pcre-devel openssl-devel
2.下载nginx源码包
wget http://nginx.org/download/nginx-1.22.0.tar.gz
3.下载nginx第三方健康检查模块
wget https://github.com/yaoweibin/nginx_upstream_check_module/archive/master.zip
4.解压第三方模块包和源码包
5.安装打补丁的命令
yum install -y patch
6.打补丁
[root@lb01 ~/nginx-1.22.0]# patch -p1 < /root/nginx_upstream_check_module-master/check_1.20.1+.patch
7.生成
./configure --prefix=/app/nginx-1.22.0 --with-compat --with-file-aio --with-threads --with-http_addition_module --with-http_auth_request_module --with-http_dav_module --with-http_flv_module --with-http_gunzip_module --with-http_gzip_static_module --with-http_mp4_module --with-http_random_index_module --with-http_realip_module --with-http_secure_link_module --with-http_slice_module --with-http_ssl_module --with-http_stub_status_module --with-http_sub_module --with-http_v2_module --with-mail --with-mail_ssl_module --with-stream --with-stream_realip_module --with-stream_ssl_module --with-stream_ssl_preread_module --with-cc-opt='-O2 -g -pipe -Wall -Wp,-D_FORTIFY_SOURCE=2 -fexceptions -fstack-protector-strong --param=ssp-buffer-size=4 -grecord-gcc-switches -m64 -mtune=generic -fPIC' --with-ld-opt='-Wl,-z,relro -Wl,-z,now -pie' --add-module=/root/nginx_upstream_check_module-master
8.编译和安装
make && make install
9.在nginx主配置文件中添加conf.d
include /app/nginx-1.22.0/conf/conf.d/*.conf;
10.创建conf.d目录
mkdir /app/nginx-1.22.0/conf/conf.d
11.编写负载均衡配置文件
upstream www.jl.com {
server 172.16.1.7:8000 max_fails=3 fail_timeout=10s;
server 172.16.1.8:8000 max_fails=3 fail_timeout=10s;
check interval=3000 rise=2 fall=3 timeout=1000 type=tcp;
## interval :检测间隔时间,单位为毫秒
## rise :表示请求2次正常,标记此后端的状态为up
## fall :表示请求3次失败,标记次后端的状态为down
## timeout :超时时间,单位为毫秒
## type :类型为tcp连接
}
server{
listen 80;
server_name www.jl.com;
location /{
proxy_pass http://www.jl.com;
include /etc/nginx/proxy_params;
}
location /check_health{
check_status;
}
}
12.语法检测
/app/nginx-1.22.0/sbin/nginx -t
13.启动nginx
/app/nginx-1.22.0/sbin/nginx
14.在window里域名解析
10.0.0.5 www.jl.com
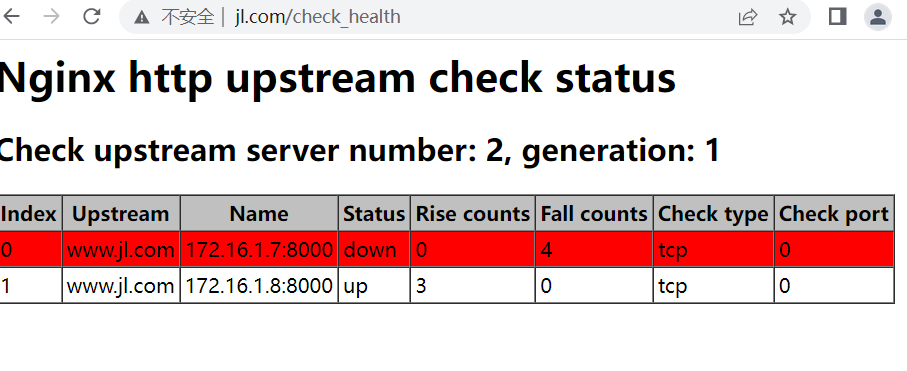
15.关闭web01的nginx
[root@web01 ~]# systemctl stop nginx
15.浏览器访问


【推荐】国内首个AI IDE,深度理解中文开发场景,立即下载体验Trae
【推荐】编程新体验,更懂你的AI,立即体验豆包MarsCode编程助手
【推荐】抖音旗下AI助手豆包,你的智能百科全书,全免费不限次数
【推荐】轻量又高性能的 SSH 工具 IShell:AI 加持,快人一步
· winform 绘制太阳,地球,月球 运作规律
· 震惊!C++程序真的从main开始吗?99%的程序员都答错了
· 【硬核科普】Trae如何「偷看」你的代码?零基础破解AI编程运行原理
· 超详细:普通电脑也行Windows部署deepseek R1训练数据并当服务器共享给他人
· 上周热点回顾(3.3-3.9)