spring boot整合mybatis
1、配置依赖
<dependency>
            <groupId>mysql</groupId>
            <artifactId>mysql-connector-java</artifactId>
            <scope>runtime</scope>
        </dependency>

        <!-- mybatis -->
        <dependency>
            <groupId>org.mybatis.spring.boot</groupId>
            <artifactId>mybatis-spring-boot-starter</artifactId>
            <version>1.3.0</version>
        </dependency>

        <!-- 数据源 -->
        <dependency>
            <groupId>com.alibaba</groupId>
            <artifactId>druid</artifactId>
            <version>1.0.19</version>
        </dependency>
MyBatis-Spring-Boot-Starter依赖将会提供如下
- 自动检测现有的DataSource
- 将创建并注册SqlSessionFactory的实例,该实例使用SqlSessionFactoryBean将该DataSource作为输入进行传递
- 将创建并注册从SqlSessionFactory中获取的SqlSessionTemplate的实例。
- 自动扫描您的mappers,将它们链接到SqlSessionTemplate并将其注册到Spring上下文,以便将它们注入到您的bean中。
就是说,使用了该Starter之后,只需要定义一个DataSource即可(application.properties中可配置),它会自动创建使用该DataSource的SqlSessionFactoryBean以及SqlSessionTemplate。会自动扫描你的Mappers,连接到SqlSessionTemplate,并注册到Spring上下文中。
spring.datasource.url=jdbc:mysql://localhost:3306/test
spring.datasource.username = root
spring.datasource.password = *****
spring.datasource.driver-class-name = com.mysql.jdbc.Driver

mybatis.mapper-locations=classpath:com/***/mapper/*.xml
2、配置spring boot启动类
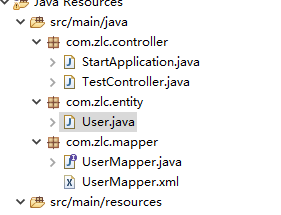
package com.zlc.controller;

import javax.sql.DataSource;

import org.mybatis.spring.annotation.MapperScan;
import org.springframework.beans.factory.annotation.Autowired;
import org.springframework.boot.SpringApplication;
import org.springframework.boot.autoconfigure.EnableAutoConfiguration;
import org.springframework.boot.autoconfigure.SpringBootApplication;
import org.springframework.context.annotation.Bean;
import org.springframework.core.env.Environment;

import com.alibaba.druid.pool.DruidDataSource;

@SpringBootApplication(scanBasePackages = "com.zlc")
//扫描mapper接口
@MapperScan(basePackages="com.zlc.mapper")
@EnableAutoConfiguration
public class StartApplication {

    public static void main(String[] args) {
        SpringApplication.run(StartApplication.class, args);
    }
    @Autowired
    private Environment env;

    @Bean
    public DataSource dataSource() {
        DruidDataSource dataSource = new DruidDataSource();
        dataSource.setUrl(env.getProperty("spring.datasource.url"));
        dataSource.setUsername(env.getProperty("spring.datasource.username"));//用户名
        dataSource.setPassword(env.getProperty("spring.datasource.password"));//密码
        dataSource.setDriverClassName(env.getProperty("spring.datasource.driver-class-name"));
        dataSource.setInitialSize(2);//初始化时建立物理连接的个数
        dataSource.setMaxActive(20);//最大连接池数量
        dataSource.setMinIdle(0);//最小连接池数量
        dataSource.setMaxWait(60000);//获取连接时最大等待时间,单位毫秒。
        dataSource.setValidationQuery("SELECT 1");//用来检测连接是否有效的sql
        dataSource.setTestOnBorrow(false);//申请连接时执行validationQuery检测连接是否有效
        dataSource.setTestWhileIdle(true);//建议配置为true,不影响性能,并且保证安全性。
        dataSource.setPoolPreparedStatements(false);//是否缓存preparedStatement,也就是PSCache
        return dataSource;
    }

}
3、可以按照正常的ssm框架去使用了
4、测试类
package com.zlc.controller;

import org.springframework.beans.factory.annotation.Autowired;
import org.springframework.web.bind.annotation.RequestMapping;
import org.springframework.web.bind.annotation.ResponseBody;
import org.springframework.web.bind.annotation.RestController;

import com.zlc.entity.User;
import com.zlc.mapper.UserMapper;

@RestController
public class TestController {

    @Autowired
    private UserMapper userMapper;

    @RequestMapping("/test")
    public User test() {
        return userMapper.getUser(6);
    }

}
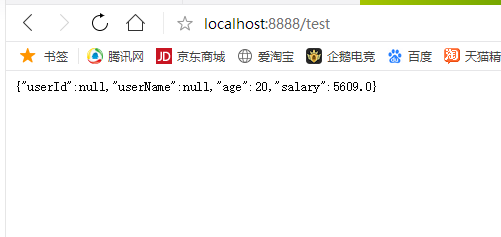
运行结果: