Spring Web MVC的应用(基于XML配置)
Spring Web Mvc需要用到IOC功能,用于开发MVC结构的Web程序
1、MVC思想
将程序组件分为模型,视图,控制器组件三部分
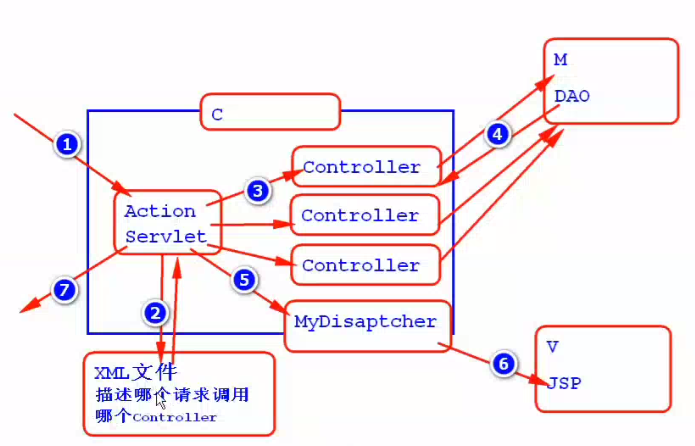
图1 基本的MVC思想图
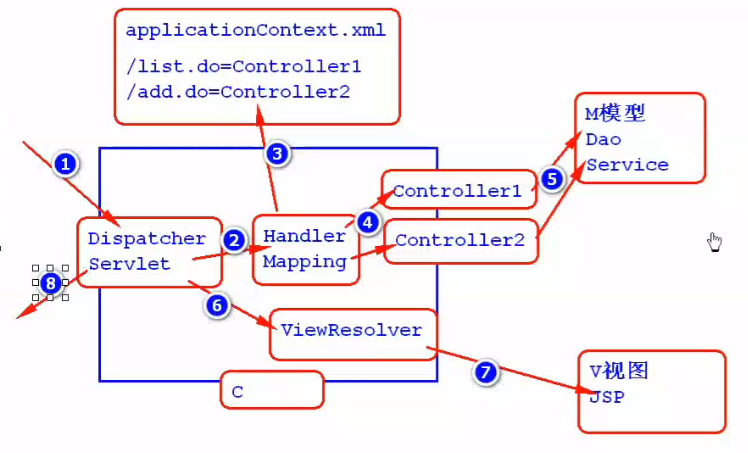
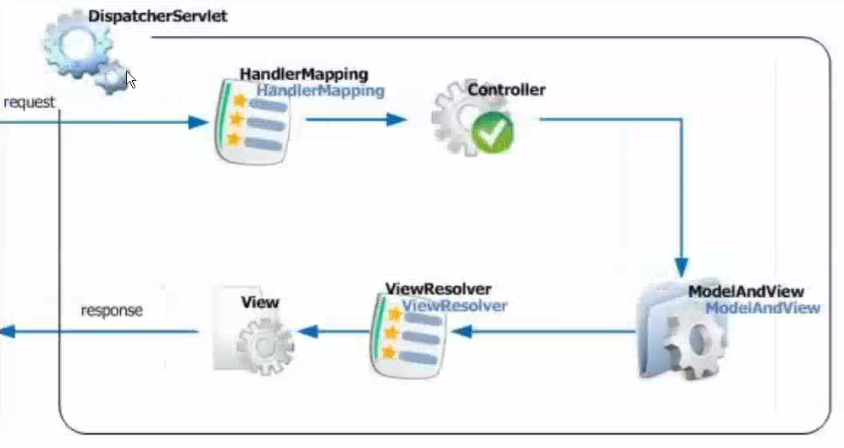
图2 Spring MVC模型图
2、搭建Spring MVC开发环境
(1)引入IOC,MVC等相关jar包
(2)在src下添加一个applicationContext.xml文件
(3)在web.xml中添加Spring Mvc核心控制器DispatcherServlet的配置,配置如下
<?xml version="1.0" encoding="ISO-8859-1"?>
<web-app xmlns="http://java.sun.com/xml/ns/javaee"
  xmlns:xsi="http://www.w3.org/2001/XMLSchema-instance"
  xsi:schemaLocation="http://java.sun.com/xml/ns/javaee
                      http://java.sun.com/xml/ns/javaee/web-app_3_0.xsd"
  version="3.0"
  metadata-complete="true">

    <servlet>
        <servlet-name>springmvc</servlet-name>
        <servlet-class>
        org.springframework.web.servlet.DispatcherServlet
        </servlet-class>
        <!-- 以下指定相应controller与请求对应信息的配置文件位置 -->
        <init-param>
            <!-- contextConfigLocation关键字 -->
            <param-name>contextConfigLocation</param-name>
            <!-- classpath关键字指定路径只有在spring里面可以用,代表着src路径 -->
            <param-value>classpath:applicationContext.xml</param-value>
        </init-param>
        <!-- 设置该Servlet实例化优先级,数字越低,优先级越高 -->
        <load-on-startup>1</load-on-startup>
    </servlet>
    <servlet-mapping>
        <servlet-name>springmvc</servlet-name>
        <url-pattern>*.do</url-pattern>
    </servlet-mapping>

</web-app>
(4)在applicationContext.xml中配置HandlerMapping,HandlerMapping用来解析请求与Controller之间的对应关系
 <!--配置HandlerMapping-->
    <bean id="handlermapping" class="org.springframework.web.servlet.handler.SimpleUrlHandlerMapping">
         <!-- 指定请求和Controller的对应关系 -->
         <property name="mappings">
             <props>
                <prop key="/hello.do">helloController</prop>
             </props>
         </property>
    </bean>
(5)在applicationContext.xml中配置Controller
   <!-- 配置Controller -->
    <bean id="helloController" class="com.zlc.controller.HelloController">
    </bean>
(6)在applicationContext.xml中配置ViewResolver
 <!-- 配置ViewResolver -->
    <bean id="viewresolver" class="org.springframework.web.servlet.view.InternalResourceViewResolver">
        <property name="prefix" value="/WEB-INF/"></property>
        <property name="suffix" value=".jsp"></property>
    </bean>
(7)编写一个HelloController,需要实现一个Controller接口
public class HelloController implements Controller{

    @Override
    public ModelAndView handleRequest(HttpServletRequest request, HttpServletResponse response) throws Exception {
        ModelAndView mav = new ModelAndView();
        mav.setViewName("hello");//设置视图名字,可以指定返回相应的视图组件
        //设置要传出去的模型数据
        mav.getModel().put("msg", "模型数据");//等价于request.setAttribute("msg","模型数据")
        return mav;
    }

}
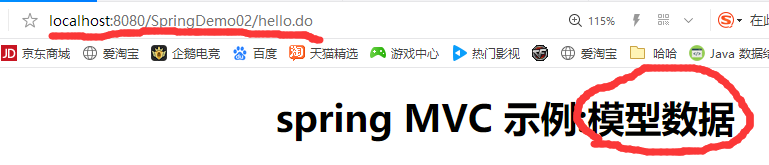
做好以上工作后,开启Tomcat,打开你的浏览器,输入http://localhost:8080/项目名/hello.do即可访问该页面,如:
源码为:

中间过程为: