Spring Boot 环境搭建及Hello World项目
一、环境要求
- jdk 1.8
- maven 3.2
- idea 2017.3.2
- spring boot 1.5.9-release
1、Maven设置,统一更改maven的settings.xml文件:
 <profile>
       <id>jdk-1.8</id>
       <activation>
           <activeByDefault>true</activeByDefault>
           <jdk>1.8</jdk>
       </activation>
       <properties>
          <maven.compiler.source>1.8</maven.compiler.source>
          <maven.compiler.target>1.8</maven.compiler.target>
          <maven.compiler.compilerVersion>1.8</maven.compiler.compilerVersion>
       </properties>
    </profile>
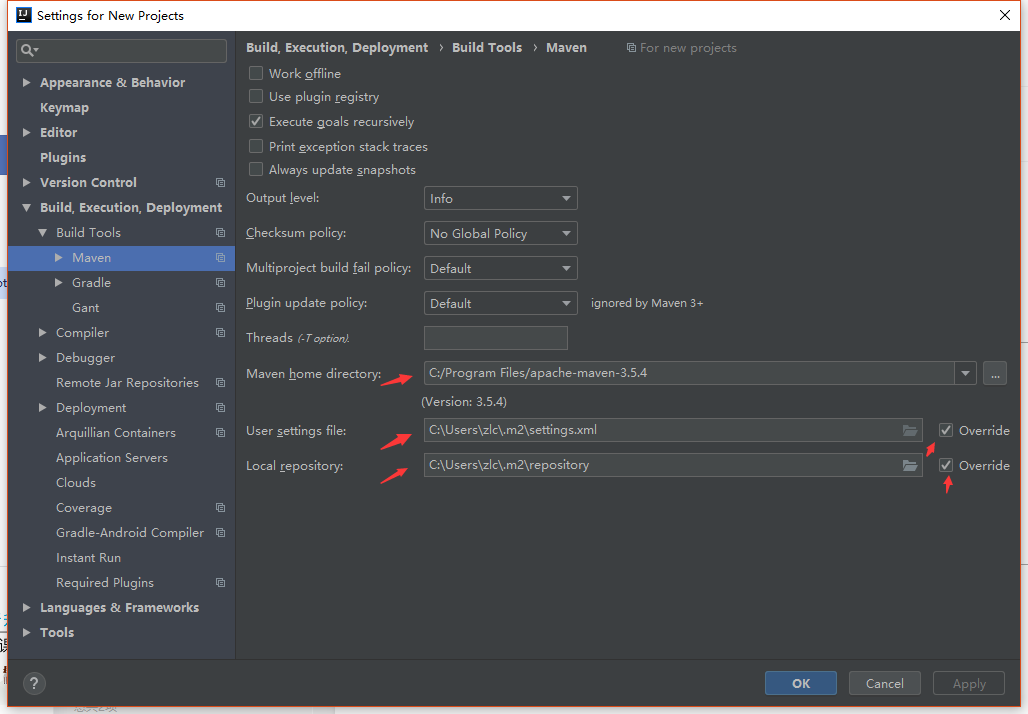
2、IDEA设置,设置Maven为本地Maven:

二 、基于Spring Boot 创建一个Hello World项目
一个功能:浏览器发送hello请求,服务器接受请求并处理,响应hello world 字符串
1、创建一个Maven工程;(.jar)
2、导入spring boot相关的依赖
    <parent>
        <groupId>org.springframework.boot</groupId>
        <artifactId>spring-boot-starter-parent</artifactId>
        <version>1.5.20.RELEASE</version>
    </parent>
    <dependencies>
        <dependency>
            <groupId>org.springframework.boot</groupId>
            <artifactId>spring-boot-starter-web</artifactId>
        </dependency>
    </dependencies>
3、创建一个主程序类,用于启动Spring boot
/**
 * @SpringBootApplication 来标注一个主程序类,说明这是一个Spring boot应用
 *
 */
@SpringBootApplication
public class MainApplication {
    public static void main(String[] args) {
        //启动spring boot应用
        SpringApplication.run(MainApplication.class,args);
    }
}
4、编写相关的Controller,Service
注意:
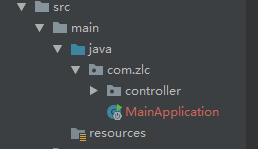
Application启动类的位置不对.要将Application类放在最外侧,即包含所有子包
- spring-boot会自动加载启动类所在包下及其子包下的所有组件

@Controller
public class HelloController {

    @ResponseBody
    @RequestMapping("/hello")
    public String Hello(){
        return "Hello World";
    }
}
5、直接运行主程序

测试结果:

6、简化部署
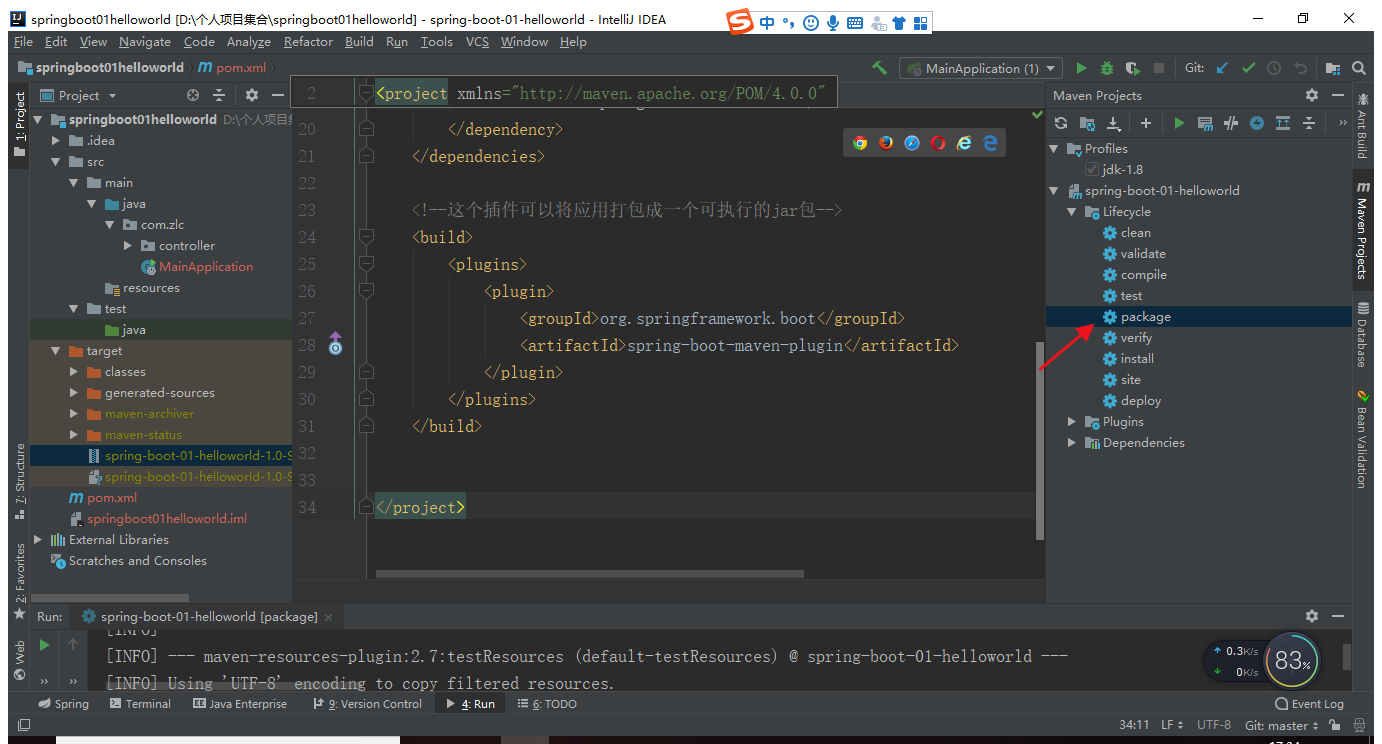
(1)导入插件
<!--这个插件可以将应用打包成一个可执行的jar包-->
    <build>
        <plugins>
            <plugin>
                <groupId>org.springframework.boot</groupId>
                <artifactId>spring-boot-maven-plugin</artifactId>
            </plugin>
        </plugins>
    </build>
(2)打包成jar包,直接进行java -jar 命令直接运行即可


