

Spring
导入包

建spring文件
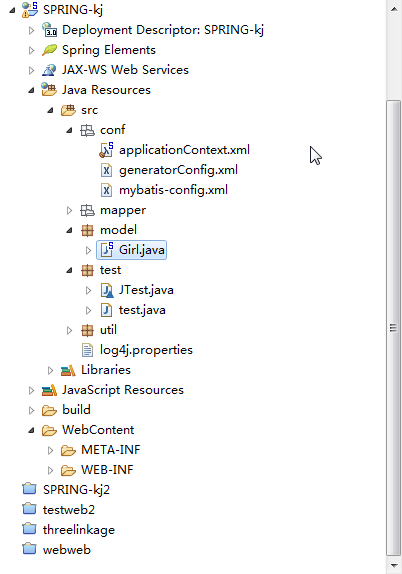
applicationContext.xml中(spring.xml文件)
<!-- 控制反转IOC,依赖注入DI 面向切面编程AOP(通知,有一个代理,可以在已固定的类方法中进行功能拓展)
@Controller 与前端打交道
@Component将一个类作为实体类放入Spring容器中
@Repository 将一个类作为业务逻辑处理层放入Spring容器中
-->
<?xml version="1.0" encoding="UTF-8"?>
<beans xmlns="http://www.springframework.org/schema/beans"
	xmlns:xsi="http://www.w3.org/2001/XMLSchema-instance"
	xmlns:p="http://www.springframework.org/schema/p"
	xsi:schemaLocation="http://www.springframework.org/schema/beans
http://www.springframework.org/schema/beans/spring-beans.xsd">

 <bean id="xiao" class="model.Girl" > <!-- p:name="开导" p:age="24" scope="singleton" -->

<!-- set方法注入  -->
   <!-- <property name="name" value="xiaobai"></property>
	<property name="age" value="17"></property>-->
<!-- 构造器是根据类型放入值,类中一定要有这个构造方法 -->
	<!-- 	<constructor-arg index="0" value="拜拜"></constructor-arg>
		<constructor-arg index="1" value="14"></constructor-arg>
		<constructor-arg index="2" ref="nowtime"></constructor-arg>    -->
		<!-- <context:annotation-config /> -->
		<property name="list"><!--通过构造方法中的名字往实体类中传值 -->
			<list>
				<value>java</value>
				<value>jjdkas</value>
				<value>dakame</value>
			</list>
			<map><!-- ref是引用的意思,传时间之类的引用 -->
				<entry key-ref="" value-ref="" value=""></entry>
			</map>
		</property>
	</bean>
	<bean id="nowtime" class="java.util.Date"></bean>
<!-- <aop:config proxy-target-class="true"></aop>-->
 </beans>
<!--如果还有一个dept类,这个类中有girl这个实体类属性,可以如下这样写来
	调用,在test中直接实例化并打印dept就行  -->
	<!-- <bean id="dept" class="com.hanqi.model.Dept">
		<property name="appUser" ref="appUser"></property>
	</bean> -->
看看实体类咋写的package model;
import java.util.Date;
import java.util.List;
//com.model/com.domain/com.entity/com.pojo都是指实体类

public class Girl {
	private String name;
	private int age;
	private Date birthday;
	private List<String> list;//假如有

	public void sayhello() {
		System.out.println(name +"说:你好!!!!!!");
	}
	public Girl() {
		super();
	}
	public Girl(String name, int age) {
		super();
		this.name = name;
		this.age = age;
	}

	public Girl(String name, int age, Date birthday) {
		super();
		this.name = name;
		this.age = age;
		this.birthday = birthday;
	}

	public Girl(String name, int age, Date birthday, List<String> list) {
		super();
		this.name = name;
		this.age = age;
		this.birthday = birthday;
		this.list = list;
	}
	public String getName() {
		return name;
	}
	public void setName(String name) {
		this.name = name;
	}
	public int getAge() {
		return age;
	}
	public void setAge(int age) {
		this.age = age;
	}
	public Date getBirthday() {
		return birthday;
	}
	public void setBirthday(Date birthday) {
		this.birthday = birthday;
	}
	public List<String> getList() {
		return list;
	}
	public void setList(List<String> list) {
		this.list = list;
	}
	@Override
	public String toString() {
		return "Girl [name=" + name + ", age=" + age + ", birthday="
+ birthday + ", list=" + list + "]";
	}
}
test怎么打印出来的
package test;

import org.springframework.context.ApplicationContext;
import org.springframework.context.support.ClassPathXmlApplicationContext;
import model.Girl;

public class test {

	public static void main(String[] args) {
		ApplicationContext ac = new ClassPathXmlApplicationContext
				("conf/applicationContext.xml");//从src下开始
		        //Girl girl = (Girl)ac.getBean("xiao");
		Girl girl1 = ac.getBean(Girl.class);//用这种泛型
		System.out.println(girl1);
		        /*girl.setName("笨蛋");
		        girl.setAge(18);
		        girl.sayhello();*/
		close(ac);
	}

	public static void close(ApplicationContext ac) {
		ClassPathXmlApplicationContext c = (ClassPathXmlApplicationContext)ac;
		c.close();
	}
}
第二种方法


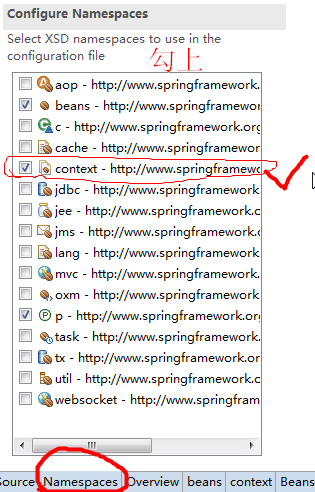
<?xml version="1.0" encoding="UTF-8"?>
<beans xmlns="http://www.springframework.org/schema/beans"
	xmlns:xsi="http://www.w3.org/2001/XMLSchema-instance"
	xmlns:context="http://www.springframework.org/schema/context"
	xsi:schemaLocation="http://www.springframework.org/schema/beans
http://www.springframework.org/schema/beans/spring-beans.xsd
		http://www.springframework.org/schema/context
http://www.springframework.org/schema/context/spring-context-4.3.xsd">
<!--这种在类名上添加注解的方式,只是用来给Spring添加配置的
	有一些实体类并不需要放到Spring中 .这种方式破坏了类中的单一职责原则-->
	<!--上下文 组件 扫描.人话:扫描上下文中所有带着component标签的类  指定一个包
	lib中要有spring-aop这个包才行!-->
	<context:component-scan base-package="com.hanqi.model" />
</beans>
SpringMVC环境搭建
1, 导包(spring框架的jar)
2, 在web.xml中声明springmvc的核心servlet---org.springframework.web.servlet.DispatcherServlet
声明springmvc配置文件的位置
也可以使用默认值, 将springmvc的配置文件放在WEB-INF下,
并且配置文件的名称一定为<servlet-name></servlet-name>里面的名字加上"-servlet"
3, 配置springmvc的配置文件
配置扫描器
配置视图解析器(InternalResourceViewResolver)
前缀
后缀
开启mvc注解驱动<mvc:annotation-driver />
4, 新建Controller控制器(@Controller)
5, 控制器类里面编写方法, 方法的返回值被视图解析器解析作为返回的视图层
返回值可以是String或者ModelAndView
常用注解
@Controller
@RequestMapping
@RequestParam
@PathVariable
@SessionAttribute
@ModelAttribute
@ResponseBody
SpringMVC的文件上传和下载
例
//运行页面
<%@ page language="java" contentType="text/html; charset=UTF-8"
    pageEncoding="UTF-8"%>
<!DOCTYPE html PUBLIC "-//W3C//DTD HTML 4.01 Transitional//EN"
"http://www.w3.org/TR/html4/loose.dtd">
<html>
<head>
<meta http-equiv="Content-Type" content="text/html; charset=UTF-8">
<title>Insert title here</title>
</head>
<body>
<a href="helloworld2?aabbcc=xiaohua">链接</a>
</body>
</html>
web.xml: 启动时加载
<?xml version="1.0" encoding="UTF-8"?>

<web-app xmlns:xsi="http://www.w3.org/2001/XMLSchema-instance"

	xmlns="http://java.sun.com/xml/ns/javaee"

	xsi:schemaLocation="http://java.sun.com/xml/ns/javaee
http://java.sun.com/xml/ns/javaee/web-app_3_0.xsd"

	id="WebApp_ID" version="3.0">

	<!-- The front controller of this Spring Web application,
responsible for

		handling all application requests -->
	<servlet>
		<servlet-name>hanqi</servlet-name>
		<servlet-class>org.springframework.web.servlet.DispatcherServlet</servlet-class>
<!-- 		<init-param>
			<param-name>contextConfigLocation</param-name>
			<param-value>classpath:conf/springmvc2.xml</param-value>
		</init-param> -->

		<!-- 启动时加载 如果不写上面那个inint-param默认,就会自动去找
与servlet-name相同的名加个后缀(-servlet.xml的文件)-->
		<!-- 当数值大于等于0的时候, 启动时加载, 数值越小, 优先级越高 -->
		<load-on-startup>1</load-on-startup>
	</servlet>

	<!-- Map all requests to the DispatcherServlet for handling -->
	<servlet-mapping>
		<servlet-name>hanqi</servlet-name>

		<url-pattern>/</url-pattern>
	</servlet-mapping>

</web-app>
如下:
原来叫springmvc2.xml,现在改名为hanqi-servlet.xml来加载文件
<?xml version="1.0" encoding="UTF-8"?>
<beans xmlns="http://www.springframework.org/schema/beans"
xmlns:xsi="http://www.w3.org/2001/XMLSchema-instance"
xmlns:context="http://www.springframework.org/schema/context"
xmlns:mvc="http://www.springframework.org/schema/mvc"
xsi:schemaLocation="http://www.springframework.org/schema/mvc
http://www.springframework.org/schema/mvc/spring-mvc-4.3.xsd
http://www.springframework.org/schema/beans
http://www.springframework.org/schema/beans/spring-beans.xsd
http://www.springframework.org/schema/context
http://www.springframework.org/schema/context/spring-context-4.3.xsd">

<context:component-scan base-package="com.hanqi.controller" />//还有这句

	<!-- 视图解析器 -->
	<bean class="org.springframework.web.servlet.view.InternalResourceViewResolver">
		<property name="suffix" value=".jsp"></property>
		<property name="prefix" value="/WEB-INF/page/"></property>

	</bean>
	<mvc:annotation-driven />  <!--注意加上这句-->
</beans>
TestController.java ----控制层
package com.hanqi.controller;
import org.springframework.stereotype.Controller;
import org.springframework.web.bind.annotation.PathVariable;
import org.springframework.web.bind.annotation.RequestMapping;
import org.springframework.web.bind.annotation.RequestParam;
import org.springframework.web.servlet.ModelAndView;
import com.hanqi.model.AppUser;

// @Component @Repository @Service
// @Autowired @Resource

@Controller
public class TestController {

	@RequestMapping("test/{dfghsdfgdsf}/aaaa")
	public String testDynaicParam(
@PathVariable("dfghsdfgdsf")String path) {
//动态路径改变(在真正的主页那里,可以写多个jsp,
这样就会在网址上输入哪个,跳哪个页面)
		//System.out.println(path);
		return path;
	}


	@RequestMapping("/helloworld2")
	public ModelAndView helloWorld(
			ModelAndView mav,
			@RequestParam("aabbcc")String username) {
//写一个modelandview这个类,自动获取和返回前台数据,甚至传入的名不一致也可以
//写个注解匹配上
		// ModelAndView mav = new ModelAndView();
		System.out.println(username);
		AppUser user = new AppUser();
		user.setRealname("超级管理员2");
		mav.addObject("currentUser", user); // request.setAttribute();
		mav.setViewName("success");
 相当于下面的request.getServletDispatcher...重定向到哪里(hanqi-servlet.xml)
		return mav;//把这些东西返回回去
	}

/*	@RequestMapping("/helloworld2")
	public String helloWorld(HttpServletRequest request,
	HttpServletResponse response) {
		String username = request.getParameter("username");
		// System.out.println(username);
		request.setAttribute("msg", "外面出太阳了");
		return "success";
	}*/
}
//走到真正的主页
<%@ page language="java" contentType="text/html;
charset=UTF-8"
    pageEncoding="UTF-8"%>
<!DOCTYPE html PUBLIC "-//W3C//DTD HTML 4.01 Transitional//EN"
"http://www.w3.org/TR/html4/loose.dtd">
<html>
<head>
<meta http-equiv="Content-Type" content="text/html; charset=UTF-8">
<title>Insert title here</title>
</head>
<body>
<h1>访问成功的页面 !</h1>
${currentUser.realname}
</body>
</html>
//这是建的那个类
package com.hanqi.model;

public class AppUser {
	private String realname;

	public String getRealname() {
		return realname;
	}

	public void setRealname(String realname) {
		this.realname = realname;
	}

}
