Ansible常用模块
目录
Ansible常用模块
1. Ansible常用模块详解
ansible常用模块有:
- ping
- yum
- template
- copy
- user
- group
- service
- raw
- command
- shell
- script
- file
ansible常用模块raw、command、shell的区别:
- shell模块调用的/bin/sh指令执行
- command模块不是调用的shell的指令,所以没有bash的环境变量
- raw很多地方和shell类似,更多的地方建议使用shell和command模块。但是如果是使用老版本python,需要用到raw,又或者是客户端是路由器,因为没有安装python模块,那就需要使用raw模块了
2. ping
ping模块用于检查指定节点机器是否连通,用法很简单,不涉及参数,主机如果在线,则回复pong
[root@Ansible ansible]# ansible all -m ping
192.168.169.140 | SUCCESS => {
    "ansible_facts": {
        "discovered_interpreter_python": "/usr/libexec/platform-python"
    },
    "changed": false,
    "ping": "pong"
}
192.168.169.142 | SUCCESS => {
    "ansible_facts": {
        "discovered_interpreter_python": "/usr/libexec/platform-python"
    },
    "changed": false,
    "ping": "pong"
}
3. command
ommand模块用于在远程主机上执行命令,ansible默认就是使用command模块。
command模块有一个缺陷就是不能使用管道符和重定向功能。
[root@Ansible ansible]# ansible 192.168.169.140 -a 'ls /tmp'
192.168.169.140 | CHANGED | rc=0 >>
ansible_command_payload_dbo1w1wp
vmware-root_1002-2957518059
vmware-root_972-2957124820

//command模块不支持重定向和管道服
[root@Ansible ansible]# ansible 192.168.169.140 -a "echo 'hello world' > /tmp/test"
192.168.169.140 | CHANGED | rc=0 >>
hello world > /tmp/test

[root@Ansible ansible]# ansible 192.168.169.140 -a 'cat /tmp/test'
192.168.169.140 | CHANGED | rc=0 >>

[root@Ansible ansible]# ansible 192.168.169.140 -a 'ps -ef|grep httpd'
192.168.169.140 | FAILED | rc=1 >>
error: unsupported SysV option

Usage:
 ps [options]

 Try 'ps --help <simple|list|output|threads|misc|all>'
  or 'ps --help <s|l|o|t|m|a>'
 for additional help text.

For more details see ps(1).non-zero return code
4. raw
raw模块用于在远程主机上执行命令,其支持管道符与重定向
[root@Ansible ansible]# ansible 192.168.169.140 -m raw -a "echo 'Hello world' > /tmp/test"
192.168.169.140 | CHANGED | rc=0 >>
Shared connection to 192.168.169.140 closed.

[root@Ansible ansible]# ansible 192.168.169.140 -a 'cat /tmp/test'
192.168.169.140 | CHANGED | rc=0 >>
Hello world
5. shell
shell模块用于在受控机上执行受控机上的脚本,亦可直接在受控机上执行命令。
shell模块亦支持管道与重定向。
//查看受控主机的脚本
[root@Ansible ansible]# ansible 192.168.169.140 -a 'ls -l /scripts'
192.168.169.140 | CHANGED | rc=0 >>
total 4
-rwxr-xr-x 1 root root 51 Oct 23 21:00 test.sh

//执行
[root@Ansible ansible]# ansible 192.168.169.140 -m shell -a '/scripts/test.sh'
192.168.169.140 | CHANGED | rc=0 >>
1
2
3
4
5
6
7
8
9
10
6. script
script模块用于在受控机上执行主控机上的脚本
[root@Ansible ansible]# ll /scripts/
total 4
-rw-r--r--. 1 root root 51 Oct 23 20:59 test.sh

[root@Ansible ansible]# ansible 192.168.169.140 -m script -a '/scripts/test.sh'
192.168.169.140 | CHANGED => {
    "changed": true,
    "rc": 0,
    "stderr": "Shared connection to 192.168.169.140 closed.\r\n",
    "stderr_lines": [
        "Shared connection to 192.168.169.140 closed."
    ],
    "stdout": "1\r\n2\r\n3\r\n4\r\n5\r\n6\r\n7\r\n8\r\n9\r\n10\r\n",
    "stdout_lines": [
        "1",
        "2",
        "3",
        "4",
        "5",
        "6",
        "7",
        "8",
        "9",
        "10"
    ]
}
7. template
template模块用于生成一个模板,并可将其传输至远程主机上。
//生成一个文件
[root@Ansible ansible]# echo "Hello World and Linux" > /tmp/hello

//将/tmp/hello传到受控主机
[root@Ansible ansible]# ansible 192.168.169.140 -m template -a 'src=/tmp/hello dest=//tmp'
192.168.169.140 | CHANGED => {
    "ansible_facts": {
        "discovered_interpreter_python": "/usr/libexec/platform-python"
    },
    "changed": true,
    "checksum": "a1ce559069430209bc8d95193581a84736c8e089",
    "dest": "//tmp/hello",
    "gid": 0,
    "group": "root",
    "md5sum": "61bec9332a9afb902bb3aee772cbd4b1",
    "mode": "0644",
    "owner": "root",
    "size": 22,
    "src": "/root/.ansible/tmp/ansible-tmp-1666530639.0381281-6225-22675868703159/source",
    "state": "file",
    "uid": 0
}

//查看受控主机上是否有hello文件
[root@Ansible ansible]# ansible 192.168.169.140 -a 'ls /tmp/hello'
192.168.169.140 | CHANGED | rc=0 >>
/tmp/hello
[root@Ansible ansible]# ansible 192.168.169.140 -a 'cat /tmp/hello'
192.168.169.140 | CHANGED | rc=0 >>
Hello World and Linux
8. yum
yum模块用于在指定节点机器上通过yum管理软件,其支持的参数主要有两个
- name:要管理的包名
- state:要进行的操作
state常用的值:
- latest:安装软件
- installed:安装软件
- present:安装软件
- removed:卸载软件
- absent:卸载软件
若想使用yum来管理软件,请确保受控机上的yum源无异常
//在受控主机安装vsftpd服务
[root@Ansible ansible]# ansible 192.168.169.142 -m yum -a 'name=vsftpd state=present'
192.168.169.142 | CHANGED => {
    "ansible_facts": {
        "discovered_interpreter_python": "/usr/libexec/platform-python"
    },
    "changed": true,
    "msg": "",
    "rc": 0,
    "results": [
        "Installed: vsftpd-3.0.3-34.el8.x86_64"
    ]
}

//卸载受控主机上的vsftpd服务
[root@Ansible ansible]# ansible 192.168.169.142 -m yum -a 'name=vsftpd state=absent'
192.168.169.142 | CHANGED => {
    "ansible_facts": {
        "discovered_interpreter_python": "/usr/libexec/platform-python"
    },
    "changed": true,
    "msg": "",
    "rc": 0,
    "results": [
        "Removed: vsftpd-3.0.3-34.el8.x86_64"
    ]
}
9. copy
copy模块用于复制文件至远程受控机。
用法和template模块类似,但是template模块远比copy模块要强大
10. group
group模块用于在受控机上添加或删除组。
//在受控机上添加一个系统组,其gid为306,组名为mysql
[root@Ansible ansible]# ansible 192.168.169.140 -m group -a 'name=mysql system=yes gid=306 state=present'
192.168.169.140 | CHANGED => {
    "ansible_facts": {
        "discovered_interpreter_python": "/usr/libexec/platform-python"
    },
    "changed": true,
    "gid": 306,
    "name": "mysql",
    "state": "present",
    "system": true
}

[root@Ansible ansible]# ansible 192.168.169.140  -a 'grep mysql /etc/group'
192.168.169.140 | CHANGED | rc=0 >>
mysql:x:306:

//删除受控机上的mysql组
[root@Ansible ansible]# ansible 192.168.169.140 -m group -a 'name=mysql system=yes gid=306 state=absent'
192.168.169.140 | CHANGED => {
    "ansible_facts": {
        "discovered_interpreter_python": "/usr/libexec/platform-python"
    },
    "changed": true,
    "name": "mysql",
    "state": "absent"
}

[root@Ansible ansible]# ansible 192.168.169.140  -a 'grep mysql /etc/group'
192.168.169.140 | FAILED | rc=1 >>
non-zero return code
11. user
user模块用于管理受控机的用户帐号。
//在受控机上添加一个系统用户,用户名为mysql,uid为306,设置其shell为/sbin/nologin,无家目录
[root@Ansible ansible]# ansible 192.168.169.140 -m user -a 'name=mysql uid=306 system=yes create_home=no shell=/sbin/nologin'
192.168.169.140 | CHANGED => {
    "ansible_facts": {
        "discovered_interpreter_python": "/usr/libexec/platform-python"
    },
    "changed": true,
    "comment": "",
    "create_home": false,
    "group": 306,
    "home": "/home/mysql",
    "name": "mysql",
    "shell": "/sbin/nologin",
    "state": "present",
    "system": true,
    "uid": 306
}

[root@Ansible ansible]# ansible 192.168.169.140  -a 'grep mysql /etc/passwd'
192.168.169.140 | CHANGED | rc=0 >>
mysql:x:306:306::/home/mysql:/sbin/nologin
[root@Ansible ansible]# ansible 192.168.169.140  -a 'ls /home'
192.168.169.140 | CHANGED | rc=0 >>

//删除受控机上的mysql用户
[root@Ansible ansible]# ansible 192.168.169.140 -m user -a 'name=mysql state=absent'
192.168.169.140 | CHANGED => {
    "ansible_facts": {
        "discovered_interpreter_python": "/usr/libexec/platform-python"
    },
    "changed": true,
    "force": false,
    "name": "mysql",
    "remove": false,
    "state": "absent"
}
[root@Ansible ansible]# ansible 192.168.169.140  -a 'grep mysql /etc/passwd'
192.168.169.140 | FAILED | rc=1 >>
non-zero return code
12. service
service模块用于管理受控机上的服务。
//查看受控机上的vsftpd服务是否启动
[root@Ansible ansible]# ansible 192.168.169.140 -m shell -a 'systemctl is-active vsftpd'
192.168.169.140 | FAILED | rc=3 >>
inactivenon-zero return code

//启动受控主机的vsftpd服务
[root@Ansible ansible]# ansible 192.168.169.140 -m service -a 'name=vsftpd state=started'
192.168.169.140 | CHANGED => {
    "ansible_facts": {
        "discovered_interpreter_python": "/usr/libexec/platform-python"
    },
    "changed": true,
    "name": "vsftpd",
    "state": "started",
    "status": {
        "ActiveState": "inactive",
…………
}

//查看受控机上的vsftpd服务是否启动
[root@Ansible ansible]# ansible 192.168.169.140 -m shell -a 'systemctl is-active vsftpd'
192.168.169.140 | CHANGED | rc=0 >>
active

//设置受控机上的vsftpd服务开机自动启动
[root@Ansible ansible]# ansible 192.168.169.140 -m service -a 'name=vsftpd enabled=yes'

//停止受控机上的vsftpd服务并关闭开机自启
[root@Ansible ansible]# ansible 192.168.169.140 -m service -a 'name=vsftpd state=stopped enabled=no'
13. file
file模块可以用来创建文件和目录,以及修改文件的权限,属主,给文件做链接
//在受控节点创建一个目录/test,权限为755
[root@Ansible ansible]# ansible 192.168.169.140 -m file -a 'path=/test state=directory mode=0755'
192.168.169.140 | CHANGED => {
    "ansible_facts": {
        "discovered_interpreter_python": "/usr/libexec/platform-python"
    },
    "changed": true,
    "gid": 0,
    "group": "root",
    "mode": "0755",
    "owner": "root",
    "path": "/test",
    "size": 6,
    "state": "directory",
    "uid": 0
}

//在test目录下创建一个文件a,权限为0644,属主和属组为root
[root@Ansible ansible]# ansible 192.168.169.140 -m file -a 'path=/test/a state=touch owner=root group=root mode=0644'
192.168.169.140 | CHANGED => {
    "ansible_facts": {
        "discovered_interpreter_python": "/usr/libexec/platform-python"
    },
    "changed": true,
    "dest": "/test/a",
    "gid": 0,
    "group": "root",
    "mode": "0644",
    "owner": "root",
    "size": 0,
    "state": "file",
    "uid": 0
}

//递归创建目录
[root@Ansible ansible]# ansible 192.168.169.140 -m file -a 'path=/test/test1/test2/test3 recurse=yes state=directory mode=0755'
192.168.169.140 | CHANGED => {
    "ansible_facts": {
        "discovered_interpreter_python": "/usr/libexec/platform-python"
    },
    "changed": true,
    "gid": 0,
    "group": "root",
    "mode": "0755",
    "owner": "root",
    "path": "/test/test1/test2/test3",
    "size": 6,
    "state": "directory",
    "uid": 0
}

//创建软链接
[root@Ansible ansible]# ansible 192.168.169.140 -m file -a 'src=/test/a dest=/test/b state=link'
192.168.169.140 | CHANGED => {
    "ansible_facts": {
        "discovered_interpreter_python": "/usr/libexec/platform-python"
    },
    "changed": true,
    "dest": "/test/b",
    "gid": 0,
    "group": "root",
    "mode": "0777",
    "owner": "root",
    "size": 7,
    "src": "/test/a",
    "state": "link",
    "uid": 0
}
[root@Ansible ansible]# ansible 192.168.169.140 -m shell -a 'ls -l /test/b'
192.168.169.140 | CHANGED | rc=0 >>
lrwxrwxrwx 1 root root 7 Oct 23 21:45 /test/b -> /test/a

//创建硬链接
[root@Ansible ansible]# ansible 192.168.169.140 -m file -a 'src=/test/a dest=/test/c state=hard'
192.168.169.140 | CHANGED => {
    "ansible_facts": {
        "discovered_interpreter_python": "/usr/libexec/platform-python"
    },
    "changed": true,
    "dest": "/test/c",
    "gid": 0,
    "group": "root",
    "mode": "0644",
    "owner": "root",
    "size": 0,
    "src": "/test/a",
    "state": "hard",
    "uid": 0
}
[root@Ansible ansible]# ansible 192.168.169.140 -m shell -a 'ls -l /test/c'
192.168.169.140 | CHANGED | rc=0 >>
-rw-r--r-- 2 root root 0 Oct 23 21:41 /test/c

//删除文件a
[root@Ansible ansible]# ansible 192.168.169.140 -m file -a 'path=/test/a state=absent'
192.168.169.140 | CHANGED => {
    "ansible_facts": {
        "discovered_interpreter_python": "/usr/libexec/platform-python"
    },
    "changed": true,
    "path": "/test/a",
    "state": "absent"
}
[root@Ansible ansible]# ansible 192.168.169.140 -m shell -a 'ls -l /test/a'
192.168.169.140 | FAILED | rc=2 >>
ls: cannot access '/test/a': No such file or directorynon-zero return code

//删除目录
[root@Ansible ansible]# ansible 192.168.169.140 -m file -a 'path=/test state=absent'
192.168.169.140 | CHANGED => {
    "ansible_facts": {
        "discovered_interpreter_python": "/usr/libexec/platform-python"
    },
    "changed": true,
    "path": "/test",
    "state": "absent"
}
[root@Ansible ansible]# ansible 192.168.169.140 -m shell -a 'ls /test'
192.168.169.140 | FAILED | rc=2 >>
ls: cannot access '/test': No such file or directorynon-zero return code
使用Ansible模块部署LNMP架构
实验环境
| 主机名 | IP | 系统 |
|---|---|---|
| Ansible | 192.168.169.139 | Centos8 |
| Nginx | 192.168.169.140 | Centos8 |
| MySQL | 192.168.169.142 | Centos8 |
| PHP | 192.168.169.145 | Centos8 |
弄4台主机,其中一台装ansible,其余三台分别部署nginx、mysql、php,实现lnmp架构。请合理分配主机资源,所有主机均给500M内存即可,若资源富裕多给些亦可。
ansible控制接节点已经提前部署完毕,首先编写配置文件和主机清单
[root@Ansible ~]# mkdir LNMP
[root@Ansible ~]# cd LNMP/
[root@Ansible LNMP]# cp /etc/ansible/ansible.cfg .
[root@Ansible LNMP]# vim ansible.cfg
inventory      = ./inventory

[root@Ansible LNMP]# touch inventory
[root@Ansible LNMP]# vim inventory
[lnmp]
Nginx
MySQL
PHP
[root@Ansible LNMP]# ansible all --list-hosts
  hosts (3):
    Nginx
    MySQL
    PHP

//编辑hosts文件
[root@Ansible LNMP]# vim /etc/hosts
192.168.169.140 Nginx
192.168.169.142 MySQL
192.168.169.145 PHP

//做ssh免密互信
[root@Ansible LNMP]# ssh-keygen -t rsa		//全部回车
………………
+---[RSA 3072]----+
|*XB              |
|X+o. .           |
|oo+ o            |
|.. =             |
| .o .   S .      |
|+ .o .   . .+    |
|*..o  .   o=     |
|===    o..+.     |
|EB    ..o=o.     |
+----[SHA256]-----+

[root@Ansible LNMP]# ssh-copy-id Nginx
[root@Ansible LNMP]# ssh-copy-id MySQL
[root@Ansible LNMP]# ssh-copy-id PHP

//关闭受控节点的防火墙
[root@Ansible LNMP]# ansible lnmp -m service -a 'name=firewalld state=stopped enabled=no'
//查看lnmp主机组所有主机防火墙是否关闭
[root@Ansible LNMP]# ansible lnmp -m shell -a 'systemctl is-active firewalld'
PHP | FAILED | rc=3 >>
inactivenon-zero return code
MySQL | FAILED | rc=3 >>
inactivenon-zero return code
Nginx | FAILED | rc=3 >>
inactivenon-zero return code

//关闭selinux
[root@Ansible LNMP]# ansible lnmp -m lineinfile -a "path=/etc/selinux/config regexp='SELINUX=.*' line='SELINUX=disabled'"
[root@Ansible LNMP]# ansible lnmp -m reboot
//等待所有受控节点重启完毕,查看lnmp主机组中所有主机selinux的状态
[root@Ansible LNMP]# ansible lnmp  -a 'getenforce'
PHP | CHANGED | rc=0 >>
Disabled
MySQL | CHANGED | rc=0 >>
Disabled
Nginx | CHANGED | rc=0 >>
Disabled

//配置网络源
[root@Ansible LNMP]# ansible lnmp -m yum_repository -a 'name=AppStrem description=AppStream file=zzd baseurl=https://mirrors.aliyun.com/centos/8/AppStream/x86_64/os/ gpgcheck=no enabled=yes'
[root@Ansible LNMP]# ansible lnmp -m yum_repository -a 'name=BaseOS description=BaseOS file=zzd baseurl=https://mirrors.aliyun.com/centos/8/BaseOS/x86_64/os/ gpgcheck=no enabled=yes'

//本实验里源码编译部分使用脚本来完成,编写脚本
[root@Ansible LNMP]# mkdir scripts
[root@Ansible LNMP]# cd scripts/
[root@Ansible scripts]# touch install.sh
[root@Ansible scripts]# chmod +x install.sh
[root@Ansible scripts]# vim install.sh
#!/bin/bash

case $1 in
    'nginx')
        cd /usr/src
        tar xf /usr/src/nginx-1.22.0.tar.gz
        cd /usr/src/nginx-1.22.0
        ;;
    'mysql')
        tar xf /usr/src/mysql-5.7.38-linux-glibc2.12-x86_64.tar.gz -C /usr/local
        ;;
    'php')
        dnf -y install epel-release && \
        cd /usr/src
        tar xf php-8.1.11.tar.gz
        cd /usr/src/php-8.1.11
        ./configure --prefix=/usr/local/php8 \
            --with-config-file-path=/etc \
            --enable-fpm \
            --disable-debug \
            --disable-rpath \
            --enable-shared \
            --enable-soap \
            --with-openssl \
            --enable-bcmath \
            --with-iconv \
            --with-bz2 \
            --with-zlib-dir \
            --with-freetype \
            --with-gettext \
            --enable-mbstring \
            --enable-pdo \
            --with-mysqli=mysqlnd \
            --with-pdo-mysql=mysqlnd \
            --with-readline \
            --enable-shmop \
            --enable-simplexml \
            --enable-sockets \
            --with-zip \
            --enable-mysqlnd-compression-support \
            --with-pear \
            --enable-pcntl \
            --enable-posix
        make && make install
        ;;
    *)
        exit
        ;;
esac

//编写mysql初始化脚本
[root@Ansible scripts]# touch mysql_init.sh
[root@Ansible scripts]# chmod +x mysql_init.sh
[root@Ansible scripts]# vim mysql_init.sh
[root@Ansible scripts]# vim mysql_init.sh
#!/bin/bash
/usr/local/mysql/bin/mysqld --initialize --user=mysql --datadir=/opt/data &> /tmp/pass
echo $(grep password /tmp/pass | awk '{print $NF}') > /tmp/mysql.pass


//编写mysql初始化密码脚本
[root@Ansible scripts]# touch mysql_init_pass.sh
[root@Ansible scripts]# chmod +x mysql_init_pass.sh
[root@Ansible scripts]# vim mysql_init_pass.sh
#!/bin/bash
mysql -uroot -p"$(cat /tmp/mysql.pass)" -e"set password = password('123456');" --connect-expired-password &> /dev/null

//准备源码包
[root@Ansible LNMP]# mkdir files
[root@Ansible LNMP]# cd files/
[root@Ansible files]# wget https://nginx.org/download/nginx-1.22.0.tar.gz
[root@Ansible files]# wget https://downloads.mysql.com/archives/get/p/23/file/mysql-5.7.38-linux-glibc2.12-x86_64.tar.gz
[root@Ansible files]# wget https://www.php.net/distributions/php-8.1.11.tar.gz
安装nginx
//将nginx源码包copy到Nginx主机上去
[root@Ansible LNMP]# ansible Nginx -m copy -a 'src=/root/LNMP/files/nginx-1.22.0.tar.gz dest=/usr/src'
Nginx | CHANGED => {
    "ansible_facts": {
        "discovered_interpreter_python": "/usr/libexec/platform-python"
    },
    "changed": true,
    "checksum": "419efb77b80f165666e2ee406ad8ae9b845aba93",
    "dest": "/usr/src/nginx-1.22.0.tar.gz",
    "gid": 0,
    "group": "root",
    "md5sum": "9b1fb7dae677b22ce4b4e271a4de3501",
    "mode": "0644",
    "owner": "root",
    "size": 1073322,
    "src": "/root/.ansible/tmp/ansible-tmp-1666510559.9542387-2715-164793659980229/source",
    "state": "file",
    "uid": 0
}

//在Nginx主机上创建系统用户nginx
[root@Ansible LNMP]# ansible Nginx -m user -a 'name=nginx system=yes create_home=no shell=/sbin/nologin state=present'
Nginx | CHANGED => {
    "ansible_facts": {
        "discovered_interpreter_python": "/usr/libexec/platform-python"
    },
    "changed": true,
    "comment": "",
    "create_home": false,
    "group": 990,
    "home": "/home/nginx",
    "name": "nginx",
    "shell": "/sbin/nologin",
    "state": "present",
    "system": true,
    "uid": 993
}

//下载编译环境和依赖包
[root@Ansible LNMP]# ansible Nginx -m dnf -a 'name=gcc,gcc-c++,make,pcre-devel,openssl,openssl-devel,gd-devel state=present'
Nginx | CHANGED => {
    "ansible_facts": {
        "discovered_interpreter_python": "/usr/libexec/platform-python"
    },
    "changed": true,
    "msg": "",
    "rc": 0,
    "results": [
        "Installed: libXpm-3.5.12-8.el8.x86_64",
        "Installed: libXpm-devel-3.5.12-8.el8.x86_64",
        "Installed: libblkid-2.32.1-28.el8.x86_64",
………………

//编译nginx
[root@Ansible LNMP]# ansible Nginx -m script -a '/root/LNMP/scripts/install.sh nginx'

//配置nginx环境变量
[root@Ansible LNMP]# ansible Nginx -m file -a 'path=/etc/profile.d/nginx.sh state=touch mode=0644'
[root@Ansible LNMP]# ansible Nginx -m blockinfile -a "path=/etc/profile.d/nginx.sh block='export PATH=\$PATH:/usr/local/nginx/sbin' insertafter=EOF"

//使用systemd风格管理nginx
[root@Ansible LNMP]# ansible Nginx -m file -a 'path=/usr/lib/systemd/system/nginx.service state=touch mode=0644'
[root@Ansible LNMP]# ansible Nginx -m blockinfile -a "path=/usr/lib/systemd/system/nginx.service block='[Unit]\nDescription=Nginx server daemon\nAfter=network.target\n\n[Service]\nType=forking\nExecStart=/usr/local/nginx/sbin/nginx\nExecStop=/usr/local/nginx/sbin/nginx -s stop\nExecReload=/bin/kill -HUP \$MAINPID\n\n[Install]\nWantedBy=multi-user.target'"
[root@Ansible LNMP]# ansible Nginx -m command -a 'systemctl daemon-reload'
[root@Ansible LNMP]# ansible Nginx -m service -a 'name=nginx state=started enabled=yes'

//查看Nginx主机上的nginx服务是否启动
[root@Ansible LNMP]# ansible Nginx -m shell -a 'systemctl is-active nginx'
Nginx | CHANGED | rc=0 >>
active
安装mysql
//将mysql安装包copy到MySQL主机上
[root@Ansible LNMP]# ansible MySQL -m copy -a 'src=/root/LNMP/files/mysql-5.7.38-linux-glibc2.12-x86_64.tar.gz dest=/usr/src'
MySQL | CHANGED => {
    "ansible_facts": {
        "discovered_interpreter_python": "/usr/libexec/platform-python"
    },
    "changed": true,
………………

//创建mysql系统用户
[root@Ansible LNMP]# ansible MySQL -m user -a 'name=mysql system=yes create_home=no shell=/sbin/nologin'

//安装ncurses-compat-libs
[root@Ansible LNMP]# ansible MySQL -m dnf -a 'name=ncurses-compat-libs state=present'

//创建数据存放目录
[root@Ansible LNMP]# ansible MySQL -m file -a 'path=/opt/data state=directory owner=mysql group=mysql mode=0755'


//安装mysql
[root@Ansible LNMP]# ansible MySQL -m script -a '/root/LNMP/scripts/install.sh mysql'

//将mysql安装目录的属主改为mysql并做软链接
[root@Ansible LNMP]# ansible MySQL -m file -a 'src=/usr/local/mysql-5.7.38-linux-glibc2.12-x86_64 dest=/usr/local/mysql owner=mysql group=mysql state=link'
[root@Ansible LNMP]# ansible MySQL -m file -a 'path=/usr/local/mysql-5.7.38-linux-glibc2.12-x86_64 owner=mysql group=mysql recurse=yes'

//配置环境变量
[root@Ansible LNMP]# ansible MySQL -m file -a 'path=/etc/profile.d/mysql.sh state=touch mode=0644'
[root@Ansible LNMP]# ansible MySQL -m blockinfile -a "path=/etc/profile.d/mysql.sh block='export PATH=\$PATH:/usr/local/mysql/bin'"

//配置头文件
[root@Ansible LNMP]# ansible MySQL -m file -a 'src=/usr/local/mysql/include dest=/usr/include/mysql owner=root group=root state=link'

//配置库文件
[root@Ansible LNMP]# ansible MySQL -m file -a 'path=/etc/ld.so.conf.d/mysql.conf state=touch mode=0644'
[root@Ansible LNMP]# ansible MySQL -m blockinfile -a "path=/etc/ld.so.conf.d/mysql.conf block='/usr/local/mysql/lib'"

//配置mysql帮助文档
[root@Ansible LNMP]# ansible MySQL -m blockinfile -a "path=/etc/man_db.conf block='MANDATORY_MANPATH /usr/local/mysql/man'"

//初始化mysql,使用之前编写的脚本进行初始化
[root@Ansible LNMP]# ansible MySQL -m script -a '/root/LNMP/scripts/mysql_init.sh'
MySQL | CHANGED => {
    "changed": true,
    "rc": 0,
    "stderr": "Shared connection to mysql closed.\r\n",
    "stderr_lines": [
        "Shared connection to mysql closed."
    ],
    "stdout": "",
    "stdout_lines": []
}

//生成mysql配置文件
[root@Ansible LNMP]# ansible MySQL -m file -a 'path=/etc/my.cnf state=touch owner=mysql group=mysql mode=0644'
[root@Ansible LNMP]# ansible MySQL -m blockinfile -a "path=/etc/my.cnf block='[mysqld]\nbasedir = /usr/local/mysql\ndatadir = /opt/data\nsocket = /tmp/mysql.sock\nport = 3306\npid-file = /opt/data/mysql.pid\nuser = mysql\nskip-name-resolve'"

//使用systemd风格管理mysql
[root@Ansible LNMP]# ansible MySQL -m file -a 'path=/usr/lib/systemd/system/mysqld.service state=touch mode=0644'
[root@Ansible LNMP]# ansible MySQL -m blockinfile -a "path=/usr/lib/systemd/system/mysqld.service block='[Unit]\nDescription=MySQL server daemon\nAfter=network.target\n\n[Service]\nType=forking\nExecStart=/usr/local/mysql/support-files/mysql.server start\nExecStop=/usr/local/mysql/support-files/mysql.server stop\nExecReload=/bin/kill -HUP \$MAINPID\n\n[Install]\nWantedBy=multi-user.target'"

[root@Ansible LNMP]# ansible MySQL -a 'systemctl daemon-reload'
[root@Ansible LNMP]# ansible MySQL -m service -a 'name=mysqld state=started enabled=yes'

//查看mysqld服务是否开启
[root@Ansible LNMP]# ansible MySQL -m shell -a 'systemctl is-active mysqld'
MySQL | CHANGED | rc=0 >>
active

//初始化mysql密码,同样使用之前编写的脚本
[root@Ansible LNMP]# ansible MySQL -m script -a '/root/LNMP/scripts/mysql_init_pass.sh'
MySQL | CHANGED => {
    "changed": true,
    "rc": 0,
    "stderr": "Shared connection to mysql closed.\r\n",
    "stderr_lines": [
        "Shared connection to mysql closed."
    ],
    "stdout": "",
    "stdout_lines": []
}

//查看mysql数据库
[root@Ansible LNMP]# ansible MySQL -m shell -a 'mysql -uroot -p123456 -e"show databases;" 2> /dev/null'
MySQL | CHANGED | rc=0 >>
Database
information_schema
mysql
performance_schema
sys
安装php
//将php源码包copy到PHP主机
[root@Ansible LNMP]# ansible PHP -m copy -a 'src=/root/LNMP/files/php-8.1.11.tar.gz dest=/usr/src'
PHP | CHANGED => {
    "ansible_facts": {
        "discovered_interpreter_python": "/usr/libexec/platform-python"
    },
    "changed": true,
    "checksum": "8faa8d313f204f19f9428e5acb42f4c5efbb8d41",
    "dest": "/usr/src/php-8.1.11.tar.gz",
…………

//安装php
[root@Ansible LNMP]# ansible PHP -m script -a '/root/LNMP/scripts/install.sh php'

//配置环境变量
[root@Ansible LNMP]# ansible PHP -m file -a 'path=/etc/profile.d/php.sh state=touch mode=0644'
[root@Ansible LNMP]# ansible PHP -m blockinfile -a "path=/etc/profile.d/php.sh block='export PATH=\$PATH:/usr/local/php8/bin'"

//配置头文件
[root@Ansible LNMP]# ansible PHP -m file -a 'src=/usr/local/php8/include dest=/usr/include/php owner=root group=root state=link'

//配置库文件
[root@Ansible LNMP]# ansible PHP -m file -a 'path=/etc/ld.so.conf.d/php.conf state=touch mode=0644'
[root@Ansible LNMP]# ansible PHP -m blockinfile -a "path=/etc/ld.so.conf.d/php.conf block='/usr/local/php8/lib'"

//配置php-fpm
[root@Ansible LNMP]# ansible PHP -a '\cp /usr/src/php-8.1.11/php.ini-production /etc/php.ini'
[root@Ansible LNMP]# ansible PHP -a 'cp /usr/src/php-8.1.11/sapi/fpm/init.d.php-fpm /usr/local/php8/bin/php-fpm'
[root@Ansible LNMP]# ansible PHP -m file -a 'path=/usr/local/php8/bin/php-fpm mode=0755'
[root@Ansible LNMP]# ansible PHP -a 'cp /usr/local/php8/etc/php-fpm.conf.default /usr/local/php8/etc/php-fpm.conf'
[root@Ansible LNMP]# ansible PHP -a 'cp /usr/local/php8/etc/php-fpm.d/www.conf.default /usr/local/php8/etc/php-fpm.d/www.conf'

//使用systemd风格管理php-fpm
[root@Ansible LNMP]# ansible PHP -m file -a 'path=/usr/lib/systemd/system/php-fpm.service state=touch mode=0644'
[root@Ansible LNMP]# ansible PHP -m blockinfile -a "path=/usr/lib/systemd/system/php-fpm.service block='[Unit]\nDescription=php-fpm server daemon\nAfter=network.target\n\n[Service]\nType=forking\nExecStart=/usr/local/php8/bin/php-fpm start\nExecStop=/usr/local/php8/bin/php-fpm stop\nExecReload=/bin/kill -HUP \$MAINPID\n\n[Install]\nWantedBy=multi-user.target'"

[root@Ansible LNMP]# ansible PHP -a 'systemctl daemon-reload'
[root@Ansible LNMP]# ansible PHP -m service -a 'name=php-fpm state=started enabled=yes'

//查看php-fpm是否启动
[root@Ansible LNMP]# ansible PHP -m shell -a 'systemctl is-active php-fpm'
PHP | CHANGED | rc=0 >>
active
配置nginx
[root@Ansible LNMP]# ansible Nginx -m lineinfile -a "path=/usr/local/nginx/conf/nginx.conf regexp='            index  index.html index.htm;' line='            index  index.php index.html index.htm;'"

[root@Ansible LNMP]# ansible Nginx -m blockinfile -a "path=/usr/local/nginx/conf/nginx.conf block='        location ~ \.php$ {\n             root html;\n             fastcgi_pass 192.168.169.145:9000;\n             fastcgi_index index.php;\n             fastcgi_param SCRIPT_FILENAME \$document_root\$fastcgi_script_name;\n             include fastcgi_params;\n         }' insertafter='/404.html;'"


//编写php测试页面
[root@Ansible LNMP]# ansible Nginx -m file -a "path=/usr/local/nginx/html/index.php state=touch mode=0644"
[root@Ansible LNMP]# ansible Nginx -m blockinfile -a "path=/usr/local/nginx/html/index.php block='<?php\n    phpinfo();\n?>'"

//重启nginx
[root@Ansible LNMP]# ansible Nginx -a 'systemctl daemon-reload'
[root@Ansible LNMP]# ansible Nginx -m service -a 'name=nginx state=restarted'


[root@Ansible LNMP]# ansible PHP -m lineinfile -a "path=/usr/local/php8/etc/php-fpm.d/www.conf regexp='listen = 127.0.0.1:9000' line='listen = 192.168.169.145:9000'"
[root@Ansible LNMP]# ansible PHP -m lineinfile -a "path=/usr/local/php8/etc/php-fpm.d/www.conf regexp=';listen.allowed.*' line=';listen.allowed_clients = 192.168.169.140'"

[root@Ansible LNMP]# ansible PHP -m file -a "path=/usr/local/nginx/html recurse=yes state=directory mode=0755"
[root@Ansible LNMP]# ansible PHP -m file -a "path=/usr/local/nginx/html/index.php state=touch mode=0644"
[root@Ansible LNMP]# ansible PHP -m blockinfile -a "path=/usr/local/nginx/html/index.php block='<?php\n    phpinfo();\n?>'"

//重启php-fpm
[root@Ansible LNMP]# ansible PHP -a 'systemctl daemon-reload'
[root@Ansible LNMP]# ansible PHP -m service -a 'name=php-fpm state=restarted'
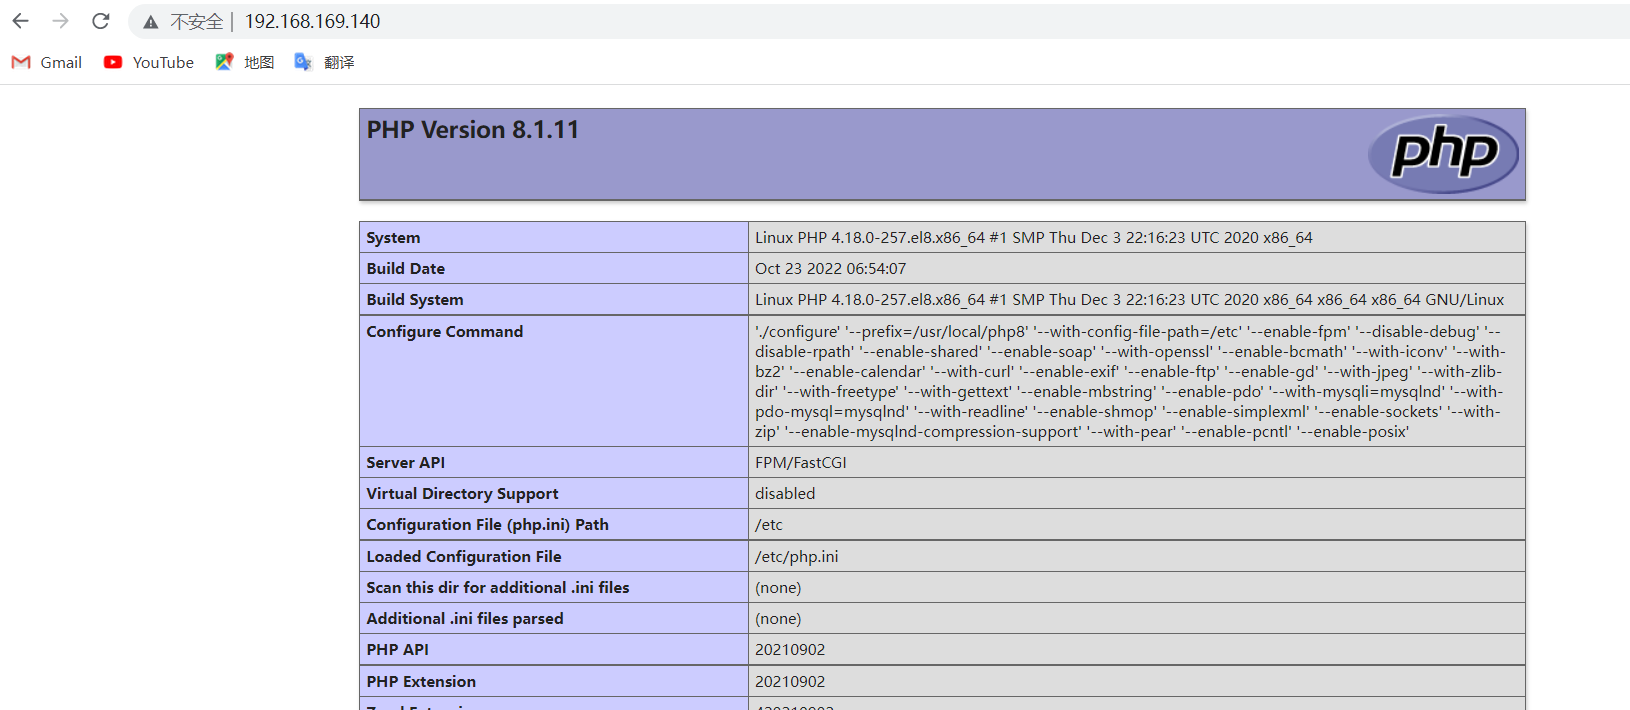
在浏览器访问nginx端的80端口

 浙公网安备 33010602011771号