一,Linux-3.19内核移植DM9000驱动(JZ2440)
文档时间:2018-08-25
交叉编译器:arm-linux-gcc-4.3.2
Ubuntu版本:16.04
kernel版本:linux-3.19
1,移植内核自带的 DM9000 网卡驱动
使用之前制作的 uboot,kernel 和 文件系统,在 uboot 终端把 machid 设置为 0x16a (SMDK2440),启动内核,然后输入 ifconfig 命令,发现不支持 DM9000,如下图所示:

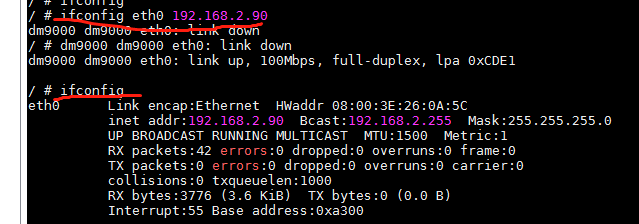
而如果把 machid 设置为 0x7cf (MINI2440),执行同样的操作,发现其能支持 DM9000 网卡驱动,结果如下:

说明在 mach-mini2440.c 单板文件里有对 DM9000 的支持,查看 mach-mini2440.c(/home/aaron/work/kernel/linux-3.19/arch/arm/mach-s3c24xx目录下)文件,看看是如何支持 DM9000 驱动的:
先查找 "dm9000" 关键字找到 mini2440_device_eth 结构,然后查找 mini2440_device_eth 找到 mini2440_device 结构里调用,查找 mini2440_device_eth 找到在 mini2440_init 函数里调用,如下:
static struct platform_device mini2440_device_eth = {    //创建 dm9000 平台设备
    .name        = "dm9000",
    .id        = -1,      //id 号,-1 表示只有一个设备
    .num_resources    = ARRAY_SIZE(mini2440_dm9k_resource),
    .resource    = mini2440_dm9k_resource,  //硬件资源相关
    .dev        = {
        .platform_data    = &mini2440_dm9k_pdata,
    },
};
.............
static struct platform_device *mini2440_devices[] __initdata = {
    &s3c_device_ohci,
    &s3c_device_wdt,
    &s3c_device_i2c0,
    &s3c_device_rtc,
    &s3c_device_usbgadget,
    &mini2440_device_eth,    //将dm9000平台设备添加到数组里
    &mini2440_led1,
    &mini2440_led2,
    &mini2440_led3,
    &mini2440_led4,
    &mini2440_button_device,
    &s3c_device_nand,
    &s3c_device_sdi,
    &s3c_device_iis,
    &uda1340_codec,
    &mini2440_audio,
};
..............
static void __init mini2440_init(void)    //单板初始化函数
{
    .................
    platform_add_devices(mini2440_devices, ARRAY_SIZE(mini2440_devices));

    if (features.count)    /* the optional features */
        platform_add_devices(features.optional, features.count);    //注册添加的平台设备

}
如果与所用板子硬件原理图上 DM9000 引脚不匹配,可以通过查找 "mini2440_dm9k_resource" 来进行修改。
下面仿照上面代码,修改 mach-smdk2440.c(home/aaron/work/kernel/linux-3.19/arch/arm/mach-s3c24xx目录下) 文件,使其能够支持DM9000驱动,修改代码如下(红色为修改部分):
#include <linux/dm9000.h>        //添加头文件

/* DM9000AEP 10/100 ethernet controller */            //添加相关宏
static struct resource smdk2440_dm9k_resource[] = {
    [0] = DEFINE_RES_MEM(MACH_SMDK2440_DM9K_BASE, 4),
    [1] = DEFINE_RES_MEM(MACH_SMDK2440_DM9K_BASE + 4, 4),
    [2] = DEFINE_RES_NAMED(IRQ_EINT7, 1, NULL, IORESOURCE_IRQ \
                        | IORESOURCE_IRQ_HIGHEDGE),
};
//添加smdk2440相关结构定义
/*
 * The DM9000 has no eeprom, and it's MAC address is set by
 * the bootloader before starting the kernel.
 */
static struct dm9000_plat_data smdk2440_dm9k_pdata = {
    .flags        = (DM9000_PLATF_16BITONLY | DM9000_PLATF_NO_EEPROM),
};

static struct platform_device smdk2440_device_eth = {
    .name        = "dm9000",
    .id        = -1,
    .num_resources    = ARRAY_SIZE(smdk2440_dm9k_resource),
    .resource    = smdk2440_dm9k_resource,
    .dev        = {
        .platform_data    = &smdk2440_dm9k_pdata,
    },
};

static struct platform_device *smdk2440_devices[] __initdata = {
    &s3c_device_ohci,
    &s3c_device_lcd,
    &s3c_device_wdt,
    &s3c_device_i2c0,
    &s3c_device_iis,
    &smdk2440_device_eth,       /在数组里添加该结构
};
make uImage 进行内核编译,在 uboot 中输入以下命令烧写新内核:
nfs 32000000 192.168.2.110:/home/aaron/work/kernel/linux-3.19/arch/arm/boot/uImage
set machid 0x16a
bootm 32000000
内核启动成功后,输入以下命令验证:
ifconfig eth0 192.168.2.90        //配置
ifconfig        //查看
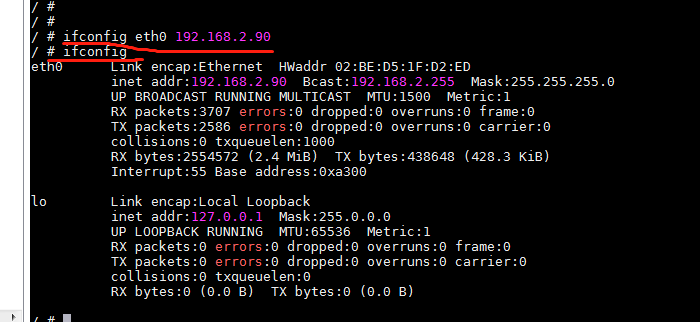
结果如下:

出现如上图所示结果,表示 DM9000 网卡驱动移植成功。
(PS:drivers/net/ethernet/davicom/dm9000.c 和 dm9000.h文件一般不用修改)


