
计算机图形学笔记三——橡皮筋技术和椭圆扫描算法
橡皮筋技术
橡皮筋技术就是可以使得用户进行可视化编辑,也就是在编辑的时候,图像能够进行实时的变化。这是一种非常实用的技术,接下来和大家讲解一下这个技术。
我们有鼠标点击回调函数,还有鼠标移动回调函数。我们需要的是在鼠标点击过后,移动鼠标能够预览我们绘制的图像。比如这是有无橡皮筋技术的对比:
有橡皮筋技术
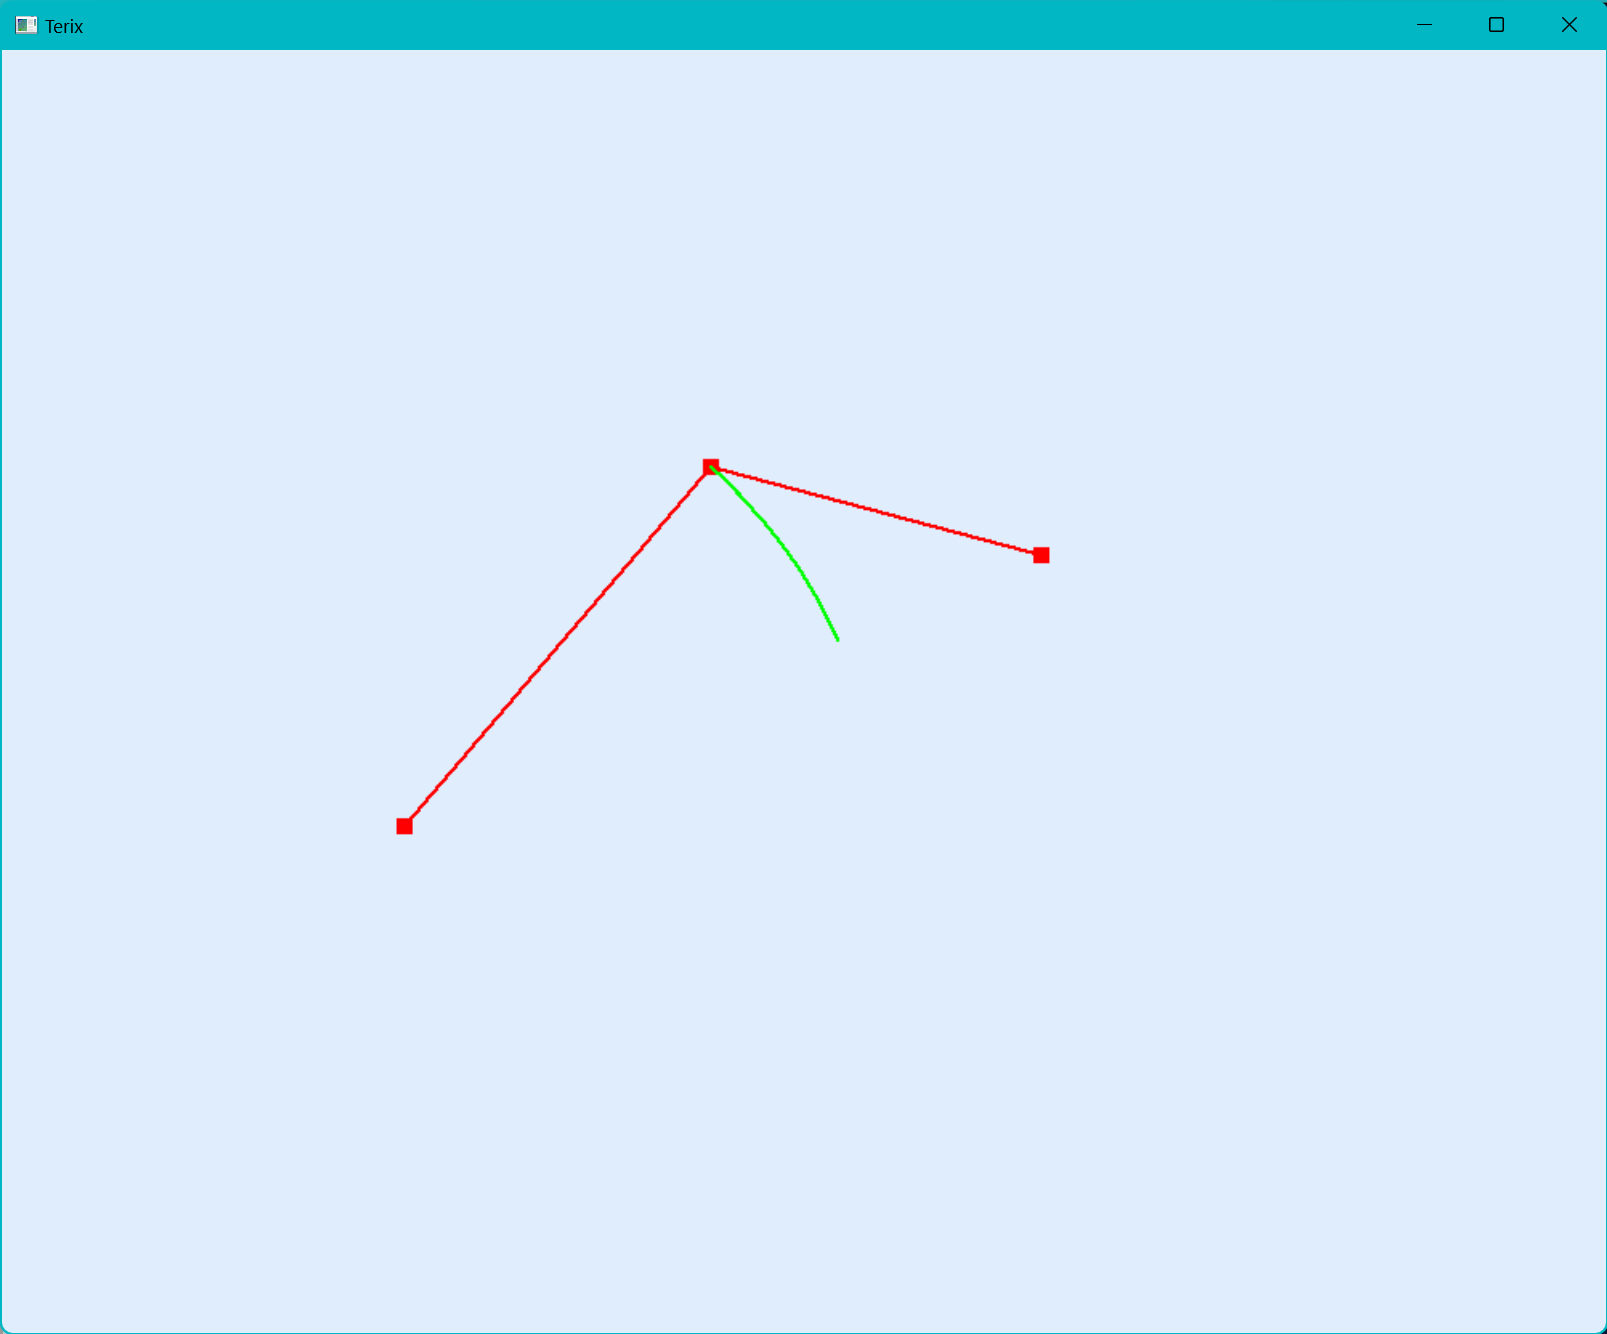
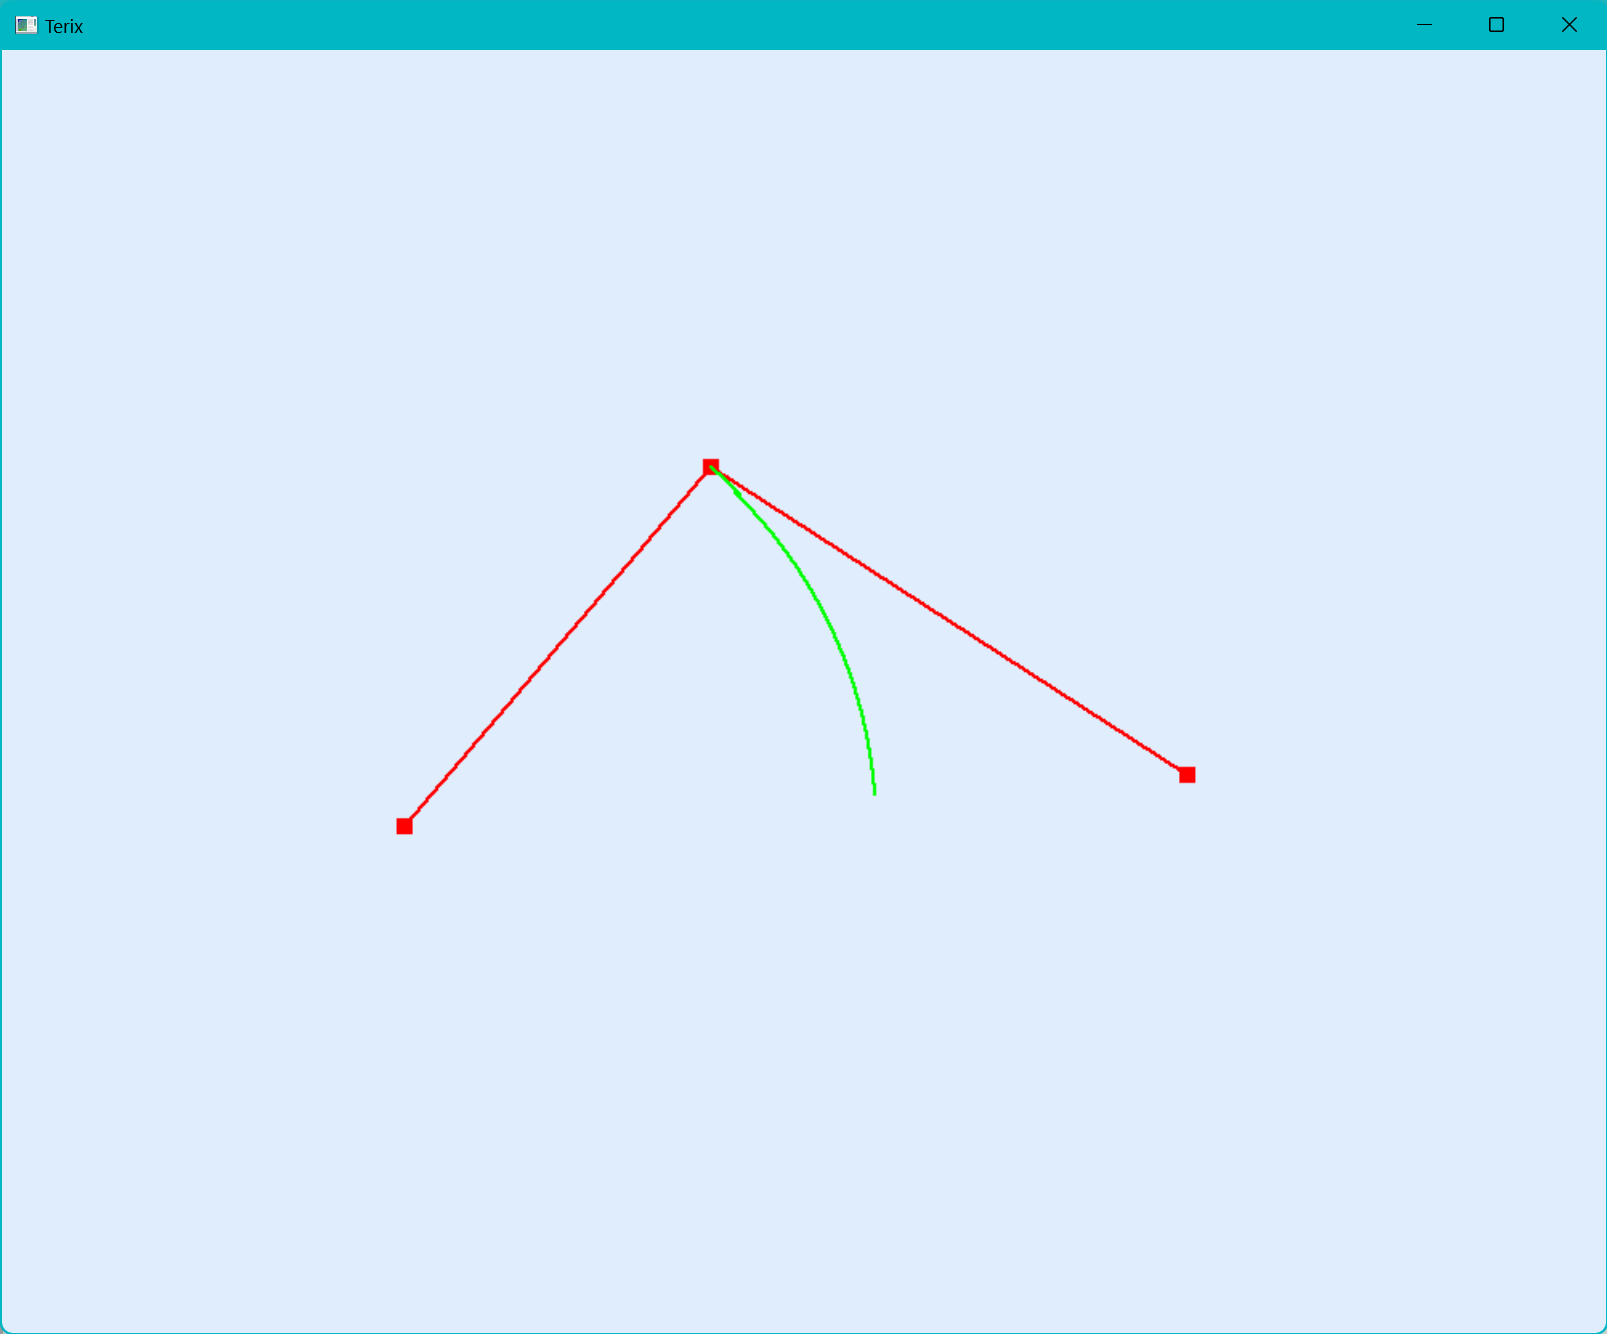
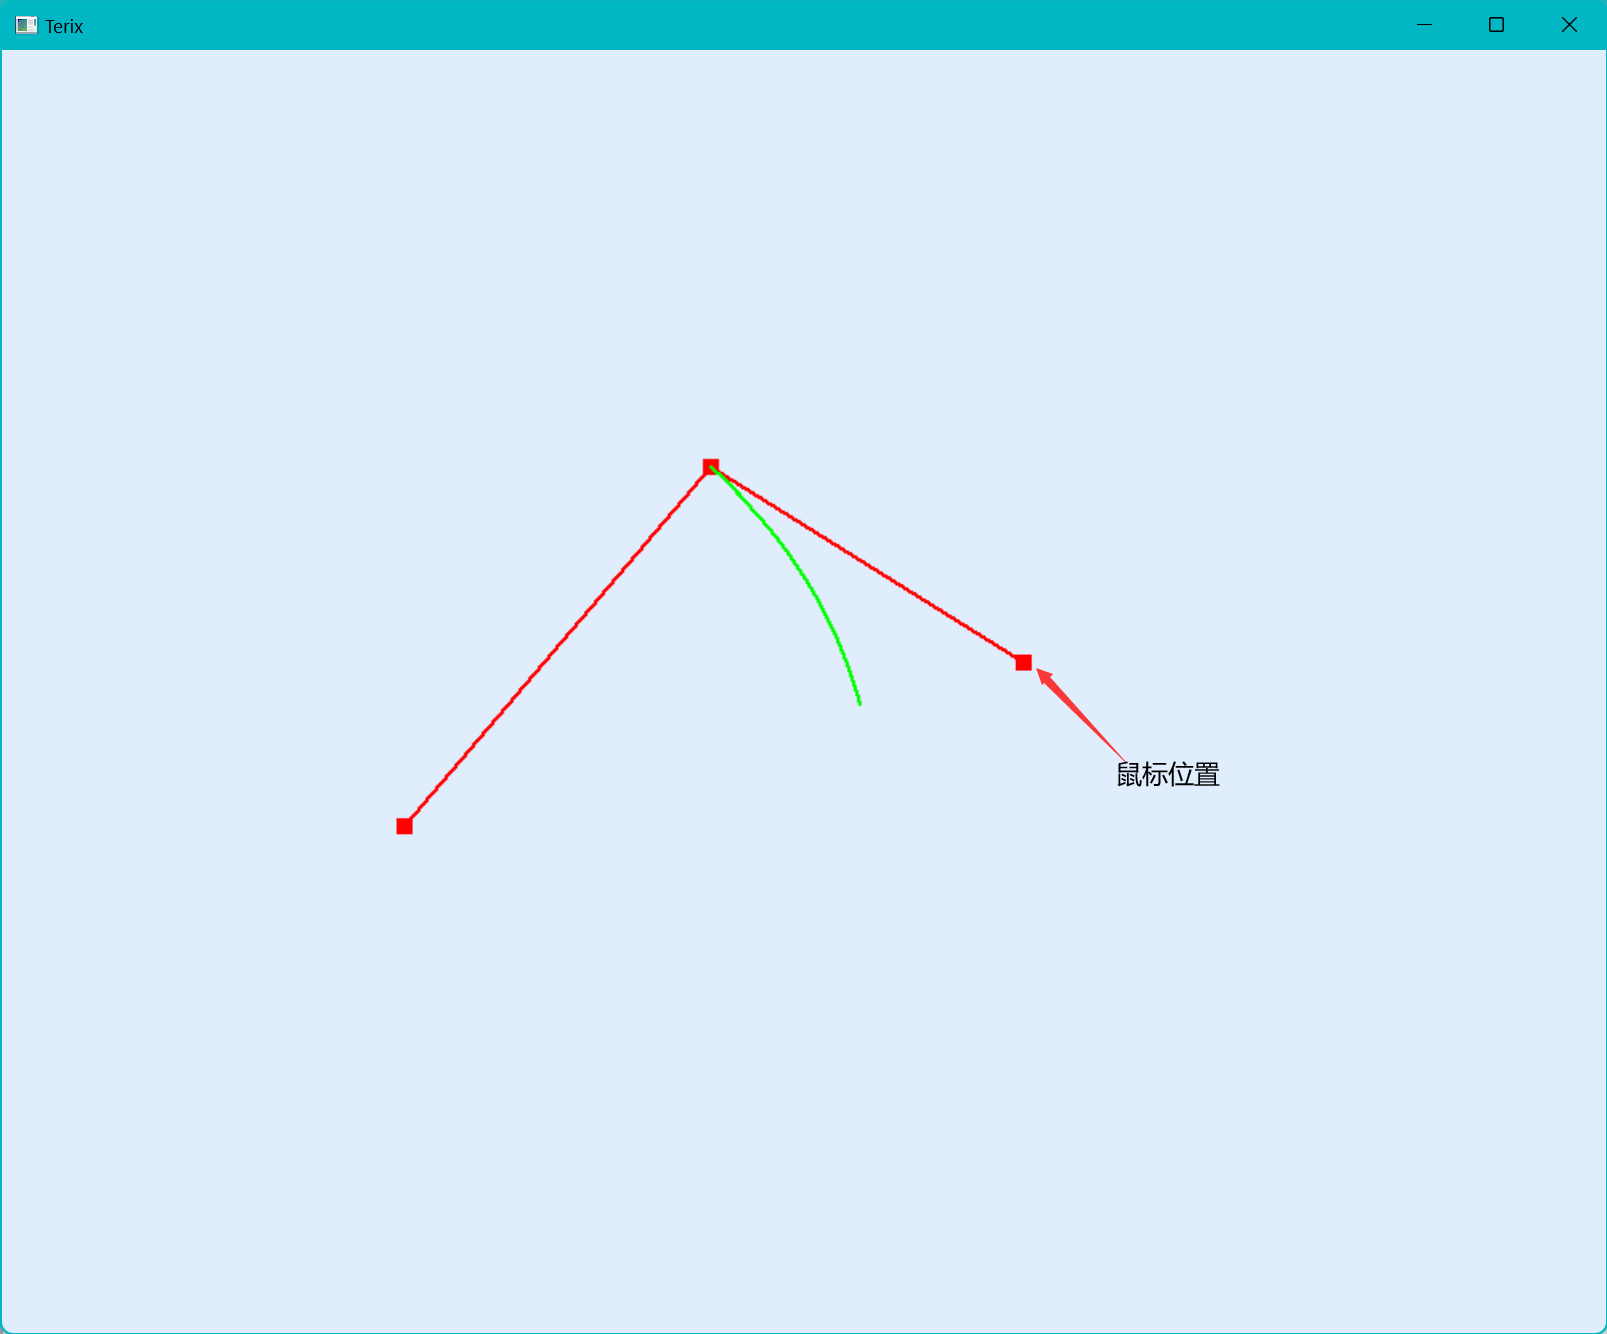
随着鼠标的移动,我们的最后一个顶点会跟着移动,可以达到很好的编辑效果。
没有橡皮筋技术
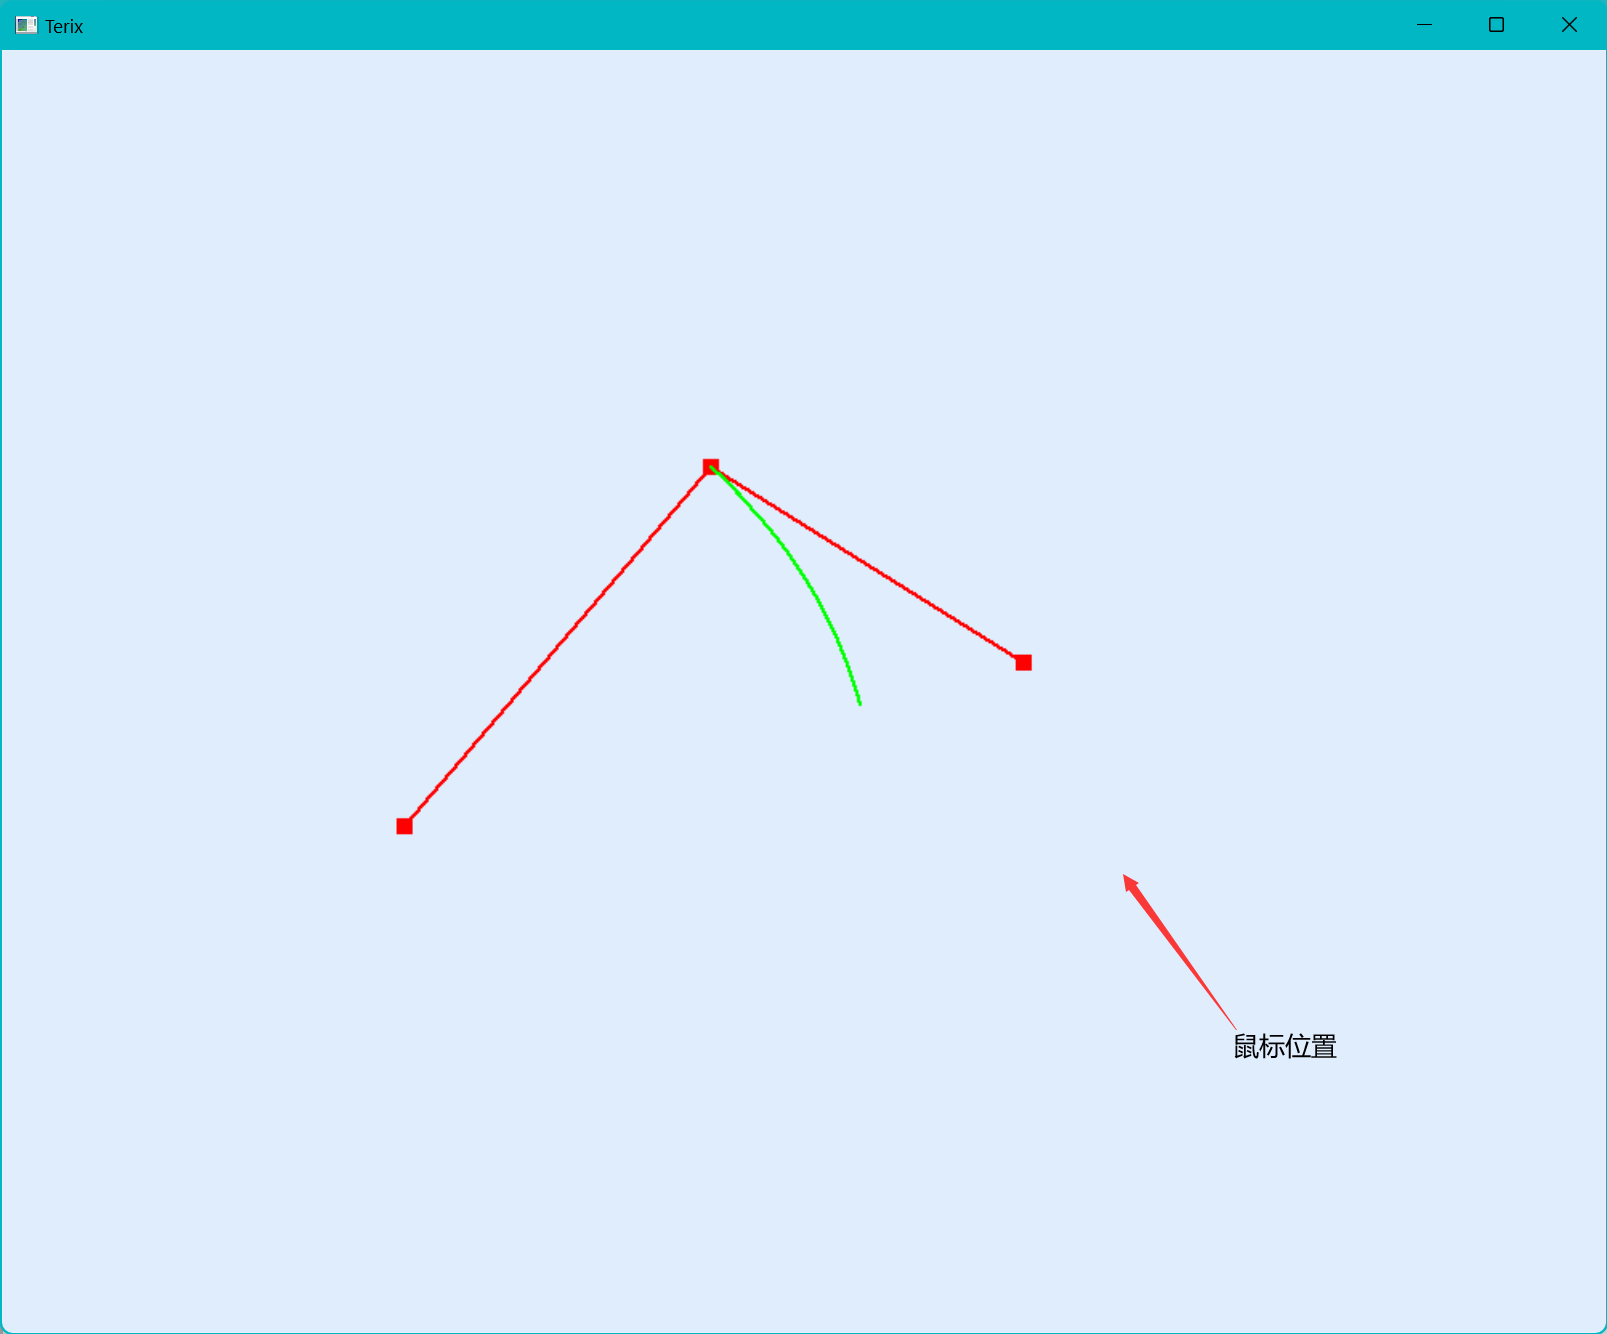
每次都会确定一个顶点位置,不能进行实时的更改。
橡皮筋技术的实现需要的两个函数和一个枚举:
//鼠标点击回调函数
glutMouseFunc(onMouse);
//鼠标移动回调函数
glutPassiveMotionFunc(onMouseMove);
typedef enum {
	MOVE,
	NONE
}MOUSEMODE;
鼠标点击回调函数
处理点击事件时,我们设置第一次点击创建两个顶点。想象一下,点击一次后,我们移动会带动第二个点移动,也就是说我们第一次点击需要创建两个顶点。在后面的点击只需要创建一个。并且把MouseMode更新为MOVE
/*这里是onMouse(GLint button, GLint state, GLint x, GLint y)*/

//如果点击状态是按下
if (state == GLUT_DOWN) {
	//如果是鼠标左键
	if (button == GLUT_LEFT_BUTTON) {
		//如果是第一个点,多创建一个顶点
		if (!Vertex.size())
			Vertex.push_back(make_pair(x, y));
		Vertex.push_back(make_pair(x, y));
		//设置控制点的位置
		ctrlPoint = Vertex.size();
		//修改控制模式
		MouseMode = MOVE;
	}
}
鼠标移动回调函数
在创建顶点过后,我们在鼠标移动回调函数中对最后一格顶点进行位置的更改,我们也可以叫最后一个顶点为临时顶点。
/*这里是onMouseMove(GLint xMouse, GLint yMouse)*/

//如果控制装填是移动
if (MouseMode == MOVE) {
	Vertex[ctrlPoint - 1].first = xMouse, Vertex[ctrlPoint - 1].second = yMouse;
	//发送重绘信息
	glutPostRedisplay();
}
额外的——使用右键进行顶点的消除和暂停绘制
/*这里是onMouse(GLint button, GLint state, GLint x, GLint y)*/

//如果按下的是右键
else if (button == GLUT_RIGHT_BUTTON) {
	//如果正在进行橡皮筋操作
	if (MouseMode == MOVE) {
		//停止橡皮筋操作(停止实时绘画)
		MouseMode = NONE;
		return;
	}
	//否则为删除模式,判断顶点位置
	auto ibeg = Vertex.begin();
	while (ibeg != Vertex.end()) {
		//模糊搜索,先绘制的顶点先删除(距离都满足条件的话)
		if (((x - ibeg->first) * (x - ibeg->first)) + ((y - ibeg->second) * (y - ibeg->second)) < 400) {
			//找到了,删除该顶点
			Vertex.erase(ibeg);
			break;
		}
		ibeg++;
	}
}
这里是可以用于前面圆和圆弧绘制的测试代码
/*
你可以使用左键绘制顶点
你可以使用右键删除顶点
直线的绘制沿着顶点顺序
*/
#include <gl/glut.h>
#include <iostream>
#include <vector>
#include <string>
#include <sstream>
#include "DrawLine.hpp"
#include "DrawRound.hpp"

using namespace std;

#define m_POINT_SIZE 10
#define m_LINE_SIZE 2
typedef enum {
	MOVE,
	NONE
}MOUSEMODE;

vector<pair<GLint, GLint >>Vertex;
MOUSEMODE MouseMode = NONE;
GLint ctrlPoint = 0;

void onDisplay();
void onReshape(GLint w, GLint h);
void onMouse(GLint button, GLint state, GLint x, GLint y);
void onMouseMove(GLint xMouse, GLint yMouse);

void onReshape(GLint w, GLint h)
{
	// 设置视口大小
	glViewport(0, 0, w, h);
	// 切换矩阵模式为投影矩阵
	glMatrixMode(GL_PROJECTION);
	// 载入单位矩阵
	glLoadIdentity();
	// 进行二维平行投影
	gluOrtho2D(0, w, h, 0);
	// 切换矩阵模式为模型矩阵
	glMatrixMode(GL_MODELVIEW);
	// 发送重绘
	glutPostRedisplay();
}
void onMouse(GLint button, GLint state, GLint x, GLint y){
	if (state == GLUT_DOWN) {
		if (button == GLUT_LEFT_BUTTON) {
			if(!Vertex.size())
			Vertex.push_back(make_pair(x, y));
			Vertex.push_back(make_pair(x, y));
			ctrlPoint = Vertex.size();
			MouseMode = MOVE;
		}
		else if (button == GLUT_RIGHT_BUTTON) {
			if (MouseMode == MOVE) {
				MouseMode = NONE;
				return;
			}
			auto ibeg = Vertex.begin();
			while (ibeg != Vertex.end()) {
				if (((x - ibeg->first) * (x - ibeg->first)) + ((y - ibeg->second) * (y - ibeg->second)) < 400) {
					Vertex.erase(ibeg);
					break;
				}
				ibeg++;
			}
		}
	}
	glutPostRedisplay();
}
void onMouseMove(GLint xMouse, GLint yMouse) {
	if (MouseMode == MOVE) {
		Vertex[ctrlPoint-1].first = xMouse, Vertex[ctrlPoint-1].second = yMouse;
		glutPostRedisplay();
	}
}
void onDisplay() {
	glClearColor(224 / 255.0, 237 / 255.0, 253 / 255.0,1.0);
	glClear(GL_COLOR_BUFFER_BIT);

	glColor3f(1.0f, 0, 0);
	auto ibeg = Vertex.begin(),jbeg=ibeg;
	GLint VertexNum = Vertex.size();
	while (ibeg != Vertex.end()) {
		glPointSize(m_POINT_SIZE);
		glBegin(GL_POINTS);
		glVertex2i(ibeg->first, ibeg->second);
		glEnd();
		glPointSize(m_LINE_SIZE);
		if(VertexNum>=2) {
			//这里可以选择直线绘制方式
			BRESENHAM_Line(ibeg->first, ibeg->second, jbeg->first, jbeg->second);
			//TMP_Line(ibeg->first, ibeg->second, jbeg->first, jbeg->second);
			//DDA_Line(ibeg->first, ibeg->second, jbeg->first, jbeg->second);

			//这里是绘制圆形
			//Mid_Circle( jbeg->first, jbeg->second,ibeg->first, ibeg->second);
			//BRESENHAM_Circle(jbeg->first, jbeg->second, ibeg->first, ibeg->second);

		}
		jbeg = ibeg;
		ibeg++;
	}
	//这里是绘制圆弧(只绘制前三个点,可以自己DIY)
	if (VertexNum >= 3) {
		cout << "Draw CircleArc" << endl;
		DrawCircleArc(Vertex[0].first, Vertex[0].second, Vertex[1].first, Vertex[1].second, Vertex[2].first, Vertex[2].second);
	}

	glutSwapBuffers();
	cout << "Once" << endl;
}

GLint main(GLint argc, char* argv[])
{

	// 初始化 glut
	glutInit(&argc, argv);
	// 设置 OpenGL 显示模式(双缓存, RGB 颜色模式)
	glutInitDisplayMode(GLUT_DOUBLE | GLUT_RGB);
	// 设置窗口初始尺寸
	glutInitWindowSize(1000,800);
	// 设置窗口初始位置
	glutInitWindowPosition(0, 0);
	// 设置窗口标题
	glutCreateWindow("Terix");
	glutReshapeFunc(onReshape);
	glutDisplayFunc(onDisplay);
	glutMouseFunc(onMouse);
	glutPassiveMotionFunc(onMouseMove);
	// 设置菜单
	// 进入 glut 事件循环
	glutMainLoop();
	return 0;
}
椭圆扫描算法
然后我们来介绍一下最后一个绘制圆锥曲线的算法(我的专栏里)——椭圆的绘制.
由于椭圆的对称性较圆稍差,它的对称性只有4份,也就是四个卦象内对称,也就是说我们得绘制出第一卦象一整个卦象的图像。当斜率绝对值小于1的时候使用x作为步长,反之为y轴。接下来来推导一下迭代方程和斜率的判别式:
设一个椭圆方程为
x轴
假设当前最佳迭代点为 \((x_i+1, y_i)\),那么对于下一个迭代点的两种情况:
d<0
d>=0
迭代终点为斜率的绝对值大于1
斜率判别式
转化为:
y轴
同样的我们可以得到:
d<0
d>0
迭代终点为y==0
因为单纯使用函数已经无法很好的维护数据了,所以从椭圆开始我会将所有的算法和所需要的数据结构封装成类。
Ellipt类
class Ellipt {
public:
	Ellipt(GLint P1x=0,GLint P1y=0,GLint P2x=0,GLint P2y=0)
	{
		m_a = abs(static_cast<GLint>(P1x - P2x)/2);
		m_b= abs(static_cast<GLint>(P1y - P2y)/2);
		//四舍五入
		m_R.x = static_cast<GLint>(((P1x + P2x) / 2.0 + 0.5));
		m_R.y = static_cast<GLint>(((P1y + P2y) / 2.0 + 0.5));
	}
	void setData(GLint P1x, GLint P1y, GLint P2x, GLint P2y) {
		m_a = abs(static_cast<GLint>(P1x - P2x)/2);
		m_b = abs(static_cast<GLint>(P1y - P2y)/2);
		//四舍五入
		m_R.x = static_cast<GLint>(((P1x + P2x) / 2.0 + 0.5));
		m_R.y = static_cast<GLint>(((P1y + P2y) / 2.0 + 0.5));
	}
	void Draw(){
		MidPt_Elliptse(m_R, m_a, m_b);
	}
private:
	myPoint m_R;
	GLint m_a,m_b;
	void MidPt_Elliptse(myPoint cPt, GLint a, GLint b) {
		glBegin(GL_POINTS);
		GLint x, y, temp = a * 7 / 10, dir[4][2] = {
		{ 1, 1 }, { 1,-1 },
		{ -1,1}, {-1,-1 }
		};
		double d;
		x = 0, y = b;
		d = b * b + a * a * (-b + 0.25);
		for (int i = 0; i < 4; i++) {
			glVertex2i(cPt.x + x * dir[i][0], cPt.y + y * dir[i][1]);
		}
		while ((b * b * (x + 1)<a * a * (y + 0.5))) {
			if (d > 0)
			{
				x += 1;
				y -= 1;
				d += b * b * (2 * x + 3) + a * a * (-2 * y + 2);
			}
			else {
				x += 1;
				d += b * b * (2 * x + 3);
			}
			for (int i = 0; i < 4; i++) {
				glVertex2i(cPt.x + x * dir[i][0], cPt.y + y * dir[i][1]);
			}
		}
		while (y > 0) {
			if (d >= 0) {
				y -= 1;
				d += a * a * (-2 * y + 3);
			}
			else {
				x += 1;
				y -= 1;
				d += a * a * (-2 * y + 3) + b * b * (2 * x + 2);
			}
			for (int i = 0; i < 4; i++) {
				glVertex2i(cPt.x + x * dir[i][0], cPt.y + y * dir[i][1]);
			}
		}
		glFlush();
		glEnd();
	}
};
其中用到的myPoint类
class myPoint;

//A point or a vector in R^2
class myPoint {
public:
	myPoint(GLint X=0,GLint Y=0 ):x(X),y(Y){}
	GLint x, y;
};
myPoint operator+(const myPoint& a, const myPoint& b) {
	return myPoint(a.x + b.x, a.y + b.y);
}
myPoint operator-(const myPoint& a, const myPoint& b) {
	return myPoint(a.x - b.x, a.y - b.y);
}
GLint operator*(const myPoint& a, const myPoint& b) {
	return a.x * b.x + a.y * b.y;
}
代码汇总
你可以在这里找到目前为止所有的源代码
阿里云盘-代码汇总
gitee-代码汇总
下/上一篇
本文来自博客园,作者:zhywyt,转载请注明原文链接:https://www.cnblogs.com/zhywyt/p/17347089.html

 浙公网安备 33010602011771号