
Elasticsearch-6.7.0系列(六)ES设置集群密码
感谢此老兄:《手把手教你搭建一个 Elasticsearch 集群》
前提准备
安装kibana-6.7.0: 《Elasticsearch-6.7.0系列(三)5601端口 kibana——ES的UI界面》
升级前ES的license
升级之前访问:http://192.168.10.110:9200/_xpack 其中security一项内容如下:
security
    description    "Security for the Elastic Stack"
    available    false
    enabled    true
在kibana中升级license
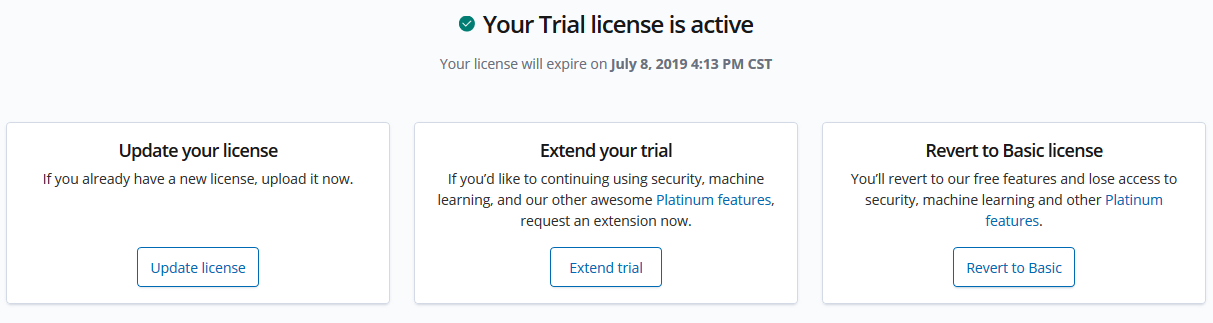
在 Kibana 中访问 Management -> Elasticsearch -> License Management,点击右侧的升级 License 按钮,可以免费试用 30 天的高级 License,升级完成之后kibana页面会显示如下:
修改ES配置文件
elasticsearch-6.7.0/config/elasticsearch.yml 添加如下配置:
xpack.security.enabled: true
xpack.ml.enabled: true
xpack.license.self_generated.type: trial        //表示试用的意思
设置集群密码
./bin/elasticsearch-setup-passwords interactive 设置集群密码:
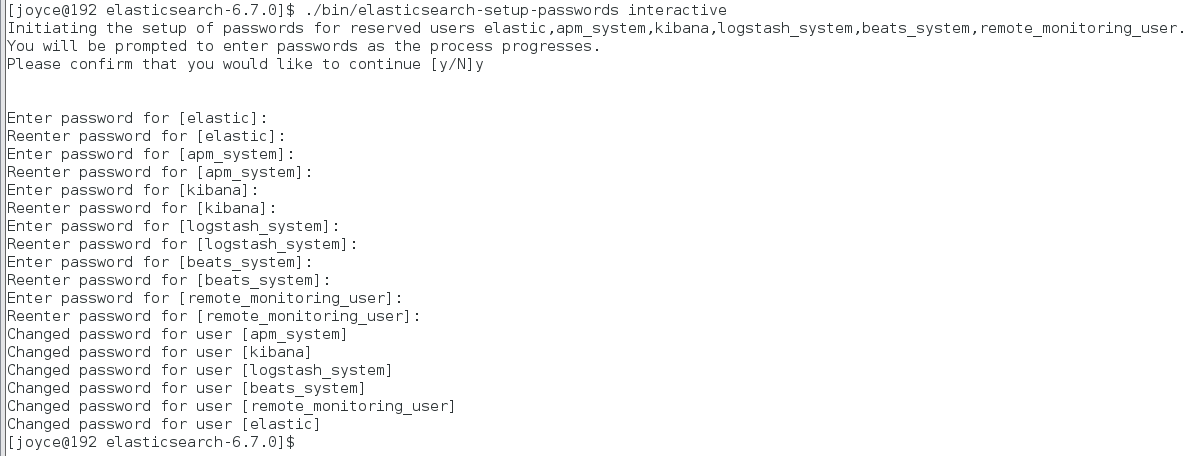
总共修改了6个用户的密码:elastic、kibana、apm_system、logstash_system、beats_system、remote_monitoring_user。
修改kibana配置文件
vim kibana-6.7.0-linux-x86_64/config/kibana.yml,设置正确的ES访问用户名密码:
elasticsearch.username: "elastic"
elasticsearch.password: "123456"
修改配置之后,记得重启ES!!! 以及,kibana!!!
ES启动时,license信息由原来的:
[2019-06-08T07:11:26,598][INFO ][o.e.l.LicenseService ] [MiIzYdB] license [33b7d4ab-ee0c-4a48-9f18-30c9e11ec47a] mode [basic] - valid
变为trial试用期:
019-06-08T04:12:13,998][INFO ][o.e.l.LicenseService ] [node-130] license [cf9606b3-5e36-4fdd-9469-587ddb323a62] mode [trial] - valid
ES集群访问使用密码
再访问http://192.168.10.110:9200/_xpack 其中security一项内容如下:
security
    description    "Security for the Elastic Stack"
    available    true               //已经从false变为true了,表示security设置成功
    enabled    true
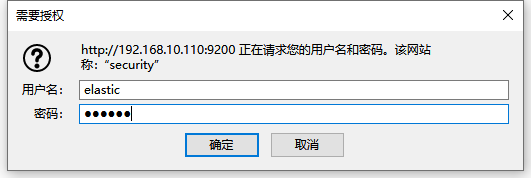
此时访问ES: http://192.168.10.110:9200 需要用户名和密码了:
访问kibana: http://192.168.10.110:5601 也需要用户名密码了:

PS:记住这个license只有30天试用期,时间到了之后要么购买,要么重新安装ES(网上说重装可行)。


