Springboot学习笔记(一)—— 安装
springboot越来越流行了,相比较于springMVC,springboot采用了一种约定大于配置的理念,可以一键安装,一键运行,一键部署,内置tomcat,省去了一大堆配置的时间,并且,springboot的生态圈也越来越来广泛,无缝对接主流消息队列、RPC框架、熔断器、注册发现中心等,还有springcloud加持,简直就是微服务开发的利器。
本人也在学习阶段,打算从零开始记录一系列springboot的学习心得。
安装
springboot的安装方式有很多,我这里只介绍在IDEA下的安装方式,目前我知道的有两种,一种是IDEA自带的Spring Initializr,需要Ultimate版才可以使用,Community版可以绕路了。另一种是通过Maven建立springboot工程。
Spring Initializr安装
首先要安装IDEA,不用多说了,其次是maven,不过也可以不安装,使用IDEA自带的maven即可。
File——>New——>Project
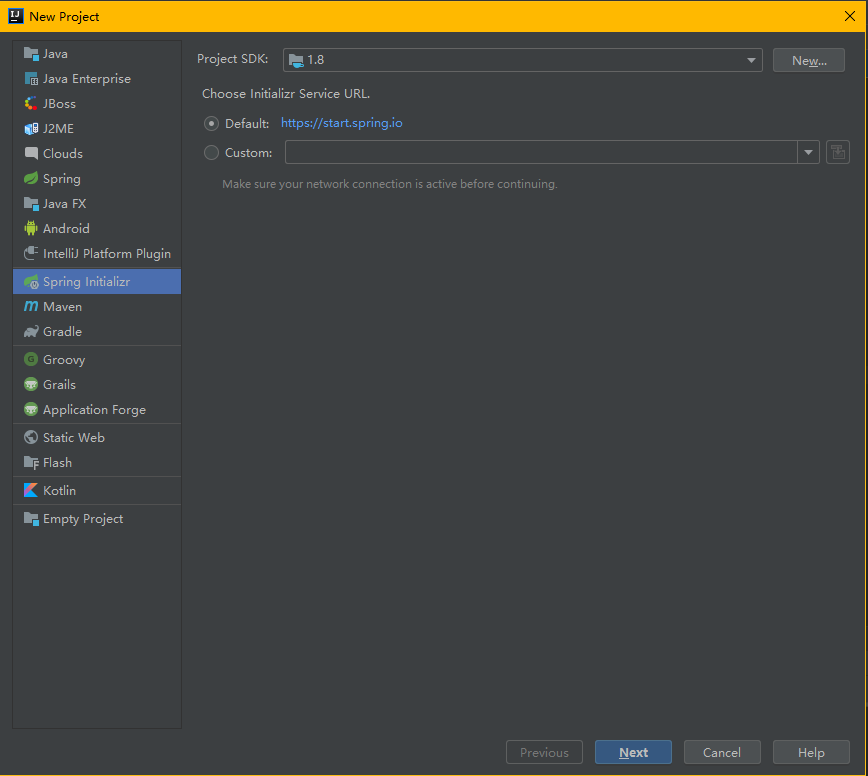
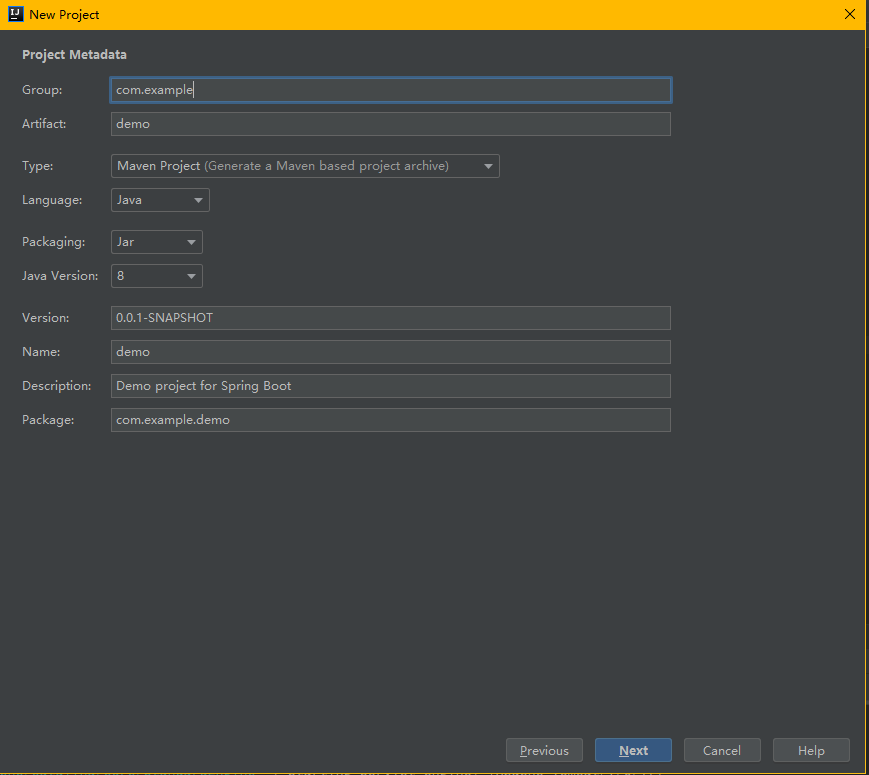
Next (Group和Artifact随便填,Group是你的组织名,也是你的包名,Artifact是你的项目名)
Next 这里选web,因为当前只需要web,后期需要的功能可以通过添加pom.xml来添加
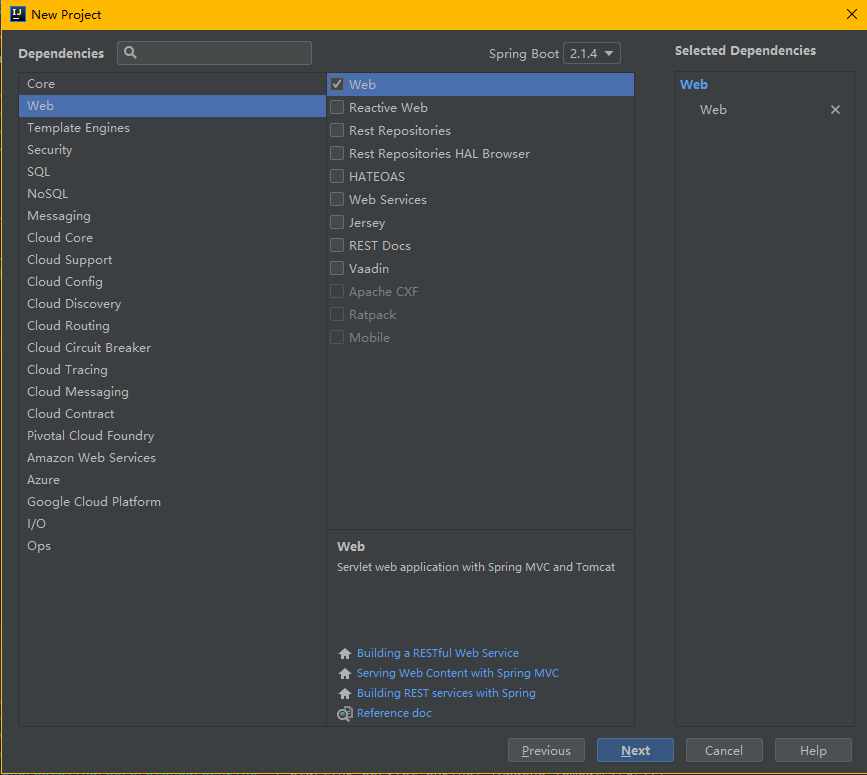
最后点Finish,一个springboot工程就建立完成了。
这里会生成两个文件,一个是pom.xml,用来管理依赖的,一个是DemoApplication.java,这个是springboot的启动器。
pom.xml
 1 <?xml version="1.0" encoding="UTF-8"?>
 2 <project xmlns="http://maven.apache.org/POM/4.0.0" xmlns:xsi="http://www.w3.org/2001/XMLSchema-instance"
 3          xsi:schemaLocation="http://maven.apache.org/POM/4.0.0 http://maven.apache.org/xsd/maven-4.0.0.xsd">
 4     <modelVersion>4.0.0</modelVersion>
 5     <parent>
 6         <groupId>org.springframework.boot</groupId>
 7         <artifactId>spring-boot-starter-parent</artifactId>
 8         <version>2.1.4.RELEASE</version>
 9         <relativePath/> <!-- lookup parent from repository -->
10     </parent>
11     <groupId>com.huawei</groupId>
12     <artifactId>demo_zsh_1</artifactId>
13     <version>0.0.1-SNAPSHOT</version>
14     <name>demo_zsh_1</name>
15     <description>Demo project for Spring Boot</description>
16
17     <properties>
18         <java.version>1.8</java.version>
19     </properties>
20
21     <dependencies>
22         <dependency>
23             <groupId>org.springframework.boot</groupId>
24             <artifactId>spring-boot-starter-web</artifactId>
25         </dependency>
26
27         <dependency>
28             <groupId>org.springframework.boot</groupId>
29             <artifactId>spring-boot-starter-test</artifactId>
30             <scope>test</scope>
31         </dependency>
32     </dependencies>
33
34     <build>
35         <plugins>
36             <plugin>
37                 <groupId>org.springframework.boot</groupId>
38                 <artifactId>spring-boot-maven-plugin</artifactId>
39             </plugin>
40         </plugins>
41     </build>
42
43 </project>
DemoApplication.java
 1 package com.huawei.demo;
 2
 3 import org.springframework.boot.SpringApplication;
 4 import org.springframework.boot.autoconfigure.SpringBootApplication;
 5
 6 @SpringBootApplication
 7 public class DemoApplication {
 8
 9     public static void main(String[] args) {
10         SpringApplication.run(DemoApplication.class, args);
11     }
12
13 }
在这里第10行可以右键,选择“Run DemoApplication”,之后看到下图,就代表安装成功,并启动了。

maven安装方式就是新建maven项目,在pom.xml中写入上述pom的内容,这里不做详细描述了。
踩过的坑
如果你的在公司搞springboot的话,这里因为网络代理的原因,有几个坑需要注意一下;
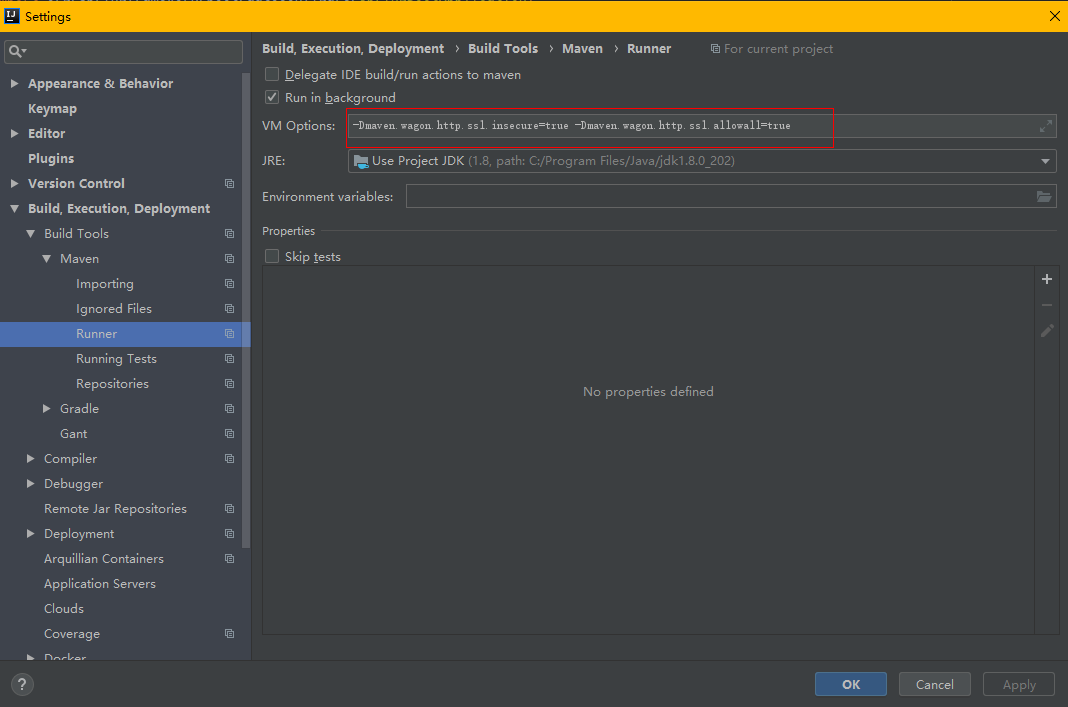
IDEA代理配置

Maven代理配置
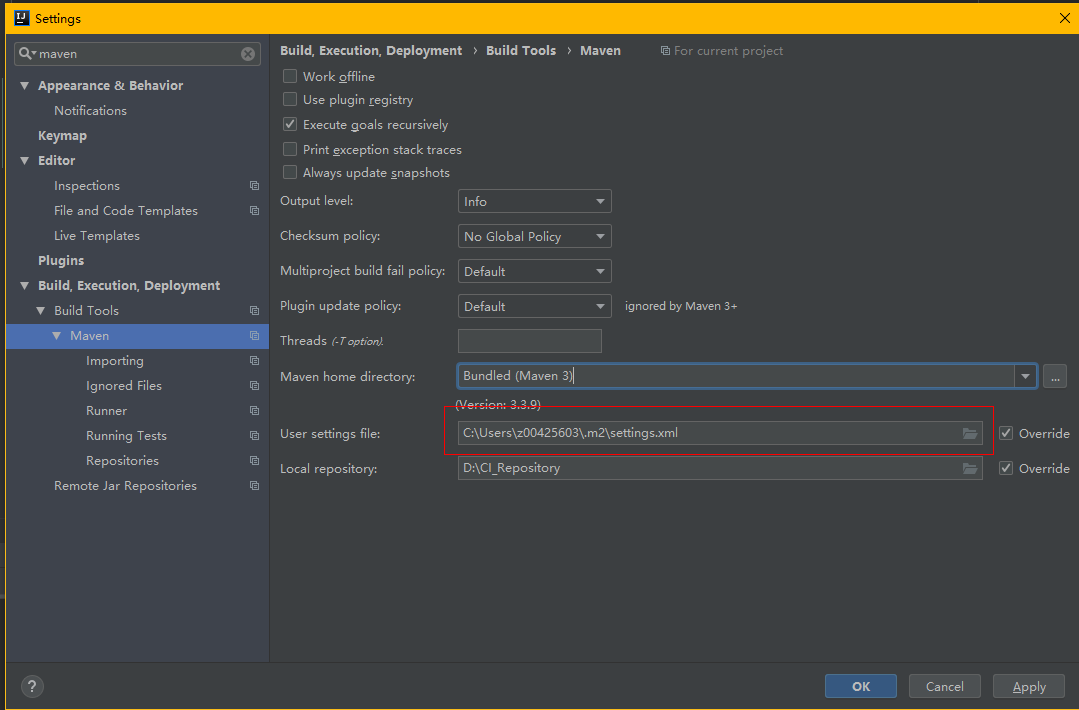
这里的setting每个公司都不同,我就不放上去了。
Java增加证书到证书库
某些java程序需要用到java的cacert证书库中的证书去访问https的网址,如果使用了代理的话,那么证书就是proxy给的证书,java的cacert肯定没有这个证书,需要从浏览器中导出,再加入到cacert中。
cd  C:\Program Files\Android\Android Studio\jre\jre\lib\security

keytool -import -alias abc -keystore cacerts -file D:/proxy.cer
当然,也可以通过命令行参数:
-Dmaven.wagon.http.ssl.insecure=true -Dmaven.wagon.http.ssl.allowall=true
忽略所有证书

