springboot热部署之配置文件自动映射到属性和实体类(三)
1配置文件加载
不废话,上代码
首先现在pom.xml中添加Maven的jar
<dependency>
<groupId>org.springframework.boot</groupId>
<artifactId>spring-boot-configuration-processor</artifactId>
<optional>true</optional>
</dependency>

1.1在controller中添加注解@PropertySource("classpath:application.properties"),然后将filePath中的静态声明去掉,并且添加注解@Value("${web.file.path}"
注意:@PropertySource("classpath:application.properties")中的application可以自定义,如果自定义的时候没有,那么需要新建
@Value("${web.file.path}"中的web.file.path也可以自定义
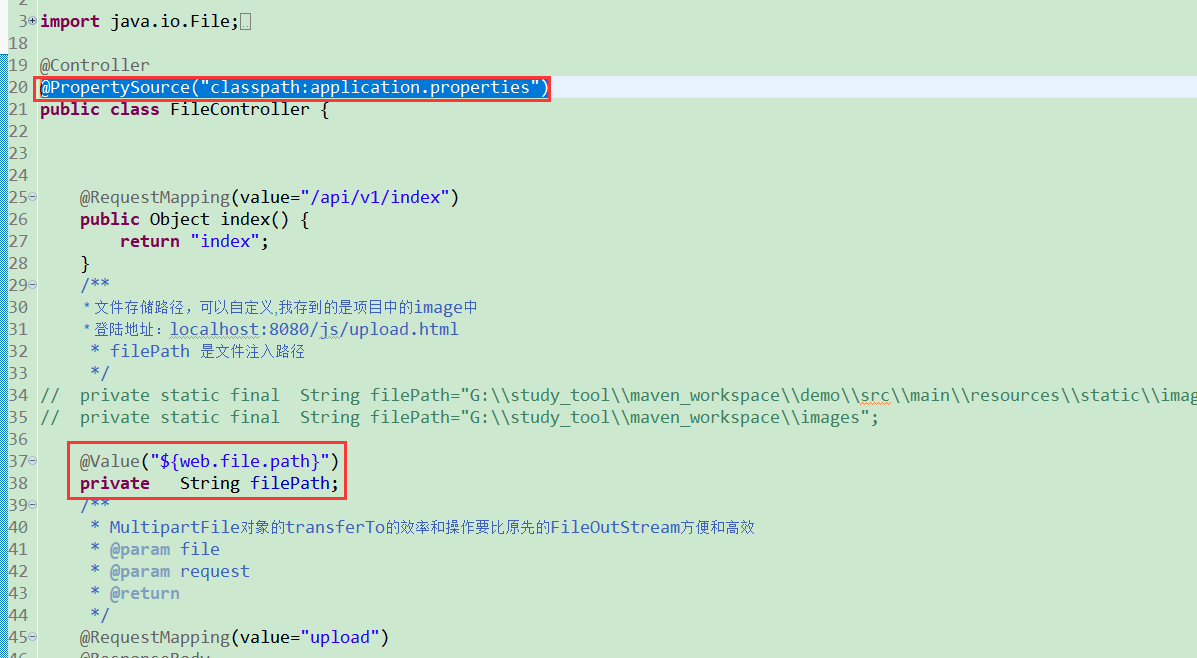
1.2在application.properties中添加配置文件web.file.path,这是文件注入路径
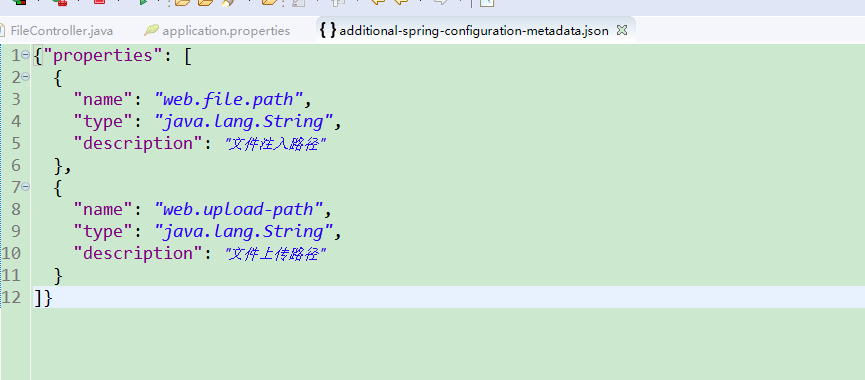
1.3注意,新建的项目web.file.path找不到,可以点击黄色感叹号,让它生成additional-spring-configuration-metadata.json
1.4 run application ,之后找到application.properties中的web.file.path,可以看见上传的文件

2实体类配置文件
不废话,上代码
2.1目录结构

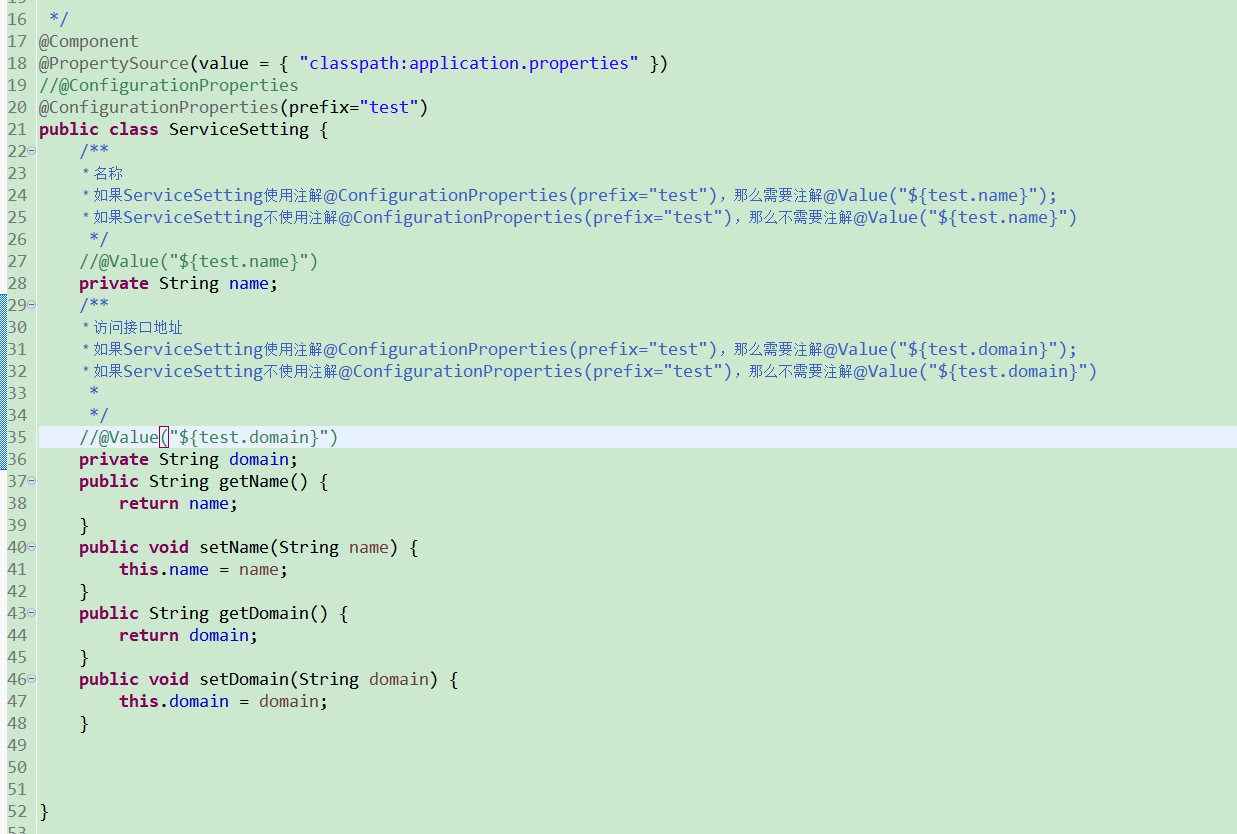
2.2新建ServiceSetting
package com.example.demo.domian;
import org.springframework.beans.factory.annotation.Value;
import org.springframework.boot.context.properties.ConfigurationProperties;
import org.springframework.context.annotation.PropertySource;
import org.springframework.stereotype.Component;
/**
* 服务器的名称
* @author Administrator
* @Component 会对主键进行扫描
* @PropertySource 注解指定配置文件的位置
* @ConfigurationProperties 指定配置文件的属性
* @ConfigurationProperties(prefix="test") 将注解中的共同属性test抽离出来,可以不用@ConfigurationProperties了
*
*/
@Component
@PropertySource(value = { "classpath:application.properties" })
//@ConfigurationProperties
@ConfigurationProperties(prefix="test")
public class ServiceSetting {
/**
* 名称
* 如果ServiceSetting使用注解@ConfigurationProperties(prefix="test"),那么需要注解@Value("${test.name}");
* 如果ServiceSetting不使用注解@ConfigurationProperties(prefix="test"),那么不需要注解@Value("${test.name}")
*/
//@Value("${test.name}")
private String name;
/**
* 访问接口地址
* 如果ServiceSetting使用注解@ConfigurationProperties(prefix="test"),那么需要注解@Value("${test.domain}");
* 如果ServiceSetting不使用注解@ConfigurationProperties(prefix="test"),那么不需要注解@Value("${test.domain}")
*
*/
//@Value("${test.domain}")
private String domain;
public String getName() {
return name;
}
public void setName(String name) {
this.name = name;
}
public String getDomain() {
return domain;
}
public void setDomain(String domain) {
this.domain = domain;
}
}
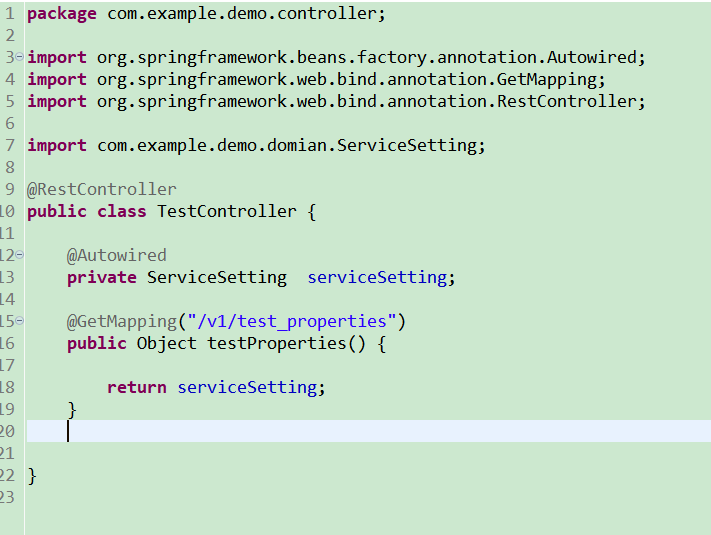
2.3新建TestController,
package com.example.demo.controller;
import org.springframework.beans.factory.annotation.Autowired;
import org.springframework.web.bind.annotation.GetMapping;
import org.springframework.web.bind.annotation.RestController;
import com.example.demo.domian.ServiceSetting;
@RestController
public class TestController {
@Autowired
private ServiceSetting serviceSetting;
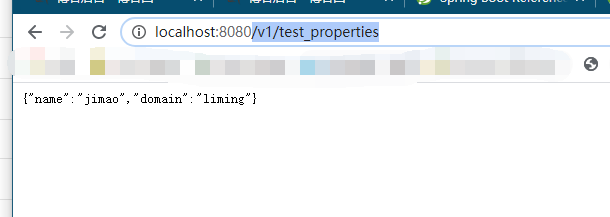
@GetMapping("/v1/test_properties")
public Object testProperties() {
return serviceSetting;
}
}
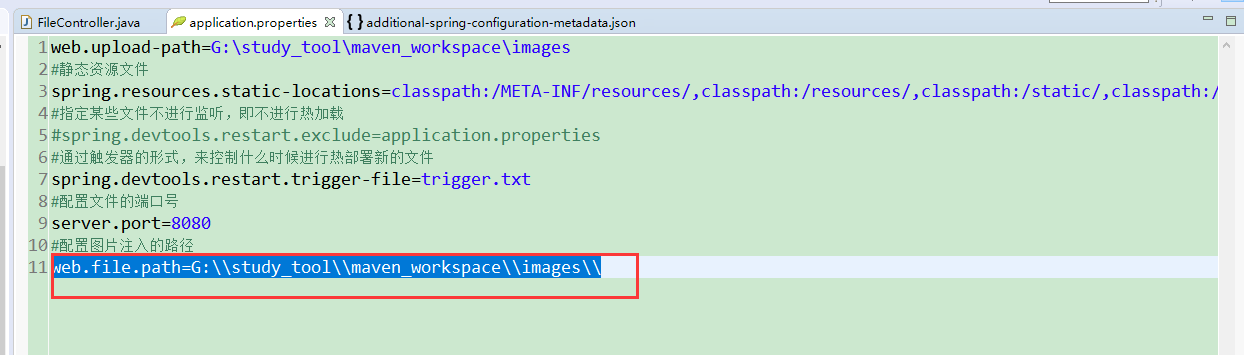
2.4修改application.properties的配置文件

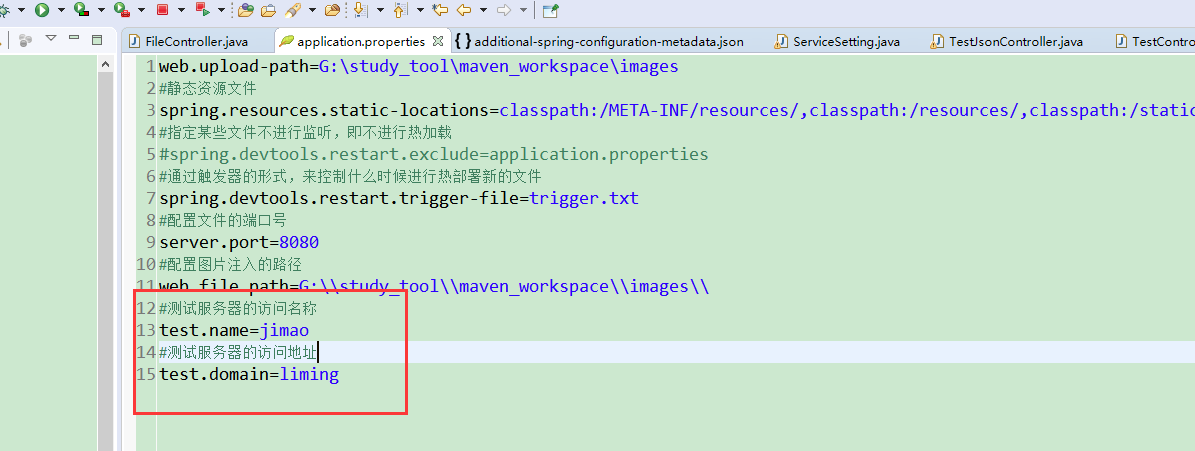
web.upload-path=G:\study_tool\maven_workspace\images
#静态资源文件
spring.resources.static-locations=classpath:/META-INF/resources/,classpath:/resources/,classpath:/static/,classpath:/public/,classpath:/test/,file:${web.upload-path}
#指定某些文件不进行监听,即不进行热加载
#spring.devtools.restart.exclude=application.properties
#通过触发器的形式,来控制什么时候进行热部署新的文件
spring.devtools.restart.trigger-file=trigger.txt
#配置文件的端口号
server.port=8080
#配置图片注入的路径
web.file.path=G:\\study_tool\\maven_workspace\\images\\
#测试服务器的访问名称
test.name=jimao
#测试服务器的访问地址
test.domain=liming
2.5run application ,通过地址访问:local:host:8080//v1/test_properties,即可得到结果