CentOS7下的Django2集成部署五:Jenkins的流水线部署pipeline-job
1.Push本地的项目到GitLab
准备工作:由于之前在MySQL设置时禁止了root用户的远程访问,此处需要授权一个新的用户
mysql> GRANT ALL PRIVILEGES ON *.* TO 'py3web'@'%' IDENTIFIED BY '123456' WITH GRANT OPTION;
Query OK, 0 rows affected, 1 warning (0.00 sec)

mysql> flush privileges;
Query OK, 0 rows affected (0.00 sec)

#新建数据库
mysql> CREATE DATABASE pyblog DEFAULT CHARACTER SET utf8 COLLATE utf8_general_ci;
Query OK, 1 row affected (0.01 sec)
本地项目初始目录

在GitLab上新建项目
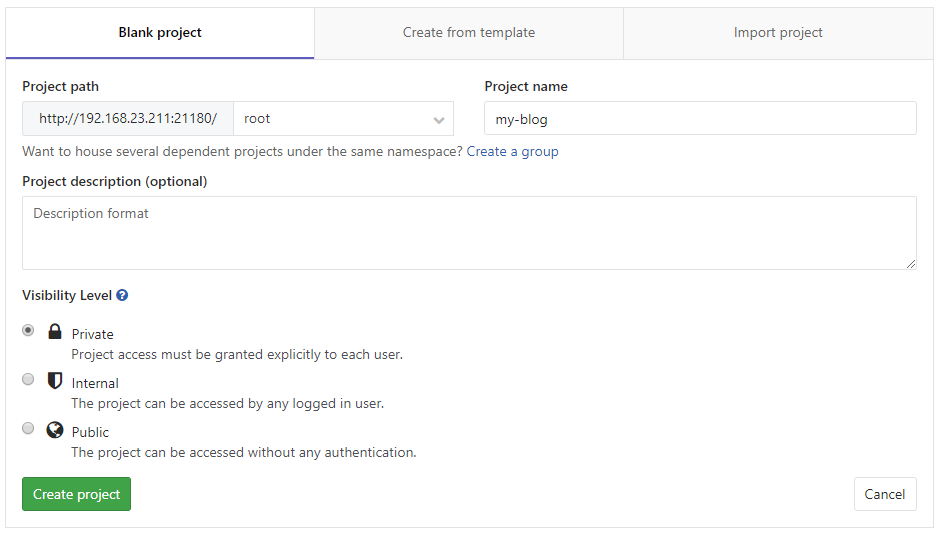
push本地项目到GitLab
admin@DESKTOP-BC8FMN2 MINGW64 /e/python
$ cd my-blog/

$ git init
Initialized empty Git repository in E:/python/my-blog/.git/

$ git remote add origin git@192.168.23.211:root/my-blog.git

$ git add .

$ git commit -m "initial code"

admin@DESKTOP-BC8FMN2 MINGW64 /e/python/my-blog (master)
$ git push -u origin master
Counting objects: 117, done.
Delta compression using up to 6 threads.
Compressing objects: 100% (113/113), done.
Writing objects: 100% (117/117), 1.35 MiB | 7.15 MiB/s, done.
Total 117 (delta 14), reused 0 (delta 0)
remote: Resolving deltas: 100% (14/14), done.
To 192.168.23.211:root/my-blog.git
 * [new branch]      master -> master
Branch 'master' set up to track remote branch 'master' from 'origin'.
2.创建Jenkins的pipeline-job
创建步骤

基本设置

构建触发器
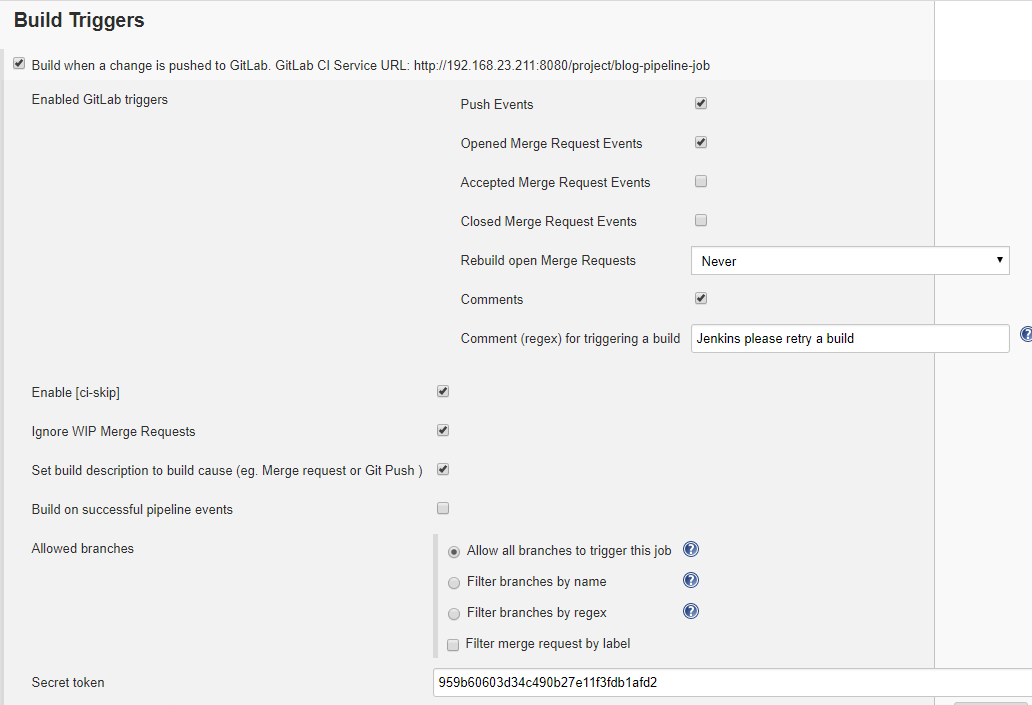
流水线构建

重新保存下设置。
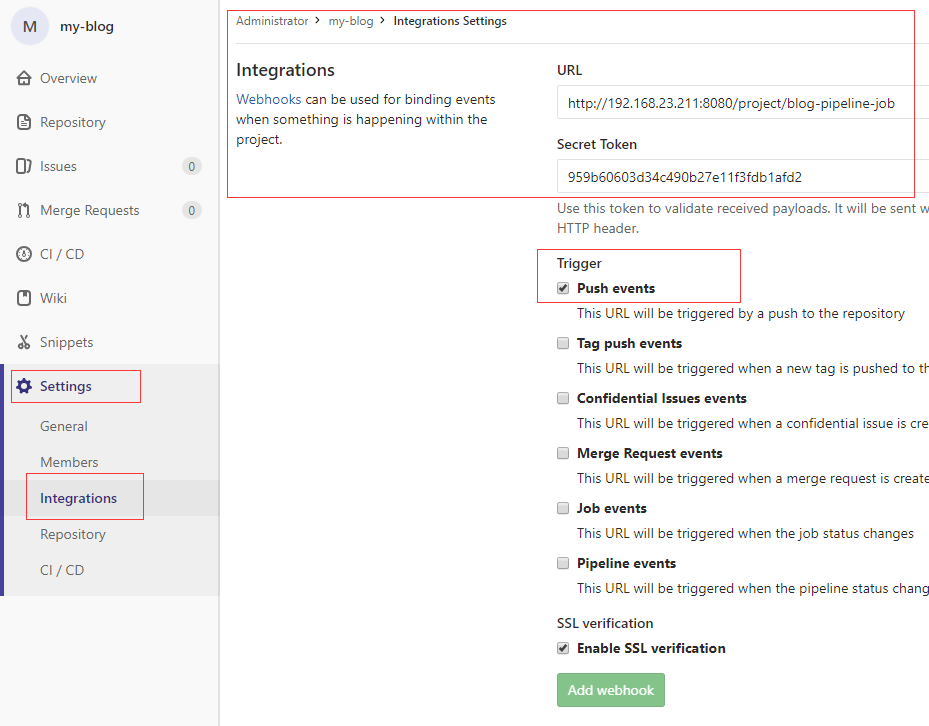
同样的,需要将 Build Triggers里的GitLab CI Service URL http://192.168.23.211:8080/project/blog-pipeline-job 和 Secret Token 配置到GitLab的该git项目的settings-->intergrations中
此时需要在项目中添加下Jenkinsfile,以便后面的调试
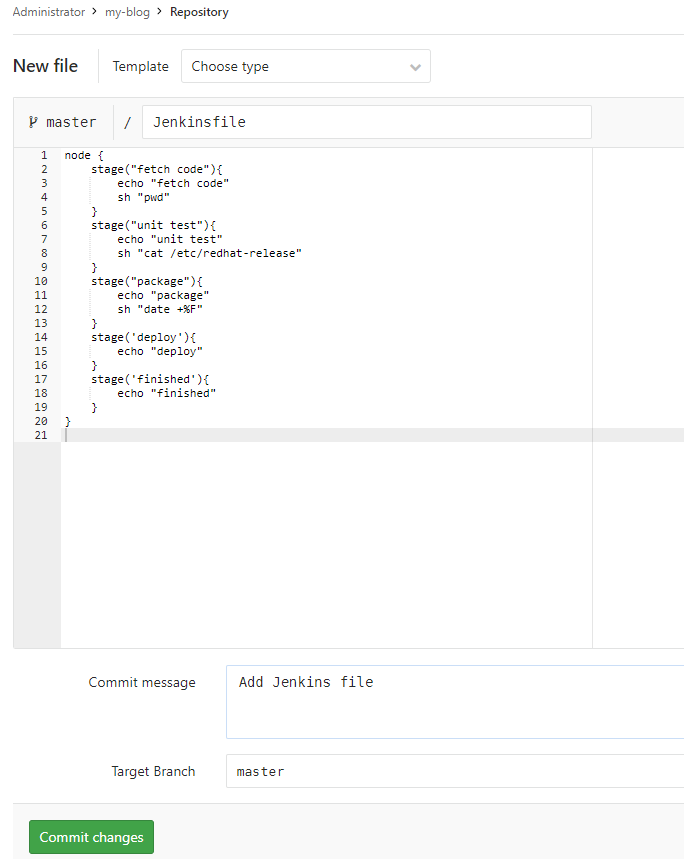
提交后,Jenkins这边就已经自动触发了
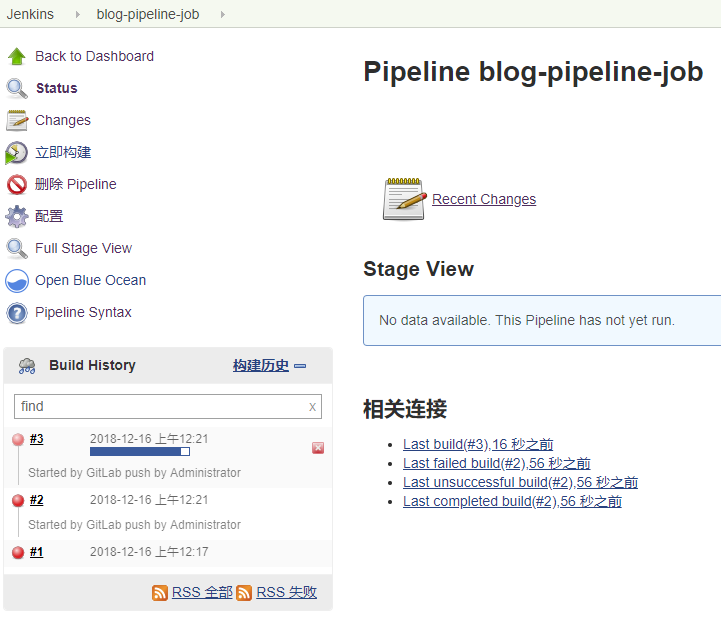
执行完成后可以看到流水线记录
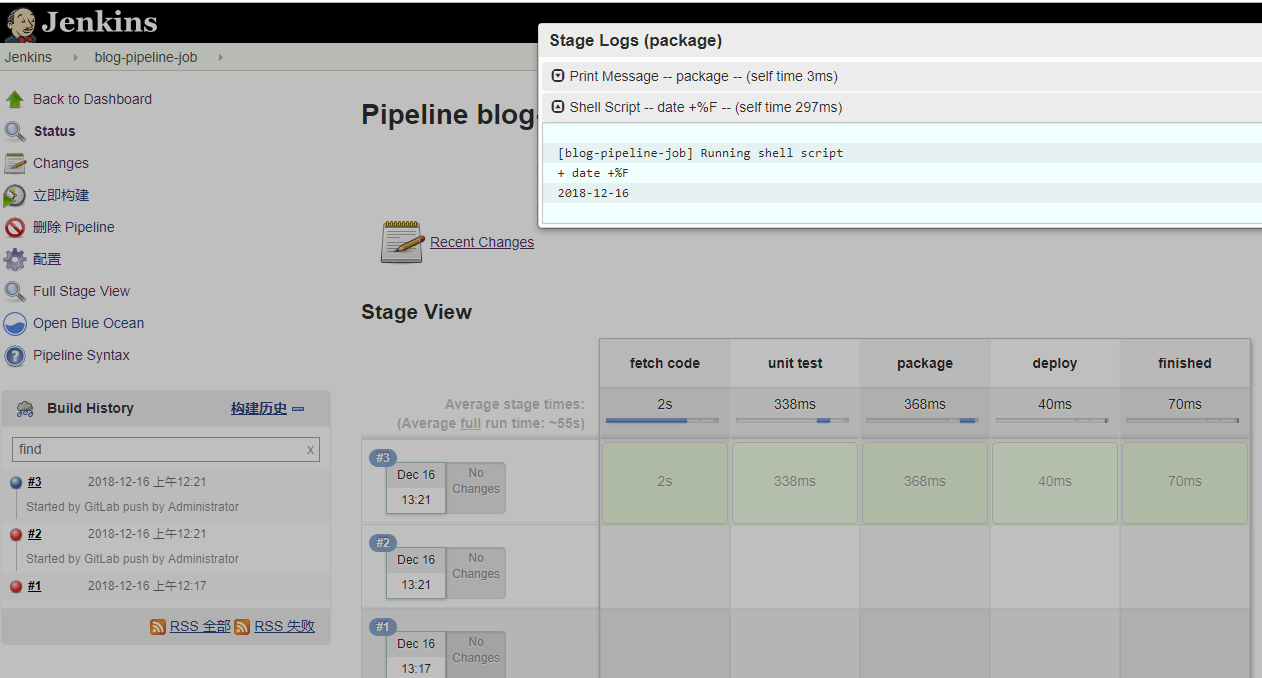
基本上pipeline已经就绪了
3.初步调试构建
给my-blog项目配置nginx的conf
[root@home-ct75211 ~]# vim /etc/nginx/conf.d/my_blog.conf

 1     server {
 2         listen       80;
 3         server_name  www.my-blog.cc;
 4
 5         #charset koi8-r;
 6
 7         #access_log  logs/host.access.log  main;
 8
 9         location / {
10             include  uwsgi_params;
11             uwsgi_pass  127.0.0.1:21190;
12             uwsgi_param UWSGI_SCRIPT luffy_blog.wsgi;
13             uwsgi_param UWSGI_CHDIR  /usr/share/nginx/html/my_blog;
14             index  index.html index.htm;
15             client_max_body_size 35m;
16             #uwsgi_cache_valid 1m;
17             #uwsgi_temp_file_write_size 64k;
18             #uwsgi_busy_buffers_size 64k;
19             #uwsgi_buffers 8 64k;
20             #uwsgi_buffer_size 64k;
21             #uwsgi_read_timeout 300;
22             #uwsgi_send_timeout 300;
23             #uwsgi_connect_timeout 300;
24         }
25
26         #error_page  404              /404.html;
27
28         # redirect server error pages to the static page /50x.html
29         #
30         error_page   500 502 503 504  /50x.html;
31         location = /50x.html {
32             root   html;
33         }
34
35
36     }
[root@home-ct75211 ~]# systemctl restart nginx
要自动部署,后面的流水线脚本则需要重新修改下

 1 pipeline {
 2     agent any
 3     stages{
 4         stage("fetch code"){
 5             steps {
 6                 echo "fetch code"
 7                 sh "pwd"
 8             }
 9         }
10         stage("unit test"){
11             steps {
12                 echo "unit test"
13                 echo "${BUILD_NUMBER}"
14             }
15         }
16         stage("package"){
17             steps {
18                 echo "package"
19                 sh 'tar czf /opt/blog-${BUILD_ID}.tar.gz ./* --exclude=./git --exclude=Jenkinsfile'
20             }
21
22         }
23         stage('deploy'){
24             steps {
25                 sh 'cd /var/webroot && mkdir blog-${BUILD_ID}'
26                 sh 'cp /opt/blog-${BUILD_ID}.tar.gz /var/webroot/blog-${BUILD_ID}'
27                 sh 'cd /var/webroot/blog-${BUILD_ID} && tar xf blog-${BUILD_ID}.tar.gz && rm -f blog-${BUILD_ID}.tar.gz'
28                 sh 'cd /var/webroot && rm -rf my_blog && ln -s /var/webroot/blog-${BUILD_ID} /usr/share/nginx/html/my_blog'
29             }
30
31         }
32         stage('finished'){
33             steps {
34                 echo "finished"
35                 sh "date +%F"
36             }
37
38         }
39     }
40 }
提交后,Jenkins那边的显示为
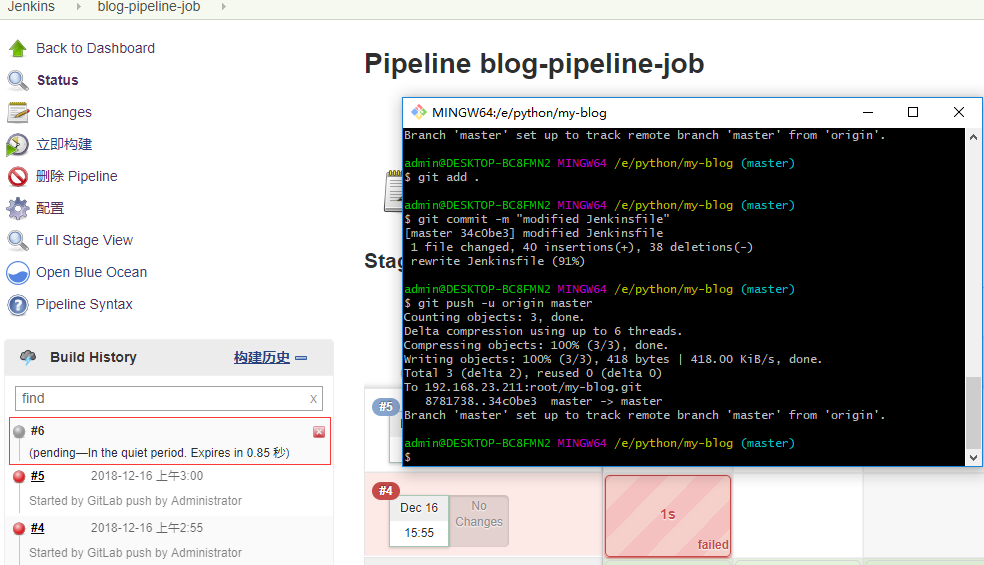
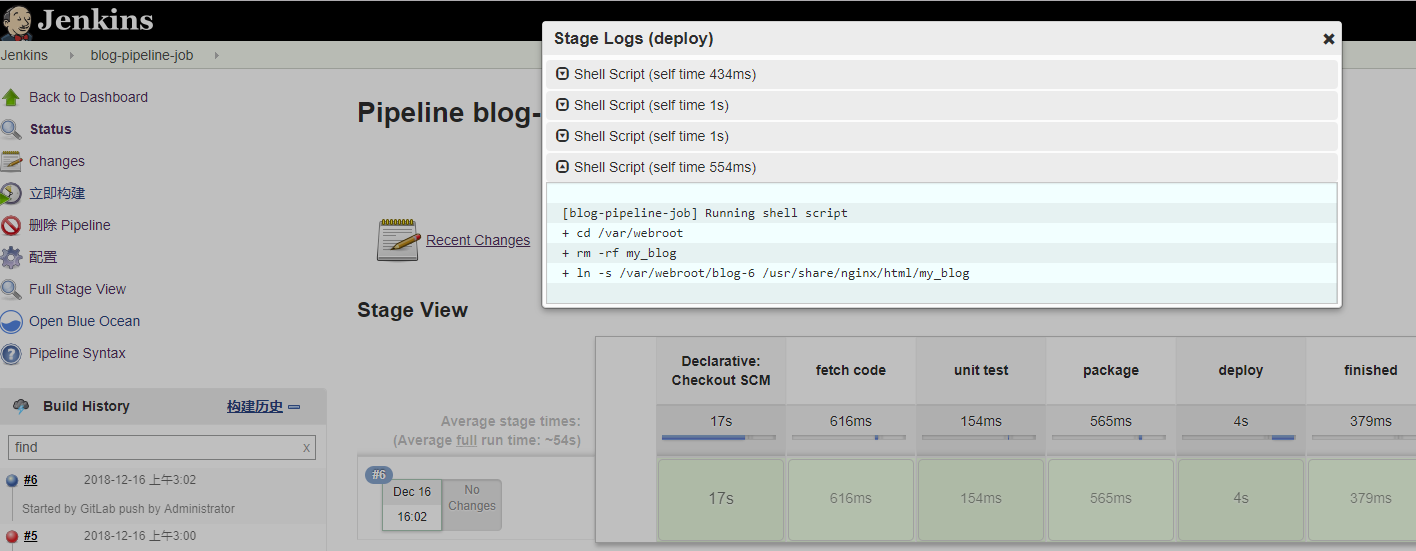
可以看到触发的脚本事件正常运行了,访问下看下
[root@home-ct75211 my_blog]# elinks http://www.my-blog.cc --dump
   Internal Server Error
# 看下uwsgi的日志

[root@home-ct75211 my_blog]# tailf /var/log/uwsgi21190.log
added /root/py3web/lib/python3.7/site-packages/ to pythonpath.
ModuleNotFoundError: No module named 'my_blog'
unable to load app 1 (mountpoint='www.my-blog.cc|') (callable not found or import error)
--- no python application found, check your startup logs for errors ---
www.my-blog.cc [pid: 831|app: -1|req: -1/5] 127.0.0.1 () {42 vars in 539 bytes} [Sun Dec 16 08:09:16 2018] GET / => generated 21 bytes in 64 msecs (HTTP/1.1 500) 2 headers in 83 bytes (0 switches on core 0)
因为虚拟环境的pip里只装了Django,但项目中还有用到了其他模块,此处需要同步下pip环境。其实到这里,pipeline的部署已经基本完结了,后面的基本就属于Django项目的环境问题了


