Django实现用户注册登录
学习Django中:试着着写一个用户注册登录系统,开始搞事情 =====O(∩_∩)O哈哈~=====
=================
Ubuntu
python 2.7.12
Django 1.10.4
IDE:Pycharm
Bootstrap(其实没怎么用~~)
=================
新建项目:(我是直接用pycharm直接生成的)
使用终端:
(创建项目)django-admin.py startproject mysite
(进入mysite新建app)django-admin.py startapp app01
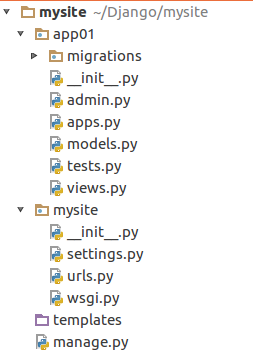
记得在settings.py里面添加app

设计模型:
/mysite/app01/models.py:
from __future__ import unicode_literals

from django.db import models

# Create your models here.

class User(models.Model):
    username = models.CharField(max_length=50)
    password = models.CharField(max_length=50)
    email = models.EmailField()
创建User类,存放 username、password、email三个字段
同步数据库:
Python manage.py makemigrations
python manage.py migrate
Django会自动创建一系列表

没有自动创建superuser.......咱们手动创建:
python manage.py createsuperuser

设计逻辑视图(views):(使用表单)
/mysite/app01/views.py:
#coding=utf-8
from django.shortcuts import render,render_to_response
from django.http import HttpResponse
from django import forms
from models import User
# Create your views here.
class UserForm(forms.Form):
    username = forms.CharField(label='用户名',max_length=50)
    password = forms.CharField(label='密码',widget=forms.PasswordInput())
    email = forms.EmailField(label='邮箱')

def regist(request):
    if request.method == 'POST':
        userform = UserForm(request.POST)
        if userform.is_valid():
            username = userform.cleaned_data['username']
            password = userform.cleaned_data['password']
            email = userform.cleaned_data['email']

            User.objects.create(username=username,password=password,email=email)
            User.save()

            return HttpResponse('regist success!!!')
    else:
        userform = UserForm()
    return render_to_response('regist.html',{'userform':userform})

def login(request):
    if request.method == 'POST':
        userform = UserForm(request.POST)
        if userform.is_valid():
            username = userform.cleaned_data['username']
            password = userform.cleaned_data['password']

            user = User.objects.filter(username__exact=username,password__exact=password)

            if user:
                return render_to_response('index.html',{'userform':userform})
            else:
                return HttpResponse('用户名或密码错误,请重新登录')

    else:
        userform = UserForm()
    return render_to_response('login.html',{'userform':userform})
注释:
label:标签
widget:装饰
widget=forms.PasswordInput():设置密码字段
设计模板文件
在templates里面新建index.html、regist.html、login.html
regist.html
<!DOCTYPE html>
{% load static %}
<html lang="zh-CN"><head>
<meta http-equiv="content-type" content="text/html; charset=UTF-8">
    <meta charset="utf-8">
    <meta http-equiv="X-UA-Compatible" content="IE=edge">
    <meta name="viewport" content="width=device-width, initial-scale=1">
    <!-- 上述3个meta标签*必须*放在最前面,任何其他内容都*必须*跟随其后! -->
    <meta name="description" content="">
    <meta name="author" content="">

    <title>Regist</title>

    <!-- Bootstrap core CSS -->
    <link href="{% static 'css/bootstrap.css' %}" rel="stylesheet">

    <!-- IE10 viewport hack for Surface/desktop Windows 8 bug -->
    <link href="{% static 'css/ie10-viewport-bug-workaround.css' %}" rel="stylesheet">

    <!-- Custom styles for this template -->
    <link href="{% static 'css/signin.css' %}" rel="stylesheet">

    <!-- Just for debugging purposes. Don't actually copy these 2 lines! -->
    <!--[if lt IE 9]><script src="../../assets/js/ie8-responsive-file-warning.js"></script><![endif]-->
    <script src="{% static 'js/ie-emulation-modes-warning.js' %}"></script>

    <!-- HTML5 shim and Respond.js for IE8 support of HTML5 elements and media queries -->
    <!--[if lt IE 9]>
      <script src="https://cdn.bootcss.com/html5shiv/3.7.3/html5shiv.min.js"></script>
      <script src="https://cdn.bootcss.com/respond.js/1.4.2/respond.min.js"></script>
    <![endif]-->
  </head>
<style>
        html,body{text-align:center;margin:0px auto;}
</style>
<body>
<h1>注册页面</h1>
<form method = 'post' enctype="multipart/form-data">
{{userform.as_p}}
<input type="submit" value = "Regist" />
</form>
</body>
</html>
login.html
<!DOCTYPE html>
{% load static %}
<html lang="zh-CN"><head>
<meta http-equiv="content-type" content="text/html; charset=UTF-8">
    <meta charset="utf-8">
    <meta http-equiv="X-UA-Compatible" content="IE=edge">
    <meta name="viewport" content="width=device-width, initial-scale=1">
    <!-- 上述3个meta标签*必须*放在最前面,任何其他内容都*必须*跟随其后! -->
    <meta name="description" content="">
    <meta name="author" content="">

    <title>Login</title>

    <!-- Bootstrap core CSS -->
    <link href="{% static 'css/bootstrap.css' %}" rel="stylesheet">

    <!-- IE10 viewport hack for Surface/desktop Windows 8 bug -->
    <link href="{% static 'css/ie10-viewport-bug-workaround.css' %}" rel="stylesheet">

    <!-- Custom styles for this template -->
    <link href="{% static 'css/signin.css' %}" rel="stylesheet">

    <!-- Just for debugging purposes. Don't actually copy these 2 lines! -->
    <!--[if lt IE 9]><script src="../../assets/js/ie8-responsive-file-warning.js"></script><![endif]-->
    <script src="{% static 'js/ie-emulation-modes-warning.js' %}"></script>

    <!-- HTML5 shim and Respond.js for IE8 support of HTML5 elements and media queries -->
    <!--[if lt IE 9]>
      <script src="https://cdn.bootcss.com/html5shiv/3.7.3/html5shiv.min.js"></script>
      <script src="https://cdn.bootcss.com/respond.js/1.4.2/respond.min.js"></script>
    <![endif]-->
  </head>
<style>
        html,body{text-align:center;margin:0px auto;}
</style>
<body>
<h1>登录页面</h1>
<form method = 'post' enctype="multipart/form-data">
{{userform.as_p}}
<input type="submit" value = "Login" />
</form>
</body>
</html>
index.html
<!DOCTYPE html>
<html lang="en">
<head>
    <meta charset="UTF-8">
    <title>主页</title>
</head>
<style>
        html,body{text-align:center;margin:0px auto;}
</style>
<body>
<h1>Hello Word!</h1>
</body>
</html>
设计urls
/mysite/urls.py
from django.conf.urls import url,include
from django.contrib import admin
from app01 import urls
import app01

urlpatterns = [
    url(r'^admin/', admin.site.urls),
    url(r'',include(app01.urls)),
]
/mysite/app01/urls.py
from django.conf.urls import url,include
from django.contrib import admin
import views
admin.autodiscover()

urlpatterns = [
    url(r'^index/$',views.index),
    url(r'^login/$',views.login),
    url(r'^regist/$',views.regist),

]
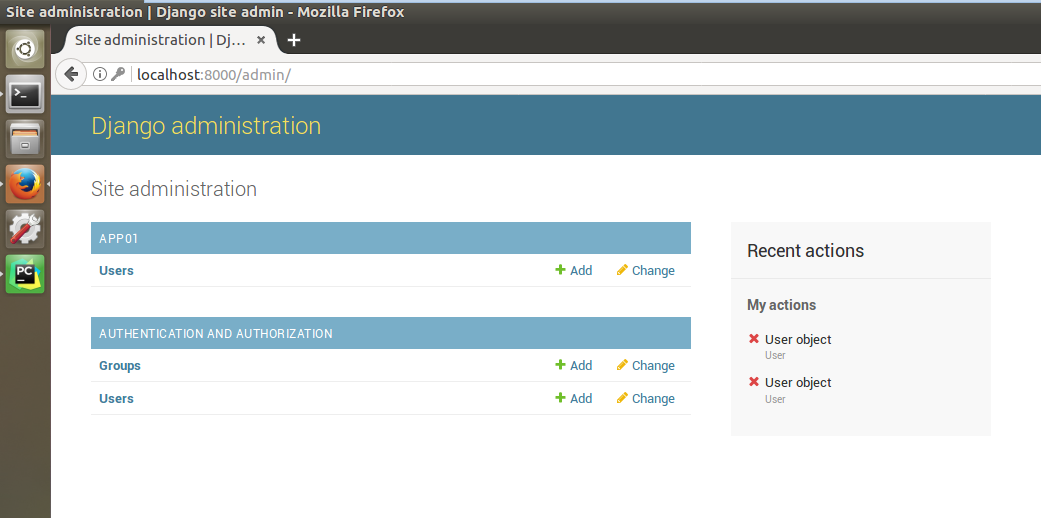
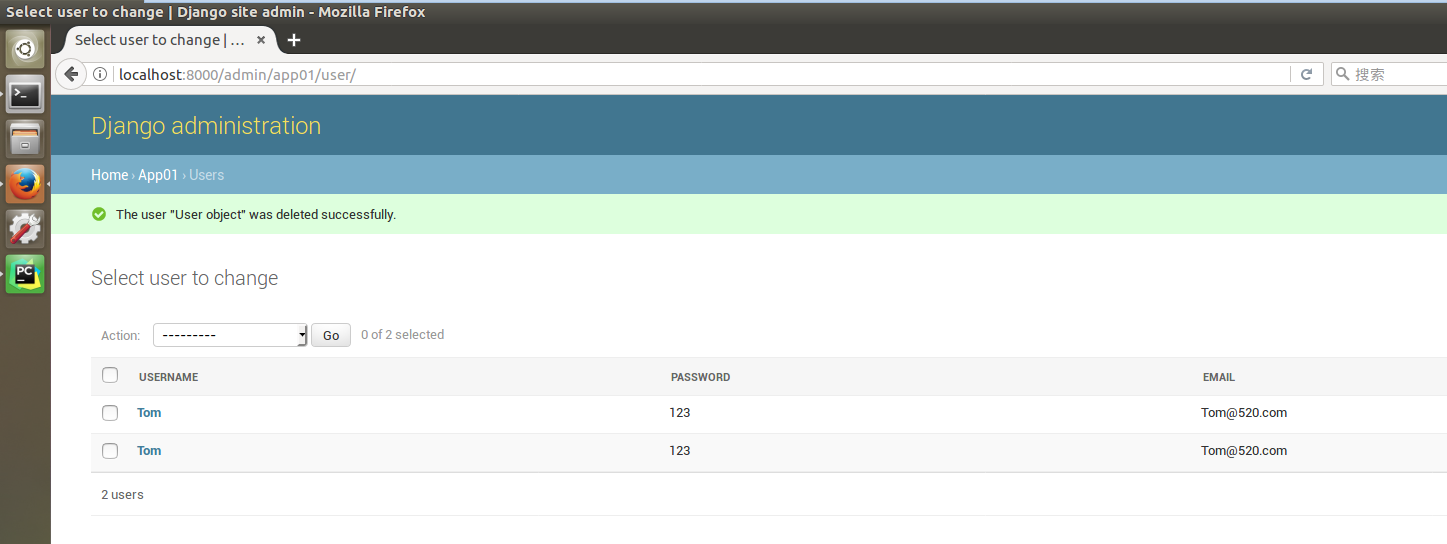
使用admin后台管理注册的用户
在models.py里面设计一个UserAdmin类,用来记录注册用户的信息
/mysite/app01/models.py
from __future__ import unicode_literals
from django.contrib import admin
from django.db import models

# Create your models here.

class User(models.Model):
    username = models.CharField(max_length=50)
    password = models.CharField(max_length=50)
    email = models.EmailField()

class UserAdmin(admin.ModelAdmin):
    list_display = ('username','password','email')

admin.site.register(User,UserAdmin)
同步一下数据库(方法同上)
效果图
主页:

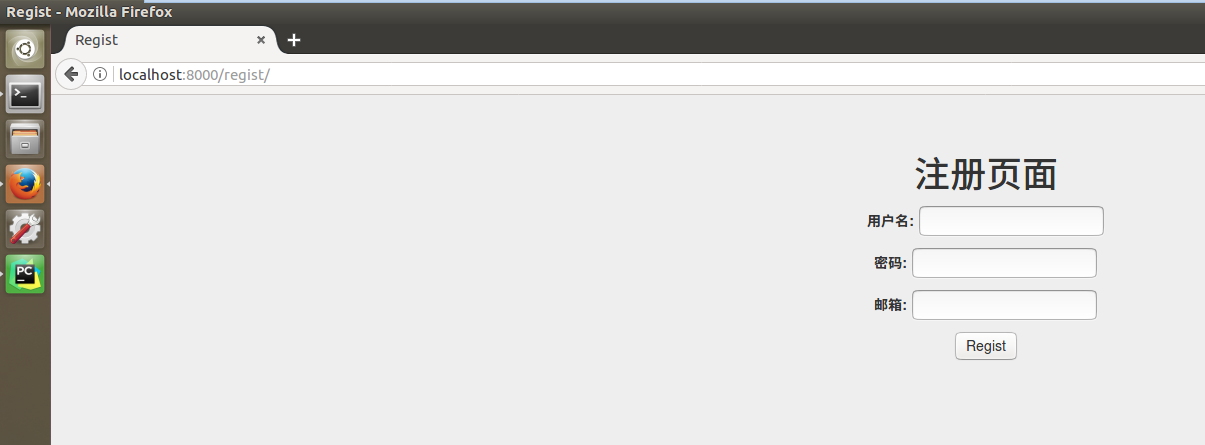
注册页:
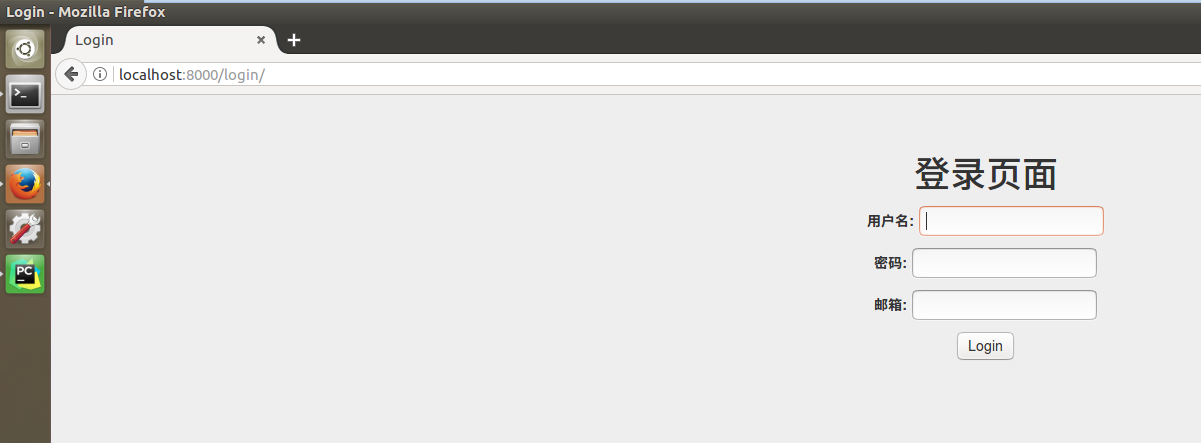
登录页面:
后台:
