Springboot
一、创建maven工程
create new project,选择maven工程,依次填写groupid和artifactid,一直下一步,最后finish。
二、添加起步依赖
添加spring-boot-starter-parent和web的启动依赖
<parent>
        <groupId>org.springframework.boot</groupId>
        <artifactId>spring-boot-starter-parent</artifactId>
        <version>2.0.1.RELEASE</version>
</parent>


<dependencies>
        <!--web功能的起步依赖-->
        <dependency>
            <groupId>org.springframework.boot</groupId>
            <artifactId>spring-boot-starter-web</artifactId>
        </dependency>
</dependencies>
三、springboot的引导类
在java文件夹下创建SpringbootApplication类
1 @SpringBootConfiguration
2 public class SpringbootApplication {
3     public static void main(String[] args) {
4         SpringApplication.run(SpringbootApplication.class);
5     }
6
7 }
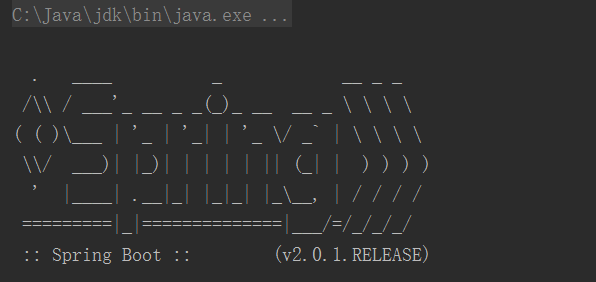
接下来启动程序,控制台可以看到springboot及其版本号。

四、编写Controller
在SpringbootApplication所在同级包或者子包下面编写QuickStartController,写好Controller之后通过注解的形式进行配置。
1 @Controller
2 public class QuickStartController {
3     @RequestMapping("/springboot")
4     @ResponseBody
5     public String quick(){
6         return "hello Springboot";
7     }
8 }
可以看到,springboot的入门和环境搭建就是简单的四个步骤。
在QuickStartController添加注解而不需要xml的配置就能运行,而不再需要导入spring、springMVC的坐标,主要是spring-boot-starter-web集成了相应的start启动功能,底层继承了spring、springMVC的功能,SpringbootApplication中加入注解@SpringBootConfiguration可以将SpringbootApplication声明为Springboot的一个引导类。SpringApplication中的run方法,表示要运行springboot的引导类,传入的参数为SpringbootApplication作为引导类的字节码对象。
五、Springboot热部署
在pom.xml配置文件中导入热部署坐标
 <!--热部署配置-->
        <dependency>
            <groupId>org.springframework.boot</groupId>
            <artifactId>spring-boot-devtools</artifactId>
</dependency>
注:在IDEA中,默认情况下不支持热部署,这个时候需要手动设置一下,方法很简单,在settings中找到Compiler,将Build project automatically前面的勾给选上,然后ok,再按快捷键ctrl+shift+alt+/,打开Registry,往下拖动,找到compiler.automake.allow.when.app.running,将其后面的勾选中即可,这样当修改了某些代码,不用重新启动tomcat进行部署,只需要在浏览器刷新就可以看到修改后的效果。
六、快速创建springboot项目
在刚才创建的项目中,从头到尾,所有的代码全是我们手动书写,现在介绍一种快速生成springboot module的方式。在刚才创建的项目上右键new-->Module,现在选中Spring Initiaizr,点击下一步,依次填写Group和Artifact,其他选项可以根据自己的需求稍做修改,然后next,接下来是最为关键的一步,需要用到什么坐标,只需要简单的勾选即可。

这里我勾选了web,然后next,然后finish。会发现,除了Controller,之前我们所写的内容都自动给我们生成了。


