网站使用谷歌登录 oauth java nuxt auth
前言
- 最近做谷歌快捷登录,走了比较多弯路,这里做个记录,希望对后面的人有所帮助。
代码使用技术
后端
- Spring Boot为主。
前端
- nuxt、vue为主,还使用了nuxt-auth模块。
准备工作
谷歌控制台
-
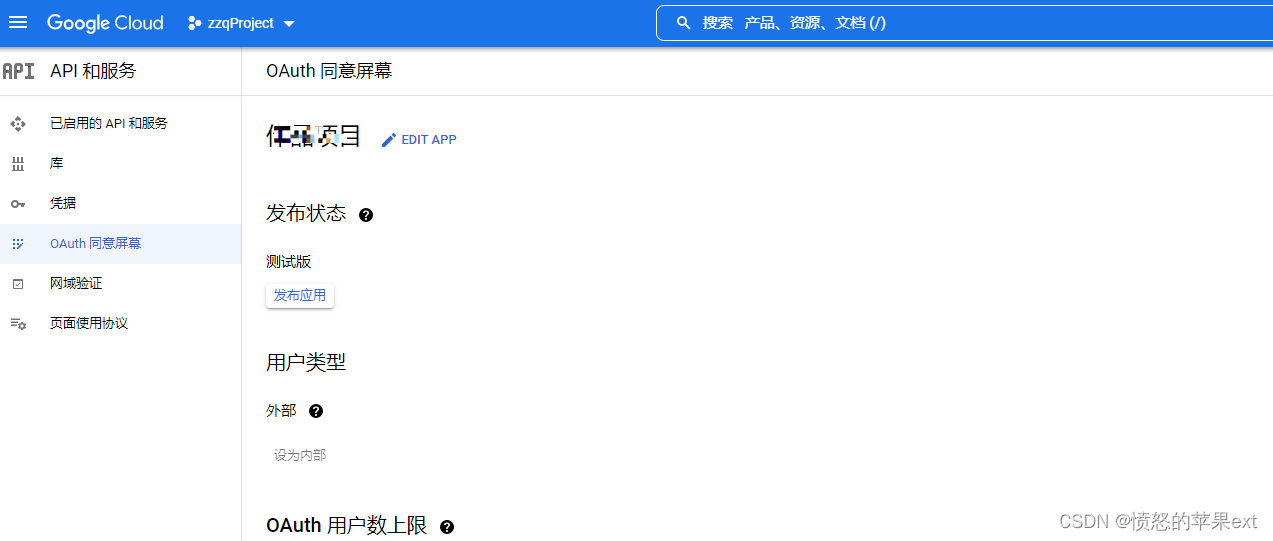
进入https://console.cloud.google.com/apis/credentials 控制台,先点
OAuth 同意屏幕,配置一波。
-
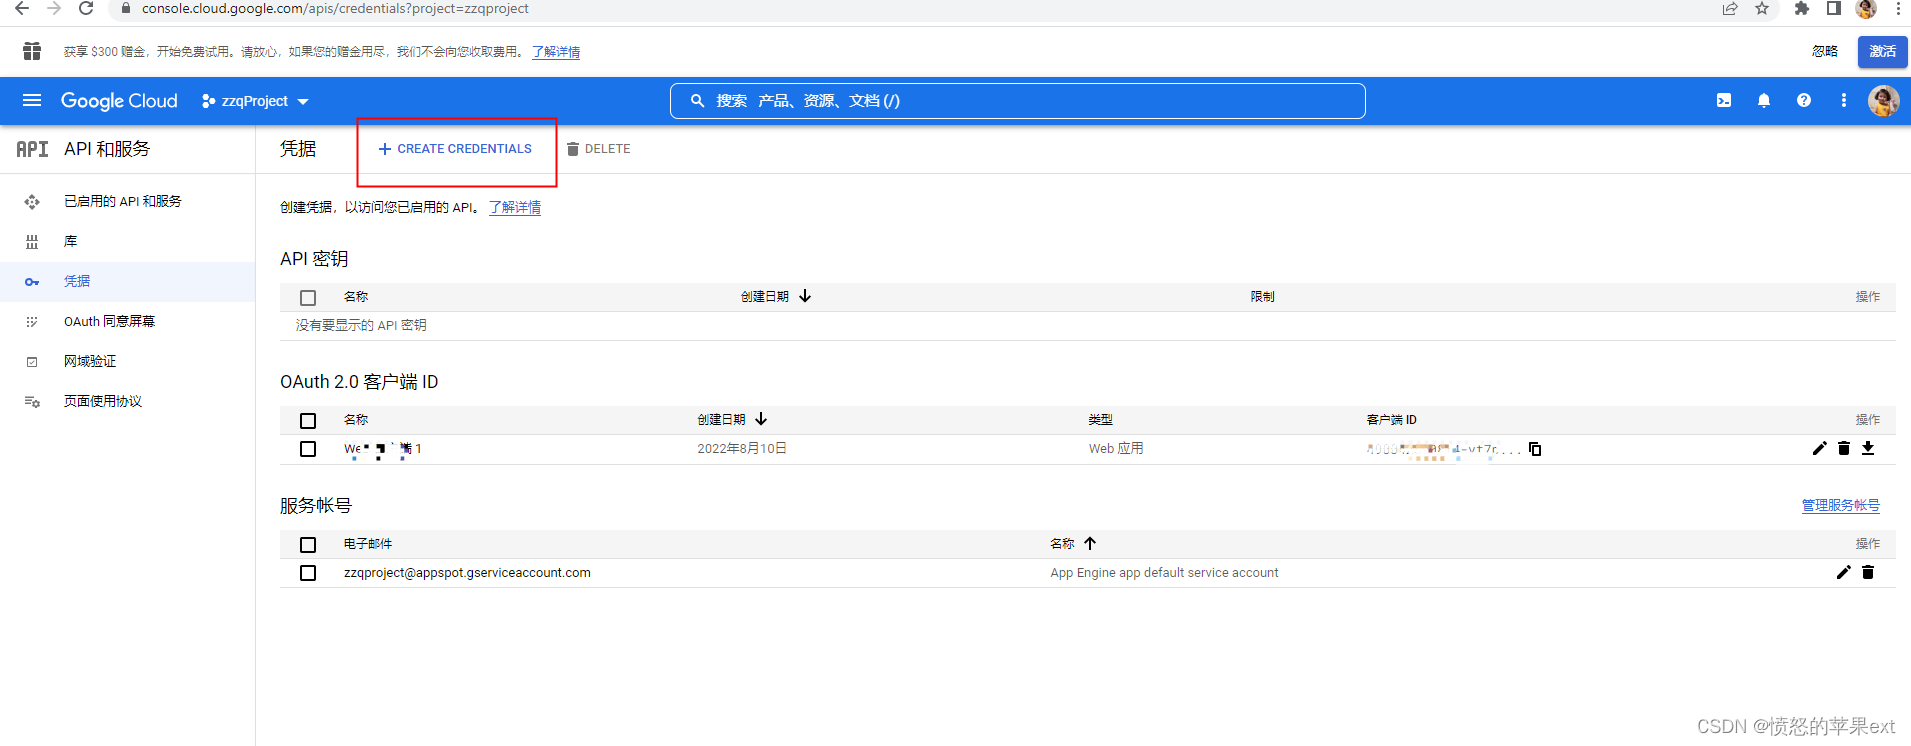
进入
凭据,创建OAuth 客户端 ID
-
这时你就得到
客户端ID和客户端密钥。
文档
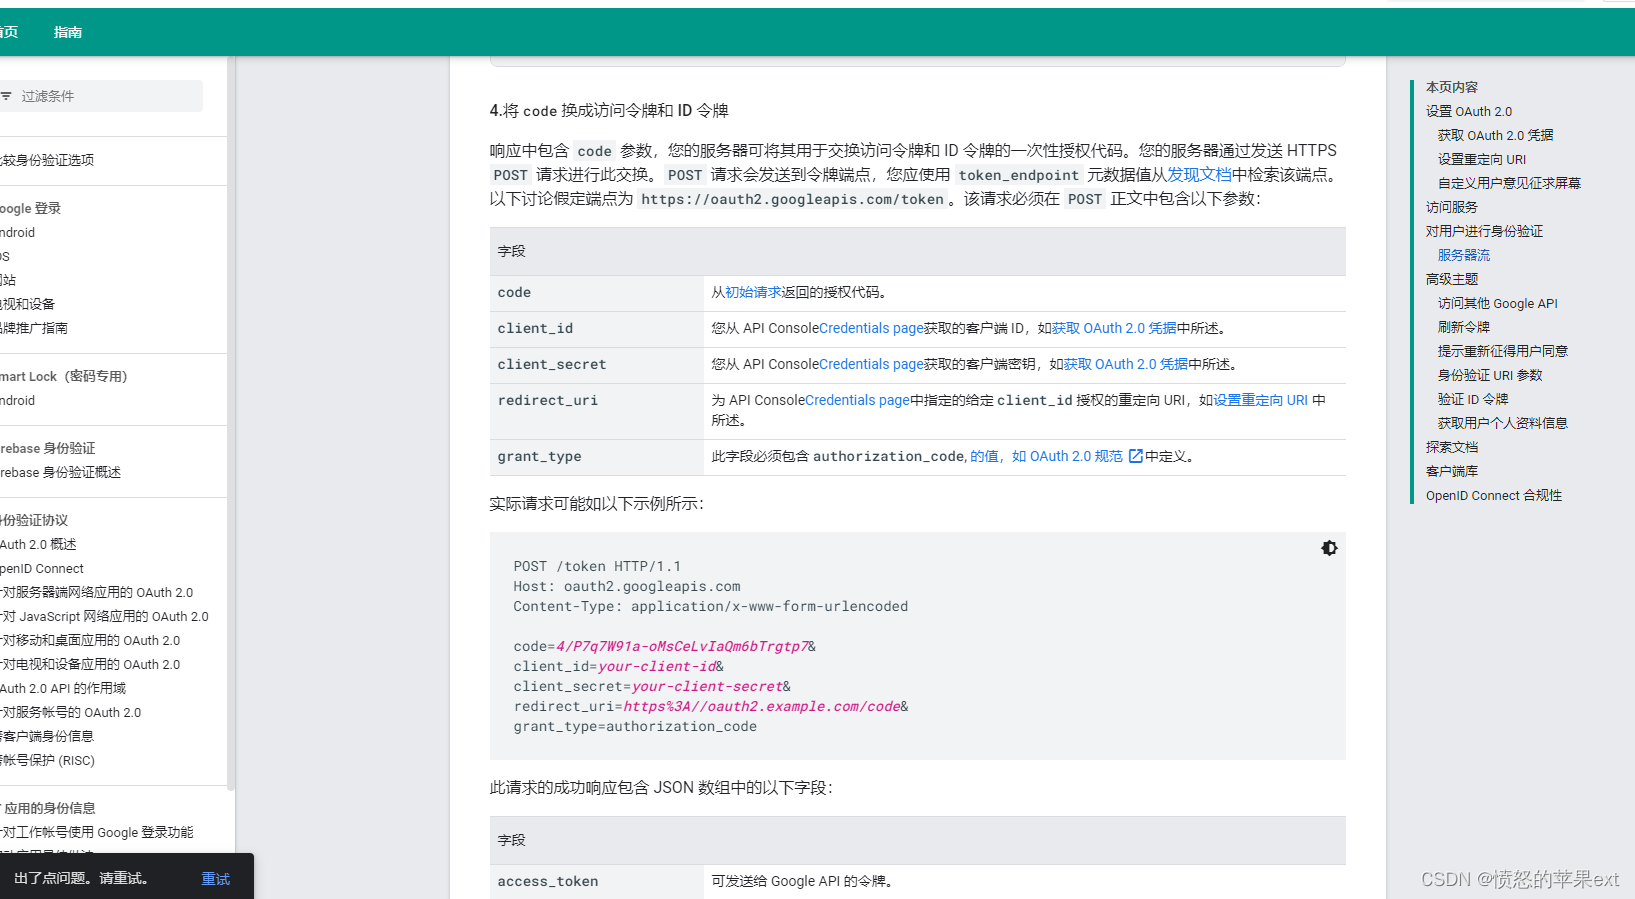
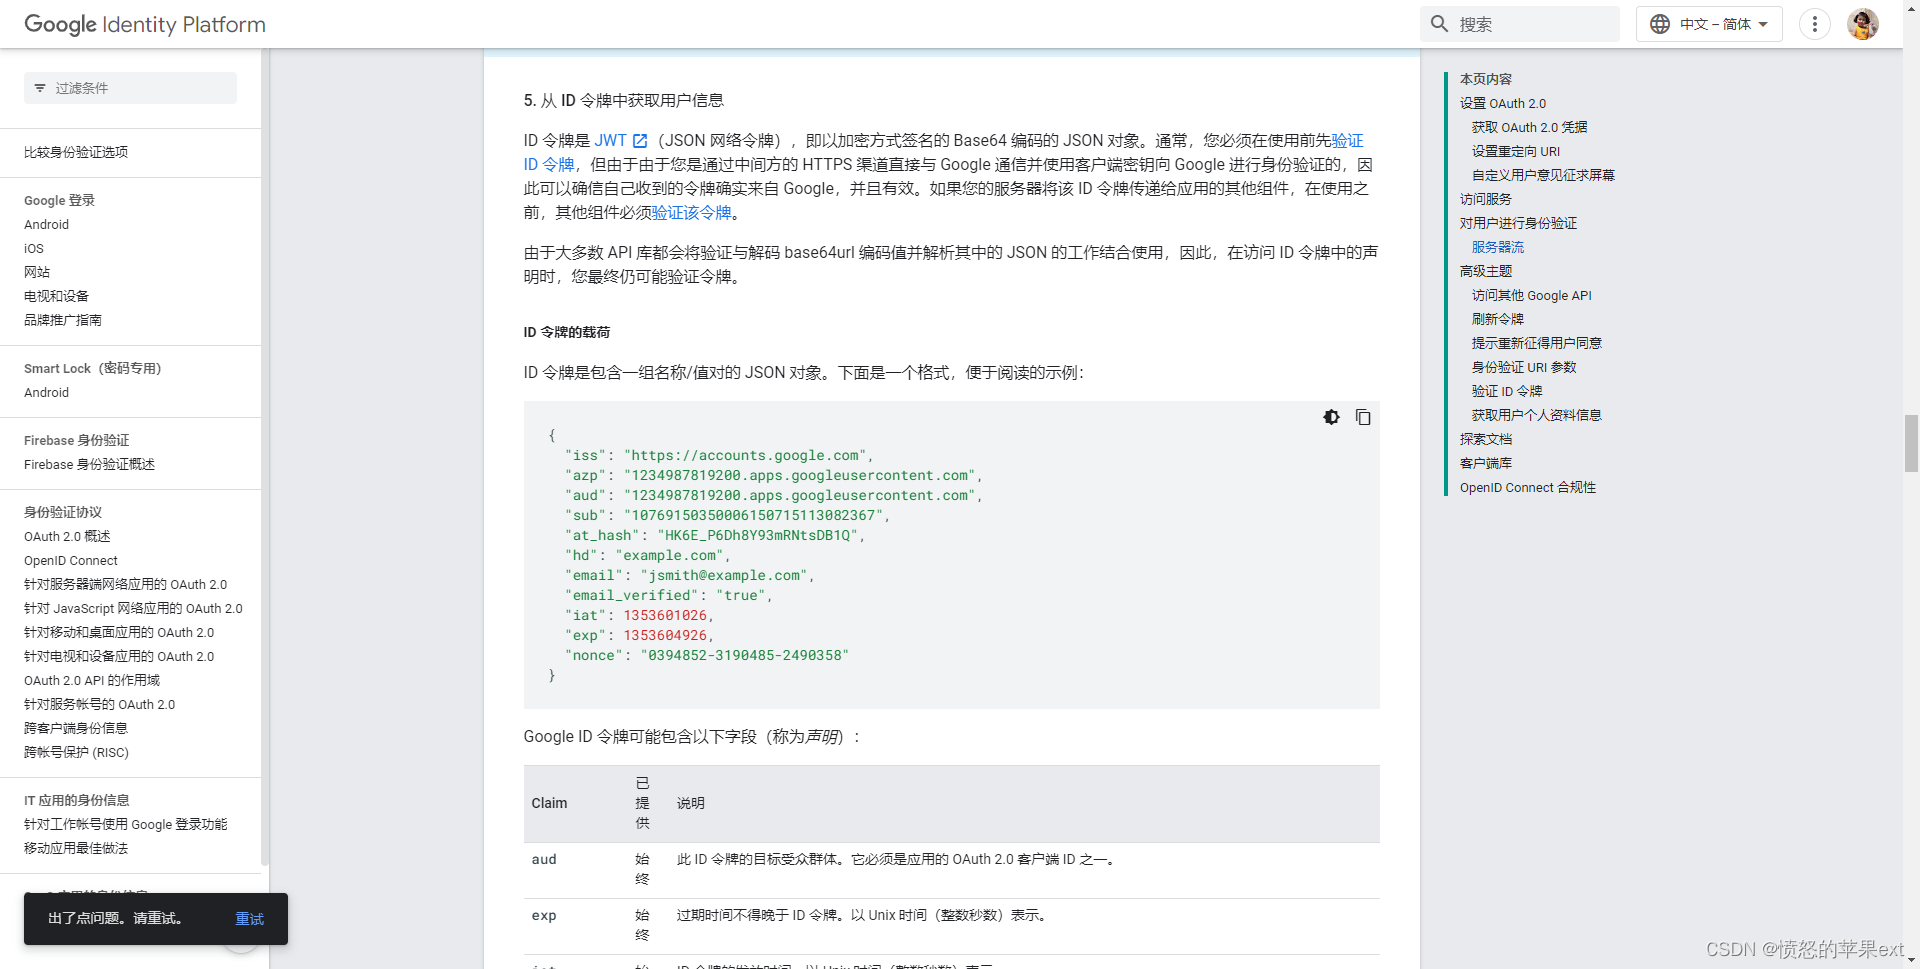
- https://developers.google.com/identity/protocols/OAuth2WebServer文档看这个就好了。
- 其实谷歌用Java SDK包可以用,但我还是自己根据文档写的请求接口代码。就感觉不太适合我的场景,因为要配置代理,而且Java SDK文档感觉不是很详细。
- nuxt auth模块文档:https://auth.nuxtjs.org/guide/setup,接入谷歌: https://auth.nuxtjs.org/providers/google
前端
- 先安装
nuxt auth模块(依赖nuxtjs/axios模块)。nuxtjs/axios模块配置我省略了。可参考文档 https://axios.nuxtjs.org/setup
npm install --save-exact @nuxtjs/auth-next
npm install @nuxtjs/axios
- 如果你是
yarn。
yarn add --exact @nuxtjs/auth-next
yarn add @nuxtjs/axios
nuxt.config.js配置。clientId就是前面申请的客户端id。
  // nuxt auth模块配置
  auth: {
    strategies: {
      google: {
      // 这个就是前面申请的客户端id
        clientId: 'xxxx.apps.googleusercontent.com',
        codeChallengeMethod: '',
        responseType: 'code',
        endpoints: {
        // /api是项目统一前缀,之前配置过统一代理所以不用加前缀
          token: '/api/google', // somm backend url to resolve your auth with google and give you the token back
          userInfo: '/api/auth/user' // the endpoint to get the user info after you recived the token
        },
         token: {
          property: 'data',
          type: 'Bearer',
          maxAge: 1800
        },
        user: {
          property: 'data'
        },
      },
    },
  },
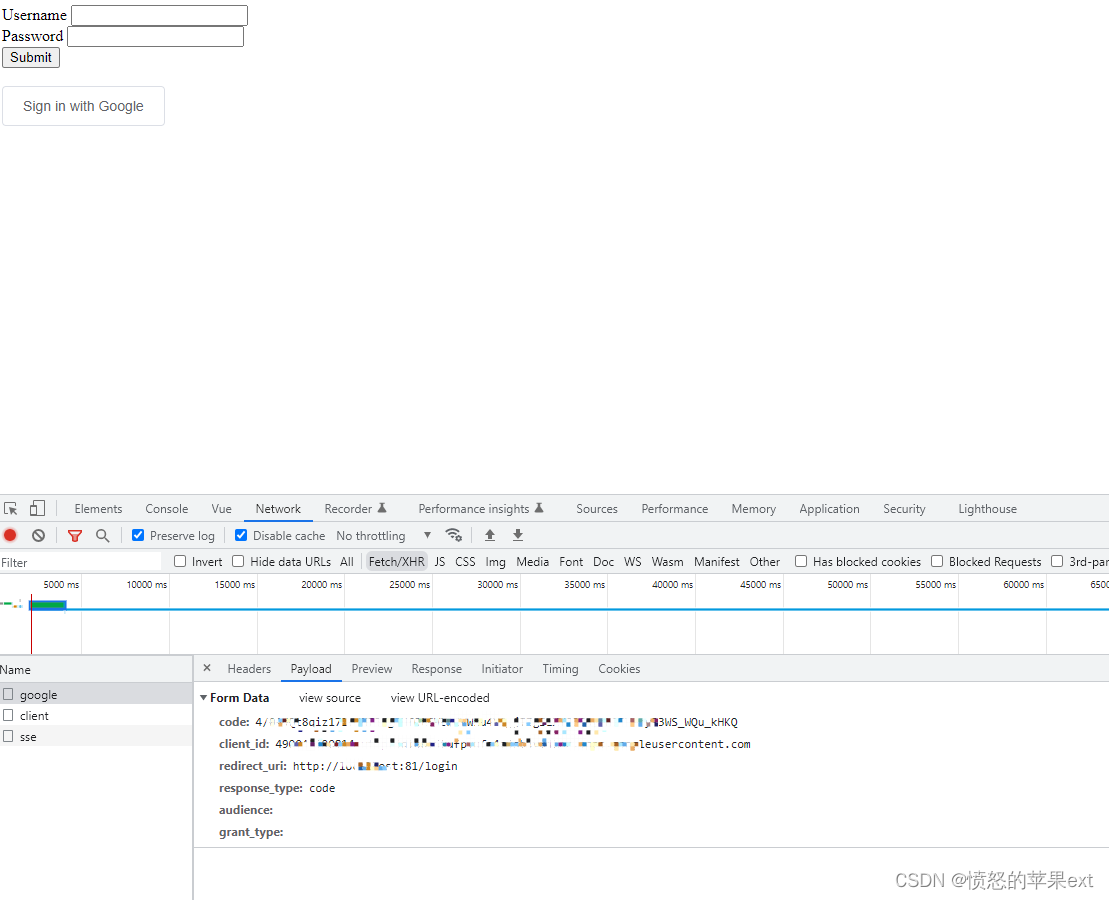
- 登录页面
login.vue
<template>
  <div>
    <form @submit.prevent="userLogin">
      <div>
        <label>Username</label>
        <input type="text" v-model="login.userName" />
      </div>
      <div>
        <label>Password</label>
        <input type="text" v-model="login.password" />
      </div>
      <div>
        <button type="submit">Submit</button>
      </div>
    </form>


    <br />
      <section class="section">
    <el-button @click="loginWithGoogle()" icon-left="google">
      Sign in with Google
    </el-button>
  </section>
  </div>
</template>

<script>
export default {
  data() {
    return {
      login: {
        userName: '',
        password: ''
      }
    }
  },
  methods: {
    async userLogin() {
      try {
        let response = await this.$auth.loginWith('local', { data: this.login })
        console.log(response)
      } catch (err) {
        console.log(err)
      }
    },
     loginWithGoogle() {
      this.$auth.loginWith("google");
    },
  }
}
</script>
后端
-
其实前面的步骤
nuxt auth已经帮我们做了,后端只需要完成4和5就能拿到用户信息了。
-
controller层,
restTemplateProxy是做了代理的。
@Bean
public RestTemplate restTemplateProxy() {
RestTemplate restTemplate = new RestTemplate();
SimpleClientHttpRequestFactory simpleClientHttpRequestFactory = new SimpleClientHttpRequestFactory();
simpleClientHttpRequestFactory.setProxy(new Proxy(Proxy.Type.HTTP,new InetSocketAddress("192.168.3.2",1080))); // 添加代理 ip 和 port 即可
restTemplate.setRequestFactory(simpleClientHttpRequestFactory);
return restTemplate;
}
@PostMapping("/google")
public R google(GooglePayloadReq googlePayload) {
// token接口
// 设置请求头,请求类型为x-www-form-urlencoded
HttpHeaders headers = new HttpHeaders();
headers.setContentType(MediaType.APPLICATION_FORM_URLENCODED);
// 设置请求参数
MultiValueMap<String, Object> map = new LinkedMultiValueMap<>();
map.add("code", googlePayload.getCode());
// 客户id
map.add("client_id", "4xxxxs.googleusercontent.com");
// 客户密钥
map.add("client_secret", "xxxx");
map.add("redirect_uri", "http://localhost:81/login");
// web 固定
map.add("grant_type", "authorization_code");
//用HttpEntity封装整个请求报文
HttpEntity<MultiValueMap<String, Object>> request = new HttpEntity<>(map, headers);
String responseBody = restTemplateProxy.postForObject("https://oauth2.googleapis.com/token", request, String.class);
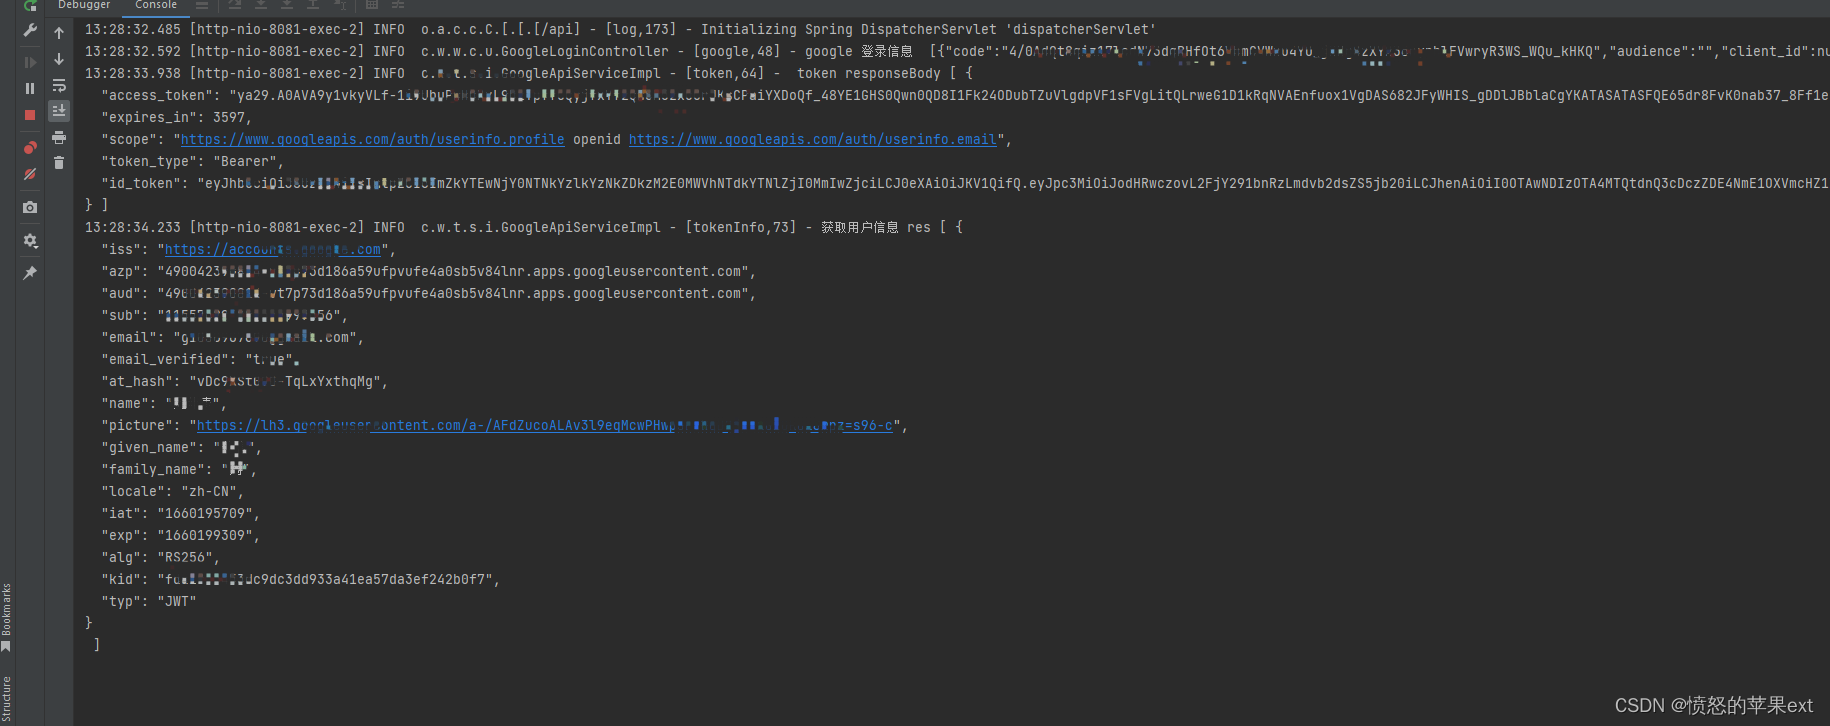
logger.info(" token responseBody [ {} ]", responseBody);
Assert.isEmpty(responseBody, "第三方接口返回异常");
GoogleTokenRes res = objectMapperFace.readValue(responseBody, GoogleTokenRes.class)
// tokeninfo 接口
tokenInfo(res)
return R.ok("tokenxxxxx");
}
public GoogleTokenInfoRes tokenInfo(GoogleTokenRes googleTokenRes) {
// 注意接口返回的是id_token字段,我用了@JsonProperty注解对应上的
String responseBody = restTemplateProxy.getForObject(
"https://oauth2.googleapis.com/tokeninfo?id_token="+googleTokenRes.getIdToken(), String.class);
logger.info("获取用户信息 res [ {} ]", responseBody);
Assert.isEmpty(responseBody, "第三方接口返回异常,获取用户信息");
return objectMapperFace.readValue(responseBody, GoogleTokenInfoRes.class);
}
@GetMapping("/auth/user")
public R authUser(HttpServletRequest request) {
logger.info("authUser");
return R.ok(new Users());
}
- ObjectMapperFace.java
import com.fasterxml.jackson.core.JsonProcessingException;
import com.fasterxml.jackson.databind.ObjectMapper;
import com.works.common.exception.ServiceException;

/**
 * @author Zhou Zhongqing
 * @ClassName ObjectMapperWarp
 * @description: 装饰ObjectMapper对象
 * @date 2022-08-10 17:50
 */
public class ObjectMapperFace {

    private ObjectMapper objectMapper;


    public ObjectMapperFace(ObjectMapper objectMapper) {
        this.objectMapper = objectMapper;
    }

    public ObjectMapper getObjectMapper() {
        return objectMapper;
    }

    public void setObjectMapper(ObjectMapper objectMapper) {
        this.objectMapper = objectMapper;
    }

    /**
     * 对象转json
     * @param value
     * @return
     */
    public String writeValueAsString(Object value) {
        try {
           return objectMapper.writeValueAsString(value);
        } catch (JsonProcessingException e) {
            e.printStackTrace();
            throw new ServiceException(e.getMessage());
        }
    }

    /**
     * json转对象
     * @param content
     * @param valueType
     * @return
     * @param <T>
     */
    public <T> T readValue(String content, Class<T> valueType) {
        try {
            return objectMapper.readValue(content,valueType);
        } catch (JsonProcessingException e) {
            e.printStackTrace();
            throw new ServiceException(e.getMessage());
        }
    }
}
运行效果
小结
- 拿到用户信息后,我们就用
sub字段与我们业务系统进行绑定。判断我们数据库有没有这个用户。


 浙公网安备 33010602011771号