openfire+elipse的导入配置
中文版:
|
Openfire 是由Jive Software 主导开发的一套功能非常强大的开源im 服务器(前身是wildfire),它基于XMPP 协议,完全用java实现,是一款非常优秀的服务器端软件。
四. check out openfire 源码
----------------- 自己创建工程: 五.创建Java项目,将源代码导入此项目中。在Eclipse中将此Java文件夹当成源代码文件夹新建工程。库都在Build目录的lib目录下,将openfire用到的库都添加到这个新建工程的Referenced Libraries中。 六. Build openfire
设置完毕,这样以后在run这个工程的时候就会按照正确的配置进行了. 英文版
|
- 下载安装JDK1.6
- 下载安装Eclipse 3.3
- 下载openfire源代码
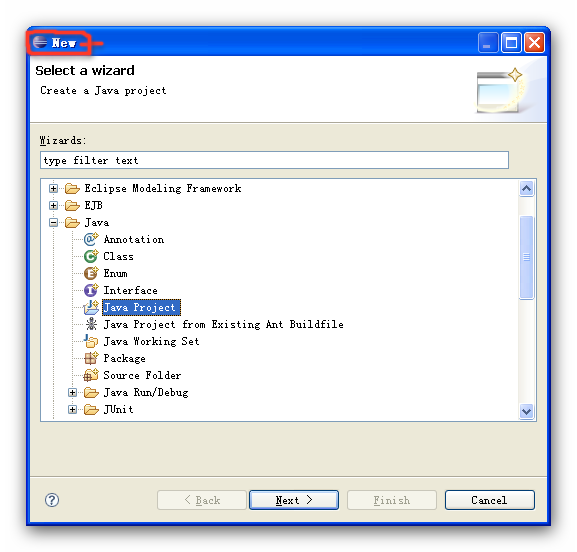
- 创建openfire项目
- Select Java::Java Project and click Next.
- On the New Java Project window choose Create project from existing source and browse to where openfire folder is located under your workspace.
- In the Project name box enter exactly as openfire.
- 编译openfire
- Click Window::Show View::Ant menu.
- Right-click the Ant screen and choose Add Buildfiles…
- Expand the openfire::build folder and select build.xml, then click OK.
- On the Ant screen, expand the Openfire XMPP Server and double-click on openfire ant task. The build may fail because you’re checking out the daily updates of Openfire sources, which may contain bugs. If so, wait for another day and hope that the developers discover and fix the bug; or you might dare to fix it yourself. During this first time setup, a successful build is necessary before you can proceed with the remaining tasks below.
- 创建项目编译器
- Click Run::Open Run Dialog… or Run::Open Debug Dialog… menu. A Run window shows.
- Select Java Application and click on the New button.
- On the Main tab of the Run window, change the New_configuration name to Openfire or anything you like.
- Click on Project::Browse button and select openfire and click OK.
- Click on Main class::Search button and select ServerStarter – org.jivesoftware.openfire.starter and click OK.
- I’d suggest that you select Stop in main check box so that you could later verify that debugging works.
- Click on the Arguments tab.
- Enter -DopenfireHome=”${workspace_loc:openfire}/target/openfire” in the VM arguments box.
- Click on Classpath tab.
- Select User Entries so that the Advanced… button will be enabled.
- Click on the Advanced… button.
- On the Advanced Options window select Add Folders and click OK.
- On the Folder Selection window select openfire::src::i18n folder and click OK.
- Click on the Advanced… and Add Folders buttons once again to include openfire::src::resources::jar folder.
- Click on Common tab.
- Select the Debug and Run check box.
- Click on Apply button.
- Click on Close button.
- 运行/调试
- The setting is now complete for Openfire.
- You may test running and debugging by clicking on Run::Run History::Openfire and Run::Debug History::Openfire respectively. If you choose the later and if you follow this instruction closely, execution will stop on the main method in ServerStarter.java.
自己写的:
从这个网址下载源码:http://www.igniterealtime.org/downloads/source.jsp;
接下来在Eclipse中新建工程,将源码导入:


接下来:
openfire是用ant构建的,所以要先设置使得eclipse中每次编译都使用内置的ant工具,保证编译的正确执行。
1. eclipse中点击Window->Show View->Ant
2. 在Ant 页面点右键,选择 Add Buildfiles...
3. 展开openfire/build文件夹,选择build.xml, 点 OK.
4. 在Ant页面, 展开Openfire XMPP Server,双击 openfire 任务
再接下来:(由于我的Eclipse的版本是3.4的,所以和上边中、英文中说的不一样。)
创建项目编译器的路径:
run-->Run configurations...

记录一下用ant编译openfire的过程:
注:我把openfire的源文件放到路径:D:\Mayframework框架\消息组件下边了。


