01 - 为SQL Server高可用集群配置域控制器
In this series for SQL Server Always On Availability Groups, we are covering end to end configurations for SQL Server 2019 on Windows Server 2016. In the article, A comprehensive guide to SQL Server Always On Availability Groups on Windows Server 2016, we configured three virtual machines with their networking configurations.
In this article, we will explore the following topics.
- Domain controller, active directory and join servers in the configured domain
- Assign static IP’s for all virtual machines
- Disable firewall settings
- Validate and create a cluster
Prerequisites
- You should follow the article, A comprehensive guide to SQL Server Always On Availability Groups on Windows Server 2016, and be ready with the Powered on virtual machines.
- You should get a basic knowledge of domain controller, active directory, IP configurations
Enable Domain Controller and Active Directory in a virtual machine for SQL Server Always On Availability Groups
Before we enable these features and roles, let’s go over their brief description:
- Domain Controller: A domain controller servers all security authentications requests for a Windows Server domain. In an organization, each server is a member of the domain controller. We use an FQDN [ServerName].[Domain] to connect with the server
- DNS: You cannot remember the IP addresses of all servers. For example, we can easily connect to SQLShack.com, but if you have its IP address, it is difficult to remember all URL’s IP address. It is a standard method to associate names instead of the IP address
- Active Directory: It is a container that consists of organization units for all users, their credentials, groups. All users must authenticate themselves to use an organization resource
We will use the VM named VDITest3 for the configuration of active directory (AD) and domain. Usually, in an organization, you maintain different servers for both AD and domain.
Connect to the Virtual machine for the domain controller and Active Directory configuration. Launch the server manager -> dashboard.
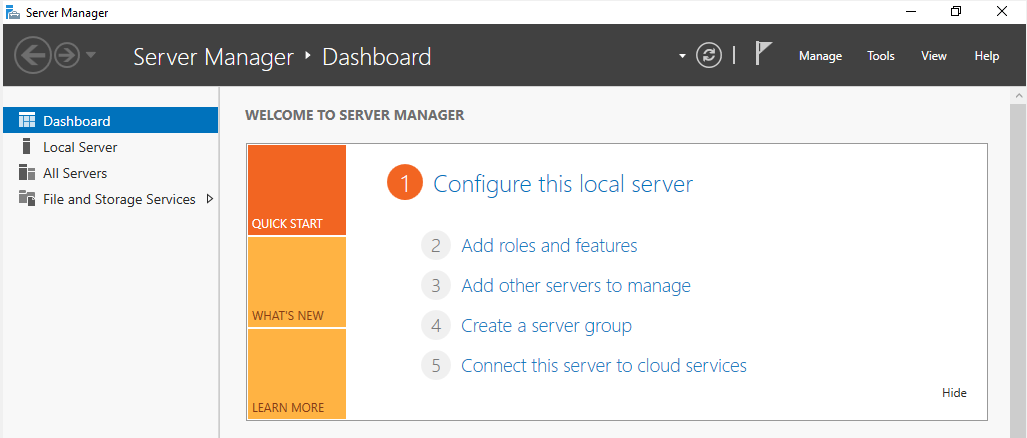
Click on the Add Roles and Features. It opens the wizard with brief information. We can skip this step.
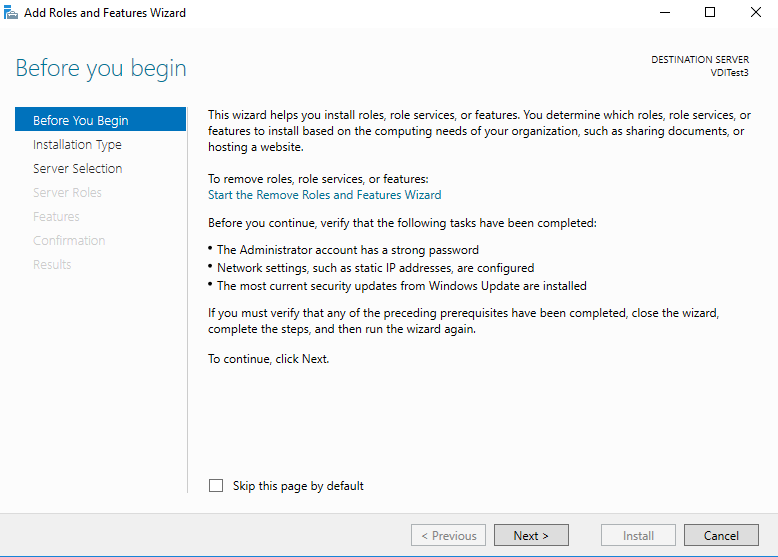
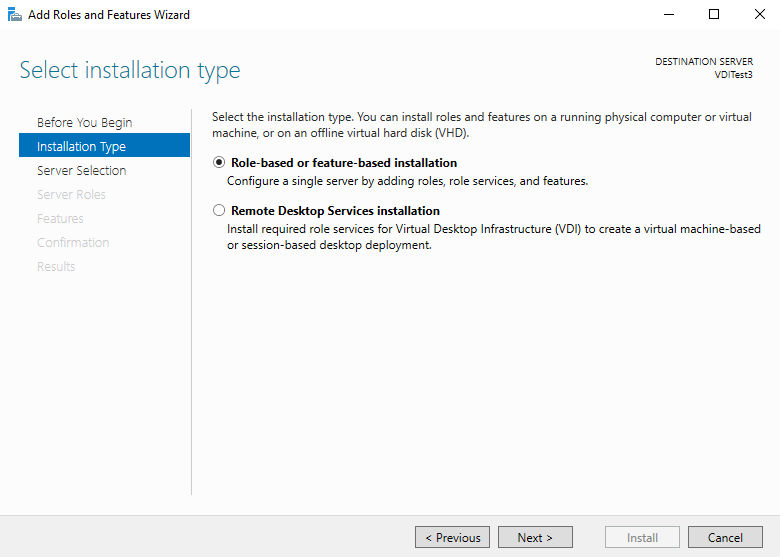
In the next step, Select option Role-based or feature-based installation and click Next.
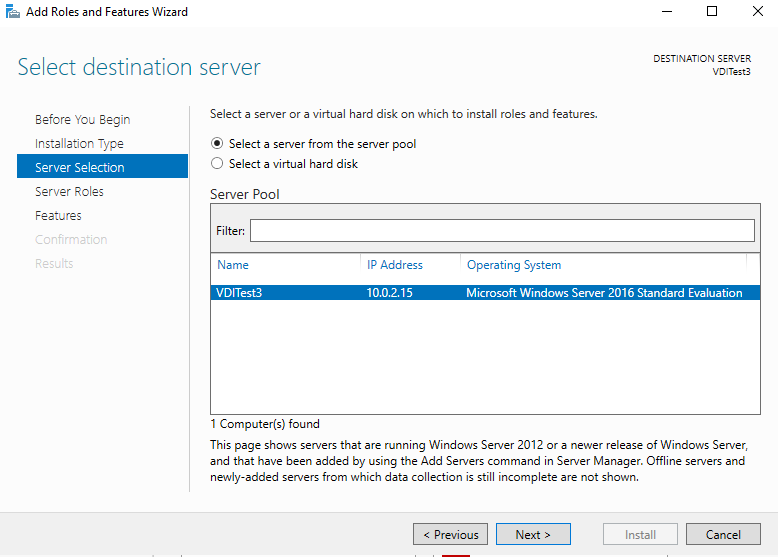
It shows the VM name, IP address and operating system in the destination server. You can verify the server name before continuing with the installation.
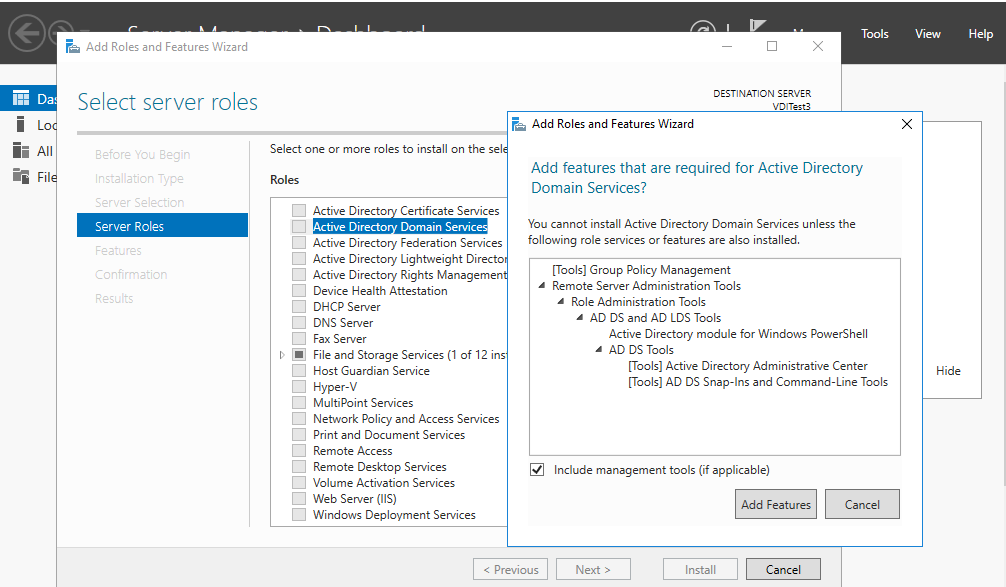
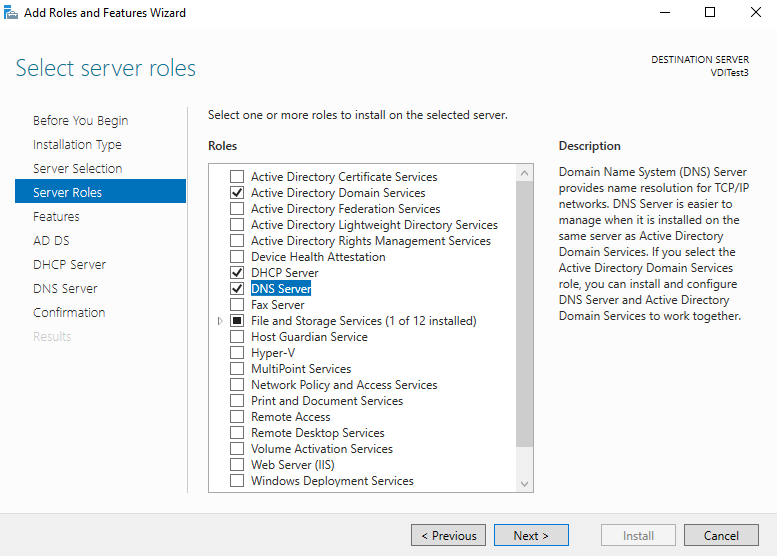
In the server roles, enable the Active Directory Domain Services. It opens a pop-up window with its dependency features or services. Click on Add features to install all dependencies.
Similarly, enable the DNS server as well.
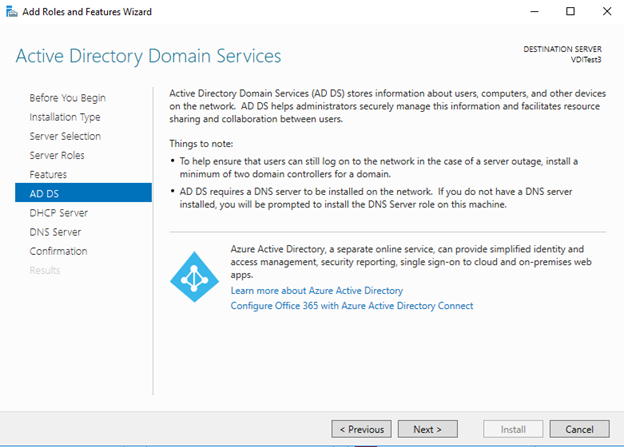
Click Next, and you get an introduction page for the active directory. You can go through the information provided to gain a basic understanding.
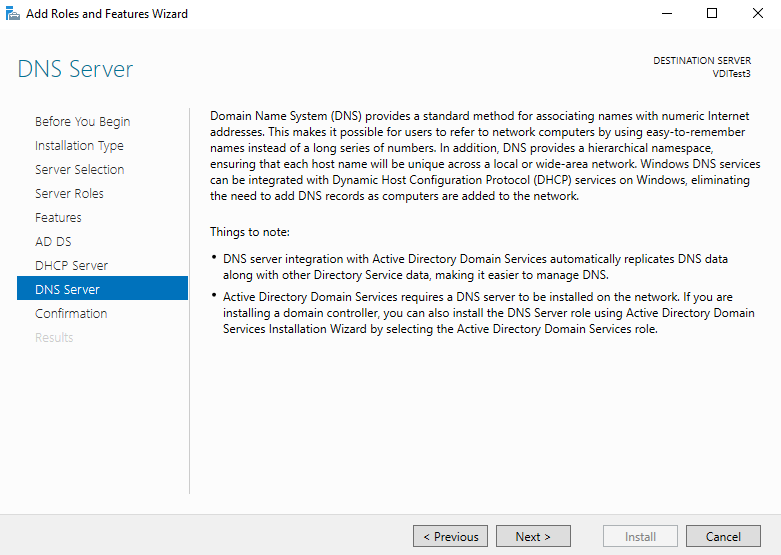
Similarly, you get an introduction to the DNS services as well.
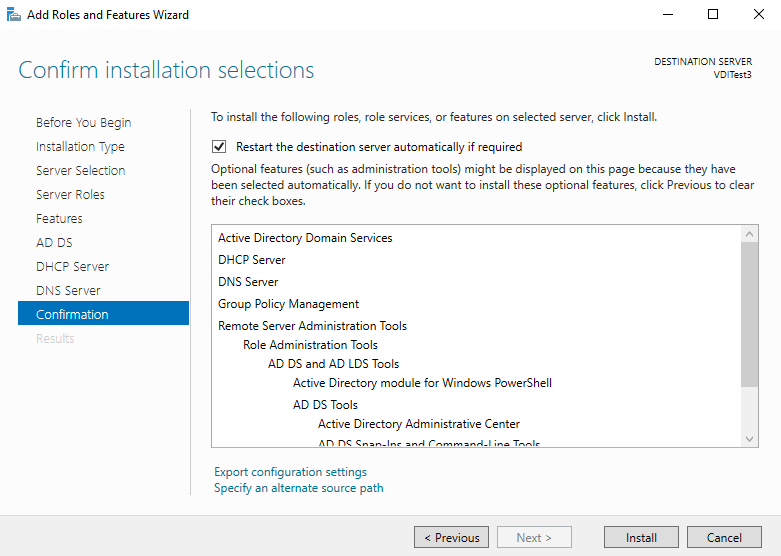
In the next step, review all features and roles installations. You should not install unnecessary services, features, roles on a server as a best practice.
Some roles and features require a reboot of the server. Therefore I put a check on the Restart the destination server automatically if required.
In case, you add a role or feature to an existing server, and I would recommend you reboot manually.
It starts the installation of the specified roles and features.
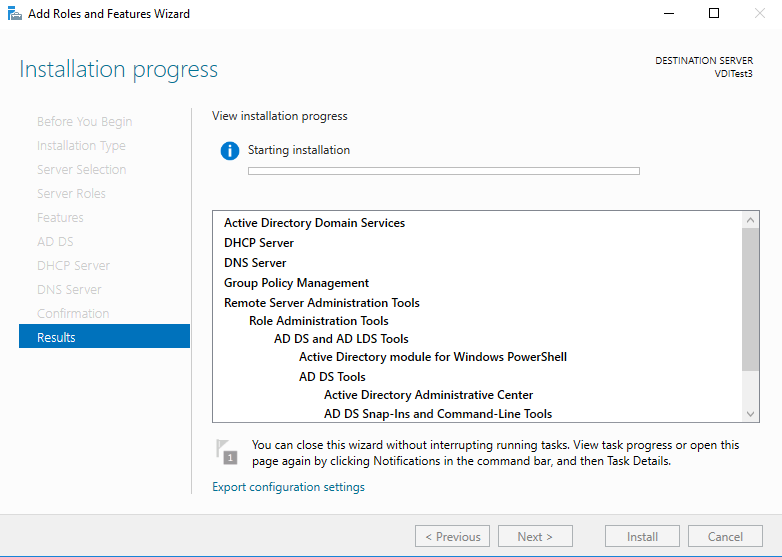
We can see features installation is completed.
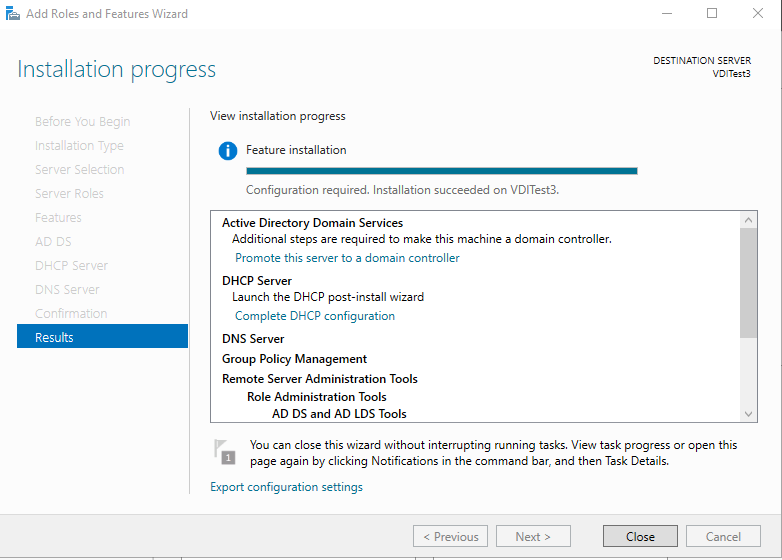
In the server roles, we get a warning message, and it asks us to promote the server as a domain controller because we installed a Domain controller feature on this server. Click on the message- Promote this server as a domain controller.
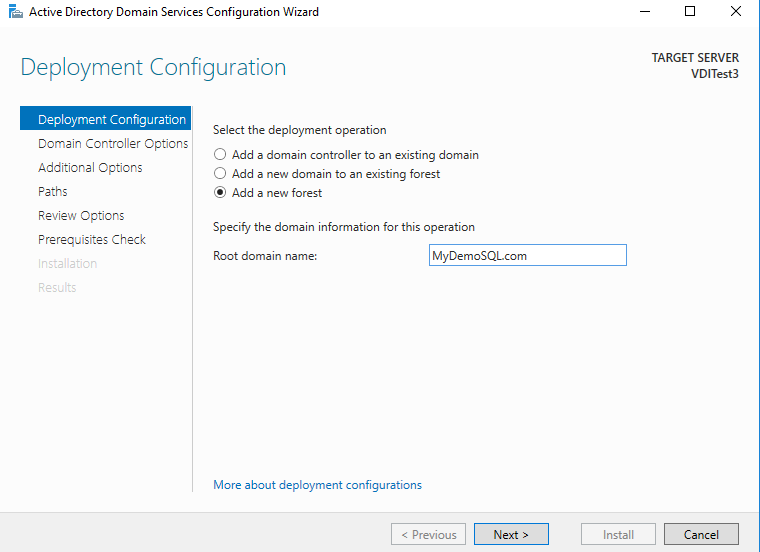
It opens an active directory services configuration wizard, as shown below. In this deployment configuration, select Add a new forest and specify the root domain name. I specify the root domain as MyDemoSQL.com
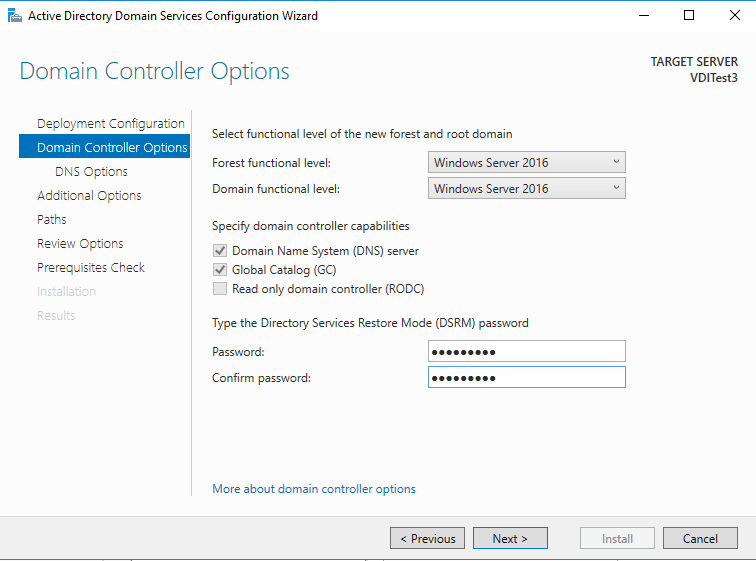
Click Next. We can go with the default options for the forest functional level and functional domain level. Specify the domain admin password. You should store this password in a safe and secure place.
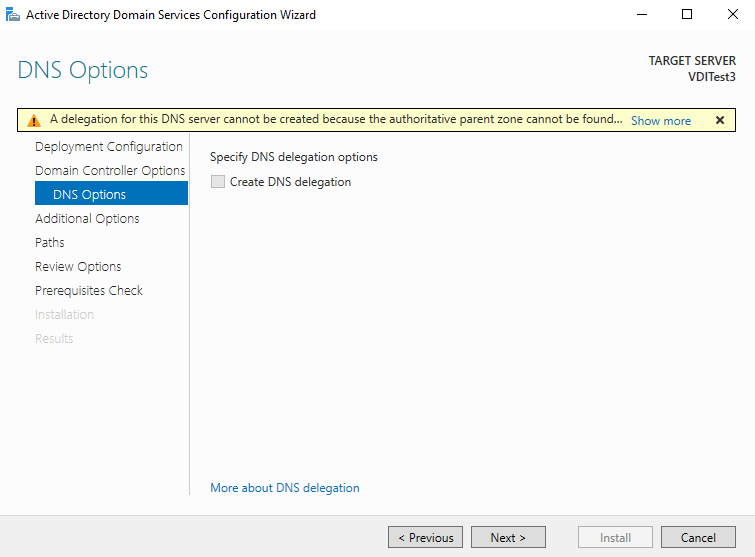
In the DNS option, skip the configuration and move towards the next page.
It shows the NetBIOS domain name. It is the domain name without .com suffix.
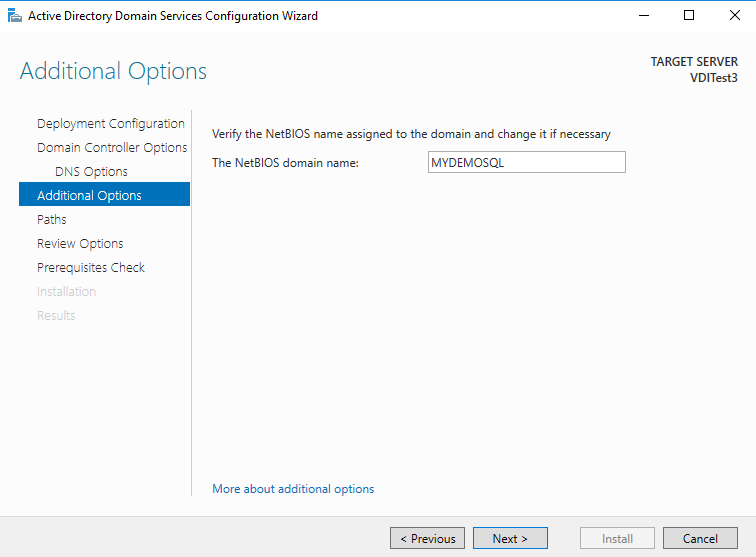
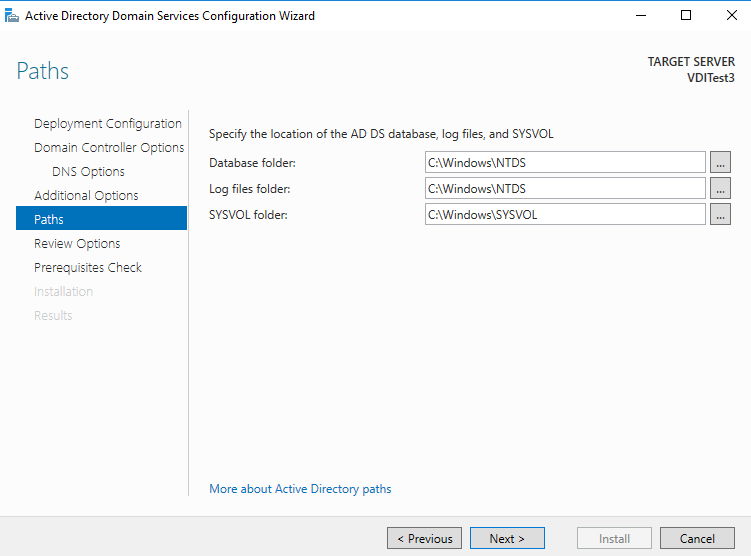
By default, it installs the AD database, log file in the Windows directory of the root drive. We can go-ahead for the C drive for the demo purpose.
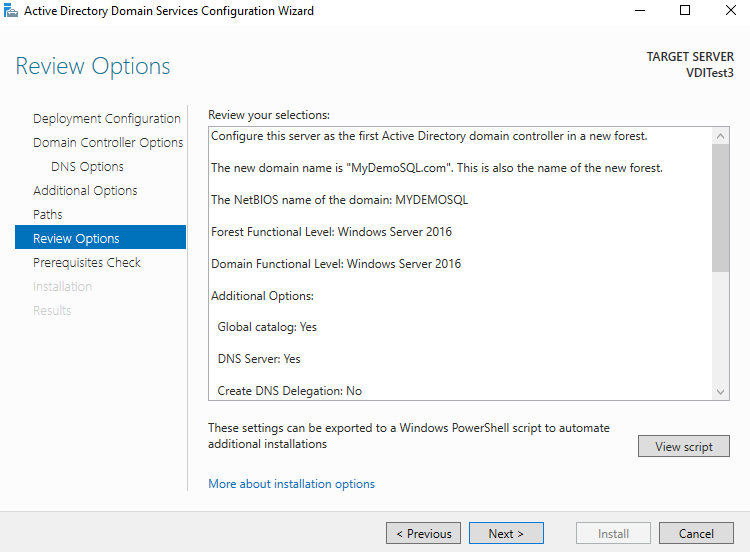
Review your configurations and Click Next to begin active directory configuration.
First, it does the prerequisite check. We can ignore the warning messages here.
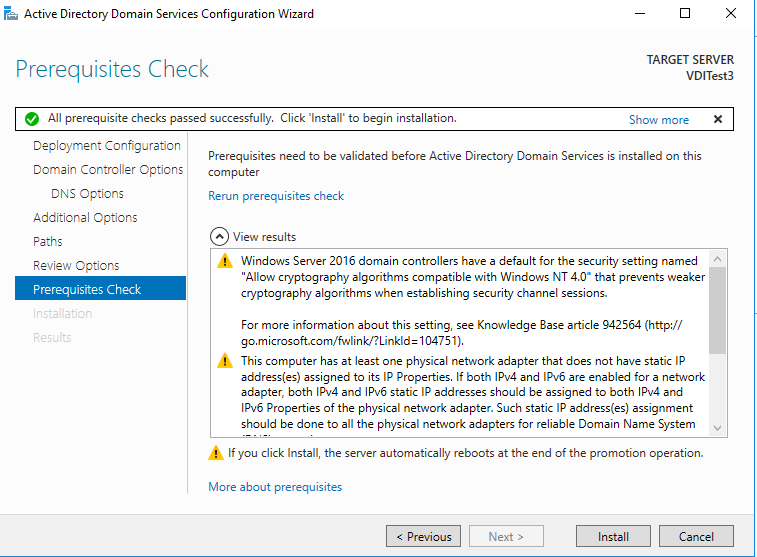
It performs the reboot of the VM.

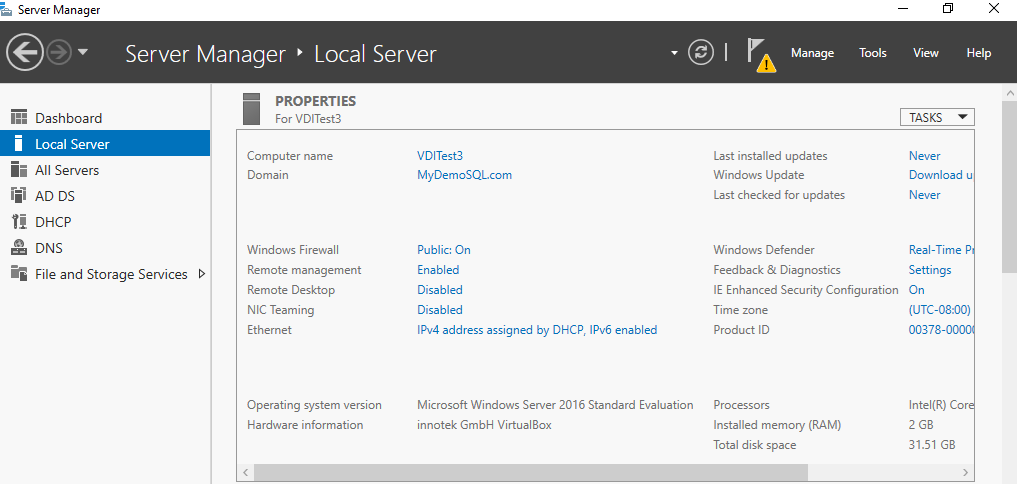
After reboot, you can verify that the computer is part of the MyDemoSQL.com domain. At this point, we have only one VM configured with the domain.
Network configuration for the Static IP and DNS Server
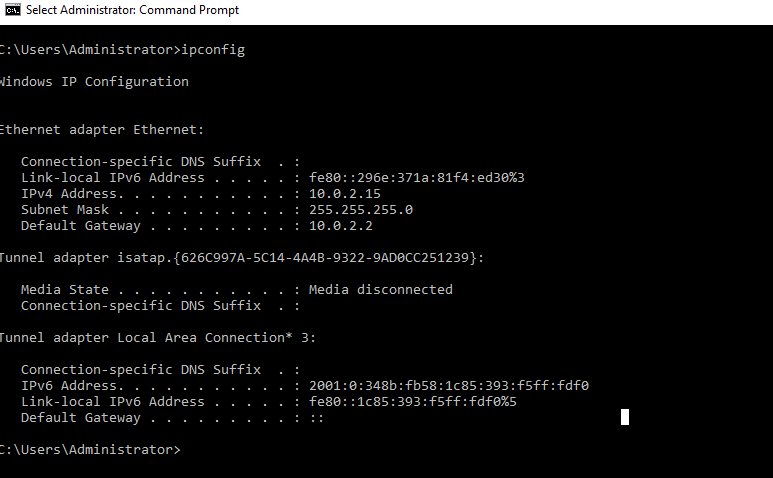
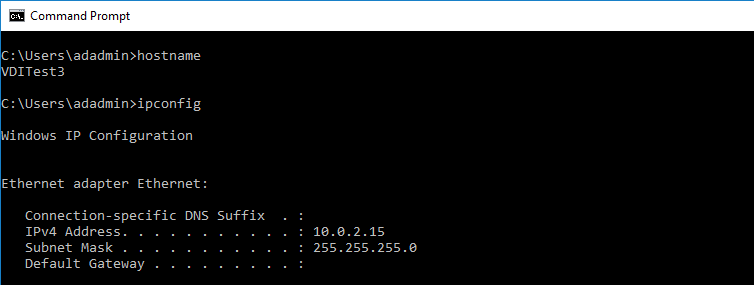
We require a static IP for the domain controller VM along with the SQL Server Always On Availability Groups. Type ipconfig and it returns the following output.
In the output, we can note the IPv4 address, subnet mask and default gateway.
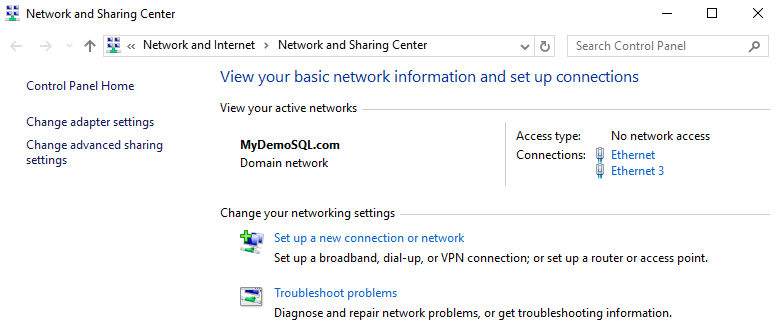
To set a static IP address, navigate to the Control Panel->Network and Internet->Network Connections. Click on the Change adapter settings.
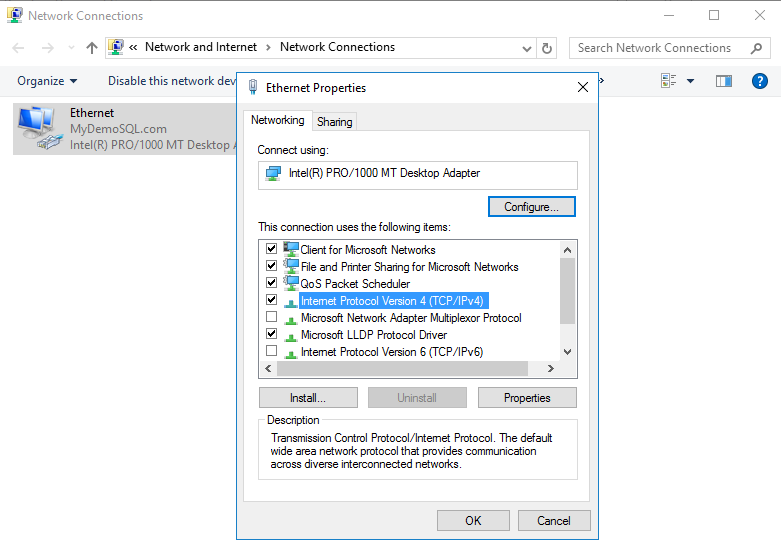
It opens networking options. Here, click on the Internet Protocol Version 4(TCP/IPv4) and Properties.
By default, it is configured to obtain the IP address automatically. In this case, if you reboot the server, it might get a new IP address.
Click on the Use the following IP addresses and specify the IP address as follows.
- IP address: 10.0.2.15
- Subnet mask: 255.255.255.0
- Preferred gateway – blank
- Preferred DNS server: 127.0.0.1 ( because this server itself is a DNS server)
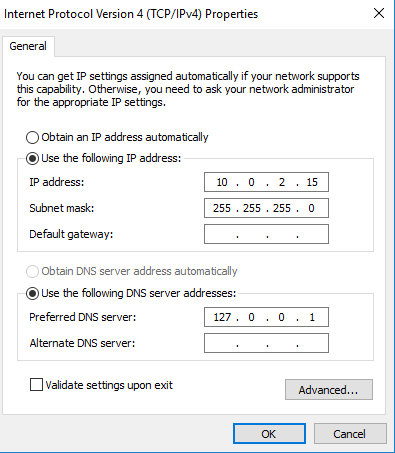
Click OK to save the changes. You can again type ipconfig in the command prompt to validate these settings.
Configure Reverse lookup zones in DNS for SQL Server Always On Availability Groups
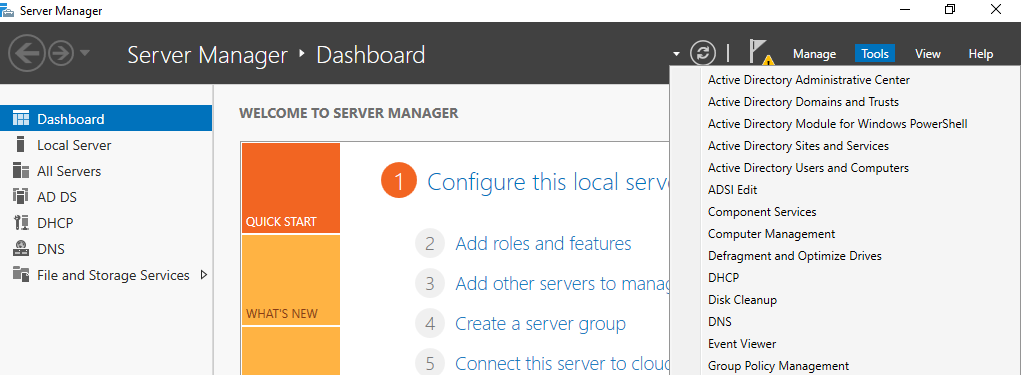
We need to configure a reverse lookup zone in the DNS. It resolves the IP address to the server name. In the server manager dashboard, navigate to tools -> DNS.
It opens the following DNS manager with different folders.
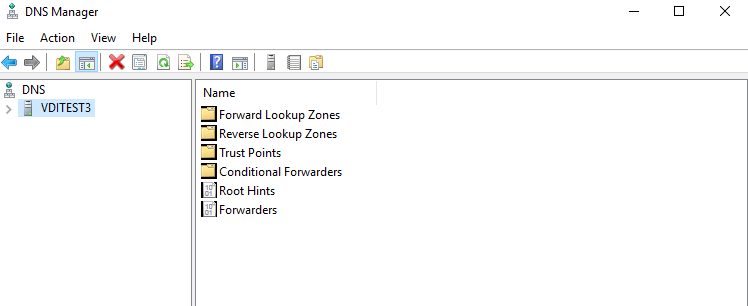
Open the Reverse Lookup Zones folder and right-click on it to launch a new zone wizard.
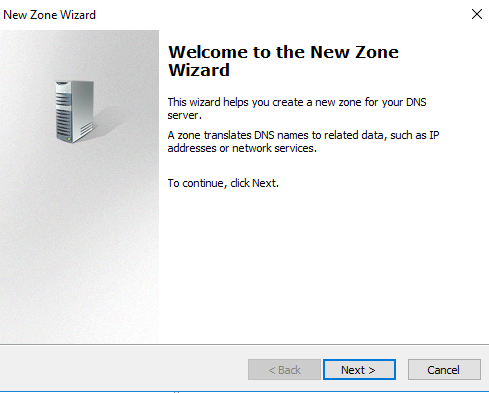
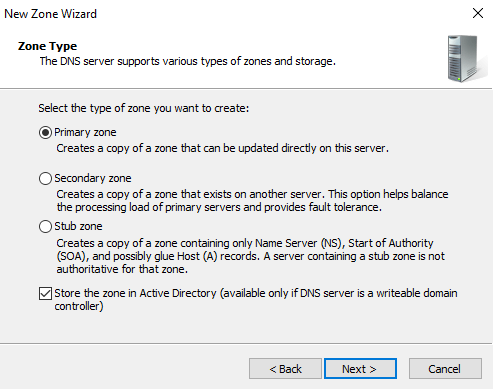
In the next zone wizard, go with the default option – Primary zone.
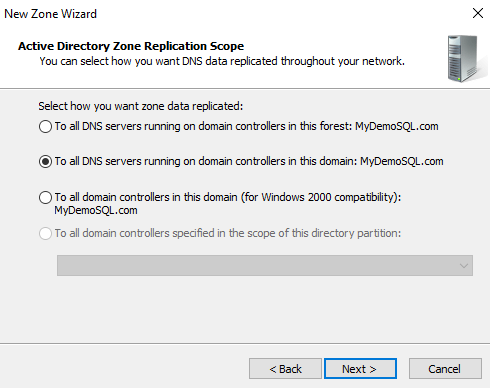
In the next step, select the zone replication scope- To all DNS servers running on domain controllers in the domain: MyDemoSQL.com
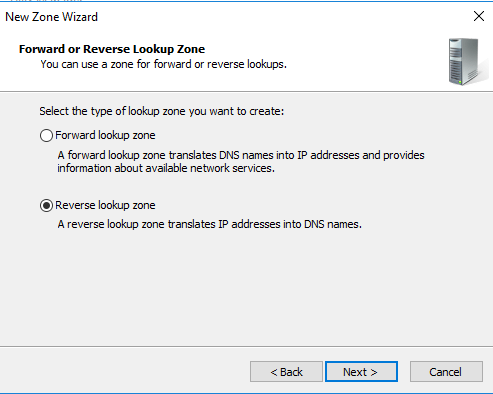
Select the type of lookup zone as a Reverse lookup zone.
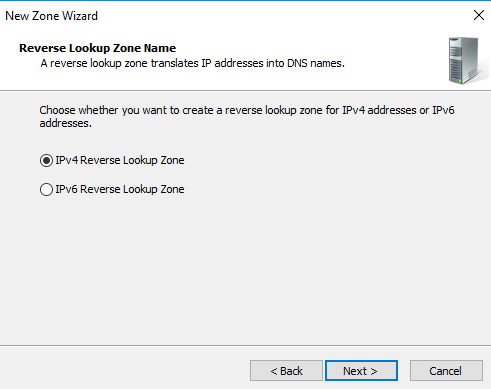
We are using an IPv4 address range, so select the IPv4 reverse lookup zone. In case you use an IPv6 IP range, select the other option.
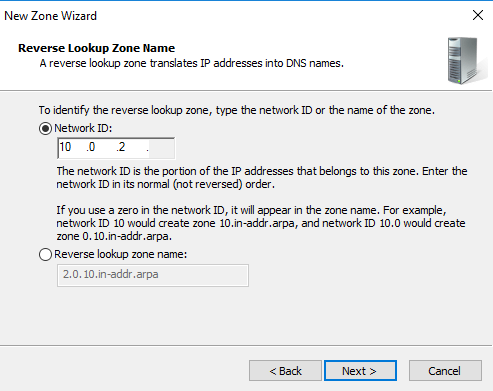
In the reverse lookup zone name, we need to enter the network ID portion of the IP address. It is the digits before the last dot. In my case, I have an IP address in the range 10.0.2.15. Therefore, the network SID is 10.0.2
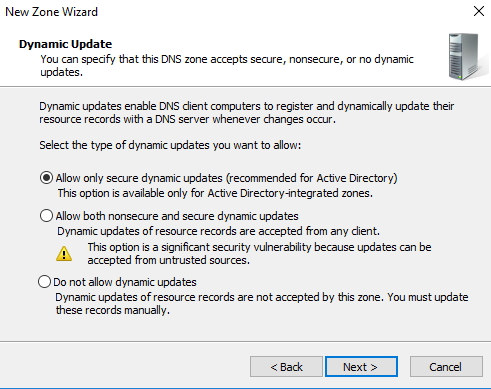
Accept the recommended method of the dynamic update as Allow only secure dynamic updates and click Next.
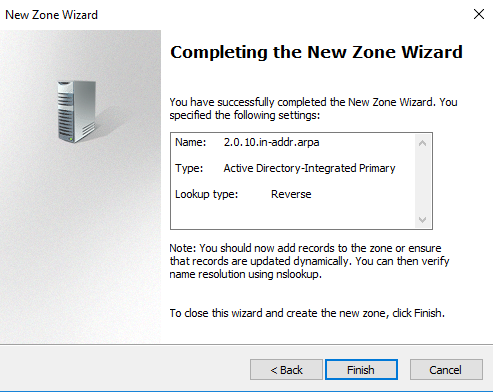
Review the configuration and click Finish to create a reverse lookup zone.
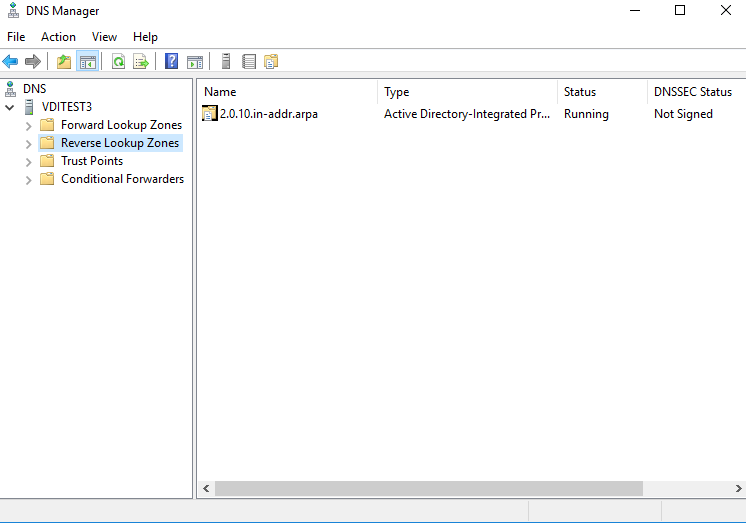
It shows the following reverse lookup zone as per our configurations.
Create an active directory user and assign domain admin permissions for SQL Server Always On availability groups
Type DSA.msc in the run, and it launches the AD containers with all users, computer service accounts.
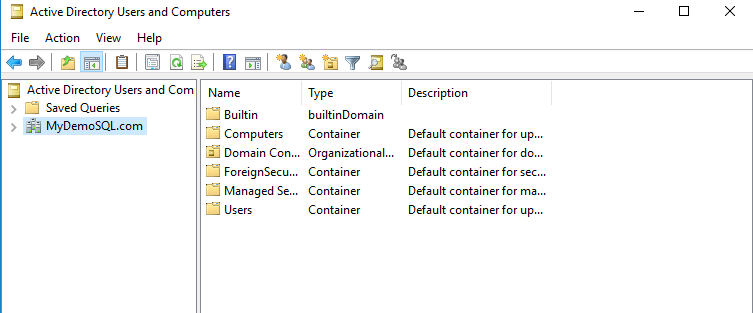
To create a new AD user, right-click on the container (in this case, Users) and create a new user.
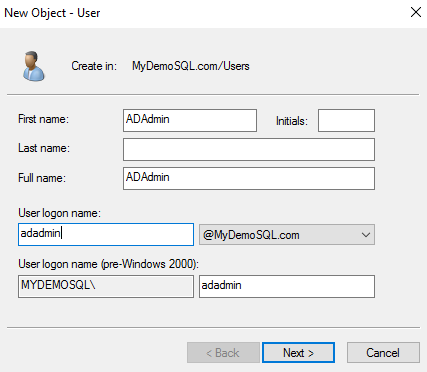
Specify the first name, last name, user login name. It should be a unique login name in an OU.
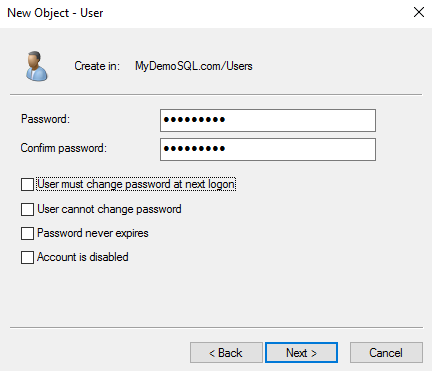
On the next page, specify the password of this AD user along with configuration options. You can specify options such as :
- User must change password at next logon
- User cannot change password
- Password never expires
- An account is disabled
For my demo purpose, I have unchecked all user password configuration.
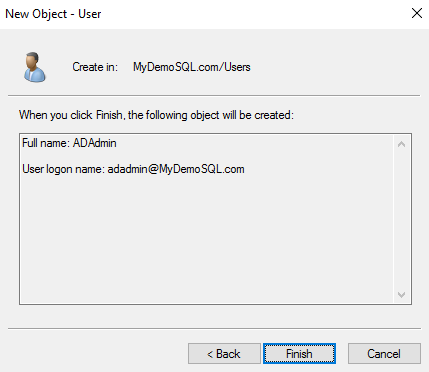
Review and confirm the user details to create in the Users group.
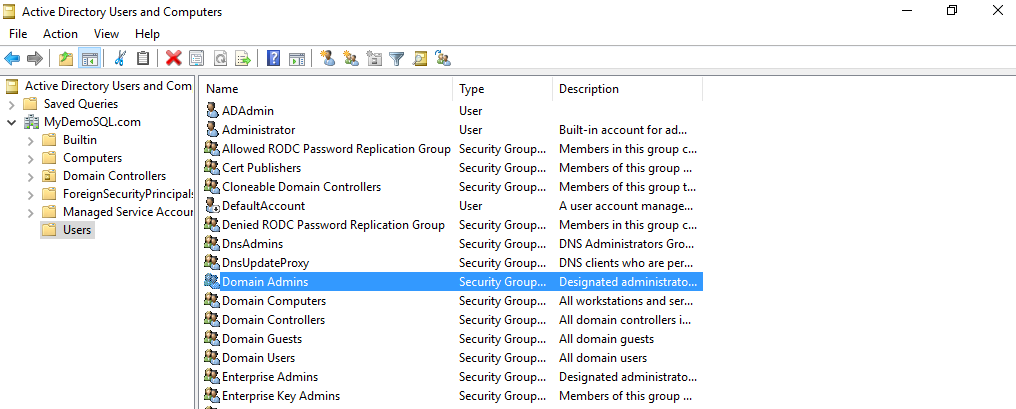
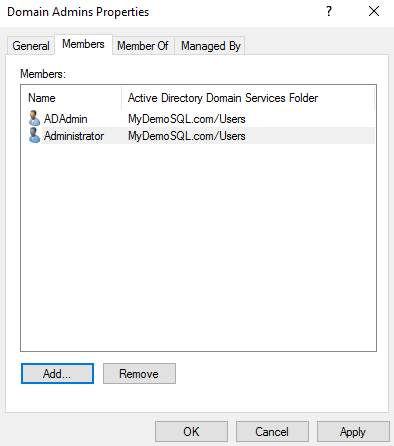
In the active directory users, double click on the Domain Admins.
It opens the domain admins properties. Click on Add, search for the AD user we created and add it here.
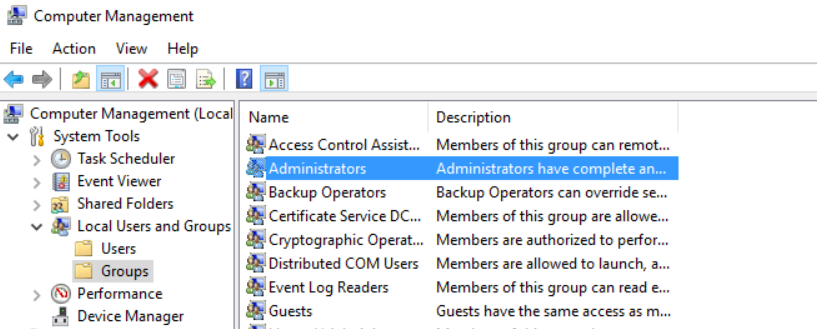
Add this user as an administrator in all three VM’s as well. Add this user to the local administrator of all three VM’s. Open the computer management from the server manager -> Tools-> Computer management.
Add SQLNode1 and SQLNode2 in the domain for SQL Server Always On availability groups
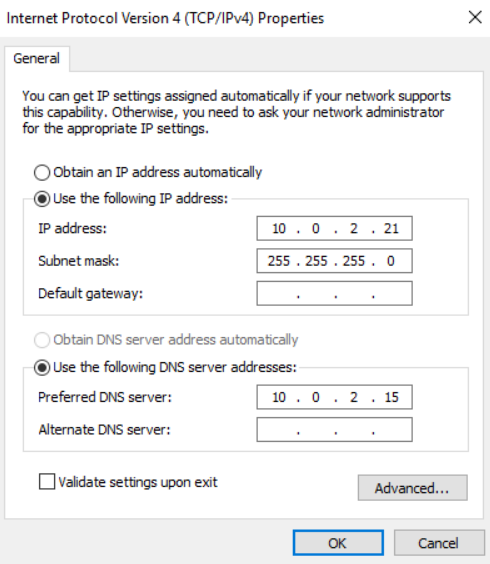
In the next step, open the network properties of the SQLNode1 and SQLNode2. Enter the following values for the IP address.
SQLNode1 network configuration
- IP address: 10.0.2.21
- Subnet mask: 255.255.255.0
- Preferred gateway – blank
- Preferred DNS server: 10.0.2.15 ( it is the IP address of our DNS server)
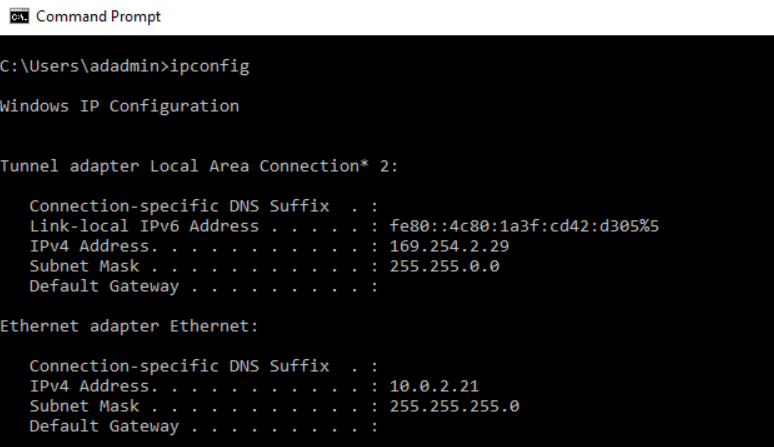
Validate IP configurations
SQLNode2 network configuration
- IP address: 10.0.2.22
- Subnet mask: 255.255.255.0
- Preferred gateway – blank
- Preferred DNS server: 10.0.2.15 ( it is the IP address of our DNS server)
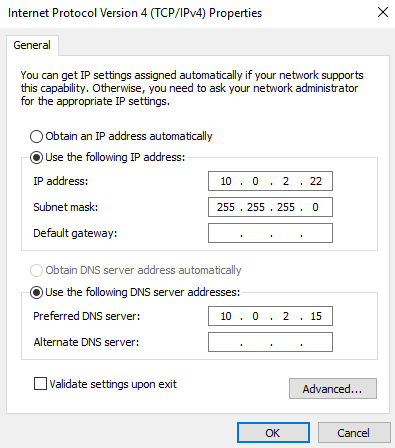
Validate IP configurations
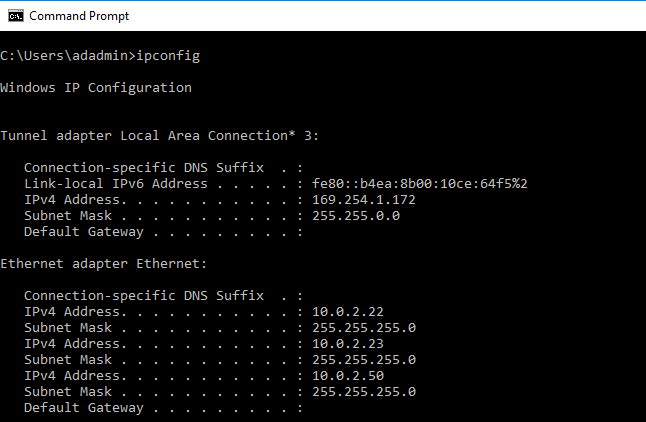
Add SQLNode1 in the MyDemoSQL.com domain for SQL Server Always On availability groups
In this step, we need to join the VM to the existing domain MyDemoSQL.com. To add a server into the domain, click on the server name in the server dashboard.

It opens the system properties. Click on the change, and you can specify the computer name and its domain.
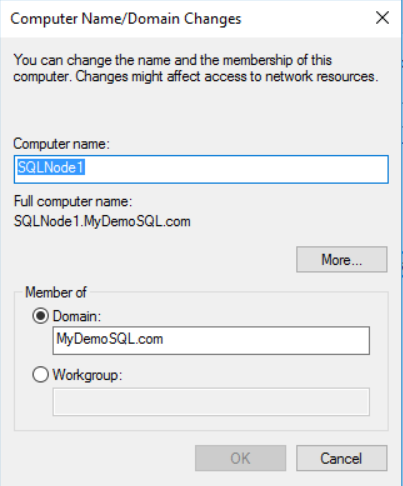
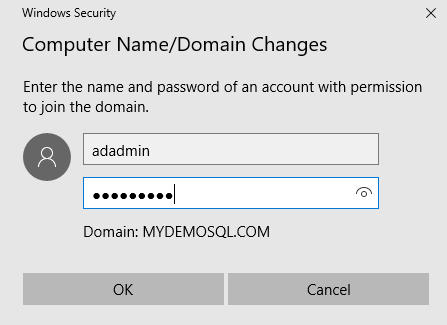
Click on OK, and it joins the VM into the specified domain. You need to specify the domain admin user name and password to allow it as a member in the MyDemoSQL.com domain.
You get a welcome message, as shown below, once it adds the server successfully.
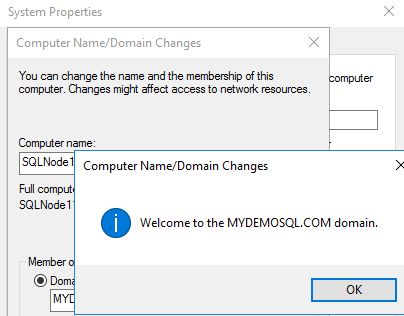
It reboots the VM. You should

Add SQLNode2 in the MyDemoSQL.com domain
Similarly, add the SQLNode2 VM as well in the MyDemoSQL.com domain and validate it.

Conclusion
In this article, we configured Domain Controller, Active Directory and DNS in a virtual machine. Later, we configured Reverse lookup zones, domain admin account, local admin account and added the servers in the domain for SQL Server Always On availability group.
In my next article, I will walk you through the configuration of failover clusters, quorum configuration and storage drives allocation for the SQL nodes.


