

caffe学习笔记(十四)digits运行object-detection实例
准备数据集
准备KITTI数据集,下载地址 http://www.cvlibs.net/datasets/kitti/eval_object.php,包括的文件有:
| Description | Filename | Size |
|---|---|---|
| Left color images of object data set | data_object_image_2.zip |
12GB |
| Training labels of object data set | data_object_label_2.zip |
5MB |
| Object development kit | devkit_object.zip |
1MB |
把文件放在目录 $DIGITS_ROOT/examples/object-detection/下,然后执行命令:

$ ./prepare_kitti_data.py
Extracting zipfiles ...
Unzipping data_object_label_2.zip ...
Unzipping data_object_image_2.zip ...
Unzipping devkit_object.zip ...
Calculating image to video mapping ...
Splitting images by video ...
Creating train/val split ...
Done.
数据集会被解压到 $DIGITS_ROOT/examples/object-detection/kitti-data/{train,val}/
The data is structured in the following way:
- An image folder containing supported images (
.png,.jpg, etc.). - A label folder containing
.txtfiles in KITTI format that define the ground truth. For each image in the image folder there must be a corresponding text file in the label folder. For example if the image folder includes an image namedfoo.pngthen the label folder needs to include a file namedfoo.txt.
把数据加载到digits
On the DIGITS home page, select the Datasets tab then click New Dataset > Images > Object Detection:

On the dataset creation page, specify the paths to the image and label folders for each of the training and validation sets. Other fields can be left to their default value. Finally, give your dataset a name and click Create:

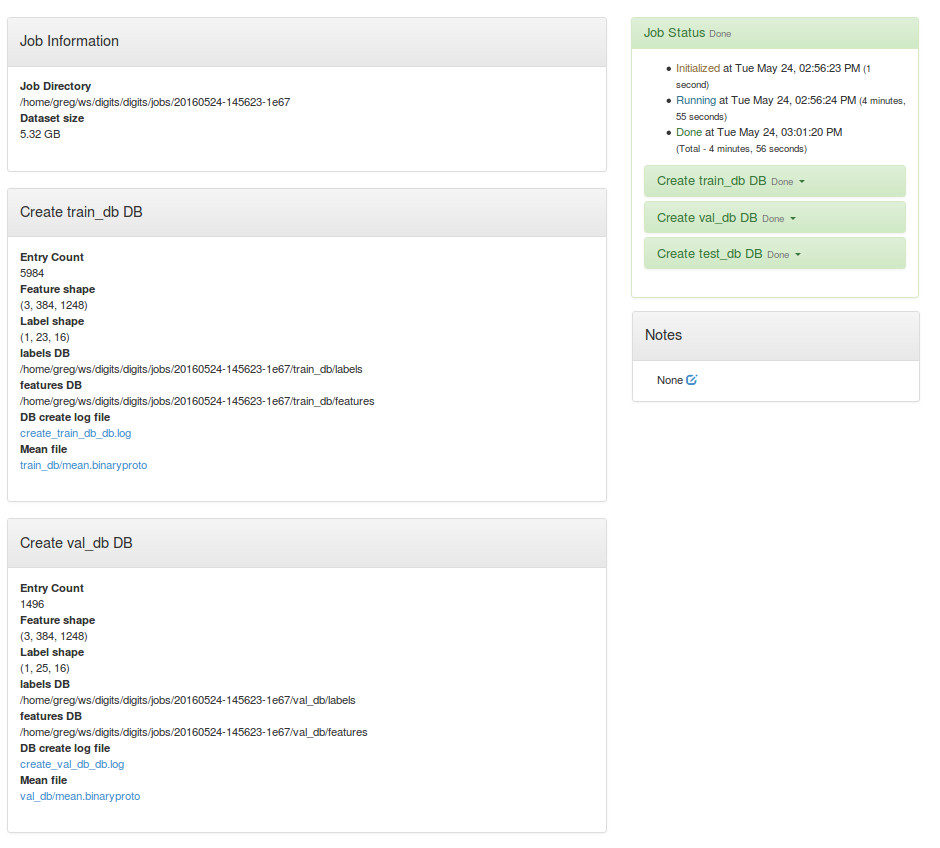
After you have created your dataset you may review data properties by visiting the dataset page. In the below example there are 5984 images in the training set and 1496 images in the validation set:
创建model
In this example we will use DetectNet. DetectNet is a GoogLeNet-derived network that is specifically tuned for Object Detection.
For more information on DetectNet, please refer to this blog post.
In order to train DetectNet, NVcaffe version 0.15.1 or later is required. The model description for DetectNet can be found at$CAFFE_ROOT/examples/kitti/detectnet_network.prototxt (raw link).
Since DetectNet is derived from GoogLeNet it is strongly recommended to use pre-trained weights from an ImageNet-trained GoogLeNet as this will help speed training up significantly. A suitable pre-trained GoogLeNet .caffemodel may be found on this page.
Training DetectNet in DIGITS
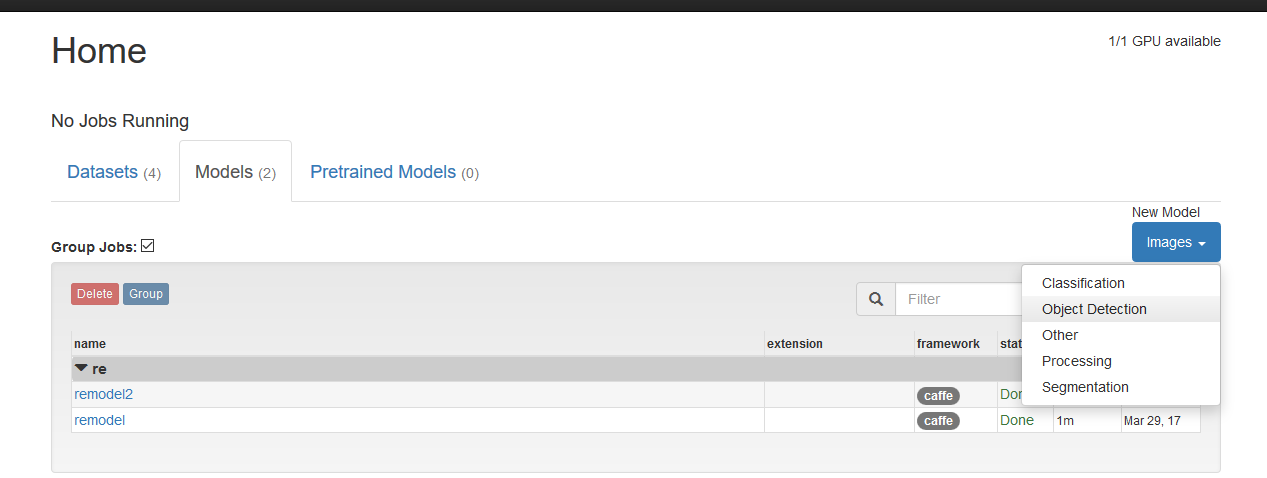
On the DIGITS home page, select the Models tab then click New Model > Images > Object Detection:
On the model creation page:
- Select the dataset that was created in the previous section.
- Set
Subtract meantoNone. - Set the base learning rate to 0.0001.
- Select the
ADAMsolver. - Select the
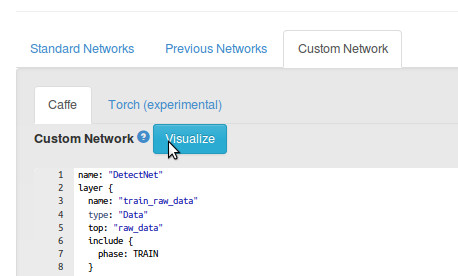
Custom Networktab.- Make sure the
Caffesub-tab is selected. - Paste the DetectNet model description in the text area.
- Make sure the
- In
Pretrained model(s)specify the path to the pre-trained GoogLeNet.
You may click Visualize to review the network topology:
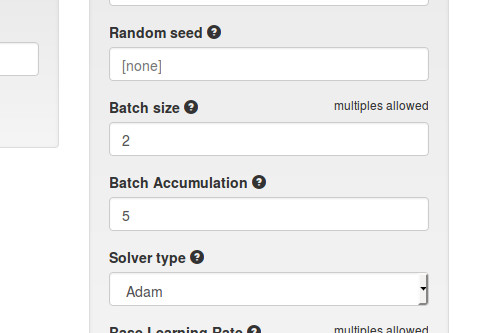
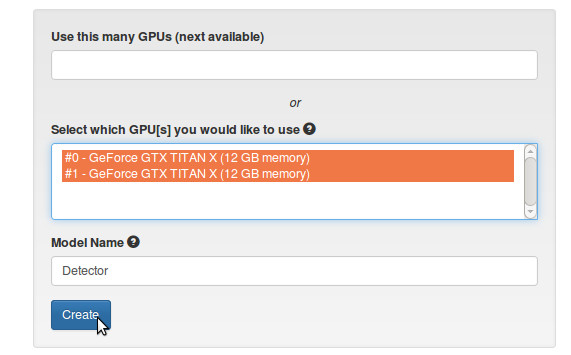
NOTE: this instance of DetectNet requires at least 12GB of GPU memory. If you have less memory on your GPU[s], you may want to decrease the batch size. On a 4GB card, you can set the batch size to 2 and the batch accumulation to 5, for an effective batch of 10, and that should fit on your card.
Finally, select the number of GPUs to train on, give your model a name then click Create:
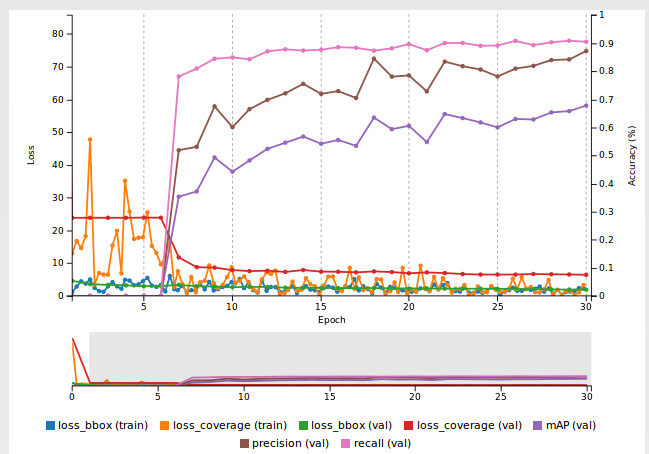
After training the model for 30 epochs the training curves may look like below. Make good note of the purple curve which is showing the mAP (mean Average Precision). The mAP is the main indicator of the network accuracy:
Verification
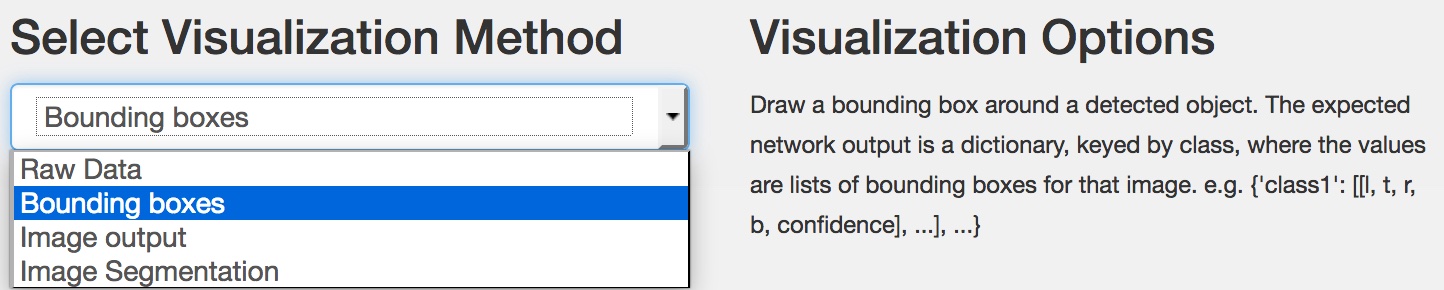
To assess the model accuracy we can verify how the model performs on test images. The network output is better visualized by drawing bounding rectangles around detected objects. To this avail, select Bounding Boxes in Select Visualization Method:
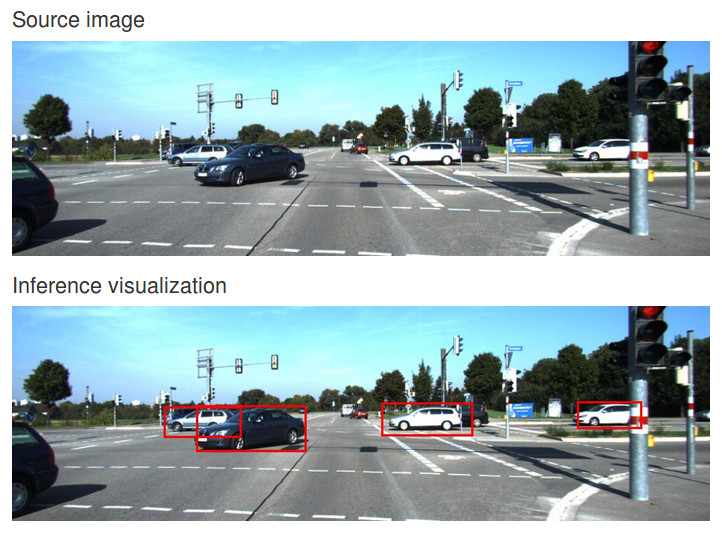
To test an image, in Test a single Image, specify the path to an image then click Test One. The output may be rendered as below:
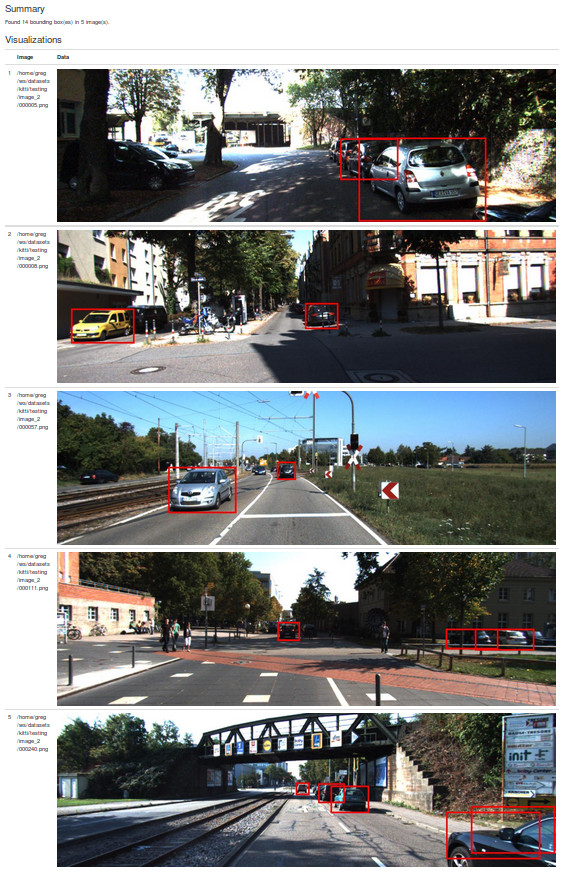
You may also test multiple images at once by specifying the image paths in a text file (one line per image path). To that end, inTest a list of Images, upload an image list. The output may be rendered as below:
The options cog menu allows you to adjust a few view options. The opacity applies to the interior of the bounding box rectangle, and desaturation appies to the image, which is useful when the image contains a lot of the bounding box color.


【推荐】国内首个AI IDE,深度理解中文开发场景,立即下载体验Trae
【推荐】编程新体验,更懂你的AI,立即体验豆包MarsCode编程助手
【推荐】抖音旗下AI助手豆包,你的智能百科全书,全免费不限次数
【推荐】轻量又高性能的 SSH 工具 IShell:AI 加持,快人一步
· 开发者必知的日志记录最佳实践
· SQL Server 2025 AI相关能力初探
· Linux系列:如何用 C#调用 C方法造成内存泄露
· AI与.NET技术实操系列(二):开始使用ML.NET
· 记一次.NET内存居高不下排查解决与启示
· 开源Multi-agent AI智能体框架aevatar.ai,欢迎大家贡献代码
· Manus重磅发布:全球首款通用AI代理技术深度解析与实战指南
· 被坑几百块钱后,我竟然真的恢复了删除的微信聊天记录!
· 没有Manus邀请码?试试免邀请码的MGX或者开源的OpenManus吧
· 园子的第一款AI主题卫衣上架——"HELLO! HOW CAN I ASSIST YOU TODAY