
[CG] TinyRenderer 学习记录(1):线段绘制
先前代码改动
给 setPixel 增加了边界检测。(之后这部分可能会再修改,因为目前是直接在屏幕坐标系上操作,还没有透视除法、NDC 之类的东西)
def setPixel(self, x, y, color): x = int(x) y = int(y) if x >= 0 and x < self.__imgWidth and y >= 0 and y < self.__imgHeight: self.__img[y][x] = color
基于线段的参数方程
def line1(self, x0, y0, x1, y1, color): # based on math equations # P(t) = S + tV S = np.array([x0, y0]) # start point V = np.array([x1 - x0, y1 - y0]) # direction for t in Utils.fRange(0.0, 1.0, 0.01): P = S + t * V self.setPixel(P[0], P[1], color)
其中 Utils.fRange 是我在 Utils.py 写的一个自定义 generator,行为类似于 range,但前者支持浮点数:
# Utils.py def fRange(start: float, stop: float, step: float): # iterate over [start, stop] while start <= stop: yield start start += step
优点:
- 不需要判断输入的两点之间的相对位置关系。
- 不用处理斜率为 0 或者不存在的情况。
缺点:
- 效率不高。
DDA
def line2(self, x0, y0, x1, y1, color): # line1 improved / DDA x0 = int(x0) y0 = int(y0) x1 = int(x1) y1 = int(y1) dx = x1 - x0 dy = y1 - y0 if dx == 0 and dy == 0: self.setPixel(x0, y0, color) return if abs(dx) >= abs(dy): if dx < 0: x0, x1 = x1, x0 y0, y1 = y1, y0 slope = dy / dx for x in range(x0, x1): self.setPixel(x, slope * (x - x0) + y0, color) else: if dy < 0: x0, x1 = x1, x0 y0, y1 = y1, y0 slope = dx / dy for y in range(y0, y1): self.setPixel(slope * (y - y0) + x0, y, color)
优点:
- 效率比前面要高。
缺点:
- 代码更加复杂。
Bresenham's Line Drawing Algorithm
def line3(self, x0, y0, x1, y1, color): # Bresenham's line drawing algorithm x0 = int(x0) y0 = int(y0) x1 = int(x1) y1 = int(y1) dx = x1 - x0 dy = y1 - y0 if dx == 0 and dy == 0: self.setPixel(x0, y0, color) return if abs(dx) >= abs(dy): if dx < 0: x0, x1 = x1, x0 y0, y1 = y1, y0 dx = -dx dy = -dy yOffset = 1 if dy > 0 else -1 dy = abs(dy) y = y0 P = 2 * dy - dx for x in range(x0, x1 + 1): self.setPixel(x, y, color) if P > 0: P -= dx << 1 y += yOffset P += dy << 1 else: if dy < 0: x0, x1 = x1, x0 y0, y1 = y1, y0 dx = -dx dy = -dy xOffset = 1 if dx > 0 else -1 dx = abs(dx) x = x0 P = 2 * dx - dy for y in range(y0, y1 + 1): self.setPixel(x, y, color) if P > 0: P -= dy << 1 x += xOffset P += dx << 1
优点:
- 效率最高。
缺点:
- 代码更加更加复杂。
OBJ 模型加载
def wireframe(self, wireframeFilePath): # only support WaveFront OBJ Format obj = open(wireframeFilePath) lines = obj.readlines() obj.close() coords = [[]] for line in lines: item = line.strip().split(" ") if item[0] == "v": pos = list(map(float, item[1:])) for i in range(3): pos[i] *= self.__imgWidth // 2 - 1 pos[i] += self.__imgWidth // 2 - 1 if i == 1: pos[i] = self.__imgWidth - pos[i] coords.append(pos) elif item[0] == "f": faceData = [int(data.split("/")[0]) for data in item[1:]] for v in range(3): nv = (v + 1) % 3 self.line( coords[faceData[v]][0], coords[faceData[v]][1], coords[faceData[nv]][0], coords[faceData[nv]][1], [0.0, 0.0, 1.0], )
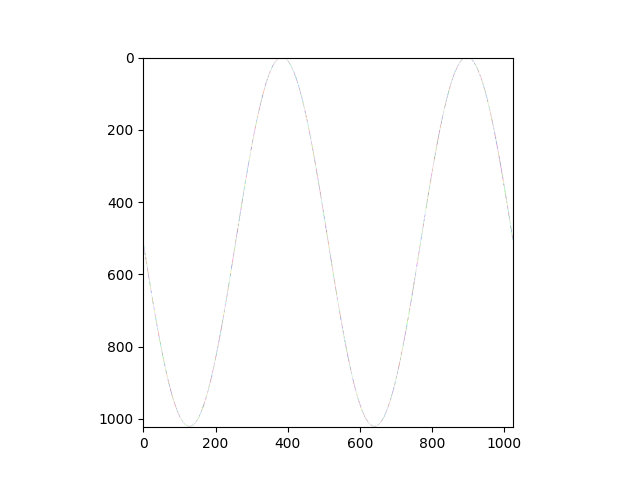
测试:正弦函数绘制
from Renderer import Renderer from random import uniform import math width = 1024 height = 1024 renderer = Renderer(width, height) sinFigure = [ (x, (width // 2 - 1) * (math.sin(2 * 3.141592653 * 1 / (width // 2) * x) + 1)) for x in range(width) ] for i in range(1, width): color = [uniform(0.0, 1.0) for _ in range(3)] renderer.line( sinFigure[i - 1][0], sinFigure[i - 1][1], sinFigure[i][0], sinFigure[i][1], color, ) renderer.render()
测试:加载 OBJ 文件,绘制线框
from Renderer import Renderer width = 1024 height = 1024 renderer = Renderer(width, height) renderer.wireframe("tinyrenderer/african_head.obj") renderer.render()
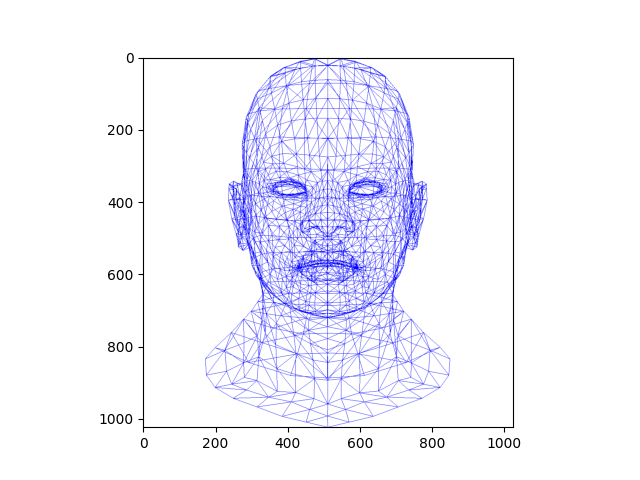
OBJ 文件从 这里 下载。


【推荐】国内首个AI IDE,深度理解中文开发场景,立即下载体验Trae
【推荐】编程新体验,更懂你的AI,立即体验豆包MarsCode编程助手
【推荐】抖音旗下AI助手豆包,你的智能百科全书,全免费不限次数
【推荐】轻量又高性能的 SSH 工具 IShell:AI 加持,快人一步
· winform 绘制太阳,地球,月球 运作规律
· AI与.NET技术实操系列(五):向量存储与相似性搜索在 .NET 中的实现
· 超详细:普通电脑也行Windows部署deepseek R1训练数据并当服务器共享给他人
· 【硬核科普】Trae如何「偷看」你的代码?零基础破解AI编程运行原理
· 上周热点回顾(3.3-3.9)