Android用户界面程序设计示例
[例1]按钮和Toast弹出对话框 1
[例3]TextView文本框 (2) 4
[例4]编辑框EditText 4
[例7]多选checkbox 12
[例10]图片视图ImageView 19
[例12]垂直线性布局 24
[例15]表单布局 27
[例1]按钮和Toast弹出对话框
1、设计界面如图所示:

2、布局文件:
<TextView
android:layout_width="fill_parent"
android:layout_height="wrap_content"
android:text="@string/hello"
/>
<Button
android:id="@+id/ok"
android:layout_width="fill_parent"
android:layout_height="wrap_content"
android:text="OK"/>
3、Activity界面程序:
public class Activity01 extends Activity {
public void onCreate(Bundle savedInstanceState) {
super.onCreate(savedInstanceState);
setContentView(R.layout.main);
// 获得Button对象
Button button_ok = (Button) findViewById(R.id.ok);
// 设置Button控件监听器
button_ok.setOnClickListener(new Button.OnClickListener() {
public void onClick(View v) {
// 这里处理事件
//DisplayToast("点击了OK按钮");
Toast.makeText(this, ("点击了OK按钮", Toast.LENGTH_SHORT).show();
}
});
}
public void DisplayToast(String str) {
Toast.makeText(this, str, Toast.LENGTH_SHORT).show();
}
/* 按键按下所触发的事件 */
public boolean onKeyDown(int keyCode, KeyEvent event) {
switch (keyCode) {
case KeyEvent.KEYCODE_DPAD_CENTER:
DisplayToast("按下:中键");
break;
case KeyEvent.KEYCODE_DPAD_UP:
DisplayToast("按下:上方向键");
break;
case KeyEvent.KEYCODE_DPAD_DOWN:
DisplayToast("按下:下方向键");
break;
case KeyEvent.KEYCODE_DPAD_LEFT:
DisplayToast("按下:左方向键");
break;
case KeyEvent.KEYCODE_DPAD_RIGHT:
DisplayToast("按下:右方向键");
break;
}
return super.onKeyDown(keyCode, event);
}
/* 按键弹起所触发的事件 */
public boolean onKeyUp(int keyCode, KeyEvent event) {
switch (keyCode) {
case KeyEvent.KEYCODE_DPAD_CENTER:
DisplayToast("弹起:中键");
break;
case KeyEvent.KEYCODE_DPAD_UP:
DisplayToast("弹起:上方向键");
break;
case KeyEvent.KEYCODE_DPAD_DOWN:
DisplayToast("弹起:下方向键");
break;
case KeyEvent.KEYCODE_DPAD_LEFT:
DisplayToast("弹起:左方向键");
break;
case KeyEvent.KEYCODE_DPAD_RIGHT:
DisplayToast("弹起:右方向键");
break;
}
return super.onKeyUp(keyCode, event);
}
[例2]TextView(1)
1、设计界面如图所示:

2、布局文件:
<TextView
android:id="@+id/textview"
android:layout_width="fill_parent"
android:layout_height="wrap_content"
android:text="@string/hello"
/>
3、Activity界面程序的核心语句:
textview = (TextView)this.findViewById(R.id.textview);
String string = "TextView示例,wangzhiguo";
/* 设置文本的颜色 */
textview.setTextColor(Color.RED);
/* 设置字体大小 */
textview.setTextSize(20);
/* 设置文字背景 */
textview.setBackgroundColor(Color.BLUE);
/* 设置TextView显示的文字 */
textview.setText(string);
[例3]TextView(2)
- 设计界面 (略)
2、布局文件:
<TextView
android:id="@+id/textview"
android:layout_width="fill_parent"
android:layout_height="wrap_content"
android:text="@string/hello"
android:background="#FFFFFF"
android:textColor="#000000"
android:textSize="20px"
/>
其他一些属性
android:textColor="#ff0000"
android:textSize="24sp"
android:textStyle="bold"
3、Activity界面程序的核心语句:
setContentView(R.layout.main);//设置内容显示的xml布局文件
TextView textView=(TextView)findViewById(R.id.text_view);//取得TextView组件
textView.setTextColor(Color.RED);//设置成红色
textView.setTextSize(TypedValue.COMPLEX_UNIT_SP, 24f);//设置成24sp
textView.setTypeface(Typeface.defaultFromStyle(Typeface.BOLD));//加粗
android:autoLink="web"
android:autoLink="phone"
android:autoLink="all"
实现跑马灯效果
- <TextView
- android:id="@+id/text_view"
- android:autoLink="all"
- android:layout_width="fill_parent"
- android:layout_height="wrap_content"
- android:text="@string/hello"
- android:ellipsize="marquee"
- android:focusable="true"
- android:marqueeRepeatLimit="marquee_forever"
- android:focusableInTouchMode="true"
- android:singleLine="true"
- android:scrollHorizontally="true"/>
- </LinearLayout>
[例4]编辑框EditText
1、设计界面如图所示:

2、布局文件:
<string name="hello">文本框中内容是</string>
<string name="message">请输入账号</string>
<string name="app_name">EditText_wangzhiguo</string>
<TextView
android:id="@+id/TextView01"
android:layout_width="fill_parent"
android:layout_height="wrap_content"
android:text="@string/hello"
/>
<EditText
android:id="@+id/EditText01"
android:layout_width="fill_parent"
android:layout_height="wrap_content"
android:textSize="18sp"
android:layout_x="29px"
android:hint="@string/message"
android:layout_y="33px"
/>
3、Activity界面程序的核心语句:
super.onCreate(savedInstanceState);
setContentView(R.layout.main);
m_TextView = (TextView) findViewById(R.id.TextView01);
m_EditText = (EditText) findViewById(R.id.EditText01);
m_TextView.setTextSize(20);
/**
* 设置当m_EditText中为空时提示的内容 在XML中同样可以实现:android:hint="请输入账号"
*/
// m_EditText.setHint("请输入账号");
/* 设置EditText事件监听 */
m_EditText.setOnKeyListener(new EditText.OnKeyListener() {
@Override
public boolean onKey(View arg0, int arg1, KeyEvent arg2) {
// 得到文字,将其显示到TextView中 m_TextView.setText(Activity01.this.getString(R.string.hello) +
m_EditText.getText().toString());
return false;
}
});
补充:关于EditText的一些细节操作
android:hint="请输入用户名..." 提示属性
android:textColorHint="#238745" 更改提示颜色
android:enabled="false" 不可编辑
android:lines="10" 通过设定行高,实现文本域功能
android:maxLength="40" 最大内容长度
android:password="true" 要求输入密码
android:phoneNumber="true" 只能输入电话号码
droid:numeric="signed"
android:inputType="date" 指定输入类型
android:imeOptions="actionSearch" Enter键图标设置
- actionUnspecified 未指定,对应常量EditorInfo.IME_ACTION_UNSPECIFIED.效果:
![]()
- actionNone 没有动作,对应常量EditorInfo.IME_ACTION_NONE 效果:
![]()
- actionGo 去往,对应常量EditorInfo.IME_ACTION_GO 效果:
![]()
- actionSearch 搜索,对应常量EditorInfo.IME_ACTION_SEARCH 效果:
![]()
- actionSend 发送,对应常量EditorInfo.IME_ACTION_SEND 效果:
![]()
- actionNext 下一个,对应常量EditorInfo.IME_ACTION_NEXT 效果:
![]()
- actionDone 完成,对应常量EditorInfo.IME_ACTION_DONE 效果:
![]()


课堂练习

作业提示
//监听EditText文本的回车键
editText.setOnEditorActionListener(new OnEditorActionListener() {
@Override
public boolean onEditorAction(TextView v, int actionId, KeyEvent event) {
Toast.makeText(HelloEditText.this, String.valueOf(actionId), Toast.LENGTH_SHORT).show();
return false;
}
});
//获取EditText文本
public void onClick(View v) {
Toast.makeText(HelloEditText.this, editText.getText().toString(), Toast.LENGTH_SHORT).show();
Button all=(Button)findViewById(R.id.btn_all);
all.setOnClickListener(new OnClickListener() {
@Override
public void onClick(View v) {
editText.selectAll();
}
});
//让EditText全选
Button all=(Button)findViewById(R.id.btn_all);
all.setOnClickListener(new OnClickListener() {
@Override
public void onClick(View v) {
editText.selectAll();
}
});
//从第2个字符开始选择EditText文本
public void onClick(View v) {
Editable editable=editText.getText();
Selection.setSelection(editable, 1,editable.length());
}
public void onClick(View v) {
int start=editText.getSelectionStart();
int end=editText.getSelectionEnd();
CharSequence selectText=editText.getText().subSequence(start, end);
oast.makeText(HelloEditText.this, selectText, Toast.LENGTH_SHORT).show();
}
/**
* 交换两个变量的值
* @param start 变量初值
* @param end 变量终值
*/
protected void switchIndex(int start, int end) {
int temp=start;
start=end;
end=temp;
}
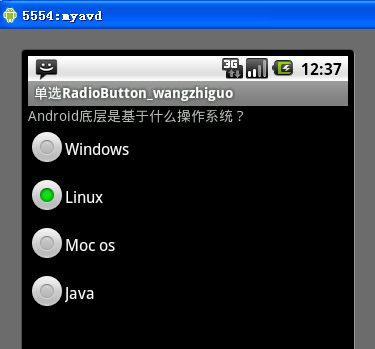
[例5]单选RadioButton
1、设计界面如图所示:
2、布局文件:
<resources>
<string name="hello">Android底层是基于什么操作系统?</string>
<string name="app_name">单选RadioButton_wangzhiguo</string>
<string name="RadioButton1">Windows</string>
<string name="RadioButton2">Linux</string>
<string name="RadioButton3">Moc os</string>
<string name="RadioButton4">Java</string>
</resources>
<TextView
android:id="@+id/TextView01"
android:layout_width="fill_parent"
android:layout_height="wrap_content"
android:text="@string/hello"
/>
<RadioGroup
android:id="@+id/RadioGroup01"
android:layout_width="wrap_content"
android:layout_height="wrap_content"
android:orientation="vertical"
android:layout_x="3px"
android:layout_y="54px"
>
<RadioButton
android:id="@+id/RadioButton1"
android:layout_width="wrap_content"
android:layout_height="wrap_content"
android:text="@string/RadioButton1"
/>
<RadioButton
android:id="@+id/RadioButton2"
android:layout_width="wrap_content"
android:layout_height="wrap_content"
android:text="@string/RadioButton2"
/>
<RadioButton
android:id="@+id/RadioButton3"
android:layout_width="wrap_content"
android:layout_height="wrap_content"
android:text="@string/RadioButton3"
/>
<RadioButton
android:id="@+id/RadioButton4"
android:layout_width="wrap_content"
android:layout_height="wrap_content"
android:text="@string/RadioButton4"
/>
</RadioGroup>
3、Activity界面程序的核心语句:
/**
* 获得TextView对象 获得RadioGroup对象 获得4个RadioButton对象
*/
m_TextView = (TextView) findViewById(R.id.TextView01);
m_RadioGroup = (RadioGroup) findViewById(R.id.RadioGroup01);
m_Radio1 = (RadioButton) findViewById(R.id.RadioButton1);
m_Radio2 = (RadioButton) findViewById(R.id.RadioButton2);
m_Radio3 = (RadioButton) findViewById(R.id.RadioButton3);
m_Radio4 = (RadioButton) findViewById(R.id.RadioButton4);
/* 设置事件监听 */
m_RadioGroup
.setOnCheckedChangeListener(new RadioGroup.OnCheckedChangeListener() {
@Override
public void onCheckedChanged(RadioGroup group, int checkedId) {
// TODO Auto-generated method stub
if (checkedId == m_Radio2.getId()) {
DisplayToast("正确答案:" + m_Radio2.getText()
+ ",恭喜你,回答正确!");
} else {
DisplayToast("请注意,回答错误!");
}
}
});
}
/* 显示Toast */
public void DisplayToast(String str) {
Toast toast = Toast.makeText(this, str, Toast.LENGTH_LONG);
// 设置toast显示的位置
toast.setGravity(Gravity.TOP, 0, 220);
// 显示该Toast
toast.show();
}
[例6]Toast的用法简介
[例6_1] 弹出式提示框的默认样式
- 设计界面如图所示:

2、核心语句:
Toast.makeText(getApplicationContext(), "默认Toast样式",
Toast.LENGTH_SHORT).show();
[例6_2] 自定义提示框显示位置
- 设计界面如图所示:

2、核心语句:
toast = Toast.makeText(getApplicationContext(),
"自定义位置Toast", Toast.LENGTH_LONG);
toast.setGravity(Gravity.CENTER, 0, 0);
toast.show();
[例6_3]带图片提示框效果
- 设计界面如图所示:

2、核心语句:
toast = Toast.makeText(getApplicationContext(),
"带图片的Toast", Toast.LENGTH_LONG);
toast.setGravity(Gravity.CENTER, 0, 0);
LinearLayout toastView = (LinearLayout) toast.getView();
ImageView imageCodeProject = new ImageView(getApplicationContext());
imageCodeProject.setImageResource(R.drawable.icon);
toastView.addView(imageCodeProject, 0);
toast.show();
[例6_4]带图片的自定义提示框效果
1、设计界面如图所示:

2、核心语句:
LayoutInflater inflater = getLayoutInflater();
View layout = inflater.inflate(R.layout.custom,
(ViewGroup) findViewById(R.id.llToast));
ImageView image = (ImageView) layout
.findViewById(R.id.tvImageToast);
image.setImageResource(R.drawable.icon);
TextView title = (TextView) layout.findViewById(R.id.tvTitleToast);
title.setText("Attention");
TextView text = (TextView) layout.findViewById(R.id.tvTextToast);
text.setText("完全自定义Toast");
toast = new Toast(getApplicationContext());
toast.setGravity(Gravity.RIGHT | Gravity.TOP, 12, 40);
toast.setDuration(Toast.LENGTH_LONG);
toast.setView(layout);
toast.show();
[例6_5] 其他线程
1、设计界面如图所示:

- 核心语句:
new Thread(new Runnable() {
public void run() {
showToast();
}
}).start();
[例7]多选checkbox
1、设计界面如图所示:

2、布局文件:
<string name="hello">调查:你喜欢Android的原因?</string>
<string name="app_name">CheckBox_wangzhiguo</string>
<string name="CheckBox1">无界限的应用程序</string>
<string name="CheckBox2">应用程序是在平等的条件下创建的</string>
<string name="CheckBox3">应用程序可以轻松地嵌入网络</string>
<string name="CheckBox4">应用程序可以并行运行</string>
<TextView
android:id="@+id/TextView1"
android:layout_width="fill_parent"
android:layout_height="wrap_content"
android:text="@string/hello"
/>
<CheckBox
android:id="@+id/CheckBox1"
android:layout_width="fill_parent"
android:layout_height="wrap_content"
android:text="@string/CheckBox1"
>
</CheckBox>
<CheckBox
android:id="@+id/CheckBox4"
android:layout_width="fill_parent"
android:layout_height="wrap_content"
android:text="@string/CheckBox4"
>
</CheckBox>
<Button
android:id="@+id/button1"
android:layout_width="wrap_content"
android:layout_height="wrap_content"
android:text="提交"
>
</Button>
3、核心语句:
m_CheckBox1.setOnCheckedChangeListener(new CheckBox.OnCheckedChangeListener() {
@Override
public void onCheckedChanged(CompoundButton buttonView,
boolean isChecked) {
if (m_CheckBox1.isChecked()) {
DisplayToast("你选择了:" + m_CheckBox1.getText());
}
}
});
m_Button1.setOnClickListener(new Button.OnClickListener() {
public void onClick(View v) {
int num = 0;
if (m_CheckBox1.isChecked()) {
num++;
}
if (m_CheckBox2.isChecked()) {
num++;
}
if (m_CheckBox3.isChecked()) {
num++;
}
if (m_CheckBox4.isChecked()) {
num++;
}
DisplayToast("谢谢参与!你一共选择了" + num + "项!");
}
});
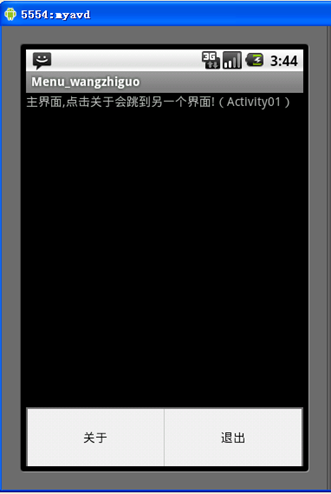
[例8] 菜单Menu
1、设计界面如图所示:
2、布局文件:
<string name="hello">主界面,点击关于会跳到另一个界面!(Activity01)</string>
<string name="hello2">关于\nAndroid Menu使用范例!(Activity02)</string>
<string name="app_name">Menu_wangzhiguo</string>
<string name="ok">切换Activity</string>
<string name="back">返回</string>
创建menu文件夹,其中放入menu.xml
<menu xmlns:android="http://schemas.android.com/apk/res/android">
<item android:id="@+id/about"
android:title="关于" />
<item android:id="@+id/exit"
android:title="退出" />
</menu>
创建两个main.xml,两个activity,并且在AndroidManifest.xml中加入
<activity android:name=".Activity02" ></activity>
3、Activity界面程序的核心语句:
启用菜单
/* 创建menu */
public boolean onCreateOptionsMenu(Menu menu) {
MenuInflater inflater = getMenuInflater();
// 设置menu界面为res/menu/menu.xml
inflater.inflate(R.menu.menu, menu);
return true;
}
/* 处理菜单事件 */
public boolean onOptionsItemSelected(MenuItem item) {
// 得到当前选中的MenuItem的ID,
int item_id = item.getItemId();
switch (item_id) {
case R.id.about:
/* 新建一个Intent对象 */
Intent intent = new Intent();
/* 指定intent要启动的类 */
intent.setClass(Activity01.this, Activity02.class);
/* 启动一个新的Activity */
startActivity(intent);
/* 关闭当前的Activity */
Activity01.this.finish();
break;
case R.id.exit:
Activity01.this.finish();
break;
}
return true;
}
启用菜单的另外一种方式
public boolean onCreateOptionsMenu(Menu menu) {
// 为menu添加内容
menu.add(0, 0, 0, R.string.ok);
menu.add(0, 1, 1, R.string.back);
return true;
}
[例9] Dialog对话框
1、设计界面如图所示:


2、核心语句:
Dialog dialog = new AlertDialog.Builder(this).
setTitle("exit").setMessage("你确定退出程序吗").setNegativeButton("取消", new DialogInterface.OnClickListener(){
@Override
public void onClick(DialogInterface dialog, int which)
// Acitivity01.this.finish();
Acitivity01.this.loginDialog().show();
}}
).setPositiveButton("ok", new DialogInterface.OnClickListener(){
@Override
public void onClick(DialogInterface dialog, int which) {
pDialog = ProgressDialog.show(Acitivity01.this, "请稍等", "您正在登陆", true);
new Thread(){
public void run() {
try {
Thread.sleep(3000);
} catch (InterruptedException e) {
// TODO Auto-generated catch block
e.printStackTrace();
}
pDialog.dismiss();
};
}.start();
Acitivity01.this.finish();
}}).create();
dialog.show();
public Dialog loginDialog(){
LayoutInflater factory = LayoutInflater.from(Acitivity01.this);
View dialogView = factory.inflate(R.layout.dialog, null);
Dialog dialog = null;
AlertDialog.Builder builder = new AlertDialog.Builder(Acitivity01.this);
builder.setTitle("this is a login view");
builder.setView(dialogView);
builder.setPositiveButton("ok", null);
builder.setNegativeButton("cancel", null);
dialog = builder.create();
return dialog;
}
[例10] 图片视图ImageView
1、设计界面如图所示:

2、布局文件:
<ImageView
android:id="@+id/ImageView01"
android:layout_width="wrap_content"
android:layout_height="wrap_content"
>
</ImageView>
<TextView
android:id="@+id/TextView01"
android:layout_below="@id/ImageView01"
android:layout_width="wrap_content"
android:layout_height="wrap_content"
>
3、核心语句:
// 获得ImageView的对象
imageview = (ImageView) this.findViewById(R.id.ImageView01);
textview = (TextView) this.findViewById(R.id.TextView01);
// 设置imageview的图片资源。同样可以再xml布局中像下面这样写
// android:src="@drawable/logo"
imageview.setImageResource(R.drawable.logo);
// 设置imageview的Alpha值,Alpha值表示透明度,如:全透明,半透明
imageview.setAlpha(image_alpha);
// 开启一个线程来让Alpha值递减
new Thread(new Runnable() {
public void run() {
while (isrung) {
try {
Thread.sleep(200);
// 更新Alpha值
updateAlpha();
} catch (InterruptedException e) {
e.printStackTrace();
}
}
}
}).start();
// 接受消息之后更新imageview视图
mHandler = new Handler() {
@Override
public void handleMessage(Message msg) {
super.handleMessage(msg);
imageview.setAlpha(image_alpha);
textview.setText("现在alpha值是:" + Integer.toString(image_alpha));
// 更新
imageview.invalidate();
}
};
}
public void updateAlpha() {
if (image_alpha - 7 >= 0) {
image_alpha -= 7;
} else {
image_alpha = 0;
isrung = false;
}
// 发送需要更新imageview视图的消息
mHandler.sendMessage(mHandler.obtainMessage());
}
列表视图ListView
1 参考帮助文档的一种写法
public class MainActivity extends ListActivity {
String[] strs = {"aa1","bb2","cc3"};
public void onCreate(Bundle savedInstanceState) {
super.onCreate(savedInstanceState);
ArrayAdapter<String> aa = new ArrayAdapter<String>(this, R.layout.simple_list_item_1, strs);
setListAdapter(aa);
ListView lv = this.getListView();
lv.setOnItemClickListener(new OnItemClickListener() {
public void onItemClick(AdapterView<?> parent, View view,
int position, long id) {
Toast.makeText(MainActivity.this, strs[position], Toast.LENGTH_LONG).show();
}
});
}
}
监听还可以这样加
protected void onListItemClick(ListView l, View v, int position, long id) {
// TODO Auto-generated method stub
super.onListItemClick(l, v, position, id);
Toast.makeText(this, strs[position], Toast.LENGTH_LONG).show();
}
第二种ListView的写法
<ListView
android:id="@+id/ListView01"
android:layout_width="fill_parent"
android:layout_height="wrap_content"/>
public class TestListView2 extends Activity {
ListView lv;
String[] strs = { "Java", "JavaME", "JavaEE", "Android" };
@Override
protected void onCreate(Bundle savedInstanceState) {
super.onCreate(savedInstanceState);
setContentView(R.layout.test_listview);
lv = (ListView)findViewById(R.id.ListView01);
ArrayAdapter<String> aa = new
ArrayAdapter<String>(this, android.R.layout.simple_list_item_1,strs);
lv.setAdapter(aa);
lv.setOnItemClickListener(new OnItemClickListener() {
public void onItemClick(AdapterView<?> parent, View view,
int position, long id) {
Toast.makeText(TestListView2.this, strs[position], Toast.LENGTH_LONG).show();
}
});
}
}
第三种ListView的写法
<ImageView android:id="@+id/ImageView01"
android:layout_width="wrap_content"
android:layout_height="wrap_content"/>
<TextView
android:text=""
android:id="@+id/text_TextView01"
android:layout_width="wrap_content"
android:layout_height="wrap_content"/>
public class TestListView3 extends ListActivity {
@Override
protected void onCreate(Bundle savedInstanceState) {
super.onCreate(savedInstanceState);
setListAdapter(new MyAdapter());
}
class MyAdapter extends BaseAdapter {
String[] strs = { "Java", "JavaME", "JavaEE", "Android" };
LayoutInflater li = LayoutInflater.from(getApplicationContext());
public int getCount() {
return strs.length;
}
public Object getItem(int position) {
return null;
}
public long getItemId(int position) {
return 0;
}
public View getView(int position, View convertView, ViewGroup parent) {
View v = li.inflate(R.layout.listview_item, null);
ImageView iv = (ImageView)v.findViewById(R.id.ImageView01);
TextView tv = (TextView)v.findViewById(R.id.text_TextView01);
tv.setText(strs[position]);
iv.setImageResource(R.drawable.icon);
return v;
}
}
}
[例11] 图片按钮ImageButton
1、设计界面如图所示:

2、布局文件:
m_TextView = (TextView) findViewById(R.id.TextView01);
// 分别取得4个ImageButton对象
m_ImageButton1 = (ImageButton) findViewById(R.id.ImageButton01);
m_ImageButton2 = (ImageButton) findViewById(R.id.ImageButton02);
m_ImageButton3 = (ImageButton) findViewById(R.id.ImageButton03);
m_ImageButton4 = (ImageButton) findViewById(R.id.ImageButton04);
// 分别设置所使用的图标
// m_ImageButton1是在xml布局中设置的,这里就暂时不设置了
m_ImageButton2.setImageDrawable(getResources().getDrawable(
R.drawable.button2));
m_ImageButton3.setImageDrawable(getResources().getDrawable(
R.drawable.button3));
m_ImageButton4.setImageDrawable(getResources().getDrawable(
android.R.drawable.sym_call_incoming));
// 以下分别为每个按钮设置事件监听setOnClickListener
m_ImageButton1.setOnClickListener(new Button.OnClickListener() {
public void onClick(View v) {
// 对话框
Dialog dialog = new AlertDialog.Builder(Activity01.this)
.setTitle("提示").setMessage("我是ImageButton1")
.setPositiveButton("确定",
new DialogInterface.OnClickListener() {
public void onClick(DialogInterface dialog,
int whichButton) {
}
}).create();// 创建按钮
dialog.show();
}
});
m_ImageButton2.setOnClickListener(new Button.OnClickListener() {
public void onClick(View v) {
Dialog dialog = new AlertDialog.Builder(Activity01.this)
.setTitle("提示").setMessage(
"我是ImageButton2,我要使用ImageButton3的图标")
.setPositiveButton("确定",
new DialogInterface.OnClickListener() {
public void onClick(DialogInterface dialog,
int whichButton) {m_ImageButton2
.setImageDrawable(getResources()
.getDrawable(R.drawable.button3));
}
}).create();// 创建按钮
dialog.show();
}
});
m_ImageButton3.setOnClickListener(new Button.OnClickListener() {
public void onClick(View v) {
Dialog dialog = new AlertDialog.Builder(Activity01.this)
.setTitle("提示")
.setMessage("我是ImageButton3,我要使用系统打电话图标")
.setPositiveButton("确定",
new DialogInterface.OnClickListener() {
public void onClick(DialogInterface dialog,
int whichButton) {
m_ImageButton3.setImageDrawable(getResources()
.getDrawable( android.R.drawable.sym_action_call));
}
}).create();// 创建按钮
dialog.show();
}
});
m_ImageButton4.setOnClickListener(new Button.OnClickListener() {
public void onClick(View v) {
Dialog dialog = new AlertDialog.Builder(Activity01.this)
.setTitle("提示").setMessage("我是使用的系统图标!")
.setPositiveButton("确定",
new DialogInterface.OnClickListener() {
public void onClick(DialogInterface dialog,
int whichButton) {
}
}).create();// 创建按钮
dialog.show();
}
});
界面布局
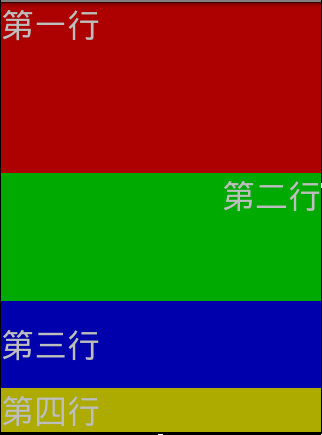
[例12] 垂直线性布局
- 设计界面如图所示:
2、布局文件:
<LinearLayout xmlns:android="http://schemas.android.com/apk/res/android"
android:orientation="vertical"
android:layout_width="fill_parent"
android:layout_height="fill_parent"
>
<TextView
android:text="第一行"
android:gravity="top"
android:textSize="15pt"
android:background="#aa0000"
android:layout_width="fill_parent"
android:layout_height="wrap_content"
android:layout_weight="3"/> //重量级,越大则在界面中所占比例也越多(即四行所占比例会把界面全部占满,重量级越多的占得比例越多)
<TextView
android:text="第二行"
android:textSize="15pt"
android:gravity="right"
android:background="#00aa00"
android:layout_width="fill_parent"
android:layout_height="wrap_content"
android:layout_weight="2"/>
<TextView
android:text="第三行"
android:textSize="15pt"
android:gravity="center_vertical"
android:background="#0000aa"
android:layout_width="fill_parent"
android:layout_height="wrap_content"
android:layout_weight="1"/>
<TextView
android:text="第四行"
android:textSize="15pt"
android:gravity="center_vertical"
android:background="#aaaa00"
android:layout_width="fill_parent"
android:layout_height="wrap_content"
android:layout_weight="0"/>
</LinearLayout>
[例13] 水平线性布局
1、设计界面如图所示:

2、布局文件:
<LinearLayout xmlns:android="http://schemas.android.com/apk/res/android"
android:orientation="horizontal"
android:layout_width="fill_parent"
android:layout_height="fill_parent"
>
<TextView
android:text="第一列"
android:gravity="center_horizontal"
android:background="#aa0000"
android:layout_width="wrap_content"
android:layout_height="fill_parent"
android:layout_weight="1"/>
<TextView
android:text="第二列"
android:gravity="center_horizontal"
android:background="#00aa00"
android:layout_width="wrap_content"
android:layout_height="fill_parent"
android:layout_weight="1"/>
<TextView
android:text="第三列"
android:gravity="center_horizontal"
android:background="#0000aa"
android:layout_width="wrap_content"
android:layout_height="fill_parent"
android:layout_weight="1"/>
<TextView
android:text="第四列"
android:gravity="center_horizontal"
android:background="#aaaa00"
android:layout_width="wrap_content"
android:layout_height="fill_parent"
android:layout_weight="1"/>
</LinearLayout>
[例14] 相对布局
1、设计界面如图所示:

2、布局文件:
<RelativeLayout xmlns:android="http://schemas.android.com/apk/res/android"
android:layout_width="fill_parent"
android:layout_height="fill_parent">
<TextView
android:id="@+id/label"
android:layout_width="fill_parent"
android:layout_height="wrap_content"
android:text="请输入:"/>
<EditText
android:id="@+id/entry"
android:layout_width="wrap_content"
android:layout_height="wrap_content"
android:background="@android:drawable/editbox_background"
android:layout_below="@id/label"/>// layout_below表示该标签放在TextView标签下面
<Button
android:id="@+id/ok"
android:layout_width="wrap_content"
android:layout_height="wrap_content"
android:layout_below="@id/entry"
android:layout_alignParentRight="true" //靠右
android:layout_marginLeft="10dip" //距左边标签间隔10个单位
android:text="确定" />
<Button
android:layout_width="wrap_content"
android:layout_height="wrap_content"
android:layout_toLeftOf="@id/ok" //在id=ok标签的左边
android:layout_alignTop="@id/ok" //顶部和id=ok的标签对齐
android:text="取消" />
</RelativeLayout>
绝对布局
[例15] 表单布局
1、设计界面如图所示:

2、布局文件:
<TableLayout xmlns:android="http://schemas.android.com/apk/res/android"
android:layout_width="fill_parent"
android:layout_height="fill_parent"
android:stretchColumns="1">
//第一列可以延伸、扩展。这样第一列和第二列不会紧挨着排列
<TableRow>
<TextView
android:layout_column="1" //指明该列为第一列,默认为第0列
android:text="打开..."
android:padding="3dip" />
<TextView
android:text="Ctrl-O"
android:gravity="right" //该视图靠右边界面
android:padding="3dip" />
</TableRow>
<TableRow>
<TextView
android:layout_column="1"
android:text="保存..."
android:padding="3dip" />
<TextView
android:text="Ctrl-S"
android:gravity="right"
android:padding="3dip" />
</TableRow>
<TableRow>
<TextView
android:layout_column="1"
android:text="另存为..."
android:padding="3dip" />
<TextView
android:text="Ctrl-Shift-S"
android:gravity="right"
android:padding="3dip" />
</TableRow>
<View
android:layout_height="2dip"
android:background="#FF909090" />
<TableRow>
<TextView
android:text="*"
android:padding="3dip" />
<TextView
android:text="导入..."
android:padding="3dip" />
</TableRow>
<TableRow>
<TextView
android:text="*"
android:padding="3dip" />
<TextView
android:text="导出..."
android:padding="3dip" />
<TextView
android:text="Ctrl-E"
android:gravity="right"
android:padding="3dip" />
</TableRow>
<View
android:layout_height="2dip"
android:background="#FF909090" />
<TableRow>
<TextView
android:layout_column="1"
android:text="退出"
android:padding="3dip" />
</TableRow>
</TableLayout>
1、设计界面如图所示:

2、布局文件:
<TableLayout xmlns:android="http://schemas.android.com/apk/res/android"
android:layout_width="fill_parent"
android:layout_height="wrap_content"
android:stretchColumns="0,1,2"
android:shrinkColumns="1,2"
>
<TextView
android:text="Table Test"
android:gravity="center"/>
<TableRow>
<TextView
android:layout_column="1"
android:text="姓名"
android:gravity="left"/>
<TextView
android:text="基本信息"
android:gravity="center"/>
</TableRow>
<TableRow>
<TextView
android:text=" 1 "
android:gravity="center"/>
<TextView
android:text="hoyah"
android:gravity="left"/>
<TextView
android:text="Wuhan University"
android:gravity="right"/>
</TableRow>
<TableRow>
<TextView
android:text=" 2 "
android:gravity="center"/>
<TextView
android:text="Google"
android:gravity="left"/>
<TextView
android:text="hello Google"
android:gravity="right"/>
</TableRow>
<TableRow>
<TextView
android:text="3"
android:gravity="center"/>
<TextView
android:text="Android"
android:gravity="left"/>
<TextView
android:text="Android OS"
android:gravity="right"/>
</TableRow>
</TableLayout>
布局讲解:
android:collapse="1
隐藏该TableLayout里的TableRow的列1,即第2列(从0开始计算),若有多列要隐藏,用","隔开。
android:stretchColumns="0,1,2"
设置列0、1、2为可伸展列。
android:shrinkColumns="1,2"
设置列1、2为可收缩列。
android:background="@drawable/picture_name"
本例中没有涉及此属性,它是要设置当前view 的背景图片,图片文件应该放在res文件夹下。
[例16] 切换卡(TabWidget)
1、设计界面如图所示:

2、布局文件:
<?xml version="1.0" encoding="utf-8"?>
<TabHost xmlns:android="http://schemas.android.com/apk/res/android"
android:id="@android:id/tabhost"
android:layout_width="fill_parent"
android:layout_height="fill_parent">
<LinearLayout
android:orientation="vertical"
android:layout_width="fill_parent"
android:layout_height="fill_parent">
<TabWidget
android:id="@android:id/tabs"
android:layout_width="fill_parent"
android:layout_height="wrap_content" />
<FrameLayout
android:id="@android:id/tabcontent"
android:layout_width="fill_parent"
android:layout_height="fill_parent">
<TextView
android:id="@+id/textview1"
android:layout_width="fill_parent"
android:layout_height="fill_parent"
android:text="this is a tab" />
<TextView
android:id="@+id/textview2"
android:layout_width="fill_parent"
android:layout_height="fill_parent"
android:text="this is another tab" />
<TextView
android:id="@+id/textview3"
android:layout_width="fill_parent"
android:layout_height="fill_parent"
android:text="this is a third tab" />
</FrameLayout>
</LinearLayout>
</TabHost>
3、核心语句:
public class Activity01 extends TabActivity {
// 声明TabHost对象
TabHost mTabHost;
/** Called when the activity is first created. */
@Override
public void onCreate(Bundle savedInstanceState) {
super.onCreate(savedInstanceState);
setContentView(R.layout.main);
// 取得TabHost对象
mTabHost = getTabHost();
/* 为TabHost添加标签 */
// 新建一个newTabSpec(newTabSpec)
// 设置其标签和图标(setIndicator)
// 设置内容(setContent)
mTabHost.addTab(mTabHost.newTabSpec("tab_test1").setIndicator("TAB 1", getResources().getDrawable(R.drawable.img1)).setContent(
R.id.textview1));
mTabHost.addTab(mTabHost.newTabSpec("tab_test2").setIndicator("TAB 2", getResources().getDrawable(R.drawable.img2)).setContent(
R.id.textview2));
mTabHost.addTab(mTabHost.newTabSpec("tab_test3").setIndicator("TAB 3", getResources().getDrawable(R.drawable.img3)).setContent(
R.id.textview3));
// 设置TabHost的背景颜色
mTabHost.setBackgroundColor(Color.argb(150, 22, 70, 150));
// 设置TabHost的背景图片资源
// mTabHost.setBackgroundResource(R.drawable.bg0);
// 设置当前显示哪一个标签
mTabHost.setCurrentTab(0);
// 标签切换事件处理,setOnTabChangedListener
mTabHost.setOnTabChangedListener(new OnTabChangeListener() {
// TODO Auto-generated method stub
@Override
public void onTabChanged(String tabId) {
Dialog dialog = new AlertDialog.Builder(Activity01.this)
.setTitle("提示").setMessage("当前选中:" + tabId + "标签")
.setPositiveButton("确定",
new DialogInterface.OnClickListener() {
public void onClick(DialogInterface dialog,
int whichButton) {
dialog.cancel();
}
}).create();// 创建按钮
dialog.show();
}
});
}
}

 浙公网安备 33010602011771号