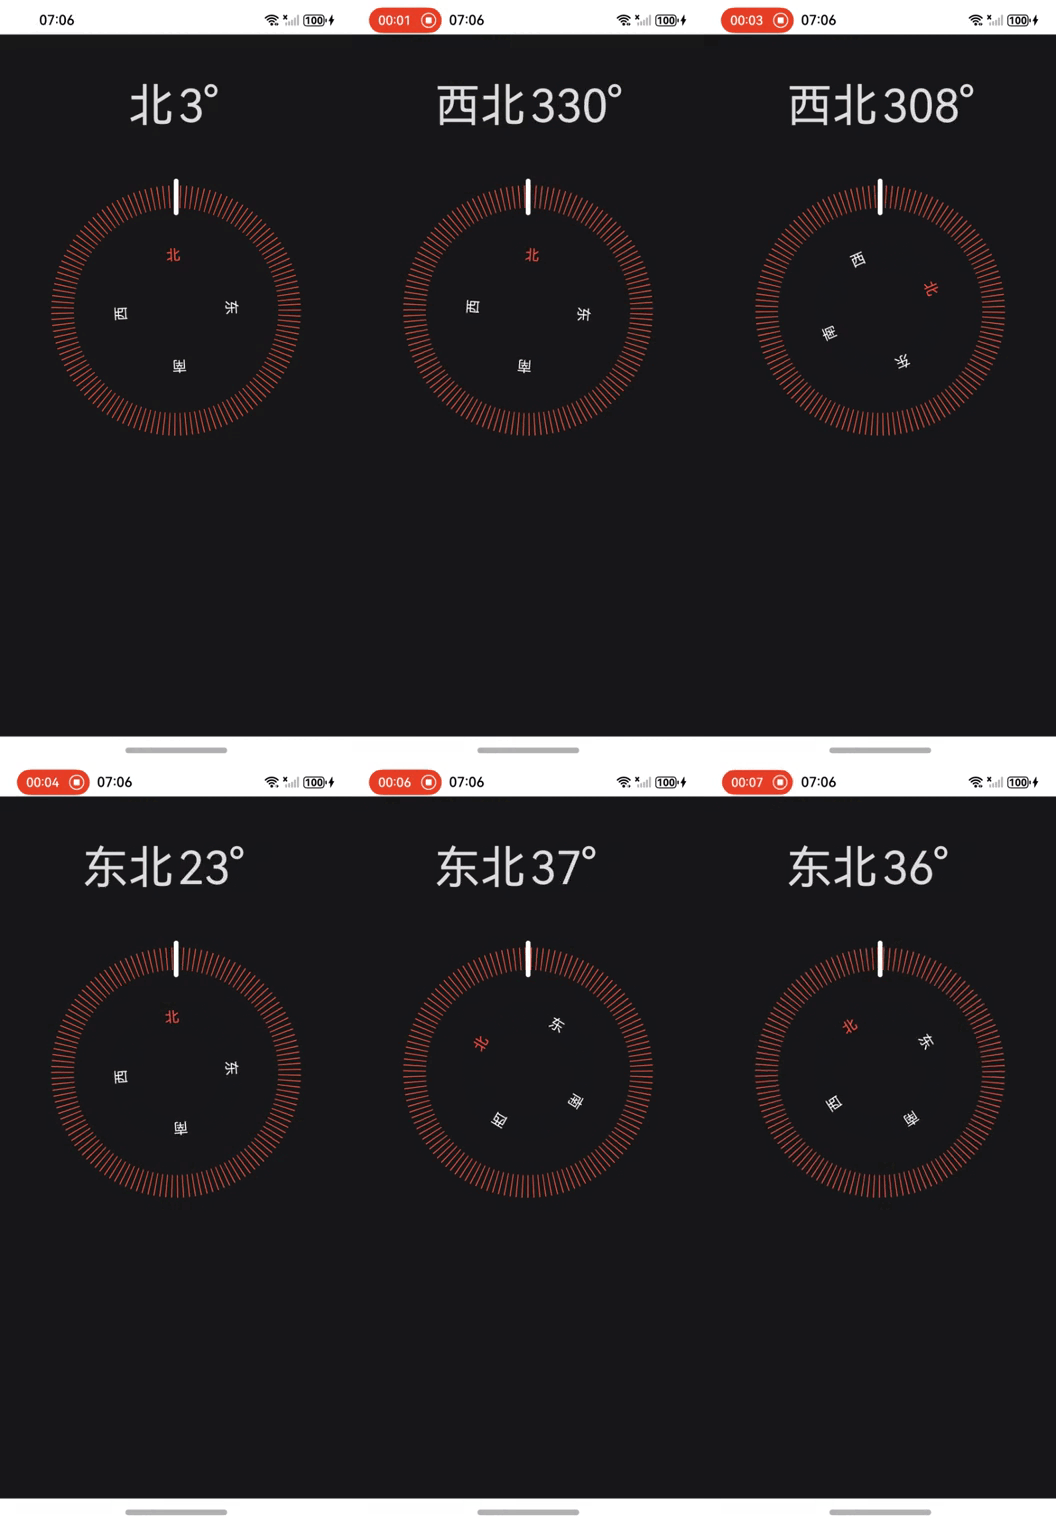
鸿蒙开发案例:指南针

【1】引言(完整代码在最后面)
在本文中,我们将介绍如何使用鸿蒙系统(HarmonyOS)开发一个简单的指南针应用。通过这个案例,你可以学习如何使用传感器服务、状态管理以及UI构建等基本技能。
【2】环境准备
电脑系统:windows 10
开发工具:DevEco Studio NEXT Beta1 Build Version: 5.0.3.806
工程版本:API 12
真机:Mate 60 Pro
语言:ArkTS、ArkUI
【3】算法分析
1. 角度差计算算法
计算当前角度与目标角度之间的差值,考虑了角度的周期性(0度和360度等效)。
1 2 3 4 5 6 7 8 9 10 11 | private calculateAngleDifference(currentAngle: number, targetAngle: number): number { let diff = targetAngle - currentAngle; if (diff > 180) { diff -= 360; // 顺时针旋转超过180度,调整为负值 } else if (diff < -180) { diff += 360; // 逆时针旋转超过180度,调整为正值 } return diff;} |
2. 累计旋转角度算法
累计计算旋转角度,确保角度在0到360度之间。以便旋转动画能正确实现
1 2 3 4 5 6 7 | private updateRotationAngle(angleDifference: number, newAngle: number): void { this.cumulativeRotation += angleDifference; // 累加旋转角度 this.rotationAngle += angleDifference; // 更新当前旋转角度 this.currentAngle = newAngle; // 更新当前传感器角度 this.rotationAngle = (this.rotationAngle % 360 + 360) % 360; // 保持在0到360度之间} |
3. 方向计算算法
根据传感器角度计算当前方向,匹配角度范围对应的方向名称。
1 2 3 4 5 6 7 8 | private calculateDirection(angle: number): string { for (const range of DIRECTION_RANGES) { if (angle >= range.min && angle < range.max) { return range.name; // 返回对应的方向名称 } } return '未知方向'; // 如果角度不在任何范围内,返回未知方向} |
【完整代码】
1 2 3 4 5 6 7 8 9 10 11 12 13 14 15 16 17 18 19 20 21 22 23 24 25 26 27 28 29 30 31 32 33 34 35 36 37 38 39 40 41 42 43 44 45 46 47 48 49 50 51 52 53 54 55 56 57 58 59 60 61 62 63 64 65 66 67 68 69 70 71 72 73 74 75 76 77 78 79 80 81 82 83 84 85 86 87 88 89 90 91 92 93 94 95 96 97 98 99 100 101 102 103 104 105 106 107 108 109 110 111 112 113 114 115 116 117 118 119 120 121 122 123 124 125 126 127 128 129 130 131 132 133 134 135 136 137 138 139 140 141 142 143 144 145 146 147 148 149 150 151 152 153 154 155 156 157 158 159 160 161 162 163 164 165 166 167 168 169 170 171 172 173 174 175 | import { sensor } from '@kit.SensorServiceKit'; // 导入传感器服务模块import { BusinessError } from '@kit.BasicServicesKit'; // 导入业务错误处理模块// 定义方向范围类class DirectionRange { name: string = ''; // 方向名称 min: number = 0; // 最小角度 max: number = 0; // 最大角度}// 定义各个方向的范围const DIRECTION_RANGES: DirectionRange[] = [ { name: '北', min: 337.5, max: 360 }, { name: '北', min: 0, max: 22.5 }, { name: '东北', min: 22.5, max: 67.5 }, { name: '东', min: 67.5, max: 112.5 }, { name: '东南', min: 112.5, max: 157.5 }, { name: '南', min: 157.5, max: 202.5 }, { name: '西南', min: 202.5, max: 247.5 }, { name: '西', min: 247.5, max: 292.5 }, { name: '西北', min: 292.5, max: 337.5 }];// 定义指南针组件@Entry@Componentstruct Compass { @State directionMessage: string = ''; // 当前方向的名称 @State rotationAngle: number = 0; // 当前旋转角度 @State currentAngle: number = 0; // 当前传感器角度 @State cumulativeRotation: number = 0; // 累计旋转角度 private threshold: number = 1; // 设置阈值,用于过滤小的旋转变化 // 组件即将出现时调用 aboutToAppear(): void { sensor.getSensorList((error: BusinessError) => { if (error) { console.error('获取传感器列表失败', error); // 如果获取传感器列表失败,打印错误信息 return; } this.startOrientationUpdates(); // 开始监听传感器数据 }); } // 开始监听传感器的方位数据 private startOrientationUpdates(): void { sensor.on(sensor.SensorId.ORIENTATION, (orientationData) => { const alpha = orientationData.alpha; // 获取当前的方位角 this.directionMessage = this.calculateDirection(alpha); // 计算当前方向 const angleDifference = this.calculateAngleDifference(this.currentAngle, alpha); // 计算角度差 if (Math.abs(angleDifference) > this.threshold) { // 如果角度变化超过阈值 this.updateRotationAngle(angleDifference, alpha); // 更新旋转角度 } }, { interval: 10000000 }); // 设置传感器更新间隔,单位为纳秒,10000000表示1秒 } // 计算两个角度之间的差异 private calculateAngleDifference(currentAngle: number, targetAngle: number): number { let diff = targetAngle - currentAngle; // 计算角度差 if (diff > 180) { diff -= 360; // 顺时针旋转超过180度,调整为负值 } else if (diff < -180) { diff += 360; // 逆时针旋转超过180度,调整为正值 } return diff; // 返回调整后的角度差 } // 更新旋转角度 private updateRotationAngle(angleDifference: number, newAngle: number): void { this.cumulativeRotation += angleDifference; // 累加旋转角度 this.rotationAngle += angleDifference; // 更新当前旋转角度 this.currentAngle = newAngle; // 更新当前传感器角度 // 动画更新 animateToImmediately({}, () => { this.rotationAngle = this.cumulativeRotation; // 将旋转角度设置为累计旋转角度 }); console.log(`累计旋转角度: ${this.cumulativeRotation}`); // 打印累计旋转角度 } // 根据角度计算方向 private calculateDirection(angle: number): string { for (const range of DIRECTION_RANGES) { if (angle >= range.min && angle < range.max) { return range.name; // 返回对应的方向名称 } } return '未知方向'; // 如果角度不在任何范围内,返回未知方向 } // 构建用户界面 build() { Column({ space: 20 }) { // 创建一个列布局,设置间距为20 Row({ space: 5 }) { // 创建一个行布局,设置间距为5 Text(this.directionMessage) // 显示当前方向 .layoutWeight(1) // 设置布局权重 .textAlign(TextAlign.End) // 文本对齐方式 .fontColor('#dedede') // 文本颜色 .fontSize(50); // 文本大小 Text(`${Math.floor(this.currentAngle)}°`) // 显示当前角度 .layoutWeight(1) // 设置布局权重 .textAlign(TextAlign.Start) // 文本对齐方式 .fontColor('#dedede') // 文本颜色 .fontSize(50); // 文本大小 }.width('100%').margin({ top: 50 }); // 设置宽度和上边距 Stack() { // 创建一个堆叠布局 Stack() { // 内部堆叠布局 Circle() // 创建一个圆形 .width(250) // 设置宽度 .height(250) // 设置高度 .fillOpacity(0) // 设置填充透明度 .strokeWidth(25) // 设置边框宽度 .stroke('#f95941') // 设置边框颜色 .strokeDashArray([1, 5]) // 设置边框虚线样式 .strokeLineJoin(LineJoinStyle.Round); // 设置边框连接方式 Text('北') // 创建一个文本,显示“北” .height('100%') // 设置高度 .width(40) // 设置宽度 .align(Alignment.Top) // 设置对齐方式 .fontColor('#ff4f3f') // 设置文本颜色 .rotate({ angle: 0 }) // 设置旋转角度 .padding({ top: 80 }) // 设置内边距 .textAlign(TextAlign.Center); // 设置文本对齐方式 Text('东') // 创建一个文本,显示“东” .height('100%') // 设置高度 .width(40) // 设置宽度 .align(Alignment.Top) // 设置对齐方式 .fontColor('#fcfdfd') // 设置文本颜色 .rotate({ angle: 90 }) // 设置旋转角度 .padding({ top: 80 }) // 设置内边距 .textAlign(TextAlign.Center); // 设置文本对齐方式 Text('南') // 创建一个文本,显示“南” .height('100%') // 设置高度 .width(40) // 设置宽度 .align(Alignment.Top) // 设置对齐方式 .fontColor('#fcfdfd') // 设置文本颜色 .rotate({ angle: 180 }) // 设置旋转角度 .padding({ top: 80 }) // 设置内边距 .textAlign(TextAlign.Center); // 设置文本对齐方式 Text('西') // 创建一个文本,显示“西” .height('100%') // 设置高度 .width(40) // 设置宽度 .align(Alignment.Top) // 设置对齐方式 .fontColor('#fcfdfd') // 设置文本颜色 .rotate({ angle: 270 }) // 设置旋转角度 .padding({ top: 80 }) // 设置内边距 .textAlign(TextAlign.Center); // 设置文本对齐方式 } .width('100%') // 设置宽度 .height('100%') // 设置高度 .borderRadius('50%') // 设置圆角 .margin({ top: 50 }) // 设置上边距 .rotate({ angle: -this.rotationAngle }) // 设置旋转角度 .animation({}); // 设置动画效果 Line() // 创建一个线条 .width(5) // 设置宽度 .height(40) // 设置高度 .backgroundColor('#fdfffe') // 设置背景颜色 .borderRadius('50%') // 设置圆角 .margin({ bottom: 200 }); // 设置下边距 } .width(300) // 设置宽度 .height(300); // 设置高度 } .height('100%') // 设置高度 .width('100%') // 设置宽度 .backgroundColor('#18181a'); // 设置背景颜色 }} |


【推荐】编程新体验,更懂你的AI,立即体验豆包MarsCode编程助手
【推荐】凌霞软件回馈社区,博客园 & 1Panel & Halo 联合会员上线
【推荐】抖音旗下AI助手豆包,你的智能百科全书,全免费不限次数
【推荐】博客园社区专享云产品让利特惠,阿里云新客6.5折上折
【推荐】轻量又高性能的 SSH 工具 IShell:AI 加持,快人一步
· 【.NET】调用本地 Deepseek 模型
· CSnakes vs Python.NET:高效嵌入与灵活互通的跨语言方案对比
· DeepSeek “源神”启动!「GitHub 热点速览」
· 我与微信审核的“相爱相杀”看个人小程序副业
· Plotly.NET 一个为 .NET 打造的强大开源交互式图表库