Linux/CentOS下安装MySql RPM Bundle
一、下载对应的版本的MySql安装文件
1、下载路径
https://dev.mysql.com/downloads/mysql/
2、选择对应的Linux版本和x86/x64位的安装文件
查看Linux的版本信息可以参考:查看CentOS/Linux的版本信息
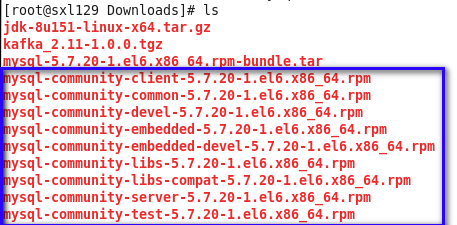
我下载的是:mysql-5.7.20-1.el6.x86_64.rpm-bundle.tar
3、解压

查看解压后的文件:

二、添加MySql用户组和用户
1、查看用户组
groups 查看当前登录用户的组内成员
groups mysql 查看mysql用户所在的组,以及组内成员
whoami 查看当前登录用户名
2、添加用户组
groupadd mysql
useradd -r -g mysql -s /bin/false mysql
注:groupadd和useradd的语法或名称在不同版本的Unix系统上可能略有不同,但在CentOS6.5中应进行如上操作。上述操作只是为了获得系统的所有权,而不是以登录为目的;使用useradd命令和-r和-s /bin/false选项来创建一个没有登录权限的用户。
三、卸载旧版本的MySql(没有的话,则跳过此步骤)
1、查看旧版本MySql
rpm -qa | grep mysql
将会列出旧版本MySql的组件列表,如:

我的电脑这里只显示一个,有可能会有多个。
2、逐个删除掉旧的组件
使用命令rpm -e --nodeps {-file-name}进行移除操作,移除的时候可能会有依赖,要注意一定的顺序。

第一次没有删除成功是因为最后多了一个空格。
三、使用rpm命令安装MySql组件
使用命令rpm -ivh {-file-name}进行安装操作。
 1 [root@sxl129 Downloads]# rpm -ivh mysql-community-common-5.7.20-1.el6.x86_64.rpm
 2 warning: mysql-community-common-5.7.20-1.el6.x86_64.rpm: Header V3 DSA/SHA1 Signature, key ID 5072e1f5: NOKEY
 3 Preparing...                ########################################### [100%]
 4    1:mysql-community-common ########################################### [100%]
 5 [root@sxl129 Downloads]# rpm -ivh mysql-community-libs-5.7.20-1.el6.x86_64.rpm
 6 warning: mysql-community-libs-5.7.20-1.el6.x86_64.rpm: Header V3 DSA/SHA1 Signature, key ID 5072e1f5: NOKEY
 7 Preparing...                ########################################### [100%]
 8    1:mysql-community-libs   ########################################### [100%]
 9 [root@sxl129 Downloads]#  rpm -ivh mysql-community-libs-compat-5.7.20-1.el6.x86_64.rpm
10 warning: mysql-community-libs-compat-5.7.20-1.el6.x86_64.rpm: Header V3 DSA/SHA1 Signature, key ID 5072e1f5: NOKEY
11 Preparing...                ########################################### [100%]
12    1:mysql-community-libs-co########################################### [100%]
13 [root@sxl129 Downloads]# rpm -ivh mysql-community-client-5.7.20-1.el6.x86_64.rpm
14 warning: mysql-community-client-5.7.20-1.el6.x86_64.rpm: Header V3 DSA/SHA1 Signature, key ID 5072e1f5: NOKEY
15 Preparing...                ########################################### [100%]
16    1:mysql-community-client ########################################### [100%]
17 [root@sxl129 Downloads]# rpm -ivh mysql-community-server-5.7.20-1.el6.x86_64.rpm
18 warning: mysql-community-server-5.7.20-1.el6.x86_64.rpm: Header V3 DSA/SHA1 Signature, key ID 5072e1f5: NOKEY
19 Preparing...                ########################################### [100%]
20    1:mysql-community-server ########################################### [100%]
注:ivh中, i-install安装;v-verbose进度条;h-hash哈希校验
四、登录并创建MySql密码
1、启动Mysql
安装完后,使用命令service mysqld start启动MySQL服务。
2、修改MySql的密码
由于MySQL5.7.4之前的版本中默认是没有密码的,登录后直接回车就可以进入数据库,进而进行设置密码等操作。其后版本对密码等安全相关操作进行了一些改变,在安装过程中,会在安装日志中生成一个随机密码。
怎么找到这个随机密码呢?
使用:
1 grep 'temporary password' /var/log/mysqld.log
即可查询到类似于如下的一条日志记录:
1 [root@sxl129 Downloads]# grep 'temporary password' /var/log/mysqld.log
2 2017-12-03T10:34:49.423162Z 1 [Note] A temporary password is generated for root@localhost: hqQRMP:D)9Q&
hqQRMP:D)9Q&即为登录密码。使用这个随机密码登录进去,然后修改密码,使用命令:
mysql -uroot -p
 1 Enter password: (在这里输入密码)
 2 Welcome to the MySQL monitor.  Commands end with ; or \g.
 3 Your MySQL connection id is 5
 4 Server version: 5.7.20
 5
 6 Copyright (c) 2000, 2017, Oracle and/or its affiliates. All rights reserved.
 7
 8 Oracle is a registered trademark of Oracle Corporation and/or its
 9 affiliates. Other names may be trademarks of their respective
10 owners.
11
12 Type 'help;' or '\h' for help. Type '\c' to clear the current input statement.
执行下面的命令修改MySql密码
1 mysql> ALTER USER 'root'@'localhost' IDENTIFIED BY 'sxl';
2 Query OK, 0 rows affected (0.00 sec)
3、创建一个可以外部访问的账户
由于MySql使用的是3306端口,我们要将3306端口加入外网访问权限,使用如下命令:
  iptables -I INPUT 1 -p tcp --dport 3306 -j ACCEPT
  启动Mysql后,你可以查看3306端口是被MySql的进程所占用:
1 root@sxl129 Desktop]# lsof -i:3306
2 COMMAND  PID  USER   FD   TYPE DEVICE SIZE/OFF NODE NAME
3 mysqld  3749 mysql   27u  IPv6  23700      0t0  TCP *:mysql (LISTEN)
在MySql中创建一个用户,然后使用户能被外网访问:
1 mysql> CREATE USER 'linglong'@'%' IDENTIFIED BY 'sxl';
2 Query OK, 0 rows affected (0.00 sec)
3
4 mysql> GRANT ALL PRIVILEGES ON *.* TO 'linglong'@'%' WITH GRANT OPTION;
5 Query OK, 0 rows affected (0.00 sec)
6
7 mysql> flush privileges;(这句一定要加上)
8 Query OK, 0 rows affected (0.00 sec)
PS:如果不能被外网访问,则会报:host-xxx-xx-xxx-xxx-is-not-allowed-to-connect-to-this-mysql-server的异常。
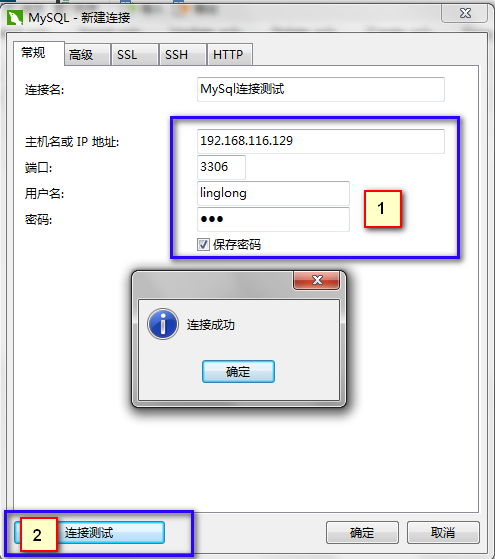
五、使用Navicat连接访问MySql

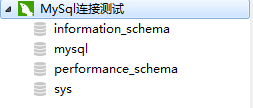
连接成功。

六、RPM安装MySql时的默认路径
数据文件:/var/lib/mysql/
配置文件模板:/usr/share/mysql mysql
客户端工具目录:/usr/bin
日志目录:/var/log/pid
sock文件目录:/tmp/(但是我在tmp目录下没有找到,在/var/lib/mysql/目录下找到了mysql.sock文件,知道的大神麻烦告知一下)
一般配置文件会放置在/etc下
七、参考文档
http://blog.csdn.net/flyingaga/article/details/62248623
https://stackoverflow.com/questions/1559955/host-xxx-xx-xxx-xxx-is-not-allowed-to-connect-to-this-mysql-server
http://blog.csdn.net/ei__nino/article/details/25069391
https://www.cnblogs.com/bookwed/p/5896619.html
http://blog.csdn.net/zhanngle/article/details/41042631


 浙公网安备 33010602011771号