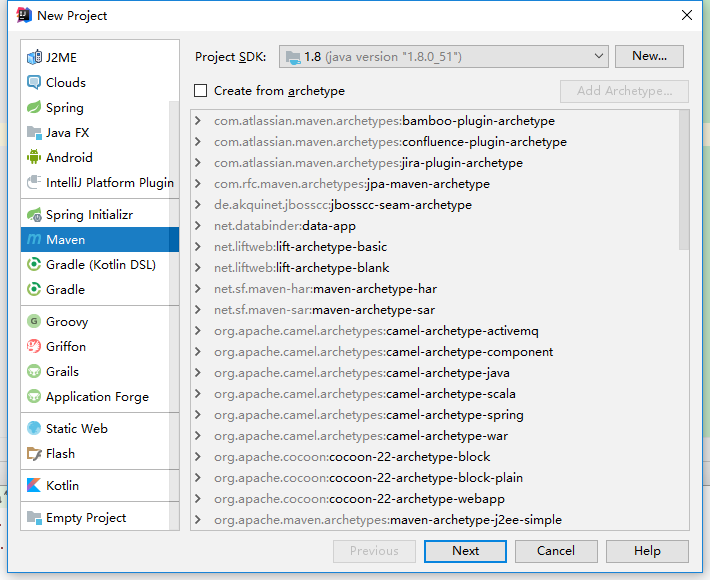
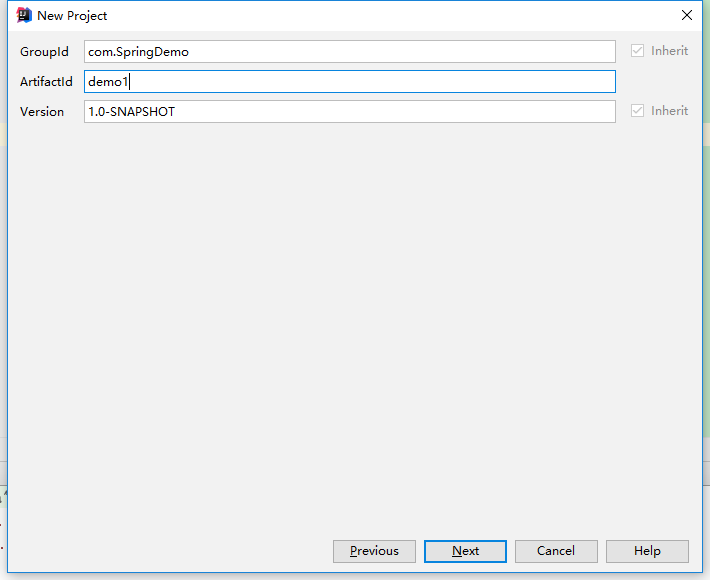
创建sprng项目
使用maven的pom.xml文件来避免自己导入jar包造成的一系列错误。
1.首先下载maven,下载地址:https://maven.apache.org/download.cgi
2.配置maven
添加环境变量M2_HOME,然后将M2_HOME添加到path变量后面


测试maven是否安装成功:dos窗口输入mvn -v

3.maven的pom.cml文件
<?xml version="1.0" encoding="UTF-8"?>
<project xmlns="http://maven.apache.org/POM/4.0.0"
         xmlns:xsi="http://www.w3.org/2001/XMLSchema-instance"
         xsi:schemaLocation="http://maven.apache.org/POM/4.0.0 http://maven.apache.org/xsd/maven-4.0.0.xsd">
    <modelVersion>4.0.0</modelVersion>

    <groupId>springDemo</groupId>
    <artifactId>Demo1</artifactId>
    <version>1.0-SNAPSHOT</version>

    <!--定义变量,java的编译级别-->
    <properties>
        <java.version>1.8</java.version>
    </properties>
    <!--添加spring依赖-->
    <dependencies>
        <dependency>
            <groupId>org.springframework</groupId>
            <artifactId>spring-context</artifactId>
            <version>4.1.5.RELEASE</version>
        </dependency>
    </dependencies>
    <!--添加编译插件-->
    <build>
        <plugins>
            <plugin>
                <groupId>org.apache.maven.plugins</groupId>
                <artifactId>maven-compiler-plugin</artifactId>
                <version>2.3.2</version>
                <configuration>
                    <source>
                        ${java.version}
                    </source>
                    <target>
                        ${java.version}
                    </target>
                </configuration>
            </plugin>
        </plugins>
    </build>
</project>
基于Eclipse搭建spring项目
如果是常规的Eclipse,则需要安装M2E(Maven Integration for Eclipse)
Spring官方推出一款基于Eclipse的开发工具Spring Tool Suite(STS),STS集成了M2E,Spring IDE等插件。STS的下载地址:https://spring.io/tools/sts/all
(1)创建maven项目,(2)输入项目的坐标名(groupId,artifactId)然后点击完成即可,(3)修改pom.xml文件,添加需要的依赖。(4)更新项目,项目右键-》Maven->Update Project
基于idea搭建
(1)新建Mave项目


(2)修改pom.xml文件,使用上面的pom.xml文件内容,idea会自动导入依赖包
spring框架的四大原则:
1.通过POJO进行轻量级和最小侵入式开发
2.通过依赖注入和基于接口编程实现松耦合
3.通过AOP和默认习惯进行声明式编程
4.使用AOP和模板减少模式化代码
声明Bean的注解:@Component,@Service,@Pepository,@Controller
注入Bean的注解:@Autowired,@Inject,@Resource
/**
 * @author Holley
 * @create 2018-07-06 10:51
 **/
@Service("helloService")
public class HelloServiceImpl implements HelloService{
    @Override
    public String sayHello(String name) {
        return "Hello " + name + "!";
    }
}
/**
 * 请输入一段话进行描述
 *
 * @author Holley
 * @create 2018-07-06 11:32
 **/
@Service("userHelloService")
public class UseHelloServiceImpl implements UserHelloService{

    @Autowired
    private HelloService helloService;
    @Override
    public String useSayHello(String name) {
        return helloService.sayHello(name);
    }
}
/**
 * 配置类,扫描com包下所有注解
 *
 * @author Holley
 * @create 2018-07-06 11:39
 **/
@Configuration
@ComponentScan("com")
public class MyConfig {
}
/**
 * 测试类
 *
 * @author Holley
 * @create 2018-07-06 11:42
 **/
public class Test {
    public static void main(String[] args){
        // 使用AnnotationConfigApplicationContext作为spring容器
        AnnotationConfigApplicationContext context = new AnnotationConfigApplicationContext(MyConfig.class);
        UserHelloService userHelloService = (UserHelloService)context.getBean("userHelloService");
        System.out.println(userHelloService.useSayHello("holley"));
        context.close();
    }
}
输出结果如下


