Spring Cloud Alibaba系列(一)nacos作为服务注册中心
Spring Cloud Alibaba各组件版本关系
| Spring Cloud Alibaba Version | Sentinel Version | Nacos Version | RocketMQ Version | Dubbo Version | Seata Version |
|---|---|---|---|---|---|
| 2.2.1.RELEASE | 1.7.1 | 1.2.1 | 4.4.0 | 2.7.6 | 1.1.0 |
| 2.2.0.RELEASE | 1.7.1 | 1.1.4 | 4.4.0 | 2.7.4.1 | 1.0.0 |
| 2.1.2.RELEASE or 2.0.2.RELEASE | 1.7.1 | 1.2.1 | 4.4.0 | 2.7.6 | 1.1.0 |
| 2.1.1.RELEASE or 2.0.1.RELEASE or 1.5.1.RELEASE | 1.7.0 | 1.1.4 | 4.4.0 | 2.7.3 | 0.9.0 |
| 2.1.0.RELEASE or 2.0.0.RELEASE or 1.5.0.RELEASE | 1.6.3 | 1.1.1 | 4.4.0 | 2.7.3 | 0.7.1 |
毕业版本依赖关系
| Spring Cloud Version | Spring Cloud Alibaba Version | Spring Boot Version |
|---|---|---|
| Spring Cloud Hoxton.SR3 | 2.2.1.RELEASE | 2.2.5.RELEASE |
| Spring Cloud Hoxton.RELEASE | 2.2.0.RELEASE | 2.2.X.RELEASE |
| Spring Cloud Greenwich | 2.1.2.RELEASE | 2.1.X.RELEASE |
| Spring Cloud Finchley | 2.0.2.RELEASE | 2.0.X.RELEASE |
| Spring Cloud Edgware | 1.5.1.RELEASE | 1.5.X.RELEASE |
这次项目中我们用的alibaba版本是2.2.1.REALEASE,因此各组件的版本与之对应,在实际应用中请务必使用与Spring Cloud Alibaba版本相对应的Spring Cloud版本和Spring Boot版本。
什么是nacos
在spring cloud版本中我们使用eureka、consul等做为服务注册中心,使用spring cloud config做为配置中心。而在spring cloud alibaba中,使用nacos组件即可完成服务注册发现与服务配置两大功能。
安装nacos
下载地址:https://github.com/alibaba/nacos/releases
nacos支持的三种模式:
- 单机模式 - 用于测试和单机试用。
- 集群模式 - 用于生产环境,确保高可用。
- 多集群模式 - 用于多数据中心场景。
下载完成后解压,我们发现有两个启动文件,stratup.cmd 和 startup.sh。打开这两个文件我们发现startup.cmd默认支持的是单机模式,startup.sh默认支持的是集群模式。
我们双击运行startup.cmd。
- nacos默认端口是:8848
- 默认用户名:nacos
- 默认密码:nacos
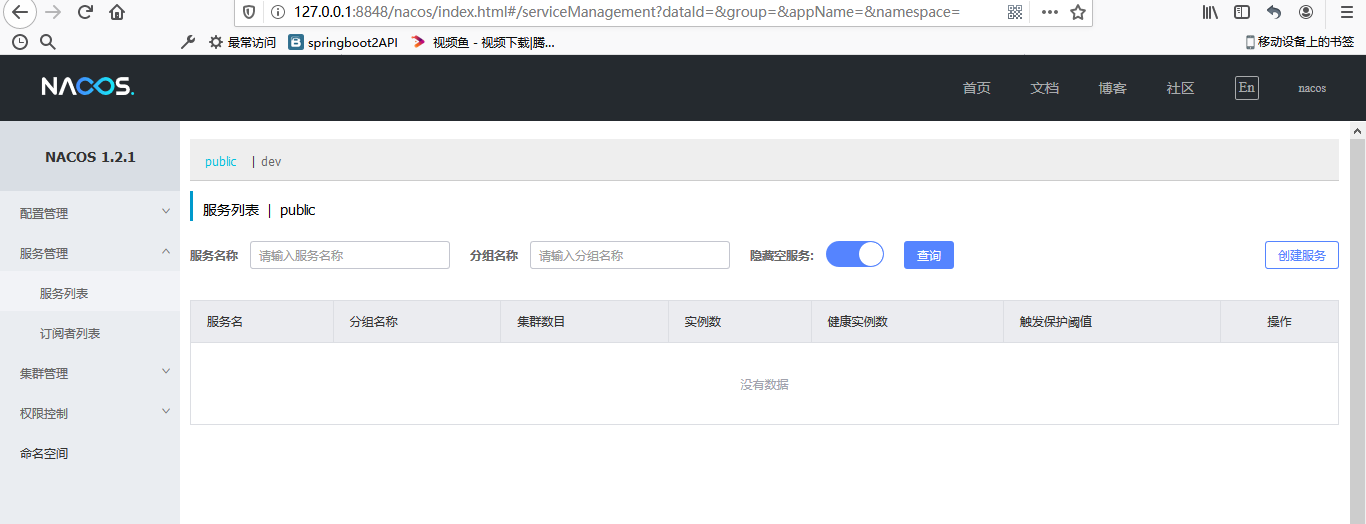
访问http://127.0.0.1:8848/nacos/index.html,如果出现以下界面则安装正常。

注册一个服务到nacos
- 新建一个服务,在pom中加入必要的依赖
  <parent>
      <groupId>org.springframework.boot</groupId>
      <artifactId>spring-boot-starter-parent</artifactId>
      <version>2.2.5.RELEASE</version>
      <relativePath/> <!-- lookup parent from repository -->
  </parent>
  <dependencyManagement>
    <dependencies>
      <!--Spring cloud Hoxton.SR3-->
      <dependency>
        <groupId>org.springframework.cloud</groupId>
        <artifactId>spring-cloud-dependencies</artifactId>
        <version>Hoxton.SR3</version>
        <type>pom</type>
        <scope>import</scope>
      </dependency>
      <!--Spring cloud alibaba 2.1.0.RELEASE-->
      <dependency>
        <groupId>com.alibaba.cloud</groupId>
        <artifactId>spring-cloud-alibaba-dependencies</artifactId>
        <version>2.2.1.RELEASE</version>
        <type>pom</type>
        <scope>import</scope>
      </dependency>
    </dependencies>
  </dependencyManagement>
  <dependencies>
    <dependency>
      <groupId>com.alibaba.cloud</groupId>
      <artifactId>spring-cloud-starter-alibaba-nacos-discovery</artifactId>
    </dependency>
  </dependencies>
- 在application.yml中配置服务名称和nacos地址
server:
  port: 9001
spring:
  application:
    name: nacos-discovery-server
  cloud:
    nacos:
      discovery:
        server-addr: 127.0.0.1:8848
- 提供一个接口
@SpringBootApplication
public class NacosDiscoveryServerApplication {

    public static void main(String[] args) {
        SpringApplication.run(NacosDiscoveryServerApplication.class, args);
    }
    @RestController
    static class TestController {
        @GetMapping("/hello")
        public String hello(@RequestParam String name) {
            return "hello,nacos discovery! " + name;
        }
    }
}
- 启动服务,控制台打印以下内容,就说明注册成功了。
2020-04-28 14:49:42.749 INFO 9864 --- [ main] c.a.c.n.registry.NacosServiceRegistry : nacos registry, DEFAULT_GROUP nacos-discovery-server 192.168.9.114:9001 register finished
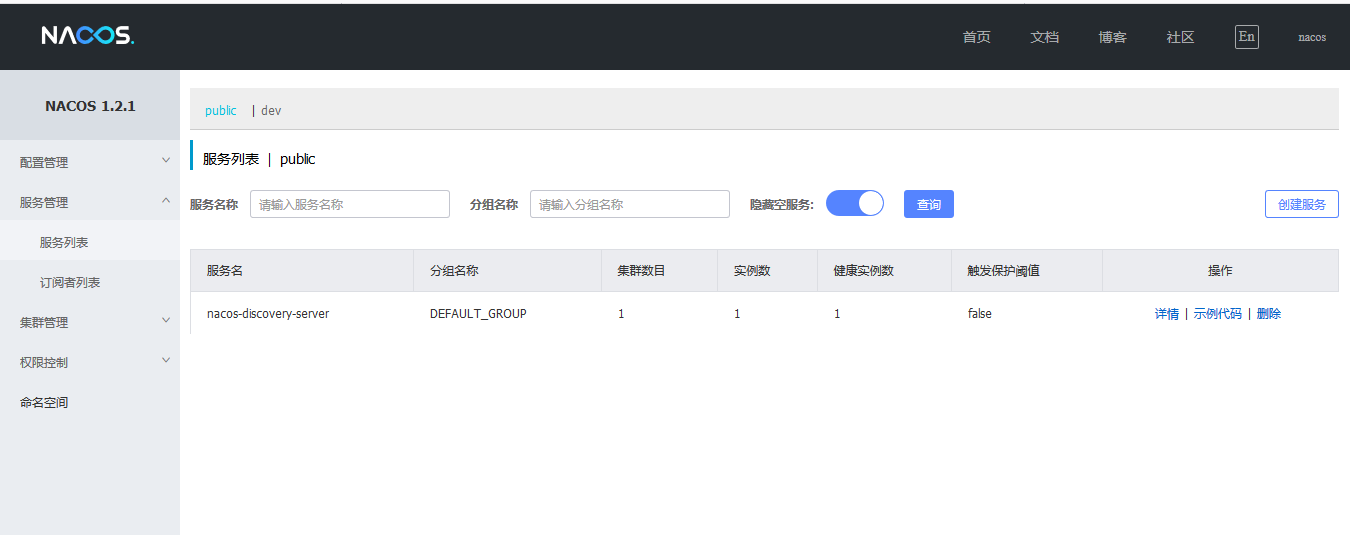
- 打开nacos控制台,我们可以在服务列表中发现我们的服务了。

注意事项
-
为什么我们的启动类上没有加@EnableDiscoveryClient注解,但是已经把服务注册到nacos上了?
在springcloud E版本的时候,对服务注册进行了优化,在依赖了spring-cloud-starter-alibaba-nacos-discovery之后,默认会将服务注册到注册中心。
-
在已经依赖spring-cloud-starter-alibaba-nacos-discovery的情况下,如果我们不想让我们的服务注册到nacos应该怎么做?
在配置文件中添加如下依赖即可:
spring:
  cloud:
    nacos:
      discovery:
        enabled: false


 浙公网安备 33010602011771号