

scrapy框架 - 入门
一、什么是scrapy框架?
- 爬虫中封装好的一个明星框架。功能:高性能的持久化存储,异步的数据下载,高性能的数据解析,分布式
二、scrapy框架的基本使用
1.环境安装:
- mac or linux:pip3 install scrapy
- windows:
- pip install wheel
- 下载twisted,下载地址为:http://www.lfd.uci.edu/~gohlke/pythonlibs/#twisted
- 安装twisted:pip install Twisted‑17.1.0‑cp36‑cp36m‑win_amd64.whl
- pip install pywin32
- pip install scrapy
- 测试:在终端里录入scrapy指令,没有报错即表示安装成功!
- pip install wheel
创建一个scrapy工程:
-
命令:scrapy startproject 工程名
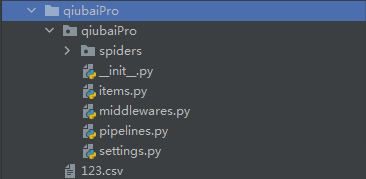
-执行完命令,会生成这样的项目目录:
-
cd 工程名目录
-
在spiders子目录中创建一个爬虫文件:
-
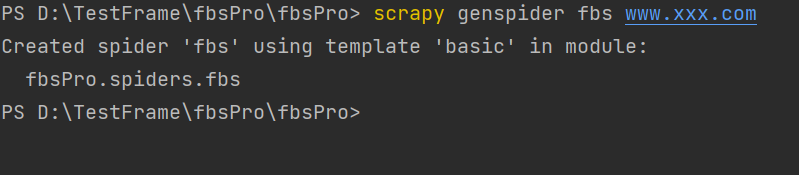
命令:scrapy genspider 爬虫名称 www.xxx.com
- 执行完命令,会在spiders.py下生成一个爬虫文件,如下:

-
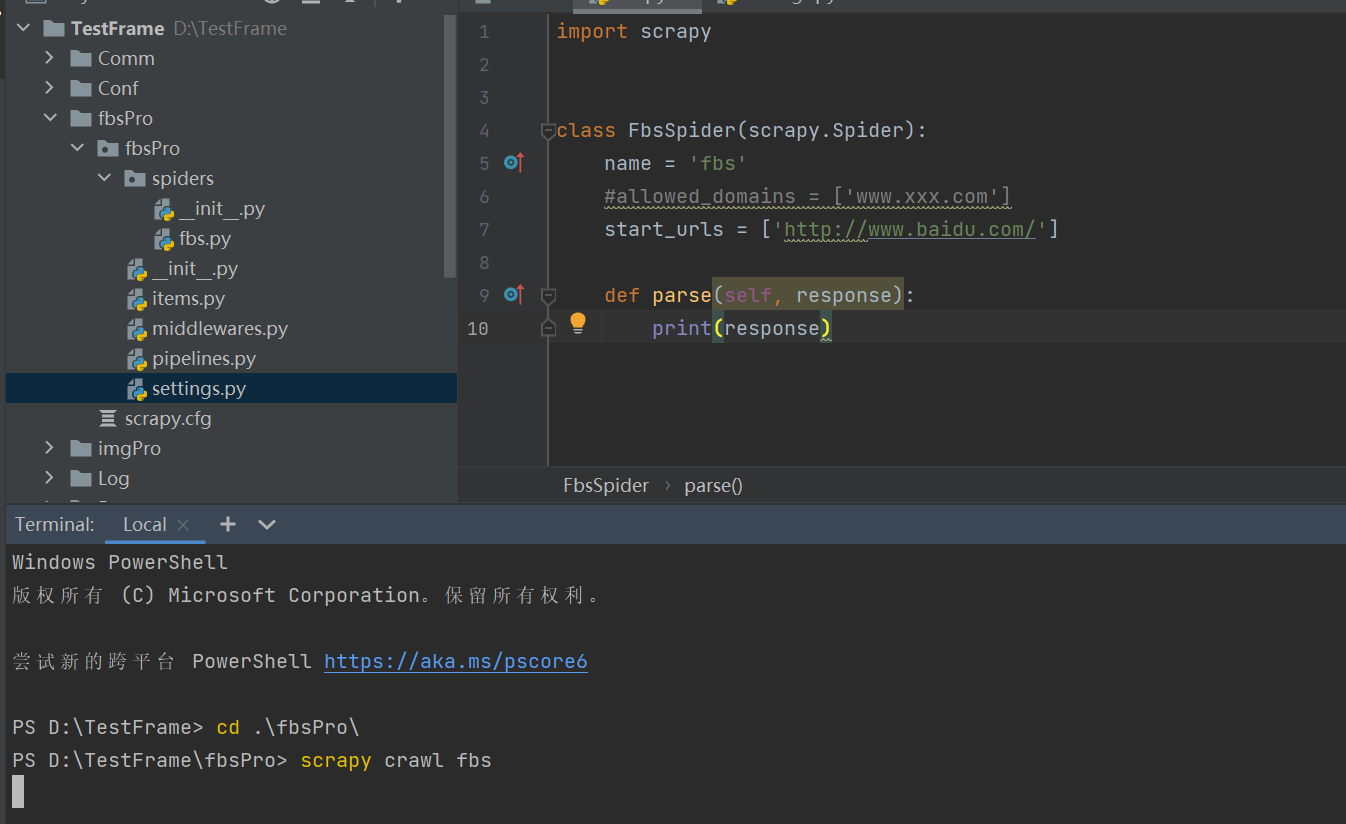
执行工程:scrapy crawl spiderName(爬虫名称)
-
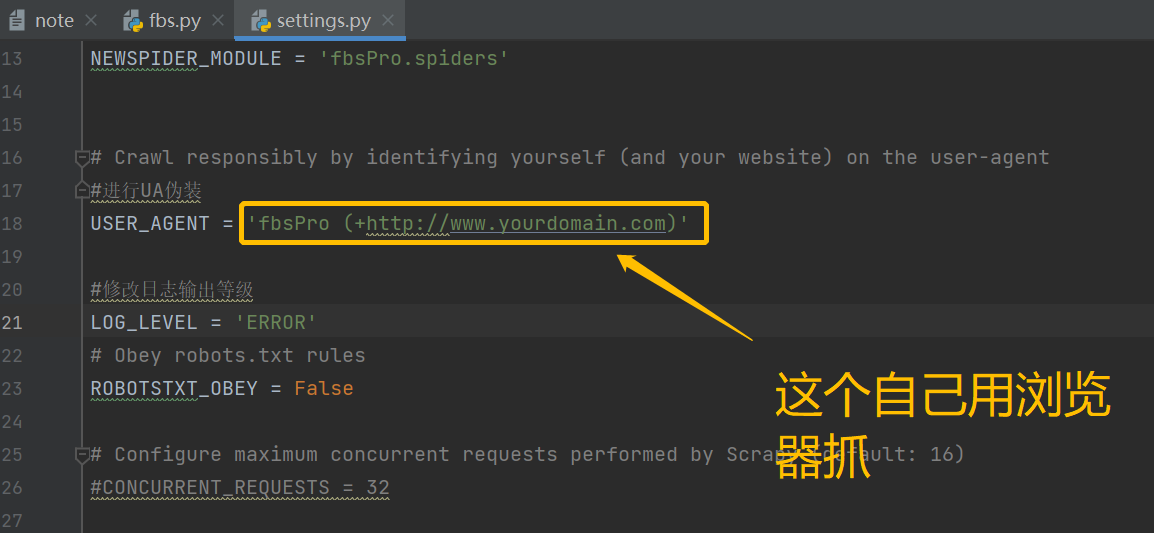
执行工程前,先在配置文件中配置,如下:
-
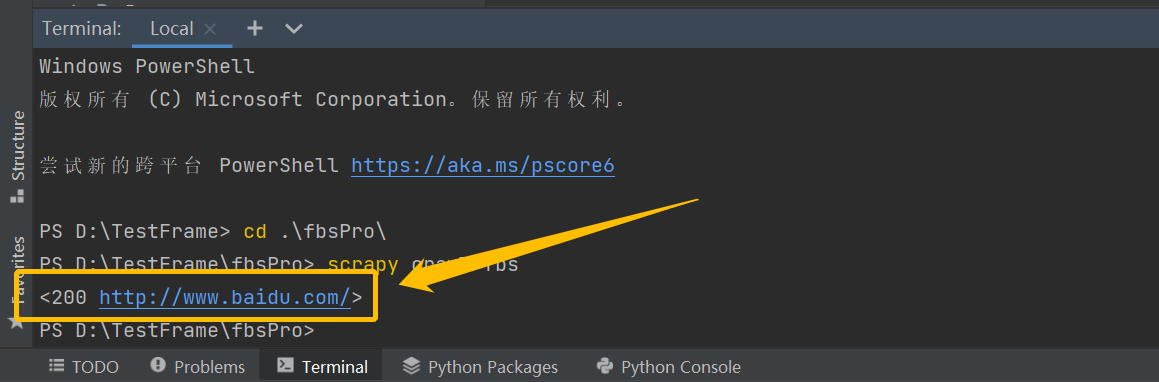
执行该命令:
-
执行结果如下:
- 执行完命令,会在spiders.py下生成一个爬虫文件,如下:
-
三、scrapy数据解析
scrapy持久化存储
- 基于终端命令:
- 要求:只可以将parse方法的返回值存储到本地的文本文件中
- 注意:持久化存储对应的文本文件的类型只可以为:'json', 'jsonlines', 'jl', 'csv', 'xml', 'marshal', 'pickle
- 指令:scrapy crawl xxx(爬虫名称) -o filePath(存储的绝对路径)
- 好处:简介高效便捷
- 缺点:局限性比较强(数据只可以存储到指定后缀的文本文件中)
#基于终端命令持久化存储

#1.爬虫文件代码示例:
import scrapy

class QiubaiSpider(scrapy.Spider):
    name = 'qiubai'
    # allowed_domains = ['www.xxx.com']
    start_urls = ['https://www.qiushibaike.com/text/']
    #
    def parse(self, response):
        #解析:作者的名称+段子内容
        div_list = response.xpath('//div[@id="content-left"]/div')
        all_data = [] #存储所有解析到的数据
        for div in div_list:
            #xpath返回的是列表,但是列表元素一定是Selector类型的对象
            #extract可以将Selector对象中data参数存储的字符串提取出来
            # author = div.xpath('./div[1]/a[2]/h2/text()')[0].extract()
            author = div.xpath('./div[1]/a[2]/h2/text()').extract_first()
            #列表调用了extract之后,则表示将列表中每一个Selector对象中data对应的字符串提取了出来
            content = div.xpath('./a[1]/div/span//text()').extract()
            content = ''.join(content)
            dic = {
                'author':author,
                'content':content
            }
            #将获取到的数据添加到列表中
            all_data.append(dic)
        return all_data

#2.在终端执行命令: scrapy  crawl  qiubai  -o   123.csv
#执行完命令,会在该目录下生成一个123.csv ,如果文件没有数据,可能是网站的反爬机制改了,需要自己去找一个别的网站联系
- 基于管道(优点:通用性强)
- 编码流程:
- 数据解析
- 在item类中定义相关的属性
- 将解析的数据封装存储到item类型的对象
- 将item类型的对象提交给管道进行持久化存储的操作
- 在管道类的process_item中要将其接受到的item对象中存储的数据进行持久化存储操作
- 在配置文件中开启管道
##基于管道的示例:将爬取到的数据,同时保存到本地和数据库

#1.爬虫文件.py中示例代码:

import scrapy
from qiubaiPro.items import QiubaiproItem

class QiubaiSpider(scrapy.Spider):
    name = 'qiubai'
    # allowed_domains = ['www.xxx.com']
    start_urls = ['https://www.qiushibaike.com/text/']

	def parse(self, response):
        #解析:作者的名称+段子内容
        div_list = response.xpath('//div[@id="content-left"]/div')
        all_data = [] #存储所有解析到的数据
        for div in div_list:
            #xpath返回的是列表,但是列表元素一定是Selector类型的对象
            #extract可以将Selector对象中data参数存储的字符串提取出来
            # author = div.xpath('./div[1]/a[2]/h2/text()')[0].extract()
            author = div.xpath('./div[1]/a[2]/h2/text() | ./div[1]/span/h2/text()').extract_first()
            #列表调用了extract之后,则表示将列表中每一个Selector对象中data对应的字符串提取了出来
            content = div.xpath('./a[1]/div/span//text()').extract()
            content = ''.join(content)

            item = QiubaiproItem()
            item['author'] = author
            item['content'] = content

            yield item#将item提交给了管道

#2.itmes.py文件代码示例

import scrapy


class QiubaiproItem(scrapy.Item):
    # define the fields for your item here like:
    author = scrapy.Field()
    content = scrapy.Field()

#3.pipeline.py文件代码示例:

class QiubaiproPipeline(object):
    fp = None
    #重写父类的一个方法:该方法只在开始爬虫的时候被调用一次
    def open_spider(self,spider):
        print('开始爬虫......')
        self.fp = open('./qiubai.txt','w',encoding='utf-8')


    #专门用来处理item类型对象
    #该方法可以接收爬虫文件提交过来的item对象
    #该方法没接收到一个item就会被调用一次
    def process_item(self, item, spider):
        author = item['author']
        content= item['content']

        self.fp.write(author+':'+content+'\n')

        return item #在每一个管道文件结束后,返回item,就会传递给下一个即将被执行的管道类

    def close_spider(self,spider):
        print('结束爬虫!')
        self.fp.close()

#管道文件中一个管道类对应将一组数据存储到一个平台或者载体中

class mysqlPileLine(object):  #将数据写入到数据库的管道类
    conn = None
    cursor = None
	#链接数据库
    def open_spider(self,spider):
        self.conn = pymysql.Connect(host='127.0.0.1',port=3306,user='root',password='123456',db='qiubai',charset='utf8')

	#将数据写入数据库的方法
    def process_item(self,item,spider):
        self.cursor = self.conn.cursor()

        try:
			#如果不出错,就将数据库成功写入数据库
            self.cursor.execute('insert into qiubai values("%s","%s")'%(item["author"],item["content"]))
            self.conn.commit()
		#如果数据写入失败,就回滚
        except Exception as e:
            print(e)
            self.conn.rollback()

        return item

	#写完数据,关闭数据库
    def close_spider(self,spider):
        self.cursor.close()
        self.conn.close()

#settings.py文件的配置,将写好的两个管道类,添加到ITEM_PIPELINES中:
ITEM_PIPELINES = {
   'qiubaiPro.pipelines.QiubaiproPipeline': 300,
   'qiubaiPro.pipelines.mysqlPileLine': 301,
    #300表示的是优先级,数值越小优先级越高
}


【推荐】国内首个AI IDE,深度理解中文开发场景,立即下载体验Trae
【推荐】编程新体验,更懂你的AI,立即体验豆包MarsCode编程助手
【推荐】抖音旗下AI助手豆包,你的智能百科全书,全免费不限次数
【推荐】轻量又高性能的 SSH 工具 IShell:AI 加持,快人一步
· 无需6万激活码!GitHub神秘组织3小时极速复刻Manus,手把手教你使用OpenManus搭建本
· Manus爆火,是硬核还是营销?
· 终于写完轮子一部分:tcp代理 了,记录一下
· 别再用vector<bool>了!Google高级工程师:这可能是STL最大的设计失误
· 单元测试从入门到精通