linux 配置ftp 服务器 与访问ftp 服务
一:配置FTP 服务器,允许匿名访问
1.1 FTP 服务
FTP 服务,用来传输文件的协议
FTP 服务器默认使用 TCP 协议的20,21 端口
- 20 端口用于建立数据连接,并传输文件数据
- 21 端口用于建立控制连接,并传输FTP 控制命令
FTP 数据连接分为2主动模式和被动模式
主动模式: 服务器主动发起数据连接
被动模式: 服务器被动等待数据链接 (本章实验使用被动模式)
1.2 配置FTP 服务器,允许匿名访问
1 2 3 4 5 6 7 8 9 10 11 12 13 14 15 16 17 18 19 20 21 22 23 24 25 26 | [root@localhost ~]# yum -y install vsftpd #安装vsftpd 包root@localhost ~]# cd /etc/vsftpd/ [root@localhost vsftpd]# lsftpusers user_list vsftpd.conf vsftpd_conf_migrate.sh[root@localhost vsftpd]# cp vsftpd.conf vsftpd.bak #备份vsftp.conf 文件[root@localhost vsftpd]# lsftpusers user_list vsftpd.bak vsftpd.conf vsftpd_conf_migrate.sh[root@localhost vsftpd]# vim /etc/vsftpd/vsftpd.confanonymous_enable=YES #开启匿名访问(默认已经开启)write_enable=YES #开放服务器的写权限(上传文件需要开启)默认快开启anon_umask=022 #设置匿名用户上传数据的权限掩码为022 (反掩码)anon_upload_enable=YES #允许匿名用户上传文件anon_mkdir_write_enable=YES #允许匿名用于创建(上传)目录anon_other_write_enable=YES #允许其他用户删除,重命名,覆盖等操作:wq #保存退出[root@localhost vsftpd]# systemctl start vsftpd #启动 ftp 服务[root@localhost vsftpd]# systemctl enable vsftpd #开启 ftp 的自启[root@localhost vsftpd]# systemctl stop firewalld #关闭防火墙[root@localhost vsftpd]# setenforce 0 #设置selinux 模式[root@localhost vsftpd]# chmod 777 /var/ftp/pub #为匿名访问ftp 目录的根目录 下的 pub 子目录 权限设置为最大权限,以便匿名用户上传数据 |
二:windows 访问测试
连接方式:
在Windows 系统 Win +r ,然后 输入 cmd ,打开命令行输入。
切换windoes 目录到桌面:
C:\Users\Administrator>cd C:\Users\Administrator\Desktop
连接ftp服务器:
ftp ftp服务器地址
匿名访问:
用户名为 ftp ,密码为空, 登录ftp
ftp 操作:
pwd #查看当前所在目录
ls #查看当前目录
cd #切换目录
get 文件名 #下载文件到windows 本地
put 文件名 #上传文件到 ftp目录
quit #退出
1 2 3 4 5 6 7 8 9 10 11 12 13 14 15 16 17 18 19 20 21 22 23 24 25 26 27 28 29 30 31 32 33 34 35 36 37 38 39 40 41 42 43 44 45 46 47 48 49 50 51 52 53 54 55 56 57 58 | C:\Users\Administrator>cd C:\Users\Administrator\Desktop #切换到桌面C:\Users\Administrator\Desktop>ftp 192.168.23.10 #连接到ftp服务器连接到 192.168.23.10。220 (vsFTPd 3.0.2)200 Always in UTF8 mode.用户(192.168.23.10:(none)): ftp #用户名输入 ftp331 Please specify the password.密码: #密码为空230 Login successful.ftp> pwd #查看当前所在目录257 "/" #根目录(匿名用户根目录是/var/ftp/)ftp> ls #查看目录下的内容200 PORT command successful. Consider using PASV.150 Here comes the directory listing.pub #目录下有pub 目录226 Directory send OK.ftp: 收到 8 字节,用时 0.00秒 8.00千字节/秒。ftp> cd pub #切换到pub 目录250 Directory successfully changed.ftp>ftp> pwd257 "/pub"ftp> ls #查看pub 目录下的内容200 PORT command successful. Consider using PASV.150 Here comes the directory listing.abc.txt #拥有 abc.txt 文件226 Directory send OK.ftp: 收到 12 字节,用时 0.00秒 12000.00千字节/秒。ftp> get abc.txt #从ftp 服务器下载 abc.txt 到本地200 PORT command successful. Consider using PASV.150 Opening BINARY mode data connection for abc.txt (15 bytes).226 Transfer complete.ftp: 收到 15 字节,用时 0.00秒 15.00千字节/秒。ftp> put test.txt #从本地 上传 test.txt 到ftp 服务器200 PORT command successful. Consider using PASV.150 Ok to send data.226 Transfer complete.ftp: 发送 12 字节,用时 0.00秒 12.00千字节/秒。ftp> quit #退出ftp 221 Goodbye.### 验证 ###C:\Users\Administrator\Desktop>dir abc.txt #windows查看 abc.txt 是否存在2021/06/29 10:25 15 abc.txt 1 个文件 15 字节 0 个目录 725,971,259,392 可用字节 [root@localhost pub]# pwd /var/ftp/pub[root@localhost pub]# ls test.txt #linux 查看 test 文件是否存在test.txt |
三:设置本地用户验证访问ftp
3.1 修改配置文件 /etc/vsftpd/vsftpd.conf
设置本地用户可以登录,禁止匿名用户登录

[root@localhost ~]# vim /etc/vsftpd/vsftpd.conf
local_enable=YES               #启用本地用户
anonymous_enable=NO            #关闭匿名用户访问(要关闭,而不失注释)
write_enable=YES               #开启服务器写权限
local_umask=077                #设置仅宿主拥有上传文件的权限(反掩码)
chroot_local_user=YES          #将访问禁锢在用户的宿主目录中
allow_writeable_chroot=YES     #允许被限制的用户主目录具有写权限
:wq

[root@localhost ~]# systemctl restart vsftpd   #重启服务
3.2 访问测试
C:\Users\Administrator\Desktop>ftp 192.168.23.10
连接到 192.168.23.10。
220 (vsFTPd 3.0.2)
200 Always in UTF8 mode.
用户(192.168.23.10:(none)): ftp
331 Please specify the password.
密码:
530 Login incorrect.
登录失败。                     #ftp 用户无密码登录失败

C:\Users\Administrator\Desktop>ftp 192.168.23.10
连接到 192.168.23.10。
220 (vsFTPd 3.0.2)
200 Always in UTF8 mode.
用户(192.168.23.10:(none)): test  #使用test 用户登录
331 Please specify the password.
密码:                             #输入test 用户密码
230 Login successful.             #使用 普通用户 test 的账号登录成功
ftp>
ftp> pwd
257 "/"              #普通用户的根目录是 它的 家目录
ftp> ls
200 PORT command successful. Consider using PASV.
150 Here comes the directory listing.
下载
公共
图片
文档
桌面
模板
视频
音乐
226 Directory send OK.     #这些是用户家目录里的文件
ftp: 收到 67 字节,用时 0.00秒 16.75千字节/秒。
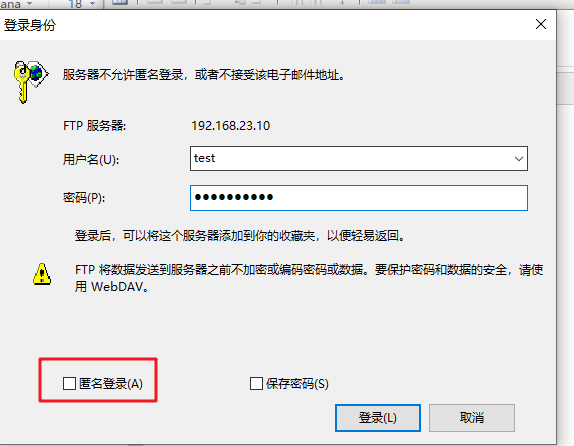
3.3 图形化登录
(1) 在地址栏 输入 ftp://ftp 服务器地址

(2) 输入 用户名 和 密码 (如果是匿名用户,点上匿名登录)
(3) windows 和linux 之间可以直接拖拽上传
从windows 上 拖拽上传

1 2 3 4 5 6 | [test@localhost ~]$ whoamitest[test@localhost ~]$ pwd/home/test[test@localhost ~]$ lstest.txt 公共 模板 视频 图片 文档 下载 音乐 桌面 |
四:设置白名单和黑名单
4.1 设置黑名单
配置 文件 /etc/vsftpd/usr_list ,向文件添加或删除 用户
1 2 3 4 5 6 7 8 9 10 11 | [root@localhost ~]# vim /etc/vsftpd/user_listtest #添加用户 :wq [root@localhost ~]# vim /etc/vsftpd/vsftpd.conf userlist_enable=YES userlist_deny=YES (默认是此设置) #设置黑名单,不允许 user_list 里的用户登录:wq [root@localhost ~]# systemctl restart vsftpd #重启服务 |
测试登录
1 2 3 4 5 6 7 8 9 10 11 12 13 14 15 16 17 18 | C:\Users\Administrator\Desktop>ftp 192.168.23.10连接到 192.168.23.10。220 (vsFTPd 3.0.2)200 Always in UTF8 mode.用户(192.168.23.10:(none)): lisi 331 Please specify the password.密码:230 Login successful. #lisi 用户不在user_list 中,可以登录ftp> quit221 Goodbye.C:\Users\Administrator\Desktop>ftp 192.168.23.10连接到 192.168.23.10。220 (vsFTPd 3.0.2)200 Always in UTF8 mode.用户(192.168.23.10:(none)): test530 Permission denied. #test 用户在user_list 中,不可以登录登录失败。 |
4.2 设置白名单
1 2 3 4 5 6 | [root@localhost ~]# vim /etc/vsftpd/vsftpd.conf userlist_enable=YESuserlist_deny=NO #将YES 改为 NO,即 设置白名单,仅允许user_list 中用户登录 :wq [root@localhost ~]# systemctl restart vsftpd #重启服务 |
测试
1 2 3 4 5 6 7 8 9 10 11 12 13 14 15 16 17 18 19 | C:\Users\Administrator\Desktop>ftp 192.168.23.10连接到 192.168.23.10。220 (vsFTPd 3.0.2)200 Always in UTF8 mode.用户(192.168.23.10:(none)): lisi530 Permission denied.登录失败。 #用户lisi 不在白名单内,登录失败ftp> quit221 Goodbye.C:\Users\Administrator\Desktop>ftp 192.168.23.10连接到 192.168.23.10。220 (vsFTPd 3.0.2)200 Always in UTF8 mode.用户(192.168.23.10:(none)): test331 Please specify the password.密码:230 Login successful. #用户test 在白名单内,登录成功ftp> |


【推荐】国内首个AI IDE,深度理解中文开发场景,立即下载体验Trae
【推荐】编程新体验,更懂你的AI,立即体验豆包MarsCode编程助手
【推荐】抖音旗下AI助手豆包,你的智能百科全书,全免费不限次数
【推荐】轻量又高性能的 SSH 工具 IShell:AI 加持,快人一步
· AI与.NET技术实操系列:基于图像分类模型对图像进行分类
· go语言实现终端里的倒计时
· 如何编写易于单元测试的代码
· 10年+ .NET Coder 心语,封装的思维:从隐藏、稳定开始理解其本质意义
· .NET Core 中如何实现缓存的预热?
· 分享一个免费、快速、无限量使用的满血 DeepSeek R1 模型,支持深度思考和联网搜索!
· 25岁的心里话
· 基于 Docker 搭建 FRP 内网穿透开源项目(很简单哒)
· ollama系列01:轻松3步本地部署deepseek,普通电脑可用
· 按钮权限的设计及实现