
安装nginx
关于nginx和apache省略index的写法
 location / {
        try_files $uri $uri/ /index.php?$query_string;
 }
#################
 <Directory />
      Options +Indexes +Includes +FollowSymLinks +MultiViews
      AllowOverride All
     Require all granted
     DirectoryIndex index.htm index.html index.php
  </Directory>
nginx遇到问题是开启了https:443和http:80并301强制转https,但是丝毫不起作用,https可以访问,http访问不到即使不强制跳转,后经排查发现是其他server模块中语法歧义问题导致
if ($scheme = http) {
    return 301 https://$server_name$request_uri;
}
#写错的地方如下 80不能开启http2这个是罪魁祸首
 server {
        listen       80 http2;
nginx配置文件中常量定义说明http://nginx.org/en/docs/http/ngx_http_core_module.html#var_request_uri
nginx查看之前安装时指定的安装参数信息
[root@lavancy ~]# /usr/local/nginx/sbin/nginx -V
nginx version: nginx/1.20.1
built by gcc 4.8.5 20150623 (Red Hat 4.8.5-44) (GCC)
built with OpenSSL 1.0.2k-fips  26 Jan 2017
TLS SNI support enabled
configure arguments: --with-http_ssl_module --with-http_mp4_module --prefix=/usr/local/nginx
启动和关闭指令 -s signal : send signal to a master process: stop, quit, reopen, reload,参考https://docs.nginx.com/nginx/admin-guide/basic-functionality/runtime-control/
nginx -s <SIGNAL>
where <SIGNAL> can be one of the following:
quit – Shut down gracefully (the SIGQUIT signal)
reload – Reload the configuration file (the SIGHUP signal)
reopen – Reopen log files (the SIGUSR1 signal)
stop – Shut down immediately (or fast shutdown, the SIGTERM singal)
安装最新openssl提示
[root@racknerd-d42c08 openssl-3.0.0]# ./Configure
Can't locate IPC/Cmd.pm in @INC (@INC contains: /usr/local/openssl-3.0.0/util/perl /usr/local/lib64/perl5
/usr/local/share/perl5 /usr/lib64/perl5/vendor_perl /usr/share/perl5/vendor_perl /usr/lib64/perl5 /usr/share/perl5
. /usr/local/openssl-3.0.0/external/perl/Text-Template-1.56/lib) at /usr/local/openssl-3.0.0/util/perl/OpenSSL/config.pm line 18.
BEGIN failed--compilation aborted at /usr/local/openssl-3.0.0/util/perl/OpenSSL/config.pm line 18.
Compilation failed in require at ./Configure line 23.
BEGIN failed--compilation aborted at ./Configure line 23.
##########
参考https://community.oracle.com/tech/apps-infra/discussion/4481624/got-error-when-trying-to-install-openssl-on-oracle-linux-8
If you're on Oracle Linux 7: yum install perl-IPC-Cmd
If you're on Oracle Linux 8: dnf install perl-IPC-Cmd
安装nginx启动http_ssl_module时报错
[root@racknerd-d42c08 nginx-1.20.2]# make
make -f objs/Makefile
make[1]: Entering directory `/usr/local/nginx-1.20.2'
cd /usr/local/openssl \
&& if [ -f Makefile ]; then make clean; fi \
&& ./config --prefix=/usr/local/openssl/.openssl no-shared no-threads  \
&& make \
&& make install_sw LIBDIR=lib
/bin/sh: line 2: ./config: No such file or directory
make[1]: *** [/usr/local/openssl/.openssl/include/openssl/ssl.h] Error 127
make[1]: Leaving directory `/usr/local/nginx-1.20.2'
make: *** [build] Error 2
[root@racknerd-d42c08 nginx-1.20.2]# cd /usr/local/openssl
[root@racknerd-d42c08 openssl]# ll
total 20
drwxr-xr-x. 2 root root 4096 Nov 19 22:24 bin
drwxr-xr-x. 3 root root 4096 Nov 19 22:24 include
drwxr-xr-x. 5 root root 4096 Nov 19 22:24 lib64
drwxr-xr-x. 4 root root 4096 Nov 19 22:26 share
drwxr-xr-x. 5 root root 4096 Nov 19 22:24 ssl
[root@racknerd-d42c08 openssl]# cd ../
[root@racknerd-d42c08 local]# cd nginx-1.20.2
#根据错误提示的路径是找不到/usr/local/openssl/.openssl/include/openssl/ssl.h,向上减一级即--with-openssl=/usr/local/
[root@nginx-1.20.2]# ./configure --with-http_ssl_module --with-http_mp4_module --prefix=/usr/local/nginx --with-openssl=/usr/local
#事实这种方法也是行不通的,最终是明白--with-openssl=是指的openssl下载解压后的源码包即可以了
默认没有安装nginx的ssl扩展,使用证书配置,如果是已经安装了,在源码包中执行./configure --with-http_ssl_module --prefix=/usr/local/nginx,然后make会在源码包
中的objs下重新生成nginx程序,不要make install因为会覆盖原有安装,(可以尝试make upgrade)然后将objs下的nginx拷贝取代到对应目录下sbin/nginx;常用配置项如http2如下
./configure --prefix=/usr/local/nginx --with-http_v2_module --with-zlib=/usr/local/zlib-1.2.12 --with-openssl=/usr/local/openssl-3.0.2
--with-perl=/usr/local/perl-5.34.1 --with-http_gzip_static_module --with-http_mp4_module --with-http_flv_module --with-http_gunzip_module
--with-http_ssl_module --with-pcre
监听apache多个端口时apache应在httpd.conf中配置多个Listen分多行,然后在VirturalHost :8081、VirturalHost :8082使用
server {
        listen       80;
        listen       443 ssl http2;//取代 ssl on;指令 listen 443 ssl http2;http2.0协议,在一台服务器中设置指令 http2 将为所有服务器启用它,所以切换时要更改所有
Check ALL listen directives in all server blocks and remove http2 from all of them参考
        server_name mysilverjewels.com www.mysilverjewels.com;
        ssl_certificate     certificate/www.mysilverjewels.com.crt;
        ssl_certificate_key certificate/www.mysilverjewels.com.key;
        location / {
            proxy_pass http://127.0.0.1:8081;
            proxy_set_header Host $http_host;
            proxy_set_header X-Real-IP $remote_addr;
            proxy_set_header X-Fonwarded-For $proxy_add_x_forwarded_for;
            proxy_set_header X-Forwarded-Proto https;//请求为https但是静态资源使用http可以使用$scheme变量替换
}
      if ($scheme = http) {
            return 301 https://$server_name$request_uri;//当http和https写在一块时通过if判断重定向
      }
}nginx配置IP访问时遇到:使用IP可以访问但是css和js部分路径加载不过来,是因为没有配置header头,将当前访问的域带到转发服务器导致的,当使用https之后css\js样式没用用https加载时用使用proxy_set_header X-Forward-Proto $scheme;
server {
        listen       80;
        server_name  plus.jl.jiaxiaoquan.com;
        location / {
        access_log /apps/openresty/nginx/logs/jl.access.log;
        error_log /apps/openresty/nginx/logs/jl.error.log;
        proxy_pass  http://jlweb/;
        proxy_set_header Host $http_host;
        proxy_set_header X-Real-IP $remote_addr;
        proxy_set_header X-Fonwarded-For $proxy_add_x_forwarded_for;
        proxy_set_header X-Forwarded-Proto https;//当使用https之后css\js样式没用用https加载时用
        }
}
nginx代理时遇到问题
1出现
Bad Request
Your browser sent a request that this server could not understand.
Additionally, a 400 Bad Request error was encountered while trying to use an ErrorDocument to handle the request.
这种问题是因为upstream名称中用了带”_”的名称
nginx漏洞修复
user aspire;
worker_processes  16;

error_log  /apps/nginx/logs/error.log;

#pid        logs/nginx.pid;


events {
    worker_connections  1024;
}


http {
    include       /apps/nginx/conf/conf.d/mime.types;
    default_type  application/octet-stream;

    log_format  main  '$remote_addr - $remote_user [$time_local] "$request" '
                      '$status $body_bytes_sent "$http_referer" '
                      '"$http_user_agent" "$http_x_forwarded_for" "$request_time" "$upstream_response_time" "$upstream_addr"';

    access_log  /apps/nginx/logs/access.log  main;

    sendfile        on;
    tcp_nopush     on;
    server_tokens off;//漏洞①
    #keepalive_timeout  0;
    keepalive_timeout  65;
#在location ~ \.php${fastcgi_pass unix:/tmp/php-fpm.sock;fastcgi_hide_header X-Powered-By;},要想完全隐藏nginx需要安装扩展
#漏洞②Http host头部攻击容易造成污染和密码重置风险,缓存污染是指攻击者通过控制一个缓存系统来将一个恶意站点的页面返回给用户。密码重置这种攻击主要是因为发送给用户的内容是可以污染的,也就是说可以间接的劫持邮件发送内容; _ 指当前ip
#1.在Nginx里还可以通过指定一个SERVER_NAME名单,
#2.Apache也可以通过指定一个SERVER_NAME名单并开启UseCanonicalName选项。
#3.tomcat修改server.xml文件中的 Host name为域名
#如:
#      <Host name=" www.example.com "  appBase="webapps"
#           unpackWARs="true" autoDeploy="true"
#            xmlValidation="false" xmlNamespaceAware="false">
#</Host>
#4.或者使用filter拦截非本站允许的host。
    server {
       listen 80 default_server;
       server_name _;
       location / {
           return 204;
       }
    }

    include /apps/nginx/conf/conf.d/*.conf;
}
问题描述:
项目分为java服务端部分和php服务端部分,两者使用一个域名,之前的部署是一个在nginx上进行端口转发分发到java服务的tomcat服务上和apache服务上,
而本次php端打算直接省掉apache直接对接nginx服务器,主要问题是对路径的重写和静态资源的请求上


 1 server {
 2         listen       80;
 3         server_name  xxx.xxxx.com;
 4         access_log   /var/log/nginx/access_xxt.log main;
 5
 6         root         /var/asxpire/www/xxx_web/current;
 7         index        index.php;
 8
 9         location / {
10
11                 location ~ \.(css|js|html|htm|jpg|gif|png|webp|jpeg|ico)$ {
12                              root /var/asxpire/www/xxt_web/current;
13                 }
14
15
16                 if ($uri ~ "^\/(?!(data|public|(.*Tpl)|(.*\.(php|html)))).*$"){
17                         rewrite "^/((\/apps\/[^\/]+){0,1})(.*)$" /index.php?s=$3 last;
18                 }
19                 fastcgi_pass 127.0.0.1:9000;
20                 fastcgi_index index.php;
21                 fastcgi_param SCRIPT_FILENAME
22                 $document_root$fastcgi_script_name;
23                 include fastcgi_params;
24
25                 access_log /apps/nginx/logs/hunanweb.access.log;
26                 error_log /apps/nginx/logs/hunanweb.error.log;
27         }
28
29          location /xxtmanageweb {
30                 access_log /apps/nginx/logs/xxtmanageweb.access.log;
31                 error_log /apps/nginx/logs/xxtmanageweb.error.log;
32                         proxy_pass   http://xxtmanageweb;
33                 }
34
35          location /xxtweb {
36                 access_log /apps/nginx/logs/xxtweb.access.log;
37                 error_log /apps/nginx/logs/xxtweb.error.log;
38                         proxy_pass   http://xxtweb;
39                 }
40                            location /mobileweb {
41                 access_log /apps/nginx/logs/mobileweb.access.log;
42                 error_log /apps/nginx/logs/mobileweb.error.log;
43                         proxy_pass   http://mobileweb;
44                 }
45
46          location /remote-server {
47                 access_log /apps/nginx/logs/remote-server.access.log;
48                 error_log /apps/nginx/logs/remote-server.error.log;
49                         proxy_pass   http://remote-server;
50                 }
51
52          location /typthn {
53                 access_log /apps/nginx/logs/typthn.access.log;
54                 error_log /apps/nginx/logs/typthn.error.log;
55                         proxy_pass   http://typthn;
56                 }
57
58         #location / {
59         #        try_files $uri $uri/ /index.php$args;
60         #}
61
62 }
问题:原先是只针对 location ~ \.php {}以.php为后缀的进行php处理,但是原先重写过的路径就不起作用了(不含.php后缀的),如果要添加模块又比较多;如这种写法location ~ \.php|Home|Index {},后经过与之前其他项目的分发对比是将 / 这个路径作为php处理的依据,即所右没转发走的都走php处理,于是也使用了这个逻辑
这样针对重写的模块就都可以访问了,但是页面加载不出静态资源如images、css、js、html,这是因为对所有没有找到的资源进进入/块行了php-fpm请求,而php-fmp一般只处理php后缀的请求,所以会出现如下的错误
*944717 FastCGI sent in stderr: "Access to the script '/var/asxpire/www/xxt_web/current/public/js/ymPrompt/ymPrompt.min.js' has been denied (see security.limit_extensions)" while reading response header from upstream, client: 192.168.10.11, server: xxx.xxx.com, request: "GET /public/js/ymPrompt/ymPrompt.min.js HTTP/1.1", upstream: "fastcgi://127.0.0.1:9000", host: "xxx.xxx.com", referrer: "http://xxx.xxx.com/"
这个在/etc/php-fpm.d/下的配置中的security.limit_extensions = .php .php3 .php4 .php5 .php7 .js .css中定义,加了扩展实验好用,但据说增加了一定的风险,并且静态资源需要再次调用php-fpm进行处理多了一层请求,想尽可能都有nginx处理,于是针对图片进行重写
location ~ \.(gif|jpg|jpeg|png|css|js|ico)$ {
    root /var/www/xx;
}
确实针对自己的网站好用,但是影响了其他走代理的项目,如location /xxtweb导致该网站的静态资源全部找不到;后通过去官网查询http://nginx.org/en/docs/http/ngx_http_core_module.html#location,文中location blocks can be nested, with some exceptions mentioned below.指明location块可以嵌套,只要嵌套了就不会影响其他模块和代理随将其移动到/块下,取得了想要的结果
使用nginx遇到问题:
25870#0: *521312 open() "/apps/aspire/www/hunan_web/current/index.html" failed (13: Permission denied), client: 192.168.10.131, server: jhx.xxx.com, request: "GET /index.html HTTP/1.1", host: "jhx.xxx.com"
nginx日志错误,是权限的问题,就将/etc/nginx/nginx.conf中的第一行改为root或www或nginx服务用户
[error] 29320#0: *521750 FastCGI sent in stderr: "Primary script unknown" while reading response header from upstream, client: 192.168.10.131, server: jxx.xxx.com, request: "GET /index.php HTTP/1.1", upstream: "fastcgi://127.0.0.1:9000", host: "jxx.xxx.com"
具体表现是:在配置的项目目录中随意创建一个index.html可以访问但是php文件访问不了;并且fastcgi是使用nginx默认配置,排查之后应该在php-fpm上,编辑php-fpm.d/www.conf中的
user = aspire
; RPM: Keep a group allowed to write in log dir.
group = aspire
#将user和group修改成nginx用户 change to Nginx user
[error] 7714#0: *530757 upstream timed out (110: Connection timed out) while reading response header from upstream, client: 192.168.10.131, server: hunanjxy.jiaxiaoquan.com, request: "GET / HTTP/1.1", upstream: "fastcgi://127.0.0.1:9000", host: "xx.jxq.com"
location ~ \.php$ {
            proxy_read_timeout 150;#超时设置
            fastcgi_pass 127.0.0.1:9000;
            fastcgi_index index.php;
            #fastcgi_param  SCRIPT_FILENAME  /scripts$fastcgi_script_name;
            fastcgi_param SCRIPT_FILENAME $document_root$fastcgi_script_name;
            include fastcgi_params;
        }
该错误是由于nginx 代理去获取上游服务器的 返回值超时了。那么这个问题是什么导致的:该请求获取的数据比较多,后端处理该请求花费的时间较长。也可能是代理服务器与上游服务器的网络问题
后经设置proxy_read_timeout发现是程序连接了无效数据库导致超时
tar式安装
-x,从归档中解出文件
-f,使用归档文件或 ARCHIVE 设备
-z,通过 gzip 过滤归档
-v,详细地列出处理的文件
gcc用yum search gcc搜索,yum install gcc安装
需安装pecl步骤configure --prefix=/dta make make install
安装后;再安装php,我的问题出现了
第一次出现了nginx403forbidden;经过查找原来是网站文件没有读、执行权限;
第二次出现了502badgateway和404经过查找原因是路径问题;即你在Server配置中root /data/www/,而在访问时只要输入ip就直接定位到index.php,而不用www/index.php
第三次又出现了502badgateway,经测试能访问.html格式文件但不支持php,后上网搜素查到是php-fpm的问题,删掉原来的php重新撞了一下在./configre时多添了 --enable-fpm,重装之后在php目录下有了sbin目录里边有个php-fpm,先修改php-fpm配置php-fmp.conf,然后启动/usr/local/php/sbin/php-fpm
location / {
root /data/www;
}
location /images/ {
root /data;
}
该location块指定/前缀与来自请求的URI比较,对于匹配到的请求,URI将被添加到root指令中指定的路径,即/data/www,如果有多个匹配的location块前缀,nginx将选择一个最长前缀的块,location块上上面是长度为1的最短前缀,所以如果所有的其它块都匹配失败,这个块才将会被用到,如果请求是以/images/开头的将会匹配到下边的location虽然location /也能匹配到,但它不是最短前缀
server {
    listen 8080;
    root /data/up1;

    location / {
    }
}
映射所有的请求到本地文件系统的/data/up1目录
location ~ \.(gif|jpg|png)$ {
    root /data/images;
}
这里的参数是正则表达式匹配所有以.gif,.jpg,.png结尾的URI,一个正则表达式前边应使用~
当nginx选择一个location块去服务一个请求的时候会首先检查location指定的具体前缀(最长前缀原则),ranhou
是检查正则表达式如果匹配到nginx将使用该location
启动遇到问题
配置使用的默认值
fastcgi_pass   127.0.0.1:9000;而自己启动php-fpm启动端口不是9000造成的,将fastcgi_pass配置改成unix:/var/run/php-fpm/php-fpm.sock;或者在php-fpm的conf中配置监听端口
Nginx和PHP-FPM的进程间通信有两种方式,一种是TCP,一种是UNIX Domain Socket.
其中TCP是IP加端口,可以跨服务器.而UNIX Domain Socket不经过网络,只能用于Nginx跟PHP-FPM都在同一服务器的场景.用哪种取决于你的PHP-FPM配置:
方式1:
php-fpm.conf: listen = 127.0.0.1:9000
nginx.conf: fastcgi_pass 127.0.0.1:9000;
方式2:
php-fpm.conf: listen = /tmp/php-fpm.sock
nginx.conf: fastcgi_pass unix:/tmp/php-fpm.sock;
其中php-fpm.sock是一个文件,由php-fpm生成,类型是srw-rw----.
产生下载的问题:当访问php页面时浏览器提示下载,原因是nginx没有开启php-fpm或在nginx配置中没有开启location ~ \.php$配置节点
nginx需要把php请求转发给fastcgi处理
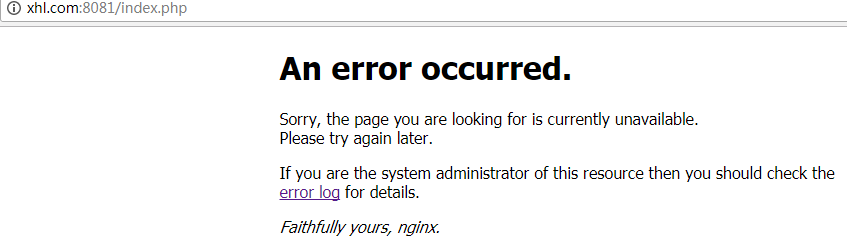
2017/11/08 05:48:47 [error] 10210#0: *72 connect() failed (111: Connection refused) while connecting to upstream, client: 106.120.105.61, server: xhl.com, request: "GET /index.php HTTP/1.1", upstream: "fastcgi://127.0.0.1:9000", host: "xhl.com:8081"
解决:先将权限问题排除,给网站根目录赋予最高权限777,还有错误
页面提示File not found.文件权限也会导致该问题,为other用户赋予x权限
       location ~ \.php$ {
            root           html;#有可能导致File not found
            #root           /home/www/wp;
            #fastcgi_pass   127.0.0.1:9000;
            fastcgi_pass   unix:/var/run/php-fpm/php-fpm.sock;
            fastcgi_index  index.php;
            #fastcgi_param  SCRIPT_FILENAME  /scripts$fastcgi_script_name;#有可能导致File not found
            fastcgi_param  SCRIPT_FILENAME  $document_root$fastcgi_script_name;
            include        fastcgi_params;
        }
#运行用户
user nobody;
#启动进程,通常设置成和cpu的数量相等
worker_processes  1;

#全局错误日志及PID文件
#error_log  logs/error.log;
#error_log  logs/error.log  notice;
#error_log  logs/error.log  info;

#pid        logs/nginx.pid;

#工作模式及连接数上限
events {
    #epoll是多路复用IO(I/O Multiplexing)中的一种方式,
    #仅用于linux2.6以上内核,可以大大提高nginx的性能
    use   epoll;

    #单个后台worker process进程的最大并发链接数
    worker_connections  1024;

    # 并发总数是 worker_processes 和 worker_connections 的乘积
    # 即 max_clients = worker_processes * worker_connections
    # 在设置了反向代理的情况下,max_clients = worker_processes * worker_connections / 4  为什么
    # 为什么上面反向代理要除以4,应该说是一个经验值
    # 根据以上条件,正常情况下的Nginx Server可以应付的最大连接数为:4 * 8000 = 32000
    # worker_connections 值的设置跟物理内存大小有关
    # 因为并发受IO约束,max_clients的值须小于系统可以打开的最大文件数
    # 而系统可以打开的最大文件数和内存大小成正比,一般1GB内存的机器上可以打开的文件数大约是10万左右
    # 我们来看看360M内存的VPS可以打开的文件句柄数是多少:
    # $ cat /proc/sys/fs/file-max
    # 输出 34336
    # 32000 < 34336,即并发连接总数小于系统可以打开的文件句柄总数,这样就在操作系统可以承受的范围之内
    # 所以,worker_connections 的值需根据 worker_processes 进程数目和系统可以打开的最大文件总数进行适当地进行设置
    # 使得并发总数小于操作系统可以打开的最大文件数目
    # 其实质也就是根据主机的物理CPU和内存进行配置
    # 当然,理论上的并发总数可能会和实际有所偏差,因为主机还有其他的工作进程需要消耗系统资源。
    # ulimit -SHn 65535

}


http {
    #设定mime类型,类型由mime.type文件定义
    include    mime.types;
    default_type  application/octet-stream;
    #设定日志格式
    log_format  main  '$remote_addr - $remote_user [$time_local] "$request" '
                      '$status $body_bytes_sent "$http_referer" '
                      '"$http_user_agent" "$http_x_forwarded_for"';

    access_log  logs/access.log  main;

    #sendfile 指令指定 nginx 是否调用 sendfile 函数(zero copy 方式)来输出文件,
    #对于普通应用,必须设为 on,
    #如果用来进行下载等应用磁盘IO重负载应用,可设置为 off,
    #以平衡磁盘与网络I/O处理速度,降低系统的uptime.
    sendfile     on;
    #tcp_nopush     on;

    #连接超时时间
    #keepalive_timeout  0;
    keepalive_timeout  65;
    tcp_nodelay     on;

    #开启gzip压缩
    gzip  on;
    gzip_disable "MSIE [1-6].";

    #设定请求缓冲
    client_header_buffer_size    128k;
    large_client_header_buffers  4 128k;


    #设定虚拟主机配置
    server {
        #侦听80端口
        listen    80;
        #定义使用 www.nginx.cn访问
        server_name  www.nginx.cn;

        #定义服务器的默认网站根目录位置
        root html;

        #设定本虚拟主机的访问日志
        access_log  logs/nginx.access.log  main;

        #默认请求
        location / {

            #定义首页索引文件的名称
            index index.php index.html index.htm;

        }

        # 定义错误提示页面
        error_page   500 502 503 504 /50x.html;
        location = /50x.html {
        }

        #静态文件,nginx自己处理
        location ~ ^/(images|javascript|js|css|flash|media|static)/ {

            #过期30天,静态文件不怎么更新,过期可以设大一点,
            #如果频繁更新,则可以设置得小一点。
            expires 30d;
        }

        #PHP 脚本请求全部转发到 FastCGI处理. 使用FastCGI默认配置.
        location ~ .php$ {
            fastcgi_pass 127.0.0.1:9000;
            fastcgi_index index.php;
            fastcgi_param  SCRIPT_FILENAME  $document_root$fastcgi_script_name;
            include fastcgi_params;
        }

        #禁止访问 .htxxx 文件
            location ~ /.ht {
            deny all;
        }

    }
}
自己动手搭建nginx负载均衡服务器感悟
负载均衡的机制round-robin(循环,请求被循环分发到各服务器)默认、least-connected(最少连接,下一个请求被分配给当前活动连接最少的服务器)、ip-hash(使用一个hash函数决定哪台服务器去接受请求,基于客户端IP)
自己搭建情况,由于80端口被apache占用nginx运行在8081上,按照视频配置成
 http {
      upstream xhl
      {
         #  server 142.4.105.129:8081;primary server
            server 142.4.105.129:8082;#department server
            server 142.4.105.129:8083;#department server
      }
      include       mime.types;
   。。。
原来的理解是错的把自己的主服务器也配置到了upstream中因此造成链接过多内容不可达的情况
正确的配置应该是通过访问8081,而把请求分发到其他两台服务器,8081相当是分发服务器
    server {
        listen       8081;
        server_name  xhl.com;

        #charset koi8-r;

        #access_log  logs/host.access.log  main;
        access_log  logs/host.leeleeshow.access.log  main;

        root   /home/www/wp;

        location / {
            proxy_set_header Host $host;
            proxy_set_header X-Real-IP $remote_addr;
            proxy_pass http://xhl;
            index  index.html index.htm index.php;
        }

        #error_page  404              /404.html;
这是分发服务器的配置
=================================
 server {
             listen 8082;
             server_name _;
             root /home/www/shop/web;
             location / {
                add_header REAL_SERVER 8082;
                index index.html index.php;
             }
             location ~ \.php$ {
                 add_header REAL_SERVER 8082;
                 fastcgi_pass  unix:/var/run/php-fpm/php-fpm.sock;
                 fastcgi_index index.php;
                 fastcgi_param SCRIPT_FILENAME $document_root$fastcgi_script_name;
                 include fastcgi_params;
             }


   }
    server {
             listen 8083;
             server_name _;
             root /home/www/shop/web;
             location / {
                 add_header REAL_SERVER 8083;
                 index index.html index.php;
             }
             location ~ \.php$ {
                 add_header REAL_SERVER 8083;
                 fastcgi_pass  unix:/var/run/php-fpm/php-fpm.sock;
                 fastcgi_index index.php;
                 fastcgi_param SCRIPT_FILENAME $document_root$fastcgi_script_name;
                 include fastcgi_params;
             }


    }
所有的请求都被代理到服务器组里xhl,nginx使用hTTp负载均衡去分发请求
upstream myapp1 {
        least_conn;
        server srv1.example.com;
        server srv2.example.com;
        server srv3.example.com;
    }
这是最少请求配置least_conn;
session持久化,请注意到循环和最少请求配置负载均衡,每个后续的客户端请求可能被分配到不同的服务器上,不能保证
相同的客户端总是指向相同的服务器,如果需要客户端与一个特殊的应用服务器绑定,换句话说,使客户端的session黏贴或永久的选择一个特殊的服务器,那么使用ip-hash负载均衡机制可以实现
当使用ip-hash时客户端的ip被使用作为一个hash key去决定服务器群里哪台服务器器将被选中为当前的客户请求服务,确保相同的客户请求总是直接防卫相同的服务器,除非服务不可用
upstream myapp1 {
    ip_hash;
    server srv1.example.com;
    server srv2.example.com;
    server srv3.example.com;
}
按权重负载,上边的例子中服务器权重不配置的话意味着所有的服务器都是相同的权重
round-robin也或多或少意味着相同权重分配
 upstream myapp1 {
        server srv1.example.com weight=3;
        server srv2.example.com;
        server srv3.example.com;
    }
如上的配置每有5个新请求,3个将被分配给srv1,一个分给srv2,一个分给srv3
nginx配置日志切割,使用logrotate;nginx.pid默认在nginx安装目录下的logs下,语法检查logrotate -vf /etc/logrotate.d/nginx,配置文件中含注释后内容过多导致报错Allocating hash table for state file, size 15360 B;logrotate uses crontab to work. It's scheduled work,If you need to test your config you can also execute logrotate on your own with the command:
logrotate /etc/logrotate.d/nginx参考https://www.redhat.com/sysadmin/setting-logrotate和https://www.cnblogs.com/xinsheng-0415/articles/16525299.html,#yum install logrotate -y#vim /etc/logrotate.d./nginx/usr/local/nginx/logs/*.log #此处为nginx存储日志的地方; {
    daily                    #指定转储周期为每天
    rotate 30                #转储次数,超过将会删除最老的那一个
    missingok                #如果日志文件丢失,不要显示错误
    compress                 #通过gzip 压缩转储以后的日志
    delaycompress            #当前转储的日志文件到下一次转储时才压缩
    notifempty               #当日志文件为空时,不进行轮转
    postrotate               #执行的指令
      if [ -f /usr/local/nginx/logs/nginx.pid ]; then
          kill -USR1 `cat /usr/local/nginx/logs/nginx.pid`
      fi
endscript                   #PID路径根据实际路径填写;
}
#crontab –e 0 0 * * * /usr/sbin/logrotate -vf /etc/logrotate.d/nginx #每天凌晨00:00自动执行日志切割任务;经查看不需要手动添加该任务,因为按照logrotate时会自动在/etc/cron.daily
下植入logrotate脚本用于每日的任务,/etc/cron.{daily,weekly,monthly} 目录中的脚本在当前的 Linux 中是被 anacron 调用的,不再依靠 cron 服务。不过,anacron 不用设置多余的配置,
我们只需要把需要定时执行的脚本放入 /etc/cron.{daily,weekly,monthly} 目录中,就会每天、每周或每月执行,而且也不再需要启动 anacron 服务了。如果需要进行修改,则只需修改
 /etc/anacrontab 配置文件即可。系统预设了这四个目录,用来放置每小时、每天、每周、每月要执行的可执行脚本文件。注意:这四个目录只是预设,并没有完全启用,并不是直接将可执行脚本文件放入其中就可以
,还需要run-parts命令的配合,相关可查看cat /etc/anacrontab,
参考https://www.cyberciti.biz/faq/linux-when-does-cron-daily-weekly-monthly-run/#:~:text=10PM)%20hours%20only.-,cron.,a%20day%20at%203%3A05AM.
现实中也可能遇到因为我的系统执行/etc/cron.daily目录下的脚本不是我想滚动日志的时间,所以我把/etc/cron.daily/logrotate拷了出来,改了一下logrotate配置文件的路径,
然后在crontab里加上一条指定时间执行这个脚本的记录,自定义周期滚动日志就可以了,原理参考:https://cloud.tencent.com/developer/article/1363352
nginx安装pagespeed扩展,安装文档:https://www.modpagespeed.com/doc/build_ngx_pagespeed_from_source;配置文档:https://www.modpagespeed.com/doc/;内容优化参考:https://developers.google.com/speed/docs/insights/MinifyResources;pagespeed支持External Caches外部缓存memcached和redis;缓存清理gui,执行时bash <(curl -f -L -sS https://ngxpagespeed.com/install)提示[curl: (60) The certificate issuer's certificate has expired]添加参数-k,然后又提示【curl: (35) Peer reports incompatible or unsupported protocol version.】,使用yum update -y nss curl libcur升级解决
 bash <(curl -f -L -sS https://ngxpagespeed.com/install)
./configure --prefix=/usr/local/nginx --with-http_v2_module --with-zlib=/usr/local/zlib-1.2.12 --with-openssl=/usr/local/openssl-3.0.2
--with-perl=/usr/local/perl-5.34.1 --with-http_gzip_static_module --with-http_mp4_module --with-http_flv_module
--with-http_gunzip_module --with-http_ssl_module --with-pcre  --add-module=/root/incubator-pagespeed-ngx-latest-stable
Tuning NGINX for Performancen性能调优;参考:https://www.cloudbees.com/blog/tuning-nginx
NGINX has one master process and one or more worker processes. If caching is enabled, the cache loader and cache manager processes also run at startup.
The main purpose of the master process is to read and evaluate configuration files, as well as maintain the worker processes.主进程的作用是读取和评估配置文件,以及维护工作进程
The worker processes do the actual processing of requests. NGINX relies on OS-dependent mechanisms to efficiently distribute requests among worker processes. The number of worker processes is defined by the worker_processes directive in the nginx.conf configuration file and can either be set to a fixed number or configured to adjust automatically to the number of available CPU cores.工作进程做实际的请求处理,nginx依靠操作系统在工作进程之间有效的分发请求,工作进程的数量被nginx.conf配置文件中的worker_processes定义,可以设置成固定数量也可以自动调整成可用的cpu cores数量
1、使用缓存会有显而易见的提升https://www.nginx.com/blog/nginx-caching-guide/
nginx环境使用的直接使用fastcg_pass而不是proxy_pass,所以根据nginx cache的文档也不知道怎么配置proxy_pass缓存,通过文档查看对其的理解是fastcgi_pass和proxy_pass都是作为反向代理使用的,但fastcgi使用的范围更具体是针对php-fpm而用的,至于缓存两者各有对应的缓存指令fastcgi_cache和proxy_cache,如【If you use proxy_pass to access backend you must use proxy_cache. The same for fastcgi_pass/fastcgi_cache.】fastcgi指定相关解释http://nginx.org/en/docs/http/ngx_http_fastcgi_module.html
user  www;
worker_processes  auto;

#error_log  logs/error.log;
#error_log  logs/error.log  notice;
#error_log  logs/error.log  info;

#pid        logs/nginx.pid;

worker_rlimit_nofile 65535;
events {
    worker_connections  2048;
}

http {
    include       mime.types;
    default_type  application/octet-stream;

    #log_format  main  '$remote_addr - $remote_user [$time_local] "$request" '
    #                  '$status $body_bytes_sent "$http_referer" '
    #                  '"$http_user_agent" "$http_x_forwarded_for"';

    #access_log  logs/access.log  main;

    sendfile        on;
    #tcp_nopush     on;

    #keepalive_timeout  0;
    keepalive_timeout  65;
    server_tokens off;

    open_file_cache max=1024 inactive=10s;
    open_file_cache_valid 120s;

    gzip  on;
    #proxy_cache_path /var/cache/nginx/proxy levels=1:2 keys_zone=mycache:10m;
   #设置缓存配置proxy_cache同fastcgi_cache是同级关系,应用场景区别
    fastcgi_cache_path /var/cache/nginx/fastcgi levels=1:2 keys_zone=mycache:10m inactive=60m;
    fastcgi_cache_key "$scheme$request_method$host$request_uri";
    fastcgi_cache_use_stale error timeout invalid_header http_500;
    fastcgi_ignore_headers Cache-Control Expires Set-Cookie;
upstream php-fpm {
server unix:/tmp/php-fpm.sock;#unix形式多个php-fmp负载均衡
server unix:/tmp/php-fpm-2.sock;
}
    pagespeed On;
    pagespeed FileCachePath "/var/cache/ngx_pagespeed/";
    pagespeed EnableFilters combine_heads,combine_css,defer_javascript,combine_javascript,collapse_whitespace,lazyload_images,canonicalize_javascript_libraries;
    pagespeed UseExperimentalJsMinifier on;

    server {
        listen       80;
        listen       443 ssl http2;
        server_name www.cm.com cm.com;

        ssl_certificate     certificate/7581081_www.crystalinmybox.com.pem;
        ssl_certificate_key certificate/7581081_www.crystalinmybox.com.key;
        ssl_session_cache shared:SSL:10m;
        ssl_session_timeout 10m;

        root   /var/www/crystalinmybox;

        location / {
            index  index.html index.htm index.php;
        }

        rewrite ^/c/(.*)+-(\d+)(?:_(\d+))?$ /index.php?main_page=index&cPath=$2&page=$3&$query_string last;
        rewrite ^/p-(.*)+-(\d+)$ /index.php?main_page=product_info&products_id=$2&$query_string last;
        rewrite ^(.*).html$      /index.php?main_page=$1&$query_string last;

        location ~ \.(css|js|html|htm|jpg|gif|png|webp|jpeg|ico)$ {
            expires 30d;
            root /var/www/crystalinmybox;
        }

        set $no_cache 0;#设置初始化开启缓存变量,对应多种状态如hit,miss

        if ($request_uri ~ ^/mybackend) {
            set $no_cache 1;#不缓存对应x-cache-status: BYPASS
        }

        location ~ \.php$ {
            proxy_read_timeout 150;#超时设置
            #fastcgi_pass 127.0.0.1:9000;
            fastcgi_pass unix:/tmp/php-fpm.sock;
fastcgi_pass php-fpm;#使用负载均衡
            fastcgi_index index.php;
            #fastcgi_param  SCRIPT_FILENAME  /scripts$fastcgi_script_name;
            fastcgi_param SCRIPT_FILENAME $document_root$fastcgi_script_name;
            include fastcgi_params;
            fastcgi_cache_bypass $no_cache;#定义不从缓存中获取响应
            fastcgi_no_cache $no_cache;#是否对其进行缓存
            fastcgi_cache mycache;
 fastcgi_cache_valid  24h;#貌似没有这个不起作用,在cache下没有内容,必须与fastcgi_ignore_headers Cache-Control Expires Set-Cookie;可以考虑是这两个的问题
            add_header X-Cache-Status $upstream_cache_status;头部标识缓存是否命中,hit,bypas,miss,状态参考
        }
location ~ /purge(/.*) {
fastcgi_cache_purge mycache "$scheme$request_method$host$1";#实际并不支持,需要单独安装purge扩展,通过此编译./configure --add-module=../ngx_cache_purge,使用cleancahce.php统一清理
}
if ($scheme = http) {
            return 301 https://$server_name$request_uri;
        }
    }

    server {
        listen       80;
        listen       443 ssl http2;
        server_name  m.cm.com;

        ssl_certificate     certificate/m.crystalinmybox.com.crt;
        ssl_certificate_key certificate/m.crystalinmybox.com.key;
        ssl_session_cache shared:SSL:10m;
        ssl_session_timeout 10m;

        root   /var/www/crystalinmybox/mobile;

        location / {
            index  index.html index.htm index.php;
        }

        location /mobile/images/ {
            expires 30d;
            rewrite ^/mobile/images/(.*)$      /images/$1 last;
        }

        location /favicon {
            expires 30d;
            root /var/www/crystalinmybox;
        }

        location /images {
            expires 30d;
            root /var/www/crystalinmybox;
        }

        rewrite ^/c/(.*)+-(\d+)(?:_(\d+))?$ /index.php?main_page=products_all&cPath=$2&page=$3&$query_string last;
        rewrite ^/p-(.*)+-(\d+)$ /index.php?main_page=product_info&products_id=$2&$query_string last;
        rewrite ^/(.*).html$      /index.php?main_page=$1&$query_string last;

        location ~ \.php$ {
            proxy_read_timeout 150;#超时设置
            #fastcgi_pass 127.0.0.1:9000;
            fastcgi_pass unix:/tmp/php-fpm.sock;
            fastcgi_index index.php;
            #fastcgi_param  SCRIPT_FILENAME  /scripts$fastcgi_script_name;
            fastcgi_param SCRIPT_FILENAME $document_root$fastcgi_script_name;
            include fastcgi_params;
            fastcgi_cache mycache;
fastcgi_cache_valid  24h;
            add_header X-Cache-Status $upstream_cache_status;
        }

        if ($scheme = http) {
            return 301 https://$server_name$request_uri;
        }
    }

}
2、设置参数
查看当前当前用户的资源限制;ulimit -n -s;该参数与nginx中的worker_rlimit_nofile(代表worker进程的最大打开文件数限制)的配置相关,修改参数vim /etc/security/limits.conf ,让其生效sysctl -p
www       soft    nofile  10000  #nofile表示单个进程可以打开的最大文件句柄数,nproc表示单个用户创建的进程数
www       hard    nofile  30000
worker_rlimit_nofile = worker_connections * 2 file descriptors;Each worker connection open 2 file descriptors (1 for upstream, 1 for downstream)
ab性能指标解释参考:https://cloud.tencent.com/developer/article/1828802
看到关于日志按天自动切割脚本中使用kill -USR1的理解,参考https://www.nginx.com/resources/wiki/start/topics/tutorials/commandline/
Here’s how to send the QUIT (Graceful Shutdown) signal to the NGINX master process:
kill -QUIT $( cat /usr/local/nginx/logs/nginx.pid )
The master process can handle the following signals:
| TERM, INT | Quick shutdown |
| QUIT | Graceful shutdown |
| KILL | Halts a stubborn process |
| HUP |
Configuration reload Start the new worker processes with a new configuration Gracefully shutdown the old worker processes |
| USR1 | Reopen the log files |
| USR2 | Upgrade Executable on the fly |
| WINCH | Gracefully shutdown the worker processes |
nginx知识
nginx启动过程中,master进程会监听配置文件中指定的各个端口,然后master进程就会调用fork()方法创建各个子进程,根据进程的工作原理,子进程是会继承父进程的全部内存数据以及监听的端口的,也就是说worker进程在启动之后也是会监听各个端口的;每个worker进程被创建的时候,都会调用ngx_worker_process_init()方法初始化当前worker进程,这个过程中有一个非常重要的步骤,即每个worker进程都会调用epoll_create()方法为自己创建一个独有的epoll句柄。对于每一个需要监听的端口,都有一个文件描述符与之对应,而worker进程只有将该文件描述符通过epoll_ctl()方法添加到当前进程的epoll句柄中,并且监听accept事件,此时才会被客户端的连接建立事件触发,从而处理该事件。参考
nginx在启用各个worker进程的时候,默认情况下,worker进程是会继承master进程所监听的socket句柄的,
    // 这就导致一个问题,就是当某个端口有客户端事件时,就会把监听该端口的进程都给唤醒,
    // 但是只有一个worker进程能够成功处理该事件,而其他的进程被唤醒之后发现事件已经过期,
    // 因而会继续进入等待状态,这种现象称为"惊群"现象。
 浙公网安备 33010602011771号