Mybatis源码学习(二)简单Demo的运行原理
0 回顾
上一节,我们写了一个简单Demo,并看到了它的运行结果,这一节,我们分析一下Mybatis执行sql的原理。
public class MybatisMain {
  public static void main(String[] args) throws IOException
  {
    String resource = "mybatis-config.xml";
    InputStream inputStream = Resources.getResourceAsStream(resource);
    SqlSessionFactory sqlSessionFactory = new SqlSessionFactoryBuilder().build(inputStream);
    SqlSession sqlSession = sqlSessionFactory.openSession();
    Blog blog = sqlSession.selectOne("org.mybatis.example.BlogMapper.selectBlog", 101);
    System.out.println(blog.getContext());
  }
}
1 解析配置文件
InputStream inputStream = Resources.getResourceAsStream(resource);
这一行代码,解析mybatis-config.xml文件,得到一个输入流。我们把xml文件也贴出来
<configuration>
    <properties resource="jdbc.properties"/>
    <environments default="development">
        <environment id="development">
            <transactionManager type="JDBC"/>
            <dataSource type="POOLED">
                <property name="driver" value="${driver}"/>
                <property name="url" value="${url}"/>
                <property name="username" value="${username}"/>
                <property name="password" value="${password}"/>
            </dataSource>
        </environment>
    </environments>
    <mappers>
        <mapper resource="mapper/BlogMapper.xml"/>
    </mappers>
</configuration>
这个xml中有3个配置:jdbc.properties,environments,mappers
2 SqlSessionFactory
SqlSessionFactory sqlSessionFactory = new SqlSessionFactoryBuilder().build(inputStream);
这里,得到一个SqlSessionFactory对象,执行完这行代码,实现了对上述xml文件的解析,把配置都保存在该对象的成员变量configuration中。

这些配置信息包括:数据库连接信息、所有Mapper
3 SqlSession
SqlSession sqlSession = sqlSessionFactory.openSession();
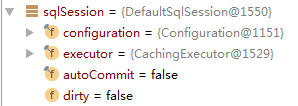
该行代码返回SqlSession对象,该对象中包含一个executor变量,默认为CachingExecutor对象(一级缓存)。这个executor对象是实际查询时的执行器。
  public SqlSession openSession() {
    return openSessionFromDataSource(configuration.getDefaultExecutorType(), null, false);
  }
这里可以看出来,mybatis默认是手动提交事务的(详情见附录2)。JDBC默认是自动提交,spring整合mybatis后默认是自动提交。
这里调用了openSessionFromDataSource方法
  private SqlSession openSessionFromDataSource(ExecutorType execType, TransactionIsolationLevel level, boolean autoCommit) {
    Transaction tx = null;
    try {
      final Environment environment = configuration.getEnvironment();
      final TransactionFactory transactionFactory = getTransactionFactoryFromEnvironment(environment);
      tx = transactionFactory.newTransaction(environment.getDataSource(), level, autoCommit);
      final Executor executor = configuration.newExecutor(tx, execType);//public enum ExecutorType {SIMPLE, REUSE, BATCH},默认为SIMPLE.为什么默认为SIMPLE?Configuration对象的defaultExecutorType属性默认值就是SIMPLE,除非对其进行了显式设置
      return new DefaultSqlSession(configuration, executor, autoCommit);
    } catch (Exception e) {
      closeTransaction(tx); // may have fetched a connection so lets call close()
      throw ExceptionFactory.wrapException("Error opening session.  Cause: " + e, e);
    } finally {
      ErrorContext.instance().reset();
    }
  }
上面代码创建了使用了很多对象的引用,比如Environment,TransactionFactory,DataSourceFactory等,他们是如何实例化的,以及他们的具体类型为什么是JdbcTransactionFactory,PooledDataSourceFactory?为什么默认开启一级缓存?感兴趣的话请看最下面的附录。
创建Executor,默认创建的是SimpleExecutor,如果开启了一级缓存,则使用CachingExecutor进行了封装。
  public Executor newExecutor(Transaction transaction, ExecutorType executorType) {
    executorType = executorType == null ? defaultExecutorType : executorType;
    executorType = executorType == null ? ExecutorType.SIMPLE : executorType;
    Executor executor;
    if (ExecutorType.BATCH == executorType) {
      executor = new BatchExecutor(this, transaction);
    } else if (ExecutorType.REUSE == executorType) {
      executor = new ReuseExecutor(this, transaction);
    } else {
      executor = new SimpleExecutor(this, transaction);
    }
    if (cacheEnabled) {
      executor = new CachingExecutor(executor);
    }
    executor = (Executor) interceptorChain.pluginAll(executor);
    return executor;
  }
最终返回一个包含CachingExecutor对象的SqlSession。
4 执行查询
Blog blog = sqlSession.selectOne("org.mybatis.example.BlogMapper.selectBlog", 101);
执行selectOne方法
  public <T> T selectOne(String statement, Object parameter) {
    // Popular vote was to return null on 0 results and throw exception on too many.
    List<T> list = this.selectList(statement, parameter);
    if (list.size() == 1) {
      return list.get(0);
    } else if (list.size() > 1) {
      throw new TooManyResultsException("Expected one result (or null) to be returned by selectOne(), but found: " + list.size());
    } else {
      return null;
    }
  }
执行selectList方法
  private <E> List<E> selectList(String statement, Object parameter, RowBounds rowBounds, ResultHandler handler) {
    try {
      MappedStatement ms = configuration.getMappedStatement(statement);
      return executor.query(ms, wrapCollection(parameter), rowBounds, handler);
    } catch (Exception e) {
      throw ExceptionFactory.wrapException("Error querying database.  Cause: " + e, e);
    } finally {
      ErrorContext.instance().reset();
    }
  }
调用CachingExecutor的query方法,判断缓存中是否有记录,如果有,取缓存中的记录,如果没有,则调用SimpleExecutor中的query查询数据库
  public <E> List<E> query(MappedStatement ms, Object parameterObject, RowBounds rowBounds, ResultHandler resultHandler, CacheKey key, BoundSql boundSql)
      throws SQLException {
    Cache cache = ms.getCache();
    if (cache != null) {
      flushCacheIfRequired(ms);
      if (ms.isUseCache() && resultHandler == null) {
        ensureNoOutParams(ms, boundSql);
        @SuppressWarnings("unchecked")
        List<E> list = (List<E>) tcm.getObject(cache, key);
        if (list == null) {
          list = delegate.query(ms, parameterObject, rowBounds, resultHandler, key, boundSql);
          tcm.putObject(cache, key, list); // issue #578 and #116
        }
        return list;
      }
    }
    return delegate.query(ms, parameterObject, rowBounds, resultHandler, key, boundSql);
  }
然后,执行SimpleExecutor的doQuery方法
  public <E> List<E> doQuery(MappedStatement ms, Object parameter, RowBounds rowBounds, ResultHandler resultHandler, BoundSql boundSql) throws SQLException {
    Statement stmt = null;
    try {
      Configuration configuration = ms.getConfiguration();
      StatementHandler handler = configuration.newStatementHandler(wrapper, ms, parameter, rowBounds, resultHandler, boundSql);
      stmt = prepareStatement(handler, ms.getStatementLog());
      return handler.query(stmt, resultHandler);
    } finally {
      closeStatement(stmt);
    }
  }
这个方法就是我们使用JDBC查询数据库的代码。
我们再回到刚开始的这行代码
Blog blog = sqlSession.selectOne("org.mybatis.example.BlogMapper.selectBlog", 101);
从上面分析来看,我们执行这行代码之后,最终返回给我们的是一个Blog对象,包含了数据库记录。
这就是我们执行mybatis的过程。
附录1 mybatis-config.xml的解析过程
mybatis-config.xml文件是mybatis的主要配置文件,里面配置了Enviroment列表,每个Environment中transactionManager的类型、dataSource的类型等重要配置。以及所有的mappers
<?xml version="1.0" encoding="UTF-8" ?>
<!DOCTYPE configuration
  PUBLIC "-//mybatis.org//DTD Config 3.0//EN"
  "http://mybatis.org/dtd/mybatis-3-config.dtd">
<configuration>
  <properties resource="jdbc.properties"/>
  <environments default="development">
    <environment id="development">
      <transactionManager type="JDBC"/>
      <dataSource type="POOLED">
        <property name="driver" value="${driver}"/>
        <property name="url" value="${url}"/>
        <property name="username" value="${username}"/>
        <property name="password" value="${password}"/>
      </dataSource>
    </environment>
  </environments>
  <mappers>
    <mapper resource="mapper/UserMapper.xml"/>
  </mappers>
</configuration>
在上面main函数中,
SqlSessionFactory sqlSessionFactory = new SqlSessionFactoryBuilder().build(inputStream);
这行代码用于实例化SqlSessionFactory,
然后调用了
public SqlSessionFactory build(InputStream inputStream) {
    return build(inputStream, null, null);
  }
然后
  public SqlSessionFactory build(InputStream inputStream, String environment, Properties properties) {
    try {
      XMLConfigBuilder parser = new XMLConfigBuilder(inputStream, environment, properties);
      return build(parser.parse());
    } catch (Exception e) {
      throw ExceptionFactory.wrapException("Error building SqlSession.", e);
    } finally {
      ErrorContext.instance().reset();
      try {
        inputStream.close();
      } catch (IOException e) {
        // Intentionally ignore. Prefer previous error.
      }
    }
  }
上面代码首先创建一个XMLConfigBuilder实例,在其构造方法中创建一个Configuration实例。
  private XMLConfigBuilder(XPathParser parser, String environment, Properties props) {
    super(new Configuration());
    ErrorContext.instance().resource("SQL Mapper Configuration");
    this.configuration.setVariables(props);
    this.parsed = false;
    this.environment = environment;
    this.parser = parser;
  }
其中Configuration实例中有一些比较重要的东西,比如typeAliasRegistry对象,其中包含了72种类型对应的默认具体类。比如:
    typeAliasRegistry.registerAlias("JDBC", JdbcTransactionFactory.class);
    typeAliasRegistry.registerAlias("MANAGED", ManagedTransactionFactory.class);

    typeAliasRegistry.registerAlias("JNDI", JndiDataSourceFactory.class);
    typeAliasRegistry.registerAlias("POOLED", PooledDataSourceFactory.class);
    typeAliasRegistry.registerAlias("UNPOOLED", UnpooledDataSourceFactory.class);
这些配置对后续的对象实例化非常有用,决定了这些对象的具体实现类是什么(比如TransactionFactory的默认实现类是JdbcTransactionFactory)
然后,我们回到build方法,我们看一下其中调用的parse方法
  public Configuration parse() {
    parseConfiguration(parser.evalNode("/configuration"));
    return configuration;
  }
然后
  private void parseConfiguration(XNode root) {
    try {
      // issue #117 read properties first
      propertiesElement(root.evalNode("properties"));
      Properties settings = settingsAsProperties(root.evalNode("settings"));
      loadCustomVfs(settings);
      loadCustomLogImpl(settings);
      typeAliasesElement(root.evalNode("typeAliases"));
      pluginElement(root.evalNode("plugins"));
      objectFactoryElement(root.evalNode("objectFactory"));
      objectWrapperFactoryElement(root.evalNode("objectWrapperFactory"));
      reflectorFactoryElement(root.evalNode("reflectorFactory"));
      settingsElement(settings);
      // read it after objectFactory and objectWrapperFactory issue #631
      environmentsElement(root.evalNode("environments"));
      databaseIdProviderElement(root.evalNode("databaseIdProvider"));
      typeHandlerElement(root.evalNode("typeHandlers"));
      mapperElement(root.evalNode("mappers"));
    } catch (Exception e) {
      throw new BuilderException("Error parsing SQL Mapper Configuration. Cause: " + e, e);
    }
  }
我们主要看一下标红的这一行
下面代码进行了删减,只看重要部分
  private void environmentsElement(XNode context) throws Exception {
          TransactionFactory txFactory = transactionManagerElement(child.evalNode("transactionManager"));
          DataSourceFactory dsFactory = dataSourceElement(child.evalNode("dataSource"));
          DataSource dataSource = dsFactory.getDataSource();
          Environment.Builder environmentBuilder = new Environment.Builder(id)
              .transactionFactory(txFactory)
              .dataSource(dataSource);
          configuration.setEnvironment(environmentBuilder.build());
  }
我们以实例化TransactionFactory为例,在下面代码中获取xml文件中的type: <transactionManager type="JDBC"/> ,然后
  private TransactionFactory transactionManagerElement(XNode context) throws Exception {
    if (context != null) {
      String type = context.getStringAttribute("type");
      Properties props = context.getChildrenAsProperties();
      TransactionFactory factory = (TransactionFactory) resolveClass(type).getDeclaredConstructor().newInstance();
      factory.setProperties(props);
      return factory;
    }
    throw new BuilderException("Environment declaration requires a TransactionFactory.");
  }
这里会根据上面提到的typeAliasRegistry对象中保存的72种对应关系决定TransactionFactory的具体实现类。
也就是解决了这个疑问,为什么创建的TransactionFactory是JdbcTransactionFactory?( <transactionManager type="JDBC"/> )
同样的道理,DataSourceFactory对应的具体实现类是PooledDataSourceFactory ( <dataSource type="POOLED"> )
然后,我们返回再看一下environment方法
  private void environmentsElement(XNode context) throws Exception {
    if (context != null) {
      if (environment == null) {
        environment = context.getStringAttribute("default");
      }
      for (XNode child : context.getChildren()) {
        String id = child.getStringAttribute("id");
        if (isSpecifiedEnvironment(id)) {
          TransactionFactory txFactory = transactionManagerElement(child.evalNode("transactionManager"));
          DataSourceFactory dsFactory = dataSourceElement(child.evalNode("dataSource"));
          DataSource dataSource = dsFactory.getDataSource();
          Environment.Builder environmentBuilder = new Environment.Builder(id)
              .transactionFactory(txFactory)
              .dataSource(dataSource);
          configuration.setEnvironment(environmentBuilder.build());
          break;
        }
      }
    }
  }
如下代码把txFactory对象和dataSource对象放到了Environment的实例中,然后把这个Environment实例放到configuration对象中。
          Environment.Builder environmentBuilder = new Environment.Builder(id)
              .transactionFactory(txFactory)
              .dataSource(dataSource);
          configuration.setEnvironment(environmentBuilder.build());
至此,解析xml文件中的<environments>标签完毕( environmentsElement(root.evalNode("environments")); )
其他标签的解析后面有时间再添加。
附录2 有关自动提交
附录3 纯JDBC
相关介绍参考:https://www.liaoxuefeng.com/wiki/1252599548343744/1321748435828770
public class PureJDBC {
  static final String DB_URL = "jdbc:mysql://xxx:3306/xxx?useUnicode=true&characterEncoding=utf8&useSSL=false&allowPublicKeyRetrieval=true&serverTimezone=GMT%2B8&zeroDateTimeBehavior=CONVERT_TO_NULL";
  static final String USER = "xxx";
  static final String PASS = "xxx";
  public static void main(String[] args) {
    Connection conn = null;
    Statement stmt = null;
    try{
      Class.forName("com.mysql.jdbc.Driver");
      //开启一个连接
      conn = DriverManager.getConnection(DB_URL, USER, PASS);
      System.out.println("是否自动提交:"+conn.getAutoCommit());
      //执行查询
      stmt = conn.createStatement();
      String sql = "select * from t_user where uid='xxx'";
      ResultSet rs = stmt.executeQuery(sql);
      while(rs.next()){
        String uname = rs.getString("uname");
        System.out.print("uname: " + uname);
      }
      rs.close();
    }catch(SQLException se){
      se.printStackTrace();
    }catch(Exception e){
      e.printStackTrace();
    }finally{
      try{
        if(stmt!=null)
          conn.close();
      }catch(SQLException se){}
      try{
        if(conn!=null)
          conn.close();
      }catch(SQLException se){
        se.printStackTrace();
      }
    }
  }
}
执行结果
是否自动提交:true
uname: xxx
从执行结果看,JDBC方式,事务是自动提交的

 浙公网安备 33010602011771号