


android搜索框实现
在Map应用中会经常见到一个浮动的搜索框 一般可以搜索附近的POI点信息 而且这些功能基本都长得差不多 所以网上查了下原来在SDK 文档里就有 在Dev Guide中有详细的介绍 不过都是英文的 看了好久呢
功能是比较简单的 就是配置起来有点麻烦 下面详细说一下
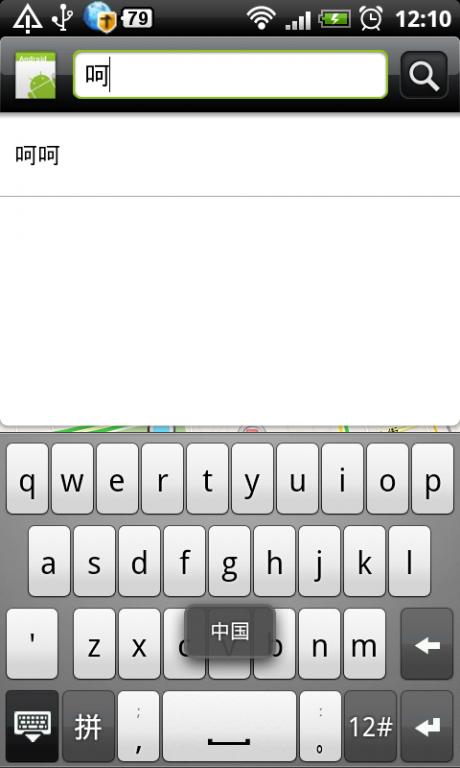
首先看效果


就这样简单 首先来看配置:
一、搜索框配置文件是一个用来配置您的应用程序中搜索框的设置的XML文件,这个文件一般命名为searchable.xml,并且保存在项目的res/xml/目录下。 配置文件的根节点必须为searchable,可以有一个或多个属性。
可以发现在SearchableInfo中 android是通过com.android.internal.R.styleable.Searchable 这个ID来获取这个配置文件的
这个Searchable应该就是标签的名字,所以必须这么命名,至于文件名不重要了 文档中说must besaved in the res/xml/ project directory 也就这个文件名不重要 但这个文件必须放在XML目录下 位置确定了 内容大该就是
- <?xmlversion="1.0"encoding="utf-8"?>
- <searchablexmlns:android="http://schemas.android.com/apk/res/android"
- android:label="@string/searchLabel"android:hint="@string/searchHint"
- android:icon="@drawable/menu_route"android:searchSuggestAuthority="com.debby.googlemap.SuggestionProvider"
- android:queryAfterZeroResults="false"android:searchSuggestSelection=" ? ">
- </searchable>
- <?xmlversion="1.0"encoding="utf-8"?><searchablexmlns:android="http://schemas.android.com/apk/res/android"android:label="@string/searchLabel"android:hint="@string/searchHint"android:icon="@drawable/menu_route"android:searchSuggestAuthority="com.debby.googlemap.SuggestionProvider"android:queryAfterZeroResults="false"android:searchSuggestSelection=" ? "></searchable>
其中有个 android:icon="@drawable/menu_route" 本来以为可以设置 就搜索Text前面那个View的 后来发现不起作用,而且文档中都没提到这个属性 看来确实没用啊 因为这属性我可折腾好久 这个以后再说吧
还有一点要注意的就是 android:label android:hint 属性不能直接写值 而是要points to a stringresource 就是用配置在values里的
android:label 标签不知道有啥用 不过还要有 android:hint 就是TextView为空的时候显示的值 相当于提示信息了
基本配置就这些 还有大量的配置是语音搜索的,不过估计这个功能真是不怎么常用吧 想要研究的就看文档吧 挺详细的 先看看吧
- <?xmlversion="1.0"encoding="utf-8"?>
- <searchablexmlns:android="http://schemas.android.com/apk/res/android"
- android:label="string resource"
- android:hint="string resource"
- android:searchMode=["queryRewriteFromData" | "queryRewriteFromText"]
- android:searchButtonText="string resource"
- android:inputType="inputType"
- android:imeOptions="imeOptions"
- android:searchSuggestAuthority="string"
- android:searchSuggestPath="string"
- android:searchSuggestSelection="string"
- android:searchSuggestIntentAction="string"
- android:searchSuggestIntentData="string"
- android:searchSuggestThreshold="int"
- android:includeInGlobalSearch=["true" | "false"]
- android:searchSettingsDescription="string resource"
- android:queryAfterZeroResults=["true" | "false"]
- android:voiceSearchMode=["showVoiceSearchButton" | "launchWebSearch" | "launchRecognizer"]
- android:voiceLanguageModel=["free-form" | "web_search"]
- android:voicePromptText="string resource"
- android:voiceLanguage="string"
- android:voiceMaxResults="int"
- >
- <actionkey
- android:keycode="KEYCODE"
- android:queryActionMsg="string"
- android:suggestActionMsg="string"
- android:suggestActionMsgColumn="string">
- </searchable>
- <?xmlversion="1.0"encoding="utf-8"?> <searchablexmlns:android="http://schemas.android.com/apk/res/android" android:label="string resource" android:hint="string resource" android:searchMode=["queryRewriteFromData" | "queryRewriteFromText"] android:searchButtonText="string resource" android:inputType="inputType" android:imeOptions="imeOptions" android:searchSuggestAuthority="string" android:searchSuggestPath="string" android:searchSuggestSelection="string" android:searchSuggestIntentAction="string" android:searchSuggestIntentData="string" android:searchSuggestThreshold="int" android:includeInGlobalSearch=["true" | "false"] android:searchSettingsDescription="string resource" android:queryAfterZeroResults=["true" | "false"] android:voiceSearchMode=["showVoiceSearchButton" | "launchWebSearch" | "launchRecognizer"] android:voiceLanguageModel=["free-form" | "web_search"] android:voicePromptText="string resource" android:voiceLanguage="string" android:voiceMaxResults="int" > <actionkey android:keycode="KEYCODE" android:queryActionMsg="string" android:suggestActionMsg="string" android:suggestActionMsgColumn="string"> </searchable>
二、创建一个搜索功能的Activity
这里的Activity可以新建一个 当然也可以是当前弹出搜索框的Acitvity 这里我用到的MapAcitivity就是要显示搜索结果的 所以这里就直接用这个Acitivity了
那这两种方式实现差不多 不过也有点小小的差别 下面来看:
首先配是一样的 就是在Acitivity 标签中加入
- <intent-filter>
- <action android:name="android.intent.action.SEARCH" />
- </intent-filter>
- <meta-data android:name="android.app.searchable"
- android:resource="@xml/searchable"/>
- <intent-filter> <action android:name="android.intent.action.SEARCH" /> </intent-filter> <meta-data android:name="android.app.searchable" android:resource="@xml/searchable"/>
就可以了那这样的配置也就是只在这个Activity中可以使用搜索功能,其实Android的搜索框可以支持整个应用Application
这样就需要创建一个专门处理搜索的Acitivity 可以这样配置 需要在<application></application> 这个标签下的
- <!-- declare the default searchable Activity for the whole app -->
- <meta-data android:name="android.app.default_searchable"
- android:value=".MySearchableActivity" />
- <!-- declare the default searchable Activity for the whole app --> <meta-data android:name="android.app.default_searchable" android:value=".MySearchableActivity" />
三、调用搜索框 现在已经配置完成了 下面就可以开始调用了
调用的方法很简单 所有的Acitivity都可以调用onSearchRequested() 方法 这样搜索框就出现了 ,那测试的时候可以有个简单的方法
在onCreate()方法中调用setDefaultKeyMode(DEFAULT_KEYS_SEARCH_LOCAL),这样,当用户按下键盘上的按键时,将会自动激活搜索框
如果你要在执行搜索时,进行别的操作,可以重写onSearchRequested()方法 如下:
- @Override
- public boolean onSearchRequested() {
- //这个方法中干你想干的事
- doSometingOther();
- return super.onSearchRequested();
- }
- @Overridepublic boolean onSearchRequested() {//这个方法中干你想干的事 doSometingOther(); return super.onSearchRequested();}
还有如果我们想在调用的时候传递一些参数 也是可以的
- public boolean onSearchRequested() {
- Log.i(TAG,"onSearchRequested------------========");
- Bundle appData = new Bundle();
- appData.putString("key", "your info");
- startSearch(null, true, appData, false);
- returntrue;
- }
- public boolean onSearchRequested() { Log.i(TAG,"onSearchRequested------------========"); Bundle appData = new Bundle(); appData.putString("key", "your info"); startSearch(null, true, appData, false); returntrue; }
四、接受查询条件 并执行查询
如果是创建了专门处理查询的Acitivity 当然可以直接在onCreate中 执行查询操作
- @Override
- publicvoid onCreate(Bundle savedInstanceState) {
- super.onCreate(savedInstanceState);
- setContentView(R.layout.search);
- Intent intent = getIntent();
- if (Intent.ACTION_SEARCH.equals(intent.getAction())) {
- String query = intent.getStringExtra(SearchManager.QUERY);
- doMySearch(query);
- }
- }
- @Overridepublic void onCreate(Bundle savedInstanceState) { super.onCreate(savedInstanceState); setContentView(R.layout.search); Intent intent = getIntent(); if (Intent.ACTION_SEARCH.equals(intent.getAction())) { String query = intent.getStringExtra(SearchManager.QUERY); doMySearch(query); }}
但如果是在当前的Acitivity上这样就不行了 应为onCreate就执行一次 这样就可以通过onNewIntent来实现了
- @Override
- publicvoid onCreate(Bundle savedInstanceState) {
- super.onCreate(savedInstanceState);
- setContentView(R.layout.search);
- handleIntent(getIntent());
- }
- @Override
- protectedvoid onNewIntent(Intent intent) {
- setIntent(intent);
- handleIntent(intent);
- }
- privatevoid handleIntent(Intent intent) {
- if (Intent.ACTION_SEARCH.equals(intent.getAction())) {
- String query = intent.getStringExtra(SearchManager.QUERY);
- doMySearch(query);
- }
- }
- @Overridepublic void onCreate(Bundle savedInstanceState) { super.onCreate(savedInstanceState); setContentView(R.layout.search); handleIntent(getIntent());} @Overrideprotected void onNewIntent(Intent intent) { setIntent(intent); handleIntent(intent);} privatevoid handleIntent(Intent intent) { if (Intent.ACTION_SEARCH.equals(intent.getAction())) { String query = intent.getStringExtra(SearchManager.QUERY); doMySearch(query); }}
这样就会通过doMySearch()完成了查询操作了 不过还有点需要注意 查询完成后我按返回发现还是这个Acitivity 不过是查询前的
这说明在Activity栈里有俩我的这个MapAcitivity实例 这个可以通过在Acitivity里android:launchMode=”singleTop”这样的配置解决
我的Acitivity配置是这样的
- <activity android:name=".GoogleMapActivity" android:launchMode="singleTop"
- android:label="@string/app_name">
- <intent-filter>
- <action android:name="android.intent.action.MAIN" />
- <category android:name="android.intent.category.LAUNCHER" />
- </intent-filter>
- <intent-filter>
- <action android:name="android.intent.action.SEARCH" />
- </intent-filter>
- <meta-data android:name="android.app.searchable"
- android:resource="@xml/searchable"/>
- </activity>
- <activity android:name=".GoogleMapActivity" android:launchMode="singleTop" android:label="@string/app_name"> <intent-filter> <action android:name="android.intent.action.MAIN" /> <category android:name="android.intent.category.LAUNCHER" /> </intent-filter> <intent-filter> <action android:name="android.intent.action.SEARCH" /> </intent-filter> <meta-data android:name="android.app.searchable" android:resource="@xml/searchable"/> </activity>
五、纪录历史关键字 我们在查询完成后会希望保存这次查询的条件 甚至有的会连结果都保存了
android这里实现了保存关键字的功能 是通过SearchRecentSuggestionsProvider 来实现的
首先创建一个Provider类
- publicclass SearchSuggestionProvider extends SearchRecentSuggestionsProvider {
- /**
- * Authority
- */
- final static String AUTHORITY = "com.debby.googlemap.SuggestionProvider";
- /**
- * Mode
- */
- final staticint MODE = DATABASE_MODE_QUERIES;
- public SearchSuggestionProvider() {
- super();
- setupSuggestions(AUTHORITY, MODE);
- }
- }
- publicclass SearchSuggestionProvider extends SearchRecentSuggestionsProvider { /** * Authority */ final static String AUTHORITY = "com.debby.googlemap.SuggestionProvider"; /** * Mode */ final staticint MODE = DATABASE_MODE_QUERIES; public SearchSuggestionProvider() { super(); setupSuggestions(AUTHORITY, MODE); }}
当然还要在 Manifest中配置
<provider android:name="com.debby.googlemap.SearchSuggestionProvider" android:authorities="com.debby.googlemap.SuggestionProvider" />
- <provider android:name="com.debby.googlemap.SearchSuggestionProvider"
- android:authorities="com.debby.googlemap.SuggestionProvider" />
- <provider android:name="com.debby.googlemap.SearchSuggestionProvider" android:authorities="com.debby.googlemap.SuggestionProvider" />
这里注意 android:authorities 的配置与Provider里的保持一致就好了
这样在Acitivity里就可以调用了
- SearchRecentSuggestions suggestions = new SearchRecentSuggestions(this,
- SearchSuggestionProvider.AUTHORITY, SearchSuggestionProvider.MODE);
- suggestions.saveRecentQuery(query, null);
- SearchRecentSuggestions suggestions = new SearchRecentSuggestions(this, SearchSuggestionProvider.AUTHORITY, SearchSuggestionProvider.MODE);suggestions.saveRecentQuery(query, null);
保存完成了 点击搜索完成后保存成功了 下次搜索就可以看到 效果看PP
那有些时候需要保存一些查询结果 例如我在地图上查询一个地点位置 那我下次查询的时候希望可以快速实现查询
这种情况就可以把上次查询的一些该地点的信息 譬如 经纬度等信息保存下来 这样就直接通过sqlit来手动保存数据
可以在handleIntent()方法中进行插入 查询操作来完成了 就是个数据库操作 不再详细实现了
就到这了 继续研究Icon那个问题

