1、全局事件总线基础知识(GlobalEventBus)
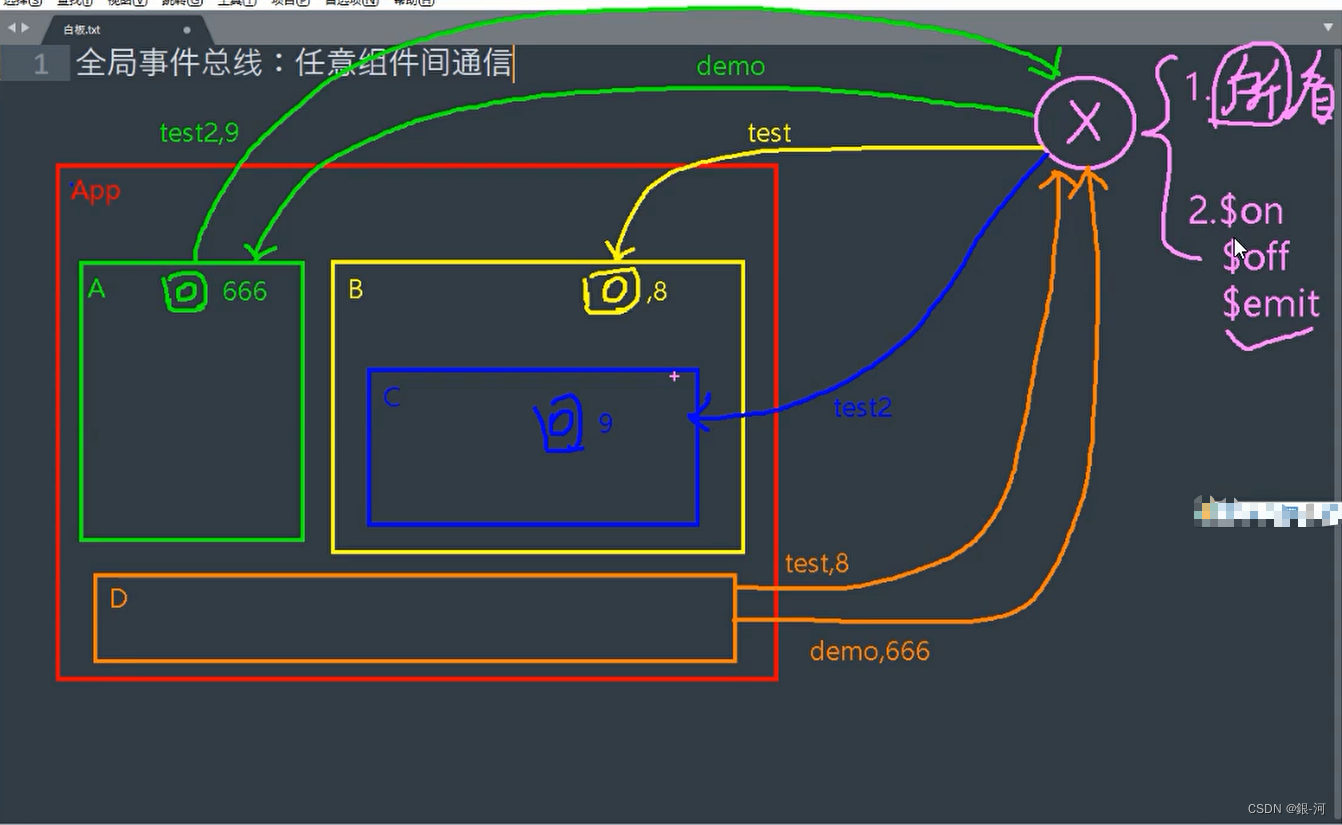
1、一种组件间通信的方式,适用于任意组件间通信。
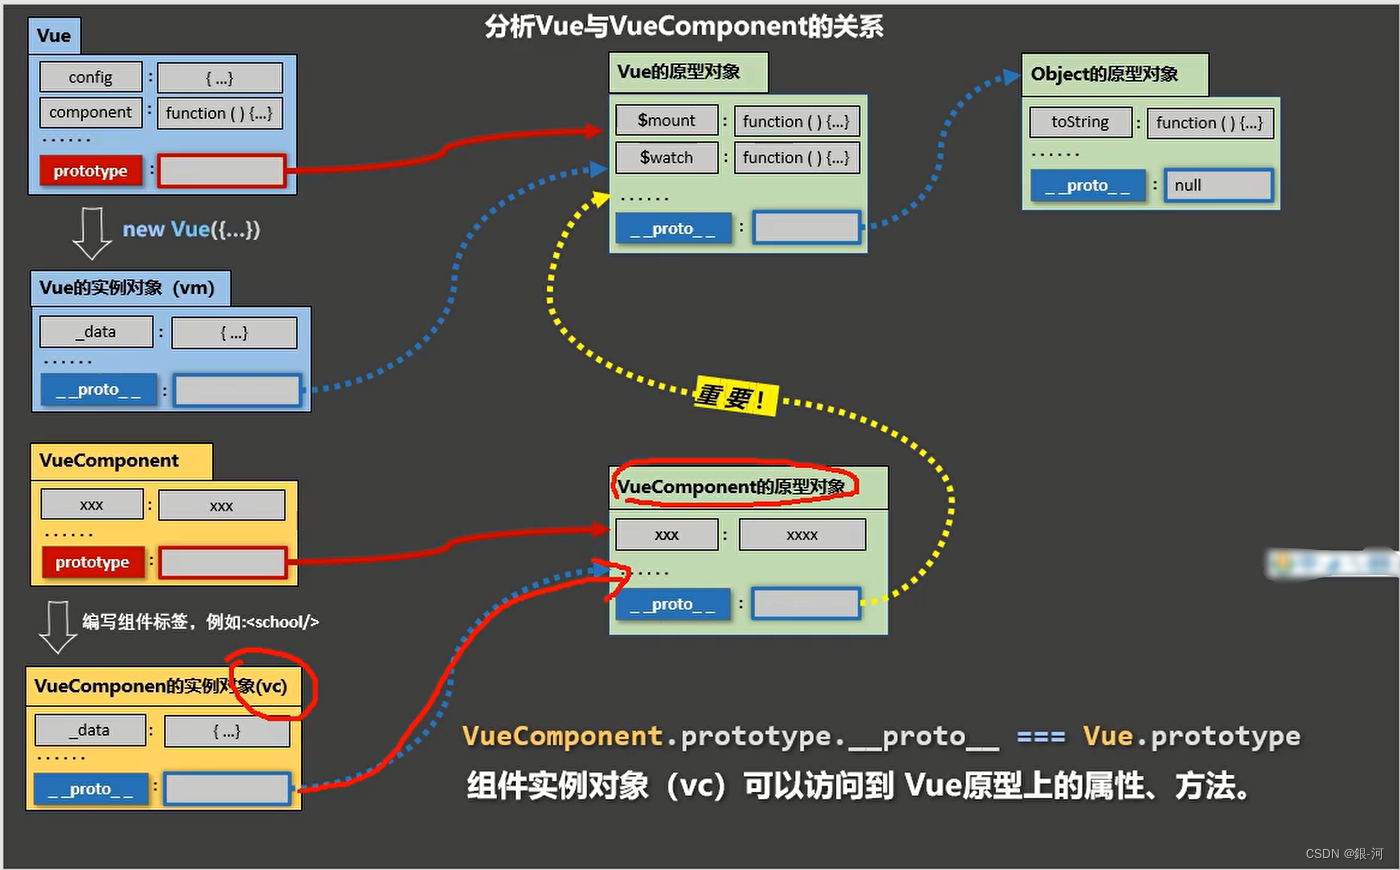
2、安装全局事件总线:
提示:在main.js中安装全局事件总线
   new Vue({
   	......
   	beforeCreate() {
   		Vue.prototype.$bus = this //安装全局事件总线,$bus就是当前应用的vm
   	},
       ......
   })
3、使用事件总线:
- 接收数据:A组件想接收数据,则在A组件中给$bus绑定自定义事件,事件的回调留在A组件自身。
      methods(){
        demo(data){......}
      }
      ......
      mounted() {
        this.$bus.$on('xxxx',this.demo)
      }
- 提供数据:
this.$bus.$emit('xxxx',数据)
4、最好在beforeDestroy钩子中,用$off去解绑当前组件所用到的事件。
2、图解过程


3、代码实例
实现组件间的通信(通过全局事件总线)
3.1 main.js
//引入Vue
import Vue from 'vue'
//引入App
import App from './App.vue'
//关闭Vue的生产提示
Vue.config.productionTip = false

//创建vm
new Vue({
	el:'#app',
	render: h => h(App),
	beforeCreate() {
		Vue.prototype.$bus = this
	},
})
3.1 App.vue
<template>
	<div class="app">
		<h1>{{msg}}</h1>
		<School/>
		<Student/>
	</div>
</template>

<script>
	import Student from './components/Student'
	import School from './components/School'

	export default {
		name:'App',
		components:{School,Student},
		data() {
			return {
				msg:'你好啊!',
			}
		}
	}
</script>

<style scoped>
	.app{
		background-color: gray;
		padding: 5px;
	}
</style>
3.2 School.vue
<template>
	<div class="school">
		<h2>学校名称:{{name}}</h2>
		<h2>学校地址:{{address}}</h2>
	</div>
</template>

<script>
	export default {
		name:'School',
		data() {
			return {
				name:'尚硅谷',
				address:'北京',
			}
		},
		mounted() {
			// console.log('School',this)
			this.$bus.$on('hello',(data)=>{
				console.log('我是School组件,收到了数据',data)
			})
		},
		beforeDestroy() {
			this.$bus.$off('hello')
		},
	}
</script>

<style scoped>
	.school{
		background-color: skyblue;
		padding: 5px;
	}
</style>
3.3 Student.vue
<template>
	<div class="student">
		<h2>学生姓名:{{name}}</h2>
		<h2>学生性别:{{sex}}</h2>
		<button @click="sendStudentName">把学生名给School组件</button>
	</div>
</template>

<script>
	export default {
		name:'Student',
		data() {
			return {
				name:'张三',
				sex:'男',
			}
		},
		mounted() {
			// console.log('Student',this.x)
		},
		methods: {
			sendStudentName(){
				this.$bus.$emit('hello',this.name)
			}
		},
	}
</script>

<style lang="less" scoped>
	.student{
		background-color: pink;
		padding: 5px;
		margin-top: 30px;
	}
</style>


【推荐】国内首个AI IDE,深度理解中文开发场景,立即下载体验Trae
【推荐】编程新体验,更懂你的AI,立即体验豆包MarsCode编程助手
【推荐】抖音旗下AI助手豆包,你的智能百科全书,全免费不限次数
【推荐】轻量又高性能的 SSH 工具 IShell:AI 加持,快人一步
· 被坑几百块钱后,我竟然真的恢复了删除的微信聊天记录!
· 没有Manus邀请码?试试免邀请码的MGX或者开源的OpenManus吧
· 【自荐】一款简洁、开源的在线白板工具 Drawnix
· 园子的第一款AI主题卫衣上架——"HELLO! HOW CAN I ASSIST YOU TODAY
· 无需6万激活码!GitHub神秘组织3小时极速复刻Manus,手把手教你使用OpenManus搭建本