1-添加依赖
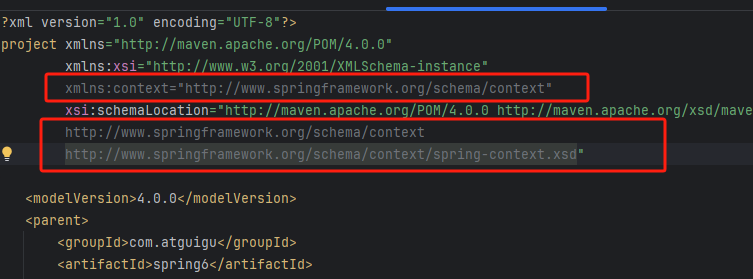
2-开启组件扫描

<beans xmlns="http://www.springframework.org/schema/beans"
       xmlns:xsi="http://www.w3.org/2001/XMLSchema-instance"
       xmlns:context="http://www.springframework.org/schema/context"
       xsi:schemaLocation="http://www.springframework.org/schema/context
         http://www.springframework.org/schema/context/spring-context.xsd
         http://www.springframework.org/schema/beans
         http://www.springframework.org/schema/beans/spring-beans.xsd">


    <!--开启组件扫描-->
    <context:component-scan base-package="com.atguigu.user">
    </context:component-scan>
</beans>
组件扫描特殊情况
<context:component-scan base-package="com.atguigu.spring6">
    <!-- context:exclude-filter标签:指定排除规则 -->
    <!--
         type:设置排除或包含的依据
        type="annotation",根据注解排除,expression中设置要排除的注解的全类名
        type="assignable",根据类型排除,expression中设置要排除的类型的全类名
    -->
    <context:exclude-filter type="annotation" expression="org.springframework.stereotype.Controller"/>
        <!--<context:exclude-filter type="assignable" expression="com.atguigu.spring6.controller.UserController"/>-->
</context:component-scan>
<context:component-scan base-package="com.atguigu" use-default-filters="false">
<!-- context:include-filter标签:指定在原有扫描规则的基础上追加的规则 -->
<!-- use-default-filters属性:取值false表示关闭默认扫描规则 -->
<!-- 此时必须设置use-default-filters="false",因为默认规则即扫描指定包下所有类 -->
<!--
type:设置排除或包含的依据
type="annotation",根据注解排除,expression中设置要排除的注解的全类名
type="assignable",根据类型排除,expression中设置要排除的类型的全类名
-->
<context:include-filter type="annotation" expression="org.springframework.stereotype.Controller"/>
<!--<context:include-filter type="assignable" expression="com.atguigu.spring6.controller.UserController"/>-->
</context:component-scan>
3-使用注解
| 注解 | 说明 |
|---|---|
| @Component | 该注解用于描述 Spring 中的 Bean,它是一个泛化的概念,仅仅表示容器中的一个组件(Bean),并且可以作用在应用的任何层次,例如 Service 层、Dao 层等。 使用时只需将该注解标注在相应类上即可。 |
| @Repository | 该注解用于将数据访问层(Dao 层)的类标识为 Spring 中的 Bean,其功能与 @Component 相同。 |
| @Service | 该注解通常作用在业务层(Service 层),用于将业务层的类标识为 Spring 中的 Bean,其功能与 @Component 相同。 |
| @Controller | 该注解通常作用在控制层(如SpringMVC 的 Controller),用于将控制层的类标识为 Spring 中的 Bean,其功能与 @Component 相同。 |
@Component(value="user")
public class user {
}
@Autowired
package org.springframework.beans.factory.annotation;

import java.lang.annotation.Documented;
import java.lang.annotation.ElementType;
import java.lang.annotation.Retention;
import java.lang.annotation.RetentionPolicy;
import java.lang.annotation.Target;

@Target({ElementType.CONSTRUCTOR, ElementType.METHOD, ElementType.PARAMETER, ElementType.FIELD, ElementType.ANNOTATION_TYPE})
@Retention(RetentionPolicy.RUNTIME)
@Documented
public @interface Autowired {
    boolean required() default true;
}
-
@Autowired -
第一处:该注解可以标注在哪里?
-
- 构造方法上
- 方法上
- 形参上
- 属性上
- 注解上
-
第二处:该注解有一个required属性,默认值是true,表示在注入的时候要求被注入的Bean必须是存在的,如果不存在则报错。如果required属性设置为false,表示注入的Bean存在或者不存在都没关系,存在的话就注入,不存在的话,也不报错。
注入方式
//第一种方法注入 属性注入

@Autowired
private UserService userService;


//第二种方法注入 set方法注入
@Autowired
public void setUserService(UserService userService) {
    this.userService = userService;
}


//第三种方法注入 构造方法注入
@Autowired
public Controller(UserService userService) {
    this.userService = userService;
}


//第四中方式注入 形参注入
public Controller(@Autowired UserService userService) {
    this.userService = userService;
}


//第五种方式 只有一种个有参构造 可以省略
//要满足条件 1.只有一个构造函数 2 必须是有参
public Controller(UserService userService) {
    this.userService = userService;
}


【推荐】国内首个AI IDE,深度理解中文开发场景,立即下载体验Trae
【推荐】编程新体验,更懂你的AI,立即体验豆包MarsCode编程助手
【推荐】抖音旗下AI助手豆包,你的智能百科全书,全免费不限次数
【推荐】轻量又高性能的 SSH 工具 IShell:AI 加持,快人一步
· 阿里最新开源QwQ-32B,效果媲美deepseek-r1满血版,部署成本又又又降低了!
· AI编程工具终极对决:字节Trae VS Cursor,谁才是开发者新宠?
· 开源Multi-agent AI智能体框架aevatar.ai,欢迎大家贡献代码
· Manus重磅发布:全球首款通用AI代理技术深度解析与实战指南
· 被坑几百块钱后,我竟然真的恢复了删除的微信聊天记录!