
Spring Boot框架的搭建
一、优点:
1.简化了配置,是基于Spring4的一套快速开发整合包,减少复杂度
而Spring MVC基于Spring 的一个MVC框架
2.会有一个statrter整合包,减少样板代码
3.自动配置Spring
4.开箱即用,没有代码生成,也无需xml配置
具体:
- 你没有做任何的web.xml配置。
- 你没有做任何的sping mvc的配置; springboot为你做了。
- 你没有配置tomcat ;springboot内嵌tomcat.
二、搭建:
环境:1.java1.8
2.maven3.3
3.spring-boot 1.3.5
4.Thymeleaf 3
步骤:
1.新建一个maven项目
2.pom文件配置
(1)下载地址的配置
jar包仓库
 1 <repositories>
 2 <repository>
 3 <id>yl</id>
 4 <name>yl Plugin Repository</name>
 5 <url>http://192.168.88.65:7000/nexus/content/groups/public</url>
 6 </repository>
 7 <repository>
 8 <id>jahia</id>
 9 <name>jahia</name>
10 <url>http://maven.jahia.org/maven2/</url>
11 </repository>
12 </repositories>
13 插件下载配置
14 <pluginRepositories>
15 <pluginRepository>
16 <id>yl</id>
17 <name>yl Plugin Repository</name>
18 <url>http://192.168.88.65:7000/nexus/content/groups/public</url>
19 </pluginRepository>
20 </pluginRepositories>
21 私服下载地址
22 <distributionManagement>
23 <repository>
24 <id>nexus-releases</id>
25 <url>http://192.168.88.65:7000/nexus/content/repositories/releases/</url>
26 </repository>
27 <snapshotRepository>
28 <id>nexus-snapshots</id>
29 <url>http://192.168.88.65:7000/nexus/content/repositories/snapshots/</url>
30 </snapshotRepository>
31 </distributionManagement>
32 (2)设置jdk版本
33 <properties>
34 <project.build.sourceEncoding>UTF-8</project.build.sourceEncoding>
35 <!-- 指定一下jdk的版本 ,这里我们使用jdk 1.8 ,默认是1.6 -->
36 <java.version>1.8</java.version>
37 <project.reporting.outputEncoding>UTF-8</project.reporting.outputEncoding>
38 </properties>
39 (3)添加依赖版本管理(自动选择合适版本添加,以下无需指定版本号)
40 <dependencyManagement>
41         <dependencies>
42             <dependency>
43                 <!-- Import dependency management from Spring Boot -->
44                 <groupId>org.springframework.boot</groupId>
45                 <artifactId>spring-boot-dependencies</artifactId>
46                 <version>1.3.5.RELEASE</version>
47                 <type>pom</type>
48                 <scope>import</scope>
49             </dependency>
50         </dependencies>
51 </dependencyManagement>
52
53 或者
54 <parent>
55 <groupId>org.springframework.boot</groupId>
56 <artifactId>spring-boot-starter-parent</artifactId>
57 <version>1.3.0.RELEASE</version>
58 </parent>
59 (4)添加spring-web项目依赖
60 <dependencies>
61         <dependency>
62             <groupId>org.springframework.boot</groupId>
63             <artifactId>spring-boot-starter-web</artifactId>
64         </dependency>
65     <dependency>
66         <groupId>org.springframework.boot</groupId>
67         <artifactId>spring-boot-devtools</artifactId>
68         <optional>true</optional>
69     </dependency>
70 </dependencies>
71 (5)添加build-plugin(红色部分解决手动利用maven编译,由于使用了jdk1.8版本而出现的错误)
72 <build>
73         <plugins>
74             <plugin>
75                 <groupId>org.springframework.boot</groupId>
76                 <artifactId>spring-boot-maven-plugin</artifactId>
77                 <configuration>
78
79 <source>1.8</source> <target>1.8</target>
80                 </configuration>
81             </plugin>
82         </plugins>
83 </build>
84 (6)添加视图渲染
85 <dependency>
86             <groupId>org.springframework.boot</groupId>
87             <artifactId>spring-boot-starter-thymeleaf</artifactId>
88 </dependency>
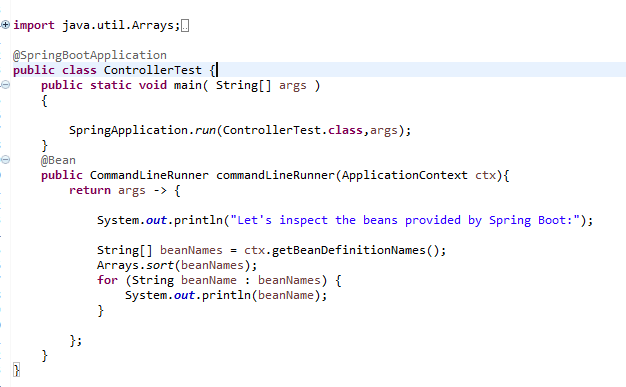
3.创建启动代码项目的代码(不用tomcat,启动该main方法即可)
@SpringBootApplication 标注启动配置入口
使用这个注解的类必须放置于最外层包中,因为默认扫描这个类以下的包。
否则需要自己配置@ComponentScan。
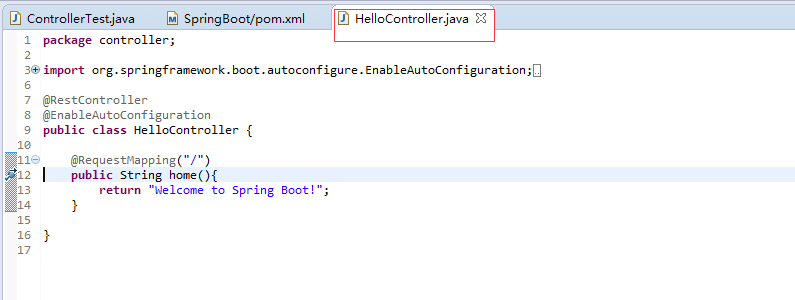
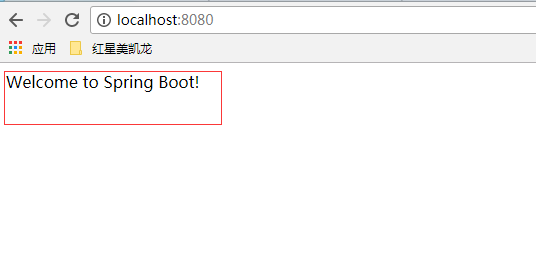
4.controller配置

 浙公网安备 33010602011771号