
Linux之Nginx介绍
Nginx虚拟主机
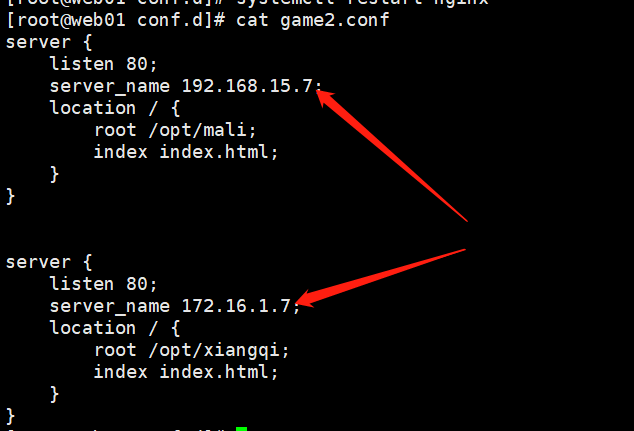
1、基于多IP的方式

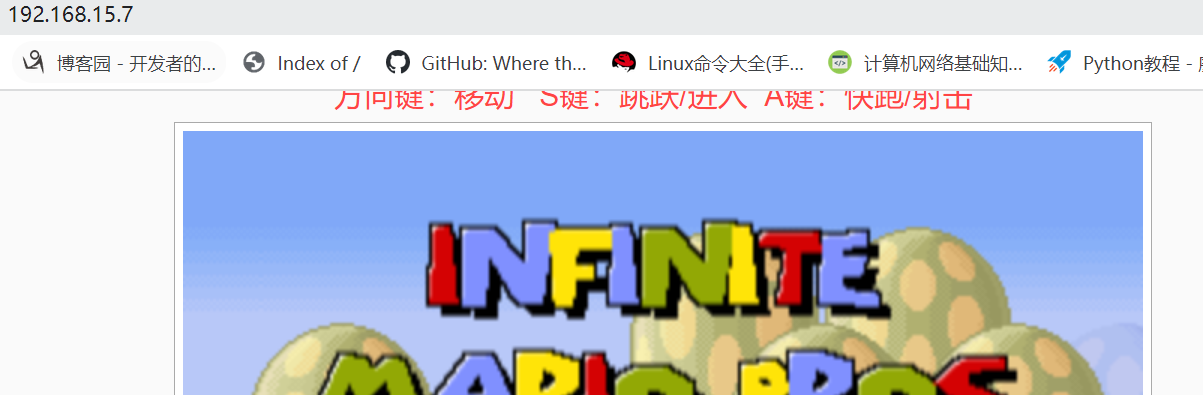
[root@web01 conf.d]# cat game2.conf
server {
    listen 80;
    server_name 192.168.15.7;
    location / {
    root /opt/Super_Marie;
        index index.html;
    }
}
server {
    listen 80;
    server_name 172.16.1.7;
    location / {
        root /opt/tank;
        index index.html;
    }
}
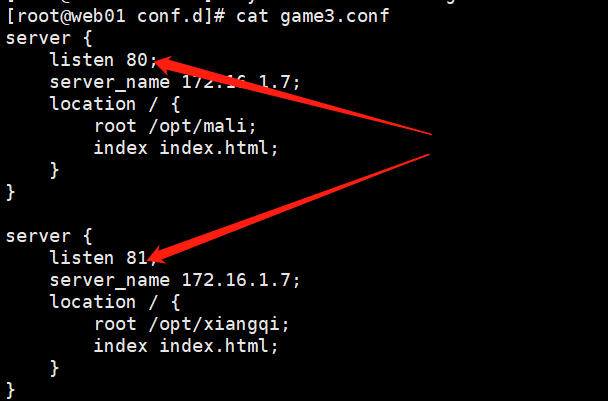
2、基于多端口的方式
[root@web01 conf.d]# cat game3.conf
server {
    listen 80;
    server_name 192.168.15.7;
    location / {
        root /opt/Super_Marie;
        index index.html;
    }
}
server {
    listen 81;
    server_name 192.168.15.7;
    location / {
        root /opt/tank;
        index index.html;
    }
}

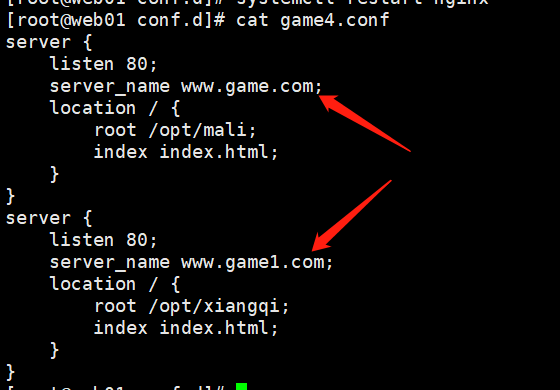
3、基于多域名的方式
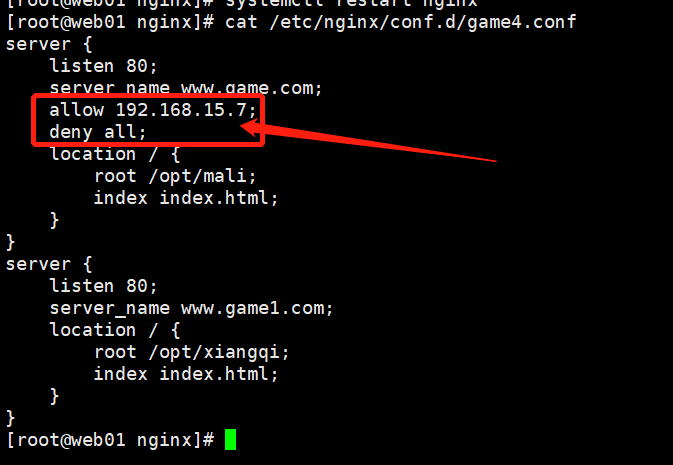
[root@web01 conf.d]# cat game4.conf
server {
    listen 80;
    server_name www.game.com;
    location / {
        root /opt/Super_Marie;
        index index.html;
    }
}
server {
    listen 80;
    server_name www.game1.com;
    location / {
        root /opt/tank;
        index index.html;
    }
}

注:记得解析域名
Nginx访问控制模块
1、ngx_http_access_module
网址:https://nginx.org/en/docs/http/ngx_http_access_module.html
允许或者拒绝某些IP访问
deny : 拒绝
allow :允许
案例
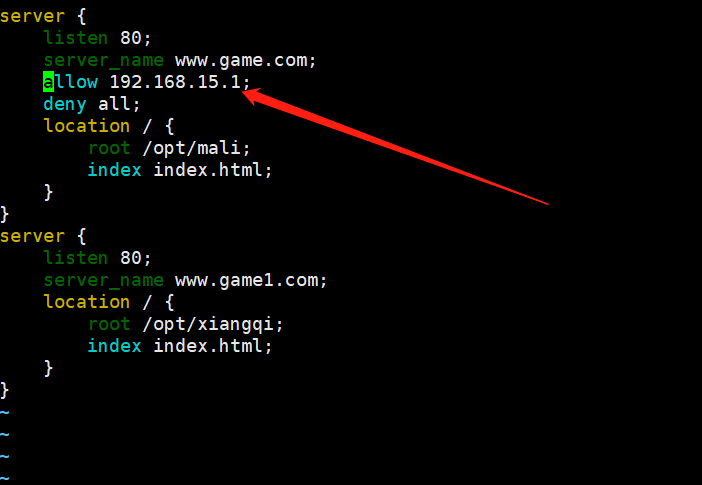
案例1:允许192.168.15.1访问,不允许其他IP访问
    allow 192.168.15.1;
    deny all;

案例2:允许192.168.15.0这个网段访问,不允许其他网段访问
    allow 192.168.15.0/24;
    deny all;

案例3:只允许通过VPN来访问
   allow 172.16.1.81;
   deny all;

看日志错误

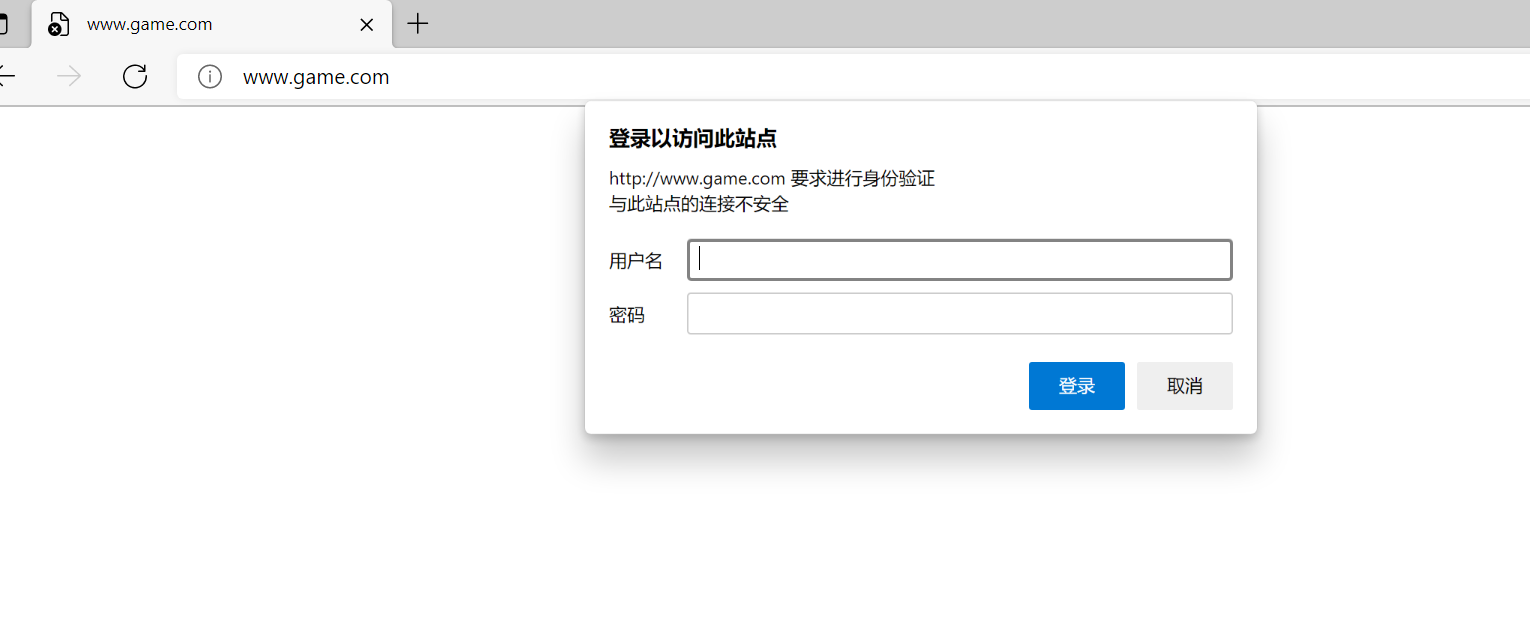
2、ngx_http_auth_basic_module
访问之前需要登录
步骤
1、安装httpd-tools
[root@web01 ~]# yum install httpd-tools -y

2、生成用户名密码文件
[root@web01 ~]# htpasswd -c /etc/nginx/auth yuanshi
New password:
Re-type new password:
Adding password for user chenyang

3、将文件路径加入Nginx配置
[root@web01 ~]# vim /etc/nginx/conf.d/game4.conf
    auth_basic "Welcome To Login";
    auth_basic_user_file /etc/nginx/auth;

4、重启Nginx
[root@web01 ~]# nginx -t
nginx: the configuration file /etc/nginx/nginx.conf syntax is ok
nginx: configuration file /etc/nginx/nginx.conf test is successful
[root@web01 ~]# systemctl restart nginx
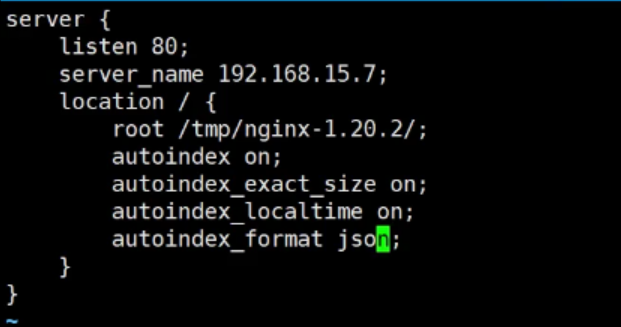
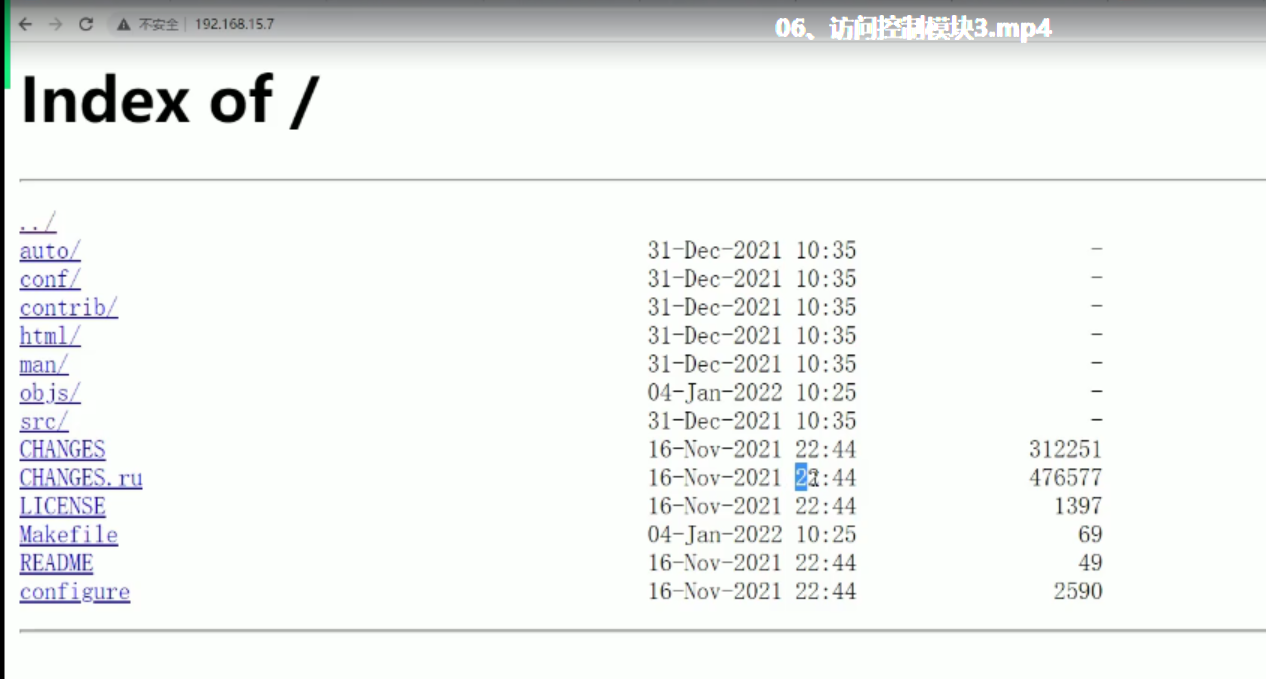
3、ngx_http_autoindex_module
展示目录索引。
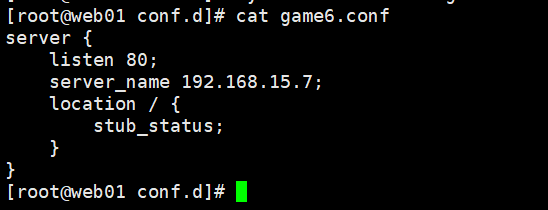
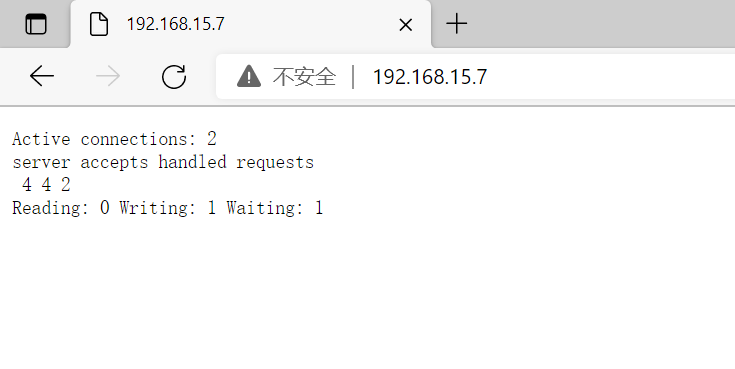
Nginx状态监控
访问链接控制
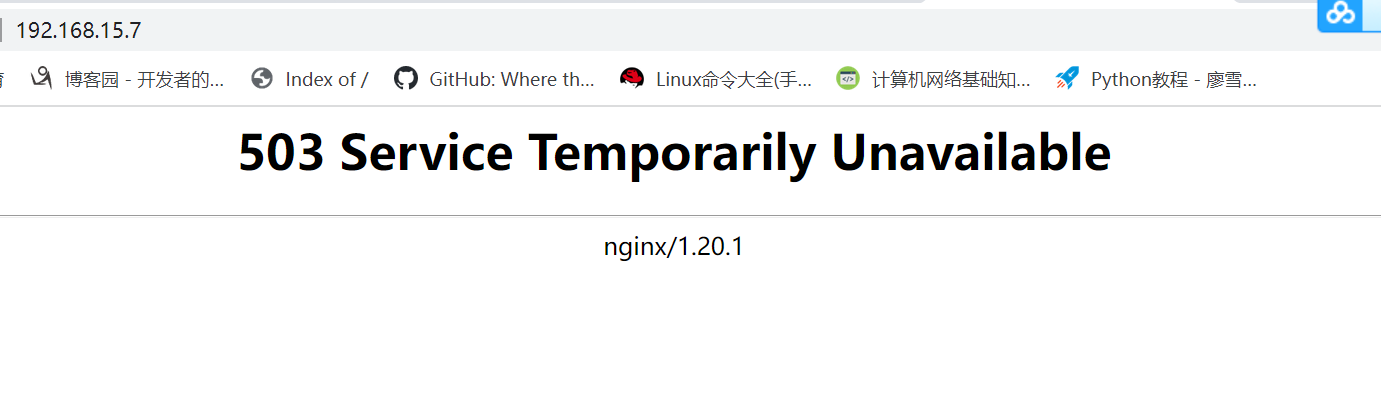
1、控制Nginx连接数(ngx_http_limit_conn_module)
1、安装ab测试命令
    yum install httpd-tools -y

2、ab 参数
     -n : 总共需要访问多少次
      -c : 每次访问多少个

[root@web01 conf.d]# cat game5.conf
# limit_req_zone $remote_addr zone=one:10m rate=1r/s;
limit_conn_zone $remote_addr zone=addr:10m;
server {
    listen 80;
    server_name 192.168.15.7;
    # limit_req zone=one burst=5;
    limit_conn addr 1;
    location / {
        root /opt/Super_Marie;
    index index.html;
    }

2、控制Nginx访问量(ngx_http_limit_req_module)
1、连接池
    limit_req_zone $remote_addr zone=one:10m rate=1r/s;
    声明连接池       变量          名称  连接池的大小  速率
2、限制数

案例1:要求每秒只能有一个访问。
[root@web01 conf.d]# cat game5.conf
limit_req_zone $remote_addr zone=one:10m rate=1r/s;
server {
    listen 80;
    server_name 192.168.15.7;
    limit_req zone=one burst=5;
    location / {
        root /opt/Super_Marie;
    index index.html;
    }
}


【推荐】国内首个AI IDE,深度理解中文开发场景,立即下载体验Trae
【推荐】编程新体验,更懂你的AI,立即体验豆包MarsCode编程助手
【推荐】抖音旗下AI助手豆包,你的智能百科全书,全免费不限次数
【推荐】轻量又高性能的 SSH 工具 IShell:AI 加持,快人一步
· TypeScript + Deepseek 打造卜卦网站:技术与玄学的结合
· 阿里巴巴 QwQ-32B真的超越了 DeepSeek R-1吗?
· 【译】Visual Studio 中新的强大生产力特性
· 10年+ .NET Coder 心语 ── 封装的思维:从隐藏、稳定开始理解其本质意义
· 【设计模式】告别冗长if-else语句:使用策略模式优化代码结构