TexturePacker的plist切成单独小图片
工具原料
Python 2.7
安装环境
1、安装 Python 2.7 https://www.python.org/download/
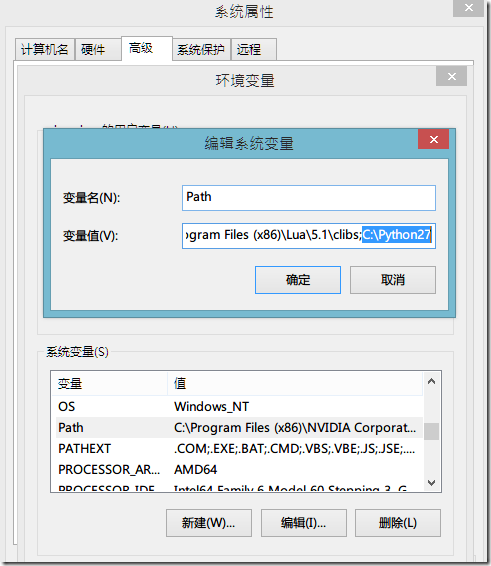
2、配置环境变量 Path :C:\Python27
python是否安装成功
3、检验python是否安装配置成功:打开cmd,输入python,如果出现以下界面,则说 明你的python安装成功了
4、安装第三方的模块 Pillow 下载地址: http://www.lfd.uci.edu/~gohlke/pythonlibs/#pil
如果不能下载,或下载的文件是whl不知怎么打开,可下载我之前下载的:http://pan.baidu.com/s/1pJBSfXL
切图脚本
创建一个文本,修改后缀为py,建议命名:unpack_plist.py,代码如下:
#!python
import os,sys
from xml.etree import ElementTree
from PIL import Image

def tree_to_dict(tree):
    d = {}
    for index, item in enumerate(tree):
        if item.tag == 'key':
            if tree[index+1].tag == 'string':
                d[item.text] = tree[index + 1].text
            elif tree[index + 1].tag == 'true':
                d[item.text] = True
            elif tree[index + 1].tag == 'false':
                d[item.text] = False
            elif tree[index+1].tag == 'dict':
                d[item.text] = tree_to_dict(tree[index+1])
    return d

def gen_png_from_plist(plist_filename, png_filename):
    file_path = plist_filename.replace('.plist', '')
    big_image = Image.open(png_filename)
    root = ElementTree.fromstring(open(plist_filename, 'r').read())
    plist_dict = tree_to_dict(root[0])
    to_list = lambda x: x.replace('{','').replace('}','').split(',')
    for k,v in plist_dict['frames'].items():
        rectlist = to_list(v['frame'])
        width = int( rectlist[3] if v['rotated'] else rectlist[2] )
        height = int( rectlist[2] if v['rotated'] else rectlist[3] )
        box=(
            int(rectlist[0]),
            int(rectlist[1]),
            int(rectlist[0]) + width,
            int(rectlist[1]) + height,
            )
        sizelist = [ int(x) for x in to_list(v['sourceSize'])]
        rect_on_big = big_image.crop(box)

        if v['rotated']:
            rect_on_big = rect_on_big.rotate(90)

        result_image = Image.new('RGBA', sizelist, (0,0,0,0))
        if v['rotated']:
            result_box=(
                ( sizelist[0] - height )/2,
                ( sizelist[1] - width )/2,
                ( sizelist[0] + height )/2,
                ( sizelist[1] + width )/2
                )
        else:
            result_box=(
                ( sizelist[0] - width )/2,
                ( sizelist[1] - height )/2,
                ( sizelist[0] + width )/2,
                ( sizelist[1] + height )/2
                )
        result_image.paste(rect_on_big, result_box, mask=0)

        if not os.path.isdir(file_path):
            os.mkdir(file_path)
        outfile = (file_path+'/' + k).replace('gift_', '')
        print outfile, "generated"
        result_image.save(outfile)

if __name__ == '__main__':
    filename = sys.argv[1]
    plist_filename = filename + '.plist'
    png_filename = filename + '.png'
    if (os.path.exists(plist_filename) and os.path.exists(png_filename)):
        gen_png_from_plist( plist_filename, png_filename )
    else:
        print "make sure you have boith plist and png files in the same directory"
使用方法
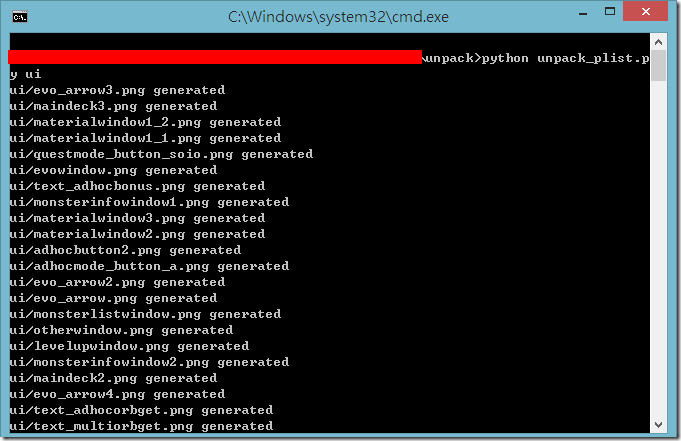
命令行: python unpack_plist.py plist文件名称
比如: python unpack_plist.py ui (我的plist文件全名为 ui.plist)


