定制你的Unity编辑器
Unity的编辑器可以通过写脚本进行界面定制,包括添加功能菜单,今天写游戏Demo用到了记录一下。
为Unity添加子菜单
示例程序
[AddComponentMenu("Defend Homeland/GridNode")]
public class GridNode : MonoBehaviour
{
      ......
}
子菜单预览
相应地在Unity的Component菜单下就会有我添加的脚本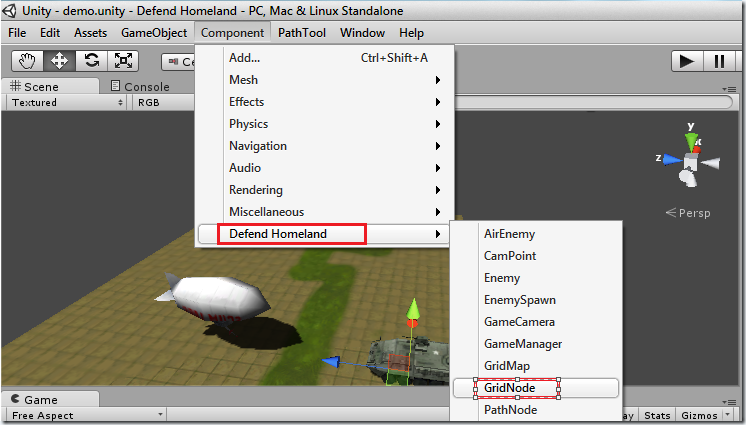
在编辑器中执行函数
示例代码
    //构建地图
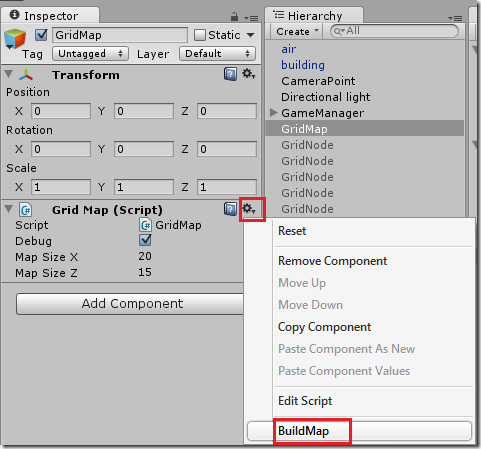
    [ContextMenu("BuildMap")]
    void BuildMap ()
    {
      .....
    }
把脚本绑定在GameObject上面时,点击右上角或者鼠标右键,就会看到在代码中添加的函数,点击即可执行。
public字段不显示在Inspector
示例代码
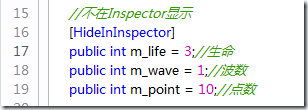
    //不在Inspector显示
    [HideInInspector]
    public int m_life = 3;//生命
    public int m_wave = 1;//波数
    public int m_point = 10;//点数
效果预览
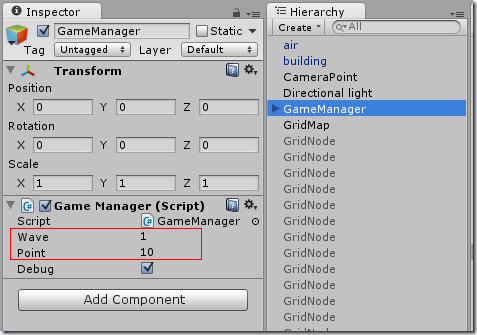
而这样在检视面板中就不会显示出m_life这个public类型,只有其它两个
自定义菜单栏
示例代码
using UnityEngine;
using UnityEditor;
using System.Collections;

/// <summary>
///
/// 作用:
/// 日期:2013-09-11
/// </summary>

[AddComponentMenu("Defend Homeland/PathTool")]
public class PathTool : ScriptableObject
{
    static PathNode m_parent = null;

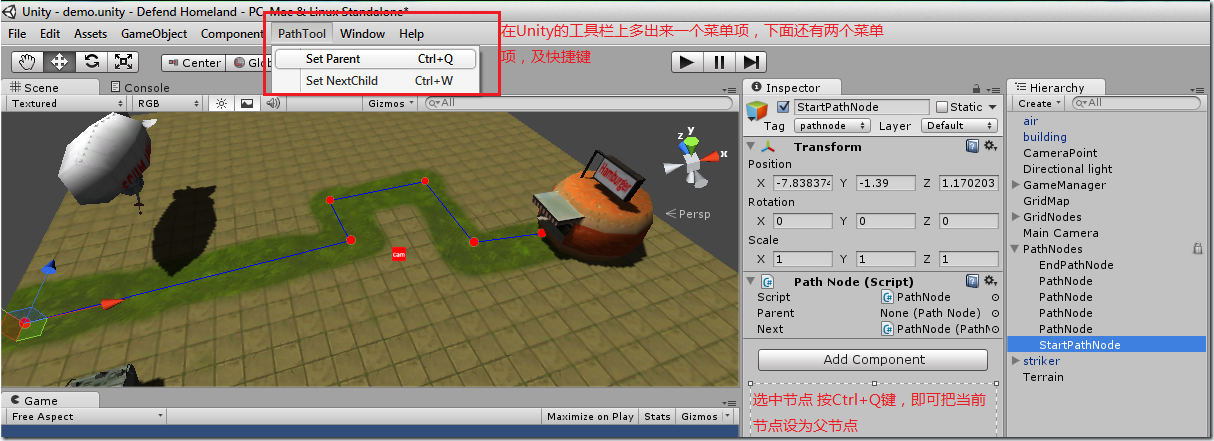
    //新建一个菜单项【PathTool】,子菜单项(Set Parent)快捷键为 Ctrl + Q
    [MenuItem("PathTool/Set Parent %q")]
    static void SetParent ()
    {
        //如果没有选中任何物体,或选择物体数量大于1,则返回
        if (!Selection.activeGameObject || Selection.GetTransforms (SelectionMode.Unfiltered).Length > 1)
            return;

        //如果选中,将选中的物体的tag设为pathnode
        if (Selection.activeGameObject.tag.CompareTo ("pathnode") == 0) {
            //设置父节点
            m_parent = Selection.activeGameObject.GetComponent<PathNode> ();
        }
    }

    //新建菜单项[PathTool/Set NextChild] ,快捷键为Ctrl+w
    [MenuItem("PathTool/Set NextChild %w")]
    static void SetNextChild ()
    {
        //如果没有选中任何物体,或选择的物体数量大于1,则返回
        if (!Selection.activeGameObject || Selection.GetTransforms (SelectionMode.Unfiltered).Length > 1)
            return;

        if (Selection.activeGameObject.tag.CompareTo ("pathnode") == 0) {
            //设置子节点
            m_parent.SetNext (Selection.activeGameObject.GetComponent<PathNode> ());
            m_parent = null;
        }
    }
}
添加菜单效果
回到Unity编辑器界面,界面发生了如下变化
资料
这些经验及小技巧来自我正在读的书《Unity3D手机游戏开发,感谢作者!


