
Nginx
Nginx是一款轻量级的HTTP服务器,采用事件驱动的异步非阻塞处理方式框架,这让其具有极好的IO性能,时常用于服务端的反向代理和负载均衡。
Nginx的优点
- 支持海量高并发:采用IO多路复用epoll。官方测试Nginx能够支持5万并发链接,实际生产环境中可以支撑2-4万并发连接数。
- 内存消耗少:在主流的服务器中Nginx目前是内存消耗最小的了,比如我们用Nginx+PHP,在3万并发链接下,开启10个Nginx进程消耗150M内存。
- 免费使用可以商业化:Nginx为开源软件,采用的是2-clause BSD-like协议,可以免费使用,并且可以用于商业。
- 配置文件简单:网络和程序配置通俗易懂,即使非专业运维也能看懂
Nginx的安装
安装必须软件
yum -y install gcc gcc-c++ autoconf pcre-devel make automake
yum -y install wget httpd-tools vim
添加yum源
vim /etc/yum.repos.d/nginx.repo
[nginx]
name=nginx repo
baseurl=http://nginx.org/packages/centos/7/$basearch/
gpgcheck=0
enabled=1
软件安装
yum install nginx
测试环境
nginx -v
查看nginx的安装目录
rpm -ql nginx
nginx.conf配置文件解读和配置
nginx.conf 文件是Nginx总配置文件,在我们搭建服务器时经常调整的文件。
进入etc/nginx目录下,然后用vim进行打开
cd /etc/nginx
vim nginx.conf
#运行用户,默认即是nginx,可以不进行设置
user  nginx;

#Nginx进程,一般设置为和CPU核数一样
worker_processes  1;

#错误日志存放目录
error_log  /var/log/nginx/error.log warn;

#进程pid存放位置
pid        /var/run/nginx.pid;


events {
    worker_connections  1024; # 单个后台进程的最大并发数
}


http {
    include       /etc/nginx/mime.types;   #文件扩展名与类型映射表
    default_type  application/octet-stream;  #默认文件类型
    #设置日志模式
    log_format  main  '$remote_addr - $remote_user [$time_local] "$request" '
                      '$status $body_bytes_sent "$http_referer" '
                      '"$http_user_agent" "$http_x_forwarded_for"';

    access_log  /var/log/nginx/access.log  main;   #nginx访问日志存放位置

    sendfile        on;   #开启高效传输模式
    #tcp_nopush     on;    #减少网络报文段的数量

    keepalive_timeout  65;  #保持连接的时间,也叫超时时间

    #gzip  on;  #开启gzip压缩

    include /etc/nginx/conf.d/*.conf; #包含的子配置项位置和文件
default.conf 配置项讲解
进入conf.d目录,然后使用vim default.conf进行查看。
server {
    listen       80;   #配置监听端口
    server_name  localhost;   #配置域名

    #charset koi8-r;
    #access_log  /var/log/nginx/host.access.log  main;

    location / {
        root   /usr/share/nginx/html;     #服务默认启动目录
        index  index.html index.htm;      #默认访问文件
    }

    #error_page  404              /404.html;   # 配置404页面

    # redirect server error pages to the static page /50x.html
    #
    error_page   500 502 503 504  /50x.html;   #错误状态码的显示页面,配置后需要重启
    location = /50x.html {
        root   /usr/share/nginx/html;
    }

    # proxy the PHP scripts to Apache listening on 127.0.0.1:80
    #
    #location ~ \.php$ {
    #    proxy_pass   http://127.0.0.1;
    #}

    # pass the PHP scripts to FastCGI server listening on 127.0.0.1:9000
    #
    #location ~ \.php$ {
    #    root           html;
    #    fastcgi_pass   127.0.0.1:9000;
    #    fastcgi_index  index.php;
    #    fastcgi_param  SCRIPT_FILENAME  /scripts$fastcgi_script_name;
    #    include        fastcgi_params;
    #}

    # deny access to .htaccess files, if Apache's document root
    # concurs with nginx's one
    #
    #location ~ /\.ht {
    #    deny  all;
    #}
}
Nginx服务相关命令
nginx #启动nginx服务
nginx -s stop #停止nginx服务
nginx -s quit #重容退出nginx服务 nginx -s reload #重新加载nginx配置文件systemctl命令操作nginx
systemctl start nginx.service   #启动nginx服务

systemctl stop nginx.service    #停止nginx服务

systemctl restart nginx.service  #重启nginx服务
查看nginx相关服务
netstat -nltp   | grep nginx   #查看nginx相关端口信息
ps aux | grep nginx     #查看是否存在nginx进程
自定义错误页面
准备好404.html
<html>
<meta charset="UTF-8">
<body>
<h1>404页面没有找到!</h1>
</body>
</html>
cd  /etc/nginx/conf.d/
vim default.conf
server {
listen 80; #配置监听端口
server_name localhost; //配置域名
location / {
root /usr/share/nginx/html; #服务默认启动目录
index index.html index.htm; #默认访问文件
}
error_page 500 502 503 504 /50x.html; #错误状态码的显示页面,配置后需要重启
error_page 404 /404.html; # 配置404页面
配置访问权限
server {
    listen       80;   #配置监听端口
    server_name  localhost;  //配置域名

    #注意  nginx里面的配置都是谁先触发,谁起作用,[先出现的配置会对后出现配置做覆盖和补充],所以allow必须放在deny的前面
    location / {
        root   /usr/share/nginx/html;     #服务默认启动目录
        index  index.html index.htm;      #默认访问文件
         allow  192.168.33.122;           #只允许192.168.33.122访问
         deny   all;                      #其他IP地址都不允许访问
    }

    error_page   500 502 503 504  /50x.html;   #错误状态码的显示页面,配置后需要重启
    error_page   404              /404.html;   # 配置404页面
    #error_page   404             http://www.xmoban.cn/demo/404moban/13/;   #也可以将404页面替换为一个404的网址

 location = /50x.html { root /usr/share/nginx/html; }
}
nginx基于端口号配置虚拟主机
基于端口号来配置虚拟主机,算是Nginx中最简单的一种方式了。原理就是Nginx监听多个端口,根据不同的端口号,来区分不同的网站。我们可以新建多个配置文件来创建多个虚拟主机
cd  /usr/share/nginx/html/
mkdir virtual01

cd  /etc/nginx/conf.d/
vim  virtual01.conf
server{
        listen 8001;
        server_name localhost;
        location /{
        root /usr/share/nginx/html/virtual01;
        index index.html;
}
}
在/usr/share/nginx/html/virtual01下创建一个测试页面index.html
<h1>welcome port 8001</h1>
测试8001端口是否可以访问
http://localhost:8001
基于IP的虚拟主机
cd  /etc/nginx/conf.d/
vim  virtual01.conf
server{
        listen 8001;
        server_name 192.168.33.122;  #修改IP地址为192.168.33.122
        location /{
        root /usr/share/nginx/html/virtual01;
        index index.html;
}
}
http://192.168.33.122:8001 #测试192.168.33.122的端口是否可以访问
域名映射
https://wanwang.aliyun.com/ #阿里云域名注册 需要阿里云的账户登录


购买完毕后 到控制台
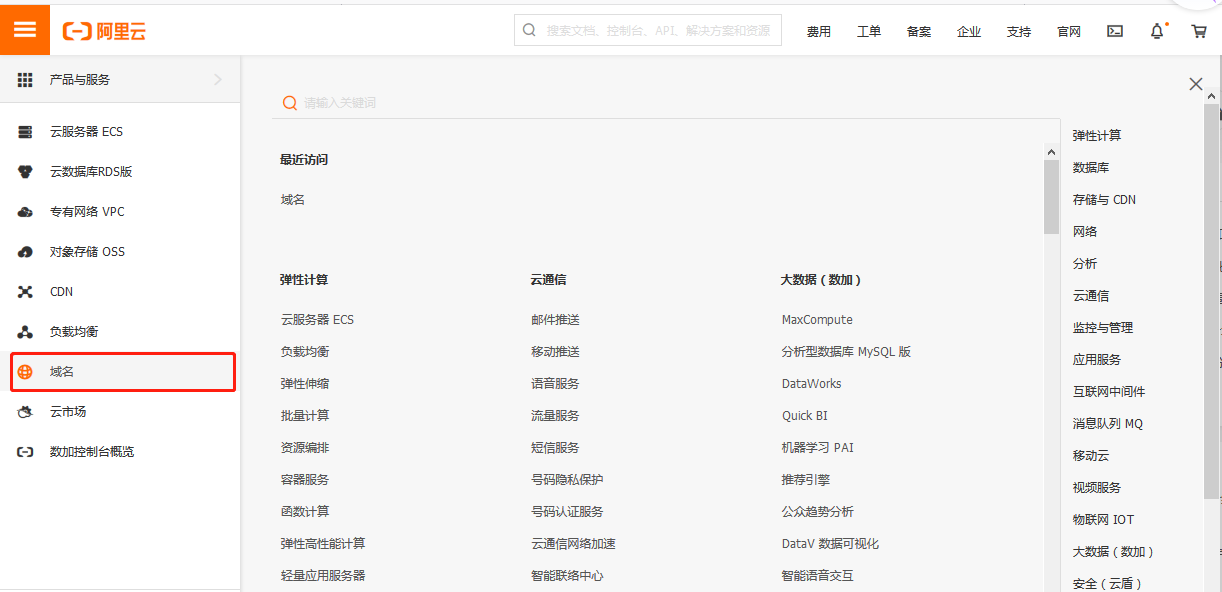
选择注册好的域名 进行解析

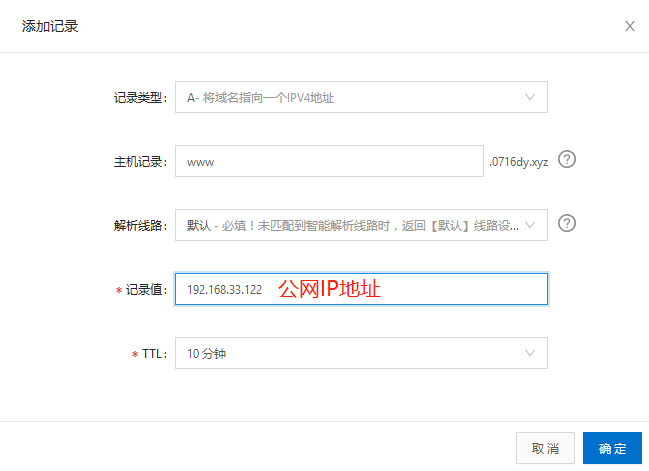
10分钟左右会生效

修改地址到域名
server{
        listen 80;
        server_name  www.0716dy.xyz;  #修改为自己注册的域名即可
        location / {
                root /usr/share/nginx/html/;
                index index.html index.htm;
        }
}
手机站和网页站自动切换
server{
     listen 80;
     server_name www.0719dy.xyz;
     location / {
      root /usr/share/nginx/pc;
      if ($http_user_agent ~* '(Android|webOS|iPhone|iPod|BlackBerry)') {
         root /usr/share/nginx/mobile;
      }
      index index.html;
     }
}
反向代理配置
upstream tomcats{
    server ip:8080; #Tomcat1
    server ip:8080; #Tomcat2
}

## Start www.redis.com.cn ##
server {
    listen 80;
    server_name  www.0719dy.xyz;

    ## send request back to apache ##
    location / {
        proxy_pass  http://tomcats;
        #Proxy Settings
        proxy_redirect     off;
        proxy_set_header   Host             $host;
        proxy_set_header   X-Real-IP        $remote_addr;
        proxy_set_header   X-Forwarded-For  $proxy_add_x_forwarded_for;
        proxy_next_upstream error timeout invalid_header http_500 http_502 http_503 http_504;
        proxy_max_temp_file_size 0;
        proxy_connect_timeout      90;
        proxy_send_timeout         90;
        proxy_read_timeout         90;
        proxy_buffer_size          4k;
        proxy_buffers              4 32k;
        proxy_busy_buffers_size    64k;
        proxy_temp_file_write_size 64k;
   }
}
反向代理还有些常用的指令,我在这里给大家列出:

    proxy_set_header :在将客户端请求发送给后端服务器之前,更改来自客户端的请求头信息。

    proxy_connect_timeout:配置Nginx与后端代理服务器尝试建立连接的超时时间。

    proxy_read_timeout : 配置Nginx向后端服务器组发出read请求后,等待相应的超时时间。

    proxy_send_timeout:配置Nginx向后端服务器组发出write请求后,等待相应的超时时间。

    proxy_redirect :用于修改后端服务器返回的响应头中的Location和Refresh。
GZIP压缩
http {
   .....
    gzip on;
    gzip_types text/plain application/javascript text/css;
   .....
}
Nginx提供了专门的gzip模块,并且模块中的指令非常丰富。

    gzip : 该指令用于开启或 关闭gzip模块。
    gzip_buffers : 设置系统获取几个单位的缓存用于存储gzip的压缩结果数据流。
    gzip_comp_level : gzip压缩比,压缩级别是1-9,1的压缩级别最低,9的压缩级别最高。压缩级别越高压缩率越大,压缩时间越长。
    gzip_disable : 可以通过该指令对一些特定的User-Agent不使用压缩功能。
    gzip_min_length:设置允许压缩的页面最小字节数,页面字节数从相应消息头的Content-length中进行获取。
    gzip_http_version:识别HTTP协议版本,其值可以是1.1.或1.0.
    gzip_proxied : 用于设置启用或禁用从代理服务器上收到相应内容gzip压缩。
    gzip_vary : 用于在响应消息头中添加Vary:Accept-Encoding,使代理服务器根据请求头中的Accept-Encoding识别是否启用gzip压缩。

