WebService-CXF使用
一、SOAP和WSDL概念:
SOAP(Simple Object Access Protocol):简单对象访问协议
SOAP作为一个基于XML语言的协议用于在网上传输数据
SOAP=在Http的基础上+xml数据
SOAP是基于http的
WSDL(WebService Description Language):web 服务描述语言,就是一个xml文档,用于描述当前服务的一些信息(服务名称、服务的发布地址、服务提供的方法、方法的参数类型、方法的返回值类型等)。
二、apache CXF入门
官网:cxf.apache.org下载CXF的开发包:
服务端开发:
第一步:创建动态web项目
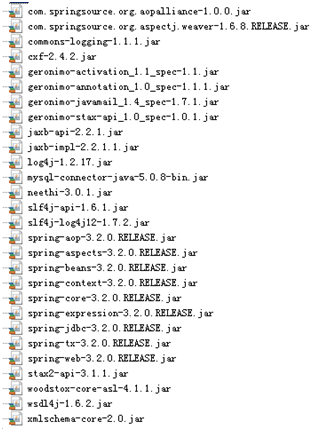
第二步:导入CXF相关jar包

第三步:在web.xml中配置CXF框架提供的一个Servlet
 1 <?xml version="1.0" encoding="UTF-8"?>
 2 <web-app xmlns:xsi="http://www.w3.org/2001/XMLSchema-instance"
 3     xmlns="http://java.sun.com/xml/ns/javaee"
 4     xsi:schemaLocation="http://java.sun.com/xml/ns/javaee http://java.sun.com/xml/ns/javaee/web-app_3_0.xsd"
 5     id="WebApp_ID" version="3.0">
 6     <display-name>crm</display-name>
 7     <welcome-file-list>
 8         <welcome-file>index.html</welcome-file>
 9         <welcome-file>index.htm</welcome-file>
10         <welcome-file>index.jsp</welcome-file>
11         <welcome-file>default.html</welcome-file>
12         <welcome-file>default.htm</welcome-file>
13         <welcome-file>default.jsp</welcome-file>
14     </welcome-file-list>
15
16     <!-- CXF Servlet -->
17     <servlet>
18         <servlet-name>cxf</servlet-name>
19         <servlet-class>org.apache.cxf.transport.servlet.CXFServlet</servlet-class>
20     </servlet>
21
22     <servlet-mapping>
23         <servlet-name>cxf</servlet-name>
24         <url-pattern>/service/*</url-pattern>
25     </servlet-mapping>
27     <!-- needed for ContextLoaderListener -->
28     <context-param>
29         <param-name>contextConfigLocation</param-name>
30         <param-value>classpath:cxf.xml</param-value>
31     </context-param>
32     <listener>
33         <listener-class>org.springframework.web.context.ContextLoaderListener</listener-class>
34     </listener>
35 </web-app>
第四步:在类路径下提供cxf.xml
<?xml version="1.0" encoding="UTF-8"?>
<beans xmlns="http://www.springframework.org/schema/beans"
    xmlns:xsi="http://www.w3.org/2001/XMLSchema-instance" xmlns:jaxws="http://cxf.apache.org/jaxws"
    xmlns:jaxrs="http://cxf.apache.org/jaxrs" xmlns:core="http://cxf.apache.org/core"
    xmlns:context="http://www.springframework.org/schema/context" xmlns:tx="http://www.springframework.org/schema/tx"
    xsi:schemaLocation="http://cxf.apache.org/jaxws http://cxf.apache.org/schemas/jaxws.xsd
        http://cxf.apache.org/core http://cxf.apache.org/schemas/core.xsd
        http://www.springframework.org/schema/beans http://www.springframework.org/schema/beans/spring-beans.xsd
        http://www.springframework.org/schema/context http://www.springframework.org/schema/context/spring-context-3.2.xsd
        http://cxf.apache.org/jaxrs http://cxf.apache.org/schemas/jaxrs.xsd
        http://www.springframework.org/schema/tx http://www.springframework.org/schema/tx/spring-tx-3.2.xsd">
    <!-- 引入CXF Bean定义如下,早期的版本中使用 -->
    <import resource="classpath:META-INF/cxf/cxf.xml" />
    <import resource="classpath:META-INF/cxf/cxf-extension-soap.xml" />
    <import resource="classpath:META-INF/cxf/cxf-servlet.xml" />
</beans>
第五步:开发一个接口和实现类


第六步:在cxf.xml中注册服务

客户端开发
第一步:创建Java项目并导入CXF相关jar包
第二步:使用wsimport或者CXF提供wsdl2java生成本地代码,只需要生成接口文件
wsdl2java 工具:此工具位于cxf_home/bin目录下,
它包含以下参数:
-d:指定代码生成的目录
-p:指定生成的新的包结构

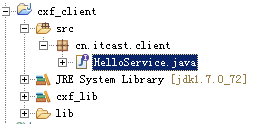
第三步:将接口文件复制到项目中

第四步:提供spring配置文件,注册客户端代理对象

第五步:读取spring配置文件,创建spring工厂,从工厂中获取代理对象,实现远程调用


