
本文讲述如何在vue-cli3项目中引入svg格式图片并封装成通用vue组件
本文讲述如何在vue-cli3项目中引入svg格式图片并封装成通用vue组件
1.首先在src路径下的components文件夹里新建一个IconSvg.vue组件template里面写入
| <svg :class="svgClass" aria-hidden="true" v-on="$listeners"> |
| <use :xlink:href="iconName" /> |
| </svg> |
props接收两个值iconClass与className;然后通过计算属性根据组件中传入的iconClass以及className去计算iconName以及svgClass
| props: { |
| iconClass: { |
| type: String, |
| required: true |
| }, |
| className: { |
| type: String, |
| default: '' |
| } |
| }, |
整体组件代码如下
| <template> |
| <svg :class="svgClass" |
| aria-hidden="true" |
| v-on="$listeners"> |
| <use :xlink:href="iconName" /> |
| </svg> |
| </template> |
| |
| <script> |
| |
| export default { |
| name: 'IconSvg', |
| props: { |
| iconClass: { |
| type: String, |
| required: true |
| }, |
| className: { |
| type: String, |
| default: '' |
| } |
| }, |
| computed: { |
| iconName () { |
| return `#icon-${this.iconClass}` |
| }, |
| svgClass () { |
| if (this.className) { |
| return this.iconClass + ' svg-icon ' + this.className |
| } else { |
| return this.iconClass + ' svg-icon' |
| } |
| }, |
| } |
| } |
| </script> |
| |
| <style scoped> |
| .svg-icon { |
| width: 17px; |
| height: 17px; |
| vertical-align: -0.15em; |
| fill: currentColor; |
| overflow: hidden; |
| font-size: 16px; |
| } |
| </style> |
| |
2.在全局引入该组件并注册该组件(或者可以通过页面单独引用的方式进行组件的注册)
在main.js中
| |
| import IconSvg from '@components/IconSvg' |
| |
| Vue。component('icon-svg',IconSvg) |
| |
| |
| import '../src/assets/icon' |
| 某页面单独引入组件: |
| import IconSvg from '../components/IconSvg.vue'; |
| export default { |
| name: 'xxx', |
| components: { |
| IconSvg, |
| }, |
| ... |
| |
3.在src下assets下新建icon文件夹icon下新建svg文件夹用于存放项目所需要的所有svg格式的文件;在与svg文件夹同级新建index.js文件用于写入将组件注册全局js代码:
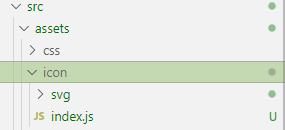
index.js:
| const req = require.context('./svg', false, /\.svg$/) |
| const requireAll = requireContext => requireContext.keys().map(requireContext) |
| requireAll(req) |
4. loader(svg-sprite-loader组件的使用)
- 在项目中新建vue.config.js文件

2.安装插件svg-sprite-loader并使用
npm i -D svg-sprite-loader
3.需要在vue.config.js中配置
| chainWebpack (config) { |
| // config.entry('main').add('babel-polyfill') |
| config.module |
| .rule('svg') |
| .exclude.add(resolve('src/assets/icon')) |
| .end() |
| config.module |
| .rule('icons') |
| .test(/\.svg$/) |
| .include.add(resolve('src/assets/icon')) |
| .end() |
| .use('svg-sprite-loader') |
| .loader('svg-sprite-loader') |
| .options({ |
| symbolId: 'icon-[name]' |
| }) |
| .end() |
| }, |
5.组件的使用方法:
将要使用的svg格式的图片编辑好名字放入svg文件夹下,然后在想要引入组件中使用该组件即可:
| ... |
| <IconSvg :iconClass="icon" |
| class="hover-fill" |
| :style="{fontSize:'20px'}" |
| v-if="link.icon"></IconSvg>{{iconName}} |
| ... |
| export default { |
| name: 'xxx', |
| components: { |
| IconSvg, |
| }, |
| ... |


【推荐】国内首个AI IDE,深度理解中文开发场景,立即下载体验Trae
【推荐】编程新体验,更懂你的AI,立即体验豆包MarsCode编程助手
【推荐】抖音旗下AI助手豆包,你的智能百科全书,全免费不限次数
【推荐】轻量又高性能的 SSH 工具 IShell:AI 加持,快人一步
· 无需6万激活码!GitHub神秘组织3小时极速复刻Manus,手把手教你使用OpenManus搭建本
· Manus爆火,是硬核还是营销?
· 终于写完轮子一部分:tcp代理 了,记录一下
· 别再用vector<bool>了!Google高级工程师:这可能是STL最大的设计失误
· 单元测试从入门到精通