


ElasticSearch学习笔记-尚硅谷
学习视频链接:https://www.bilibili.com/video/BV1hh411D7sb
参考:https://blog.csdn.net/u011863024/article/details/115721328
一、Elasticsearch入门
官方地址:https://www.elastic.co/cn/
官方文档:https://www.elastic.co/guide/index.html
ElasticSearch7.8下载界面:https://www.elastic.co/cn/downloads/past-releases/elasticsearch-7-8-0
Windows 版的 Elasticsearch 压缩包,解压即安装完毕,解压后的 Elasticsearch 的目录结构如下 :
| 目录 | 含义 |
| bin | 可执行脚本目录 |
| config | 配置目录 |
| jdk | 内置JDK目录 |
| lib | 类库 |
| logs | 日志目录 |
| modules | 模块目录 |
| plugins | 插件目录 |
解压后,进入 bin 文件目录,点击 elasticsearch.bat 文件启动 ES 服务 。
注意: 9300 端口为 Elasticsearch 集群间组件的通信端口, 9200 端口为浏览器访问的 http协议 RESTful 端口。
打开浏览器,输入地址: http://localhost:9200,测试返回结果,返回结果如下:
1 2 3 4 5 6 7 8 9 10 11 12 13 14 15 16 17 | { "name": "ZHIXI", "cluster_name": "elasticsearch", "cluster_uuid": "jMVQWiD7RZeoyghlUYF5MQ", "version": { "number": "7.6.1", "build_flavor": "default", "build_type": "zip", "build_hash": "aa751e09be0a5072e8570670309b1f12348f023b", "build_date": "2020-02-29T00:15:25.529771Z", "build_snapshot": false, "lucene_version": "8.4.0", "minimum_wire_compatibility_version": "6.8.0", "minimum_index_compatibility_version": "6.0.0-beta1" }, "tagline": "You Know, for Search"} |
1、索引的创建&查询&删除
创建
对比关系型数据库,创建索引就等同于创建数据库。
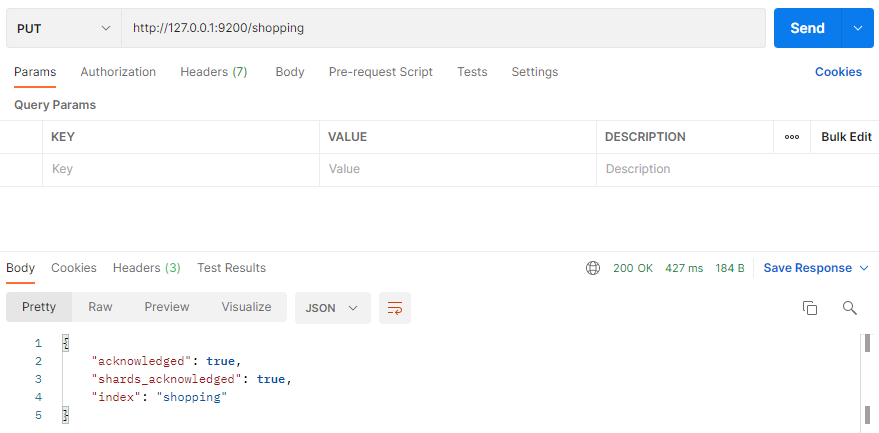
在 Postman 中,向 ES 服务器发 PUT 请求 : http://127.0.0.1:9200/shopping
请求后,服务器返回响应:
查询所有的索引
在 Postman 中,向 ES 服务器发 GET 请求 : http://127.0.0.1:9200/_cat/indices?v
这里请求路径中的_cat 表示查看的意思, indices 表示索引,所以整体含义就是查看当前 ES服务器中的所有索引,就好像 MySQL 中的 show tables 的感觉,服务器响应结果如下 :
1 2 | health status index uuid pri rep docs.count docs.deleted store.size pri.store.sizeyellow open shopping u9hibY2NTjuhAiYeY24y4A 1 1 0 0 230b 230b |
| 表头 | 含义 |
| health | 当前服务器健康状态: green(集群完整) yellow(单点正常、集群不完整) red(单点不正常) |
| status | 索引打开、关闭状态 |
| index | 索引名 |
| uuid | 索引统一编号 |
| pri | 主分片数量 |
| rep | 副本数量 |
| docs.count | 可用文档数量 |
| docs.delete | 文档删除状态(逻辑删除) |
| store.size | 主分片和副分片整体占空间大小 |
| pri.store.size | 主分片占空间大小 |
查看单个索引
1 2 3 4 5 6 7 8 9 10 11 12 13 14 15 16 17 18 | { "shopping": {//索引名 "aliases": {},//别名 "mappings": {},//映射 "settings": {//设置 "index": {//设置 - 索引 "creation_date": "1617861426847",//设置 - 索引 - 创建时间 "number_of_shards": "1",//设置 - 索引 - 主分片数量 "number_of_replicas": "1",//设置 - 索引 - 主分片数量 "uuid": "J0WlEhh4R7aDrfIc3AkwWQ",//设置 - 索引 - 主分片数量 "version": {//设置 - 索引 - 主分片数量 "created": "7080099" }, "provided_name": "shopping"//设置 - 索引 - 主分片数量 } } }} |
删除索引
在 Postman 中,向 ES 服务器发 DELETE 请求 : http://127.0.0.1:9200/shopping
返回结果如下:
1 2 3 | { "acknowledged": true} |
再次查看所有索引,GET http://127.0.0.1:9200/_cat/indices?v,返回结果如下:
1 | health status index uuid pri rep docs.count docs.deleted store.size pri.store.size |
2、文档的创建
假设索引已经创建好了,接下来我们来创建文档,并添加数据。这里的文档可以类比为关系型数据库中的表数据,添加的数据格式为 JSON 格式
在 Postman 中,向 ES 服务器发 POST 请求 : http://127.0.0.1:9200/shopping/_doc,请求体JSON内容为: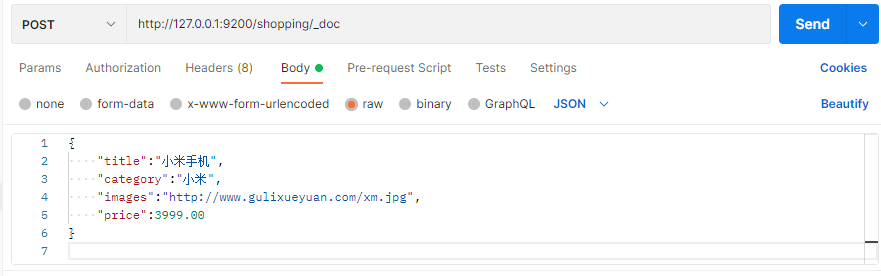
注意,此处发送请求的方式必须为 POST,不能是 PUT,否则会发生错误 。
返回结果:
1 2 3 4 5 6 7 8 9 10 11 12 13 14 | { "_index": "shopping",//索引 "_type": "_doc",//类型-文档 "_id": "ANQqsHgBaKNfVnMbhZYU",//唯一标识,可以类比为 MySQL 中的主键,随机生成 "_version": 1,//版本 "result": "created",//结果,这里的 create 表示创建成功 "_shards": {// "total": 2,//分片 - 总数 "successful": 1,//分片 - 总数 "failed": 0//分片 - 总数 }, "_seq_no": 0, "_primary_term": 1} |
上面的数据创建后,由于没有指定数据唯一性标识(ID),默认情况下, ES 服务器会随机生成一个。
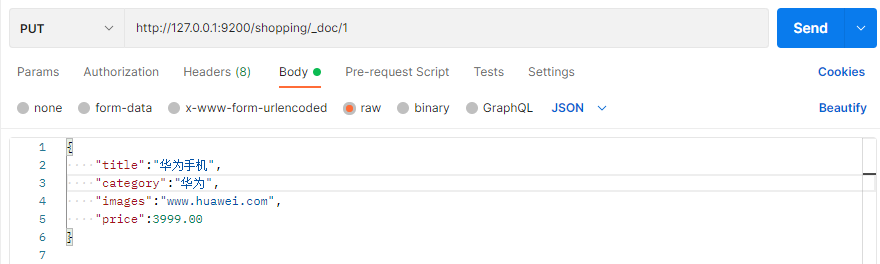
如果想要自定义唯一性标识,需要在创建时指定: http://127.0.0.1:9200/shopping/_doc/1,请求体JSON内容为:
1 2 3 4 5 6 7 8 9 10 11 12 13 14 | { "_index": "shopping", "_type": "_doc", "_id": "1",//<------------------自定义唯一性标识 "_version": 1, "result": "created", "_shards": { "total": 2, "successful": 1, "failed": 0 }, "_seq_no": 1, "_primary_term": 1} |
此处需要注意:如果增加数据时明确数据主键,那么请求方式也可以为 PUT。
3、主键查询&全查询
主键查询
查看文档时,需要指明文档的唯一性标识,类似于 MySQL 中数据的主键查询
在 Postman 中,向 ES 服务器发 GET 请求 : http://127.0.0.1:9200/shopping/_doc/1
返回结果如下:
1 2 3 4 5 6 7 8 9 10 11 12 13 14 15 | { "_index": "shopping", "_type": "_doc", "_id": "1", "_version": 1, "_seq_no": 1, "_primary_term": 1, "found": true, "_source": { "title": "小米手机", "category": "小米", "images": "http://www.gulixueyuan.com/xm.jpg", "price": 3999 }} |
全查询
查看索引下所有数据,向 ES 服务器发 GET 请求 : http://127.0.0.1:9200/shopping/_search
返回结果如下:
1 2 3 4 5 6 7 8 9 10 11 12 13 14 15 16 17 18 19 20 21 22 23 24 25 26 27 28 29 30 31 32 33 34 35 36 37 38 39 40 41 42 43 44 45 46 47 48 49 50 51 52 53 54 55 | { "took": 65, "timed_out": false, "_shards": { "total": 1, "successful": 1, "skipped": 0, "failed": 0 }, "hits": { "total": { "value": 3, "relation": "eq" }, "max_score": 1.0, "hits": [ { "_index": "shopping", "_type": "_doc", "_id": "QbWRHH8Bmr0OZbMUK5Qv", "_score": 1.0, "_source": { "title": "小米手机", "category": "小米", "images": "http://www.gulixueyuan.com/xm.jpg", "price": 3999.00 } }, { "_index": "shopping", "_type": "_doc", "_id": "2", "_score": 1.0, "_source": { "title": "华为手机", "category": "华为", "images": "www.huawei.com", "price": 3999.00 } }, { "_index": "shopping", "_type": "_doc", "_id": "1", "_score": 1.0, "_source": { "title": "小米手机", "category": "小米", "images": "http://www.gulixueyuan.com/xm.jpg", "price": 3999.00 } } ] }} |
4、文档的全量修改 & 局部修改 & 删除
全量修改
和新增文档一样,输入相同的 URL 地址请求,如果请求体变化,会将原有的数据内容覆盖
在 Postman 中,向 ES 服务器发 POST 请求 : http://127.0.0.1:9200/shopping/_doc/1
请求体JSON内容为:
1 2 3 4 5 6 | { "title":"一加手机", "category":"一加", "images":"https://www.oneplus.com/cn", "price":1999.00} |
修改成功后,服务器响应结果:
1 2 3 4 5 6 7 8 9 10 11 12 13 14 | { "_index": "shopping", "_type": "_doc", "_id": "1", "_version": 2, "result": "updated",//<-----------updated 表示数据被更新 "_shards": { "total": 2, "successful": 1, "failed": 0 }, "_seq_no": 2, "_primary_term": 1} |
局部修改
修改数据时,也可以只修改某一给条数据的局部信息
在 Postman 中,向 ES 服务器发 POST 请求 : http://127.0.0.1:9200/shopping/_update/1
请求体JSON内容为:
1 2 3 4 5 6 | { "title":"一加手机", "category":"OnePlus", "images":"https://www.oneplus.com/cn", "price":5999.00} |
返回结果如下:
1 2 3 4 5 6 7 8 9 10 11 12 13 14 | { "_index": "shopping", "_type": "_doc", "_id": "1", "_version": 4, "result": "updated", ---->表示数据被更新 "_shards": { "total": 2, "successful": 1, "failed": 0 }, "_seq_no": 5, "_primary_term": 2} |
在 Postman 中,向 ES 服务器发 GET请求 : http://127.0.0.1:9200/shopping/_doc/1,查看修改内容:
1 2 3 4 5 6 7 8 9 10 11 12 13 14 15 | { "_index": "shopping", "_type": "_doc", "_id": "1", "_version": 4, "_seq_no": 5, "_primary_term": 2, "found": true, "_source": { "title": "一加手机", "category": "OnePlus", "images": "https://www.oneplus.com/cn", "price": 5999.00 }} |
删除
删除一个文档不会立即从磁盘上移除,它只是被标记成已删除(逻辑删除)。
在 Postman 中,向 ES 服务器发 DELETE 请求 : http://127.0.0.1:9200/shopping/_doc/1
返回结果:
1 2 3 4 5 6 7 8 9 10 11 12 13 14 | { "_index": "shopping", "_type": "_doc", "_id": "2", "_version": 2, "result": "deleted", "_shards": { "total": 2, "successful": 1, "failed": 0 }, "_seq_no": 6, "_primary_term": 2} |
在 Postman 中,向 ES 服务器发 GET请求 : http://127.0.0.1:9200/shopping/_doc/1,查看是否删除成功:
1 2 3 4 5 6 | { "_index": "shopping", "_type": "_doc", "_id": "2", "found": false} |
5、条件查询 & 分页查询 & 查询排序
条件查询
假设有以下文档内容,(在 Postman 中,向 ES 服务器发 GET请求 : http://127.0.0.1:9200/shopping/_search
1 2 3 4 5 6 7 8 9 10 11 12 13 14 15 16 17 18 19 20 21 22 23 24 25 26 27 28 29 30 31 32 33 34 35 36 37 38 39 40 41 42 43 44 45 46 47 48 49 50 51 52 53 54 55 | { "took": 851, "timed_out": false, "_shards": { "total": 1, "successful": 1, "skipped": 0, "failed": 0 }, "hits": { "total": { "value": 3, "relation": "eq" }, "max_score": 1.0, "hits": [ { "_index": "shopping", "_type": "_doc", "_id": "1", "_score": 1.0, "_source": { "title": "小米手机", "category": "小米", "images": "http://www.gulixueyuan.com/xm.jpg", "price": 3999.00 } }, { "_index": "shopping", "_type": "_doc", "_id": "3", "_score": 1.0, "_source": { "title": "红米手机", "category": "小米", "images": "http://www.gulixueyuan.com/xm.jpg", "price": 3999.00 } }, { "_index": "shopping", "_type": "_doc", "_id": "2", "_score": 1.0, "_source": { "title": "华为手机", "category": "华为", "images": "http://www.huawei.com", "price": 5999.00 } } ] }} |
带参查询
查找category为小米的文档,在 Postman 中,向 ES 服务器发 GET请求 : http://127.0.0.1:9200/shopping/_search?q=category:小米
返回结果如下:
1 2 3 4 5 6 7 8 9 10 11 12 13 14 15 16 17 18 19 20 21 22 23 24 25 26 27 28 29 30 31 32 33 34 35 36 37 38 39 40 41 42 43 | { "took": 1, "timed_out": false, "_shards": { "total": 1, "successful": 1, "skipped": 0, "failed": 0 }, "hits": { "total": { "value": 2, "relation": "eq" }, "max_score": 0.5753642, "hits": [ { "_index": "shopping", "_type": "_doc", "_id": "1", "_score": 0.5753642, "_source": { "title": "小米手机", "category": "小米", "images": "http://www.gulixueyuan.com/xm.jpg", "price": 3999.00 } }, { "_index": "shopping", "_type": "_doc", "_id": "3", "_score": 0.5753642, "_source": { "title": "红米手机", "category": "小米", "images": "http://www.gulixueyuan.com/xm.jpg", "price": 3999.00 } } ] }} |
上述为URL带参数形式查询,这很容易让不善者心怀恶意,或者参数值出现中文会出现乱码情况。为了避免这些情况,我们可用使用带JSON请求体请求进行查询。
请求体带参查询
接下带JSON请求体,还是查找category为小米的文档,在 Postman 中,向 ES 服务器发 GET请求 : http://127.0.0.1:9200/shopping/_search
附带JSON体如下:
1 2 3 4 5 6 7 | { "query":{ "match":{ "category":"小米" } }} |

查找所有文档的内容:GET http://127.0.0.1:9200/shopping/_search,附带JSON参数如下
1 2 3 4 5 | { "query":{ "match_all":{} }} |
查询指定字段: 在 Postman 中,向 ES 服务器发 GET请求 : http://127.0.0.1:9200/shopping/_search,附带JSON体如下:
1 2 3 4 5 6 | { "query":{ "match_all":{} }, "_source":["title"]} |
分页查询
在 Postman 中,向 ES 服务器发 GET请求 : http://127.0.0.1:9200/shopping/_search,附带JSON体如下:
表示查询所有,从0开始,每页显示2条数据
1 2 3 4 5 6 7 | { "query":{ "match_all":{} }, "from":0, "size":2} |
查询排序
如果你想通过排序查出价格最高的手机(降序),在 Postman 中,向 ES 服务器发 GET请求 : http://127.0.0.1:9200/shopping/_search,附带JSON体如下:
1 2 3 4 5 6 7 8 9 10 | { "query":{ "match_all":{} }, "sort":{ "price":{ "order":"desc" } }} |
6、多条件查询 & 范围查询
多条件查询
假设想找出小米牌子,价格为3999元的。(must相当于数据库的&&)
在 Postman 中,向 ES 服务器发 GET请求 : http://127.0.0.1:9200/shopping/_search,附带JSON体如下:
1 2 3 4 5 6 7 8 9 10 11 12 13 14 15 | { "query":{ "bool":{ "must":[{ "match":{ "category":"小米" } },{ "match":{ "price":3999.00 } }] } }} |
假设想找出小米和华为的牌子。(should相当于数据库的||)
在 Postman 中,向 ES 服务器发 GET请求 : http://127.0.0.1:9200/shopping/_search,附带JSON体如下:
并且价格大于3999
1 2 3 4 5 6 7 8 9 10 11 12 13 14 15 16 17 18 19 20 21 22 | { "query":{ "bool":{ "should":[{ "match":{ "category":"小米" } },{ "match":{ "category":"华为" } }], "filter":{ "range":{ "price":{ "gt":3999 } } } } }} |
范围查询
假设想找出小米和华为的牌子,价格大于2000元的手机。
在 Postman 中,向 ES 服务器发 GET请求 : http://127.0.0.1:9200/shopping/_search,附带JSON体如下:
1 2 3 4 5 6 7 8 9 10 11 12 13 14 15 16 17 18 19 20 21 22 | { "query":{ "bool":{ "should":[{ "match":{ "category":"小米" } },{ "match":{ "category":"华为" } }], "filter":{ "range":{ "price":{ "gt":2000 } } } } }} |
7、全文检索 & 完全匹配 & 高亮查询
全文检索
这功能像搜索引擎那样,如品牌输入“小华”,返回结果带回品牌有“小米”和华为的。
在 Postman 中,向 ES 服务器发 GET请求 : http://127.0.0.1:9200/shopping/_search,附带JSON体如下:
1 2 3 4 5 6 7 | { "query":{ "match":{ "category" : "小华" } }} |
完全匹配
在 Postman 中,向 ES 服务器发 GET请求 : http://127.0.0.1:9200/shopping/_search,附带JSON体如下:
1 2 3 4 5 6 7 | { "query":{ "match_phrase":{ "category" : "为" } }} |
高亮匹配
在 Postman 中,向 ES 服务器发 GET请求 : http://127.0.0.1:9200/shopping/_search,附带JSON体如下:
1 2 3 4 5 6 7 8 9 10 11 12 | { "query":{ "match_phrase":{ "category" : "为" } }, "highlight":{ "fields":{ "category":{}//<----高亮这字段 } }} |
8、聚合查询
聚合允许使用者对 es 文档进行统计分析,类似与关系型数据库中的 group by,当然还有很多其他的聚合,例如取最大值max、平均值avg等等。
接下来按price字段进行分组:
在 Postman 中,向 ES 服务器发 GET请求 : http://127.0.0.1:9200/shopping/_search,附带JSON体如下:
1 2 3 4 5 6 7 8 9 | { "aggs":{//聚合操作 "price_group":{//名称,随意起名 "terms":{//分组 "field":"price"//分组字段 } } }} |
若想对所有手机价格求平均值。
在 Postman 中,向 ES 服务器发 GET请求 : http://127.0.0.1:9200/shopping/_search,附带JSON体如下:
1 2 3 4 5 6 7 8 9 10 | { "aggs":{ "price_avg":{//名称,随意起名 "avg":{//求平均 "field":"price" } } }, "size":0} |
9、映射关系
有了索引库,等于有了数据库中的 database。
接下来就需要建索引库(index)中的映射了,类似于数据库(database)中的表结构(table)。
创建数据库表需要设置字段名称,类型,长度,约束等;索引库也一样,需要知道这个类型下有哪些字段,每个字段有哪些约束信息,这就叫做映射(mapping)。
先创建一个索引
1 | PUT http://127.0.0.1:9200/user |
返回结果:
1 2 3 4 5 | { "acknowledged": true, "shards_acknowledged": true, "index": "user"} |
创建映射
PUT http://127.0.0.1:9200/user/_mapping,附带JSON信息如下:
1 2 3 4 5 6 7 8 9 10 11 12 13 14 15 16 | { "properties": { "name":{ "type": "text", "index": true }, "sex":{ "type": "keyword", "index": true }, "tel":{ "type": "keyword", "index": false } }} |
返回结果:
1 2 3 | { "acknowledged": true} |
查询映射
GET http://127.0.0.1:9200/user/_mapping
返回结果如下:
1 2 3 4 5 6 7 8 9 10 11 12 13 14 15 16 17 18 | { "user": { "mappings": { "properties": { "name": { "type": "text" }, "sex": { "type": "keyword" }, "tel": { "type": "keyword", "index": false } } } }} |
添加数据
PUT http://127.0.0.1:9200/user/_create/1001,附带JSON如下:
1 2 3 4 5 | { "name":"小米", "sex":"男的", "tel":"1111"} |
返回结果如下:
1 2 3 4 5 6 7 8 9 10 11 12 13 14 | { "_index": "user", "_type": "_doc", "_id": "1001", "_version": 1, "result": "created", "_shards": { "total": 2, "successful": 1, "failed": 0 }, "_seq_no": 0, "_primary_term": 1} |
查询数据
查找name含有‘小’的数据:
GET http://127.0.0.1:9200/user/_search
1 2 3 4 5 6 7 | { "query":{ "match":{ "name":"小" } }} |
返回结果如下:
1 2 3 4 5 6 7 8 9 10 11 12 13 14 15 16 17 18 19 20 21 22 23 24 25 26 27 28 29 30 | { "took": 354, "timed_out": false, "_shards": { "total": 1, "successful": 1, "skipped": 0, "failed": 0 }, "hits": { "total": { "value": 1, "relation": "eq" }, "max_score": 0.2876821, "hits": [ { "_index": "user", "_type": "_doc", "_id": "1001", "_score": 0.2876821, "_source": { "name": "小米", "sex": "男的", "tel": "1111" } } ] }} |
查询sex含有‘男’的数据:
GET http://127.0.0.1:9200/user/_search
1 2 3 4 5 6 7 | { "query":{ "match":{ "sex":"男" } }} |
返回结果如下:
1 2 3 4 5 6 7 8 9 10 11 12 13 14 15 16 17 18 | { "took": 1, "timed_out": false, "_shards": { "total": 1, "successful": 1, "skipped": 0, "failed": 0 }, "hits": { "total": { "value": 0, "relation": "eq" }, "max_score": null, "hits": [] }} |
找不想要的结果,只因创建映射时"sex"的类型为"keyword"。
"sex"只能完全为”男的“,才能得出原数据。
1 2 3 4 5 6 7 8 | #GET http://127.0.0.1:9200/user/_search{ "query":{ "match":{ "sex":"男的" } }} |
查询电话:
1 2 3 4 5 6 7 8 9 | GET http://127.0.0.1:9200/user/_search{ "query":{ "match":{ "tel":"11" } }} |
返回结果如下:
1 2 3 4 5 6 7 8 9 10 11 12 13 14 15 16 17 18 19 20 21 22 23 24 25 26 27 28 29 30 31 32 33 34 | { "error": { "root_cause": [ { "type": "query_shard_exception", "reason": "failed to create query: {\n \"match\" : {\n \"tel\" : {\n \"query\" : \"11\",\n \"operator\" : \"OR\",\n \"prefix_length\" : 0,\n \"max_expansions\" : 50,\n \"fuzzy_transpositions\" : true,\n \"lenient\" : false,\n \"zero_terms_query\" : \"NONE\",\n \"auto_generate_synonyms_phrase_query\" : true,\n \"boost\" : 1.0\n }\n }\n}", "index_uuid": "lvGmyIx6RbSG_bV9wnZGfg", "index": "user" } ], "type": "search_phase_execution_exception", "reason": "all shards failed", "phase": "query", "grouped": true, "failed_shards": [ { "shard": 0, "index": "user", "node": "F77uDwlKTdS-TMoG7U_8SA", "reason": { "type": "query_shard_exception", "reason": "failed to create query: {\n \"match\" : {\n \"tel\" : {\n \"query\" : \"11\",\n \"operator\" : \"OR\",\n \"prefix_length\" : 0,\n \"max_expansions\" : 50,\n \"fuzzy_transpositions\" : true,\n \"lenient\" : false,\n \"zero_terms_query\" : \"NONE\",\n \"auto_generate_synonyms_phrase_query\" : true,\n \"boost\" : 1.0\n }\n }\n}", "index_uuid": "lvGmyIx6RbSG_bV9wnZGfg", "index": "user", "caused_by": { "type": "illegal_argument_exception", "reason": "Cannot search on field [tel] since it is not indexed." } } } ] }, "status": 400} |
报错只因创建映射时"tel"的"index"为false。
二、ES-JavaAPI的使用
新建Maven项目,添加依赖:
1 2 3 4 5 6 7 8 9 10 11 12 13 14 15 16 17 18 19 20 21 22 23 24 25 26 27 28 29 30 31 32 33 34 35 | <dependencies> <dependency> <groupId>org.elasticsearch</groupId> <artifactId>elasticsearch</artifactId> <version>7.6.1</version> </dependency> <!-- elasticsearch 的客户端 --> <dependency> <groupId>org.elasticsearch.client</groupId> <artifactId>elasticsearch-rest-high-level-client</artifactId> <version>7.6.1</version> </dependency> <!-- elasticsearch 依赖 2.x 的 log4j --> <dependency> <groupId>org.apache.logging.log4j</groupId> <artifactId>log4j-api</artifactId> <version>2.8.2</version> </dependency> <dependency> <groupId>org.apache.logging.log4j</groupId> <artifactId>log4j-core</artifactId> <version>2.8.2</version> </dependency> <dependency> <groupId>com.fasterxml.jackson.core</groupId> <artifactId>jackson-databind</artifactId> <version>2.9.9</version> </dependency> <!-- junit 单元测试 --> <dependency> <groupId>junit</groupId> <artifactId>junit</artifactId> <version>4.12</version> </dependency></dependencies> |

public class Elastic01HelloWorld {
    public static void main(String[] args) throws IOException {
        /*1、创建客户端对象*/
        RestHighLevelClient restHighLevelClient = new RestHighLevelClient(RestClient.builder(new HttpHost("localhost", 9200, "http")));
        System.out.println(restHighLevelClient);
        /*2、关闭客户端连接*/
        restHighLevelClient.close();
    }
}
1、索引的创建
public class Elastic02CreateIndex {
    public static void main(String[] args) throws IOException {
        /*1、创建客户端对象*/
        RestHighLevelClient restHighLevelClient = new RestHighLevelClient(RestClient.builder(new HttpHost("localhost", 9200, "http")));
        /*2、创建索引请求对象*/
        CreateIndexRequest indexRequest = new CreateIndexRequest("user2");
        /*3、发送请求,获取相应*/
        CreateIndexResponse indexResponse = restHighLevelClient.indices().create(indexRequest, RequestOptions.DEFAULT);
        System.out.println("响应状态:" + indexResponse.isAcknowledged());

        restHighLevelClient.close();
    }
}
打印结果:
1 | 响应状态:true |
2、索引的查询与删除
查询:
/**
     * 索引的查询
     *
     * @throws IOException 异常
     */
    @Test
    public void elasticQuery() throws IOException {
        // 创建客户端对象
        RestHighLevelClient client = new RestHighLevelClient(
                RestClient.builder(new HttpHost("localhost", 9200, "http")));

        // 查询索引 - 请求对象
        GetIndexRequest request = new GetIndexRequest("user2");
        // 发送请求,获取响应
        GetIndexResponse response = client.indices().get(request, RequestOptions.DEFAULT);

        System.out.println("aliases:" + response.getAliases());
        System.out.println("mappings:" + response.getMappings());
        System.out.println("settings:" + response.getSettings());
        client.close();
    }
打印结果;
1 2 3 | aliases:{user2=[]}mappings:{user2=org.elasticsearch.cluster.metadata.MappingMetaData@bcdd66e5}settings:{user2={"index.creation_date":"1646661799262","index.number_of_replicas":"1","index.number_of_shards":"1","index.provided_name":"user2","index.uuid":"rbV9xwryTi2fYhg_Q7RjVw","index.version.created":"7060199"}} |
删除索引
    /**
     * 删除索引
     */
    @Test
    public void delIndex() throws IOException {
        RestHighLevelClient client = new RestHighLevelClient(RestClient.builder(new HttpHost("localhost", 9200, "http")));
        // 删除索引 - 请求对象
        DeleteIndexRequest request = new DeleteIndexRequest("user2");
        // 发送请求,获取响应
        AcknowledgedResponse response = client.indices().delete(request, RequestOptions.DEFAULT);
        // 操作结果
        System.out.println("操作结果 : " + response.isAcknowledged());
        client.close();
    }
打印结果:
1 | 操作结果 : true |
3、封装创建客户端的操作
public interface ElasticsearchTask {
    void doSomething(RestHighLevelClient client);
}
public class ConnectElasticsearch {
    /**
     * 简化客户端的创建过程
     * @param task es客户端对象
     */
    public static void connect(ElasticsearchTask task){
        // 创建客户端对象
        RestHighLevelClient client = new RestHighLevelClient(RestClient.builder(new HttpHost("localhost", 9200, "http")));
        try {
            task.doSomething(client);
            // 关闭客户端连接
            client.close();
        } catch (Exception e) {
            e.printStackTrace();
        }
    }
}
4、文档的新增与修改
新增:
import com.fasterxml.jackson.databind.ObjectMapper;
import org.elasticsearch.action.index.IndexRequest;
import org.elasticsearch.action.index.IndexResponse;
import org.elasticsearch.client.RequestOptions;
import org.elasticsearch.common.xcontent.XContentType;
import org.junit.Test;

/**
 * @ClassName ElasticDocCreateUpdate
 * @Author zhangzhixi
 * @Description
 * @Date 2022-3-7 22:19
 * @Version 1.0
 */
public class Elastic04DocCreateUpdate {
    /**
     * 文档数据的添加
     */
    @Test
    public void documentCreate() {
        ConnectElasticsearch.connect(client -> {
            // 新增文档 - 请求对象
            IndexRequest request = new IndexRequest();
            // 设置索引及唯一性标识
            request.index("user").id("1001");

            // 创建数据对象
            User user = new User();
            user.setName("zhangsan");
            user.setAge(30);
            user.setSex("男");

            ObjectMapper objectMapper = new ObjectMapper();
            String productJson = objectMapper.writeValueAsString(user);
            // 添加文档数据,数据格式为 JSON 格式
            request.source(productJson, XContentType.JSON);
            // 客户端发送请求,获取响应对象
            IndexResponse response = client.index(request, RequestOptions.DEFAULT);
            // 打印结果信息
            System.out.println("_index:" + response.getIndex());
            System.out.println("_id:" + response.getId());
            System.out.println("_result:" + response.getResult());
        });
    }
}

class User {
    private String name;
    private Integer age;
    private String sex;

    public String getName() {
        return name;
    }

    public void setName(String name) {
        this.name = name;
    }

    public Integer getAge() {
        return age;
    }

    public void setAge(Integer age) {
        this.age = age;
    }

    public String getSex() {
        return sex;
    }

    public void setSex(String sex) {
        this.sex = sex;
    }
}
打印结果:
1 2 3 | _index:user_id:1001_result:UPDATED |
数据的查看:GET http://127.0.0.1:9200/user/_search
索引的更新
 /**
     * 索引的修改
     */
    @Test
    public void documentUpdate() {
        ConnectElasticsearch.connect(client -> {
            // 修改文档 - 请求对象
            UpdateRequest request = new UpdateRequest();
            // 配置修改参数
            request.index("user").id("1001");
            // 设置请求体,对数据进行修改
            request.doc(XContentType.JSON, "sex", "女");
            // 客户端发送请求,获取响应对象
            UpdateResponse response = client.update(request, RequestOptions.DEFAULT);
            System.out.println("_index:" + response.getIndex());
            System.out.println("_id:" + response.getId());
            System.out.println("_result:" + response.getResult());
        });
    }
返回结果:
1 2 3 | _index:user_id:1001_result:UPDATED |
数据的查看:GET http://127.0.0.1:9200/user/_search
1 2 3 4 5 6 7 8 9 10 11 12 13 14 15 16 17 18 19 20 21 22 23 24 25 26 27 28 29 30 | { "took": 6, "timed_out": false, "_shards": { "total": 1, "successful": 1, "skipped": 0, "failed": 0 }, "hits": { "total": { "value": 1, "relation": "eq" }, "max_score": 1.0, "hits": [ { "_index": "user", "_type": "_doc", "_id": "1001", "_score": 1.0, "_source": { "name": "zhangsan", "age": 30, "sex": "女" } } ] }} |
5、文档的查询与删除
文档的查询
/**
 * 文档的查询
 */
@Test
public void elasticQuery() {
    ConnectElasticsearch.connect(client -> {
        //1.创建请求对象
        GetRequest request = new GetRequest().index("user").id("1001");
        //2.客户端发送请求,获取响应对象
        GetResponse response = client.get(request, RequestOptions.DEFAULT);
        //3.打印结果信息
        System.out.println("_index:" + response.getIndex());
        System.out.println("_type:" + response.getType());
        System.out.println("_id:" + response.getId());
        System.out.println("source:" + response.getSourceAsString());
    });
}
返回结果:
1 2 3 4 | _index:user_type:_doc_id:1001source:{"name":"zhangsan","age":30,"sex":"女"} |
文档的删除
1 2 3 4 5 6 7 8 9 10 11 12 13 14 | /** * 文档的删除 */@Testpublic void documentDel() { ConnectElasticsearch.connect(client -> { //创建请求对象 DeleteRequest request = new DeleteRequest().index("user").id("1001"); //客户端发送请求,获取响应对象 DeleteResponse response = client.delete(request, RequestOptions.DEFAULT); //打印信息 System.out.println(response.toString()); });} |
返回结果:
1 | DeleteResponse[index=user,type=_doc,id=1001,version=4,result=deleted,shards=ShardInfo{total=2, successful=1, failures=[]}] |
6、文档的批量添加与删除
批量添加
/**
     * 文档的批量添加
     */
    @Test
    public void documentCreateAll() {
        ConnectElasticsearch.connect(client -> {
            //创建批量新增请求对象
            BulkRequest request = new BulkRequest();
            request.add(new
                    IndexRequest().index("user").id("1001").source(XContentType.JSON, "name", "zhangsan"));
            request.add(new IndexRequest().index("user").id("1002").source(XContentType.JSON, "name", "lisi"));
            request.add(new IndexRequest().index("user").id("1003").source(XContentType.JSON, "name", "wangwu"));
            //客户端发送请求,获取响应对象
            BulkResponse responses = client.bulk(request, RequestOptions.DEFAULT);
            //打印结果信息
            System.out.println("took:" + responses.getTook());
            System.out.println("items:" + Arrays.toString(responses.getItems()));
        });
    }
返回结果:
1 2 | took:9msitems:[org.elasticsearch.action.bulk.BulkItemResponse@662b4c69, org.elasticsearch.action.bulk.BulkItemResponse@fa49800, org.elasticsearch.action.bulk.BulkItemResponse@71238fc2] |
批量删除
/**
 * 文档的批量删除
 */
@Test
public void documentDelAll() {
    ConnectElasticsearch.connect(client -> {
        //创建批量删除请求对象
        BulkRequest request = new BulkRequest();
        request.add(new DeleteRequest().index("user").id("1001"));
        request.add(new DeleteRequest().index("user").id("1002"));
        request.add(new DeleteRequest().index("user").id("1003"));
        //客户端发送请求,获取响应对象
        BulkResponse responses = client.bulk(request, RequestOptions.DEFAULT);
        //打印结果信息
        System.out.println("took:" + responses.getTook());
        System.out.println("items:" + responses.getItems());
    });
}
返回结果:
1 2 | took:11msitems:[Lorg.elasticsearch.action.bulk.BulkItemResponse;@79da8dc5 |
7、文档的全量查询
批量添加数据
/**
 * 先批量添加数据
 */
@Test
public void docInsertAll() {
    ConnectElasticsearch.connect(client -> {
        //创建批量新增请求对象
        BulkRequest request = new BulkRequest();
        request.add(new IndexRequest().index("user").id("1001").source(XContentType.JSON, "name", "zhangsan", "age", "10", "sex", "女"));
        request.add(new IndexRequest().index("user").id("1002").source(XContentType.JSON, "name", "lisi", "age", "30", "sex", "女"));
        request.add(new IndexRequest().index("user").id("1003").source(XContentType.JSON, "name", "wangwu1", "age", "40", "sex", "男"));
        request.add(new IndexRequest().index("user").id("1004").source(XContentType.JSON, "name", "wangwu2", "age", "20", "sex", "女"));
        request.add(new IndexRequest().index("user").id("1005").source(XContentType.JSON, "name", "wangwu3", "age", "50", "sex", "男"));
        request.add(new IndexRequest().index("user").id("1006").source(XContentType.JSON, "name", "wangwu4", "age", "20", "sex", "男"));
        //客户端发送请求,获取响应对象
        BulkResponse responses = client.bulk(request, RequestOptions.DEFAULT);
        //打印结果信息
        System.out.println("took:" + responses.getTook());
        System.out.println("items:" + Arrays.toString(responses.getItems()));
    });
}
查询所有索引数据
/**
 * 批量查询数据
 */
@Test
public void docQueryAll() {
    ConnectElasticsearch.connect(client -> {
        // 创建搜索请求对象
        SearchRequest request = new SearchRequest();
        request.indices("user");
        // 构建查询的请求体
        SearchSourceBuilder sourceBuilder = new SearchSourceBuilder();
        // 查询所有数据
        sourceBuilder.query(QueryBuilders.matchAllQuery());
        request.source(sourceBuilder);
        SearchResponse response = client.search(request, RequestOptions.DEFAULT);
        // 查询匹配
        SearchHits hits = response.getHits();
        System.out.println("took:" + response.getTook());
        System.out.println("timeout:" + response.isTimedOut());
        System.out.println("total:" + hits.getTotalHits());
        System.out.println("MaxScore:" + hits.getMaxScore());
        System.out.println("hits========>>");
        for (SearchHit hit : hits) {
            //输出每条查询的结果信息
            System.out.println(hit.getSourceAsString());
        }
        System.out.println("<<========");
    });
}
打印结果:
1 2 3 4 5 6 7 8 9 10 11 12 13 14 | took:823mstimeout:falsetotal:6 hitsMaxScore:1.0hits========>>{"name":"zhangsan","age":"10","sex":"女"}{"name":"lisi","age":"30","sex":"女"}{"name":"wangwu1","age":"40","sex":"男"}{"name":"wangwu2","age":"20","sex":"女"}{"name":"wangwu3","age":"50","sex":"男"}{"name":"wangwu4","age":"20","sex":"男"}<<========进程已结束,退出代码为 0 |
8、分页查询 & 条件查询 & 查询排序
条件查询
/**
 * 条件查询
 */
@Test
public void conditionQuery() {
    ConnectElasticsearch.connect(client -> {
        // 创建搜索请求对象
        SearchRequest request = new SearchRequest();
        request.indices("user");
        // 构建查询的请求体
        SearchSourceBuilder sourceBuilder = new SearchSourceBuilder();
        sourceBuilder.query(QueryBuilders.termQuery("age", "30"));
        request.source(sourceBuilder);
        SearchResponse response = client.search(request, RequestOptions.DEFAULT);
        // 查询匹配
        SearchHits hits = response.getHits();
        System.out.println("took:" + response.getTook());
        System.out.println("timeout:" + response.isTimedOut());
        System.out.println("total:" + hits.getTotalHits());
        System.out.println("MaxScore:" + hits.getMaxScore());
        System.out.println("hits========>>");
        for (SearchHit hit : hits) {
            //输出每条查询的结果信息
            System.out.println(hit.getSourceAsString());
        }
        System.out.println("<<========");
    });
}
查询结果:
1 2 3 4 5 6 7 | took:4mstimeout:falsetotal:1 hitsMaxScore:1.0hits========>>{"name":"lisi","age":"30","sex":"女"}<<======== |
分页查询
/**
 * 分页查询
 */
@Test
public void pagingQuery() {
    ConnectElasticsearch.connect(client -> {
        // 创建搜索请求对象
        SearchRequest request = new SearchRequest();
        request.indices("user");
        // 构建查询的请求体
        SearchSourceBuilder sourceBuilder = new SearchSourceBuilder();
        sourceBuilder.query(QueryBuilders.matchAllQuery());
        // 分页查询
        // 当前页其实索引(第一条数据的顺序号), from
        sourceBuilder.from(0);
        // 每页显示多少条 size
        sourceBuilder.size(2);
        request.source(sourceBuilder);
        SearchResponse response = client.search(request, RequestOptions.DEFAULT);
        // 查询匹配
        SearchHits hits = response.getHits();
        System.out.println("took:" + response.getTook());
        System.out.println("timeout:" + response.isTimedOut());
        System.out.println("total:" + hits.getTotalHits());
        System.out.println("MaxScore:" + hits.getMaxScore());
        System.out.println("hits========>>");
        for (SearchHit hit : hits) {
            //输出每条查询的结果信息
            System.out.println(hit.getSourceAsString());
        }
        System.out.println("<<========");
    });
}
查询结果:
1 2 3 4 5 6 7 8 | took:3mstimeout:falsetotal:6 hitsMaxScore:1.0hits========>>{"name":"zhangsan","age":"10","sex":"女"}{"name":"lisi","age":"30","sex":"女"}<<======== |
查询排序
/**
 * 查询排序
 */
@Test
public void querySorting(){
    ConnectElasticsearch.connect(client -> {
        // 创建搜索请求对象
        SearchRequest request = new SearchRequest();
        request.indices("user");
        // 构建查询的请求体
        SearchSourceBuilder sourceBuilder = new SearchSourceBuilder();
        sourceBuilder.query(QueryBuilders.matchAllQuery());
        // 排序(升序)
        sourceBuilder.sort("age", SortOrder.ASC);
        request.source(sourceBuilder);
        SearchResponse response = client.search(request, RequestOptions.DEFAULT);
        // 查询匹配
        SearchHits hits = response.getHits();
        System.out.println("took:" + response.getTook());
        System.out.println("timeout:" + response.isTimedOut());
        System.out.println("total:" + hits.getTotalHits());
        System.out.println("MaxScore:" + hits.getMaxScore());
        System.out.println("hits========>>");
        for (SearchHit hit : hits) {
            //输出每条查询的结果信息
            System.out.println(hit.getSourceAsString());
        }
        System.out.println("<<========");
    });
}
查询结果:
1 2 3 4 5 6 7 8 9 10 11 12 | took:129mstimeout:falsetotal:6 hitsMaxScore:NaNhits========>>{"name":"zhangsan","age":"10","sex":"女"}{"name":"wangwu2","age":"20","sex":"女"}{"name":"wangwu4","age":"20","sex":"男"}{"name":"lisi","age":"30","sex":"女"}{"name":"wangwu1","age":"40","sex":"男"}{"name":"wangwu3","age":"50","sex":"男"}<<======== |
9、组合查询 & 范围查询
组合查询
/**
 * 组合查询
 */
@Test
public void combinedQuery() {
    ConnectElasticsearch.connect(client -> {
        // 创建搜索请求对象
        SearchRequest request = new SearchRequest();
        request.indices("user");
        // 构建查询的请求体
        SearchSourceBuilder sourceBuilder = new SearchSourceBuilder();
        BoolQueryBuilder boolQueryBuilder = QueryBuilders.boolQuery();
        // 必须包含
        boolQueryBuilder.must(QueryBuilders.matchQuery("age", "30"));
        // 一定不含
        boolQueryBuilder.mustNot(QueryBuilders.matchQuery("name", "zhangsan"));
        // 可能包含
        boolQueryBuilder.should(QueryBuilders.matchQuery("sex", "男"));
        sourceBuilder.query(boolQueryBuilder);
        request.source(sourceBuilder);
        SearchResponse response = client.search(request, RequestOptions.DEFAULT);
        // 查询匹配
        SearchHits hits = response.getHits();
        System.out.println("took:" + response.getTook());
        System.out.println("timeout:" + response.isTimedOut());
        System.out.println("total:" + hits.getTotalHits());
        System.out.println("MaxScore:" + hits.getMaxScore());
        System.out.println("hits========>>");
        for (SearchHit hit : hits) {
            //输出每条查询的结果信息
            System.out.println(hit.getSourceAsString());
        }
        System.out.println("<<========");
    });
打印结果:
1 2 3 4 5 6 7 | took:5mstimeout:falsetotal:1 hitsMaxScore:1.0hits========>>{"name":"lisi","age":"30","sex":"女"}<<======== |
范围查询
/**
 * 范围查询
 */
@Test
public void rangeQuery() {
    ConnectElasticsearch.connect(client -> {
        // 创建搜索请求对象
        SearchRequest request = new SearchRequest();
        request.indices("user");
        // 构建查询的请求体
        SearchSourceBuilder sourceBuilder = new SearchSourceBuilder();
        /*要查询的字段*/
        RangeQueryBuilder rangeQuery = QueryBuilders.rangeQuery("age");
        /*查询条件:大于等于*/
        //rangeQuery.gte("30");
        /*查询条件:小于等于*/
        rangeQuery.lte("40");
        sourceBuilder.query(rangeQuery);
        request.source(sourceBuilder);
        SearchResponse response = client.search(request, RequestOptions.DEFAULT);
        // 查询匹配
        SearchHits hits = response.getHits();
        System.out.println("took:" + response.getTook());
        System.out.println("timeout:" + response.isTimedOut());
        System.out.println("total:" + hits.getTotalHits());
        System.out.println("MaxScore:" + hits.getMaxScore());
        System.out.println("hits========>>");
        for (SearchHit hit : hits) {
            //输出每条查询的结果信息
            System.out.println(hit.getSourceAsString());
        }
        System.out.println("<<========");
    });
}
打印结果:
1 2 3 4 5 6 7 8 9 10 11 | took:72mstimeout:falsetotal:5 hitsMaxScore:1.0hits========>>{"name":"zhangsan","age":"10","sex":"女"}{"name":"lisi","age":"30","sex":"女"}{"name":"wangwu1","age":"40","sex":"男"}{"name":"wangwu2","age":"20","sex":"女"}{"name":"wangwu4","age":"20","sex":"男"}<<======== |
10、模糊查询 & 高亮查询
模糊查询
/**
 * 模糊查询
 */
@Test
public void fuzzyQuery() {
    ConnectElasticsearch.connect(client -> {
        // 创建搜索请求对象
        SearchRequest request = new SearchRequest();
        request.indices("user");
        // 构建查询的请求体
        SearchSourceBuilder sourceBuilder = new SearchSourceBuilder();
        /*name包含wangwu的*/
        sourceBuilder.query(QueryBuilders.fuzzyQuery("name","wangwu").fuzziness(Fuzziness.ONE));
        request.source(sourceBuilder);
        SearchResponse response = client.search(request, RequestOptions.DEFAULT);
        // 查询匹配
        SearchHits hits = response.getHits();
        System.out.println("took:" + response.getTook());
        System.out.println("timeout:" + response.isTimedOut());
        System.out.println("total:" + hits.getTotalHits());
        System.out.println("MaxScore:" + hits.getMaxScore());
        System.out.println("hits========>>");
        for (SearchHit hit : hits) {
            //输出每条查询的结果信息
            System.out.println(hit.getSourceAsString());
        }
        System.out.println("<<========");
    });
}
打印结果:
1 2 3 4 5 6 7 8 9 10 | took:244mstimeout:falsetotal:4 hitsMaxScore:1.2837042hits========>>{"name":"wangwu1","age":"40","sex":"男"}{"name":"wangwu2","age":"20","sex":"女"}{"name":"wangwu3","age":"50","sex":"男"}{"name":"wangwu4","age":"20","sex":"男"}<<======== |
高亮查询:
/**
 * 高亮查询
 */
@Test
public void highlightQuery() {
    ConnectElasticsearch.connect(client -> {
        // 高亮查询
        SearchRequest request = new SearchRequest().indices("user");
        //2.创建查询请求体构建器
        SearchSourceBuilder sourceBuilder = new SearchSourceBuilder();
        //构建查询方式:高亮查询
        TermsQueryBuilder termsQueryBuilder =
                QueryBuilders.termsQuery("name", "zhangsan");
        //设置查询方式
        sourceBuilder.query(termsQueryBuilder);
        //构建高亮字段
        HighlightBuilder highlightBuilder = new HighlightBuilder();
        highlightBuilder.preTags("<font color='red'>");//设置标签前缀
        highlightBuilder.postTags("</font>");//设置标签后缀
        highlightBuilder.field("name");//设置高亮字段
        //设置高亮构建对象
        sourceBuilder.highlighter(highlightBuilder);
        //设置请求体
        request.source(sourceBuilder);
        //3.客户端发送请求,获取响应对象
        SearchResponse response = client.search(request, RequestOptions.DEFAULT);
        //4.打印响应结果
        SearchHits hits = response.getHits();
        System.out.println("took::" + response.getTook());
        System.out.println("time_out::" + response.isTimedOut());
        System.out.println("total::" + hits.getTotalHits());
        System.out.println("max_score::" + hits.getMaxScore());
        System.out.println("hits::::>>");
        for (SearchHit hit : hits) {
            String sourceAsString = hit.getSourceAsString();
            System.out.println(sourceAsString);
            //打印高亮结果
            Map<String, HighlightField> highlightFields = hit.getHighlightFields();
            System.out.println(highlightFields);
        }
        System.out.println("<<::::");
    });
}
打印结果:
1 2 3 4 | hits::::>>{"name":"zhangsan","age":"10","sex":"女"}{name=[name], fragments[[<font color='red'>zhangsan</font>]]}<<:::: |
11、最大值查询 & 分组查询
最大值查询
/**
 * 最大值查询
 */
@Test
public void maxValueQuery(){
    ConnectElasticsearch.connect(client -> {
        // 高亮查询
        SearchRequest request = new SearchRequest().indices("user");
        SearchSourceBuilder sourceBuilder = new SearchSourceBuilder();
        sourceBuilder.aggregation(AggregationBuilders.max("maxAge").field("age"));
        //设置请求体
        request.source(sourceBuilder);
        //3.客户端发送请求,获取响应对象
        SearchResponse response = client.search(request, RequestOptions.DEFAULT);
        //4.打印响应结果
        SearchHits hits = response.getHits();
        System.out.println(response);
    });
}
打印结果:
1 2 3 4 5 6 7 8 9 10 11 12 13 14 15 16 17 18 19 20 21 22 23 24 25 26 27 28 29 30 31 32 33 34 35 36 37 38 39 40 41 42 43 44 45 46 47 48 49 50 51 52 53 54 55 56 57 58 59 60 61 62 63 64 65 66 67 68 69 70 71 72 73 74 75 76 77 78 79 80 81 82 83 84 85 86 87 88 89 90 | { "took": 526, "timed_out": false, "_shards": { "total": 1, "successful": 1, "skipped": 0, "failed": 0 }, "hits": { "total": { "value": 6, "relation": "eq" }, "max_score": 1, "hits": [ { "_index": "user", "_type": "_doc", "_id": "1001", "_score": 1, "_source": { "name": "zhangsan", "age": "10", "sex": "女" } }, { "_index": "user", "_type": "_doc", "_id": "1002", "_score": 1, "_source": { "name": "lisi", "age": "30", "sex": "女" } }, { "_index": "user", "_type": "_doc", "_id": "1003", "_score": 1, "_source": { "name": "wangwu1", "age": "40", "sex": "男" } }, { "_index": "user", "_type": "_doc", "_id": "1004", "_score": 1, "_source": { "name": "wangwu2", "age": "20", "sex": "女" } }, { "_index": "user", "_type": "_doc", "_id": "1005", "_score": 1, "_source": { "name": "wangwu3", "age": "50", "sex": "男" } }, { "_index": "user", "_type": "_doc", "_id": "1006", "_score": 1, "_source": { "name": "wangwu4", "age": "20", "sex": "男" } } ] }, "aggregations": { "max#maxAge": { "value": 50 } }} |
分组查询
/**
 * 分组查询
 */
@Test
public void groupQuery() {
   ConnectElasticsearch.connect(client -> {
       SearchRequest request = new SearchRequest().indices("user");
       SearchSourceBuilder sourceBuilder = new SearchSourceBuilder();
       sourceBuilder.aggregation(AggregationBuilders.terms("age_groupby").field("age"));
       //设置请求体
       request.source(sourceBuilder);
       //3.客户端发送请求,获取响应对象
       SearchResponse response = client.search(request, RequestOptions.DEFAULT);
       //4.打印响应结果
       SearchHits hits = response.getHits();
       System.out.println(response);
   });
}
打印结果:
1 2 3 4 5 6 7 8 9 10 11 12 13 14 15 16 17 18 19 20 21 22 23 24 25 26 27 28 29 30 31 32 33 34 35 36 37 38 39 40 41 42 43 44 45 46 47 48 49 50 51 52 53 54 55 56 57 58 59 60 61 62 63 64 65 66 67 68 69 70 71 72 73 74 75 76 77 78 79 80 81 82 83 84 85 86 87 88 89 90 91 92 93 94 95 96 97 98 99 100 101 102 103 104 105 106 107 108 109 110 111 112 113 | { "took": 194, "timed_out": false, "_shards": { "total": 1, "successful": 1, "skipped": 0, "failed": 0 }, "hits": { "total": { "value": 6, "relation": "eq" }, "max_score": 1, "hits": [ { "_index": "user", "_type": "_doc", "_id": "1001", "_score": 1, "_source": { "name": "zhangsan", "age": "10", "sex": "女" } }, { "_index": "user", "_type": "_doc", "_id": "1002", "_score": 1, "_source": { "name": "lisi", "age": "30", "sex": "女" } }, { "_index": "user", "_type": "_doc", "_id": "1003", "_score": 1, "_source": { "name": "wangwu1", "age": "40", "sex": "男" } }, { "_index": "user", "_type": "_doc", "_id": "1004", "_score": 1, "_source": { "name": "wangwu2", "age": "20", "sex": "女" } }, { "_index": "user", "_type": "_doc", "_id": "1005", "_score": 1, "_source": { "name": "wangwu3", "age": "50", "sex": "男" } }, { "_index": "user", "_type": "_doc", "_id": "1006", "_score": 1, "_source": { "name": "wangwu4", "age": "20", "sex": "男" } } ] }, "aggregations": { "lterms#age_groupby": { "doc_count_error_upper_bound": 0, "sum_other_doc_count": 0, "buckets": [ { "key": 20, "doc_count": 2 }, { "key": 10, "doc_count": 1 }, { "key": 30, "doc_count": 1 }, { "key": 40, "doc_count": 1 }, { "key": 50, "doc_count": 1 } ] } }} |
三、Windows下ES单节点以及集群的部署
1、ElasticSearch环境介绍
单机 & 集群
单台 Elasticsearch 服务器提供服务,往往都有最大的负载能力,超过这个阈值,服务器
性能就会大大降低甚至不可用,所以生产环境中,一般都是运行在指定服务器集群中。
除了负载能力,单点服务器也存在其他问题:
单台机器存储容量有限
单服务器容易出现单点故障,无法实现高可用
单服务的并发处理能力有限
配置服务器集群时,集群中节点数量没有限制,大于等于 2 个节点就可以看做是集群了。
一般出于高性能及高可用方面来考虑集群中节点数量都是 3 个以上
总之,集群能提高性能,增加容错。
集群 Cluster
**一个集群就是由一个或多个服务器节点组织在一起,共同持有整个的数据,并一起提供索引和搜索功能。**一个 Elasticsearch 集群有一个唯一的名字标识,这个名字默认就是”elasticsearch”。这个名字是重要的,因为一个节点只能通过指定某个集群的名字,来加入这个集群。
节点 Node
集群中包含很多服务器, 一个节点就是其中的一个服务器。 作为集群的一部分,它存储数据,参与集群的索引和搜索功能。
一个节点也是由一个名字来标识的,默认情况下,这个名字是一个随机的漫威漫画角色的名字,这个名字会在启动的时候赋予节点。这个名字对于管理工作来说挺重要的,因为在这个管理过程中,你会去确定网络中的哪些服务器对应于 Elasticsearch 集群中的哪些节点。
一个节点可以通过配置集群名称的方式来加入一个指定的集群。默认情况下,每个节点都会被安排加入到一个叫做“elasticsearch”的集群中,这意味着,如果你在你的网络中启动了若干个节点,并假定它们能够相互发现彼此,它们将会自动地形成并加入到一个叫做“elasticsearch”的集群中。
在一个集群里,只要你想,可以拥有任意多个节点。而且,如果当前你的网络中没有运
行任何 Elasticsearch 节点,这时启动一个节点,会默认创建并加入一个叫做“elasticsearch”的
集群。
2、Windows-集群部署
1、创建一个elasticsearch-cluster文件夹
复制三份你的ElasticSearch原始文件,并改名为node-1001、node-1002、node-1003

2、修改集群文件目录中每个节点的 config/elasticsearch.yml 配置文件
node-1001:
1 2 3 4 5 6 7 8 9 10 11 12 13 14 15 16 17 18 19 20 21 22 | #节点 1 的配置信息:#集群名称,节点之间要保持一致cluster.name: my-elasticsearch#节点名称,集群内要唯一node.name: node-1001node.master: truenode.data: true#ip 地址network.host: localhost#http 端口http.port: 9300#tcp 监听端口transport.tcp.port: 9301#discovery.seed_hosts: ["localhost:9302","localhost:9303"]#discovery.zen.fd.ping_timeout: 1m#discovery.zen.fd.ping_retries: 5#集群内的可以被选为主节点的节点列表#cluster.initial_master_nodes: ["node-1", "node-2","node-3"]#跨域配置#action.destructive_requires_name: truehttp.cors.enabled: truehttp.cors.allow-origin: "*" |
node-1002:
1 2 3 4 5 6 7 8 9 10 11 12 13 14 15 16 17 18 19 20 21 22 | #节点 2 的配置信息:#集群名称,节点之间要保持一致cluster.name: my-elasticsearch#节点名称,集群内要唯一node.name: node-1002node.master: truenode.data: true#ip 地址network.host: localhost#http 端口http.port: 9400#tcp 监听端口transport.tcp.port: 9302discovery.seed_hosts: ["localhost:9301"]discovery.zen.fd.ping_timeout: 1mdiscovery.zen.fd.ping_retries: 5#集群内的可以被选为主节点的节点列表#cluster.initial_master_nodes: ["node-1", "node-2","node-3"]#跨域配置#action.destructive_requires_name: truehttp.cors.enabled: truehttp.cors.allow-origin: "*" |
node-1003:
1 2 3 4 5 6 7 8 9 10 11 12 13 14 15 16 17 18 19 20 21 22 23 | #节点 3 的配置信息:#集群名称,节点之间要保持一致cluster.name: my-elasticsearch#节点名称,集群内要唯一node.name: node-1003node.master: truenode.data: true#ip 地址network.host: localhost#http 端口http.port: 9500#tcp 监听端口transport.tcp.port: 9303#候选主节点的地址,在开启服务后可以被选为主节点discovery.seed_hosts: ["localhost:9301", "localhost:9302"]discovery.zen.fd.ping_timeout: 1mdiscovery.zen.fd.ping_retries: 5#集群内的可以被选为主节点的节点列表#cluster.initial_master_nodes: ["node-1", "node-2","node-3"]#跨域配置#action.destructive_requires_name: truehttp.cors.enabled: truehttp.cors.allow-origin: "*" |
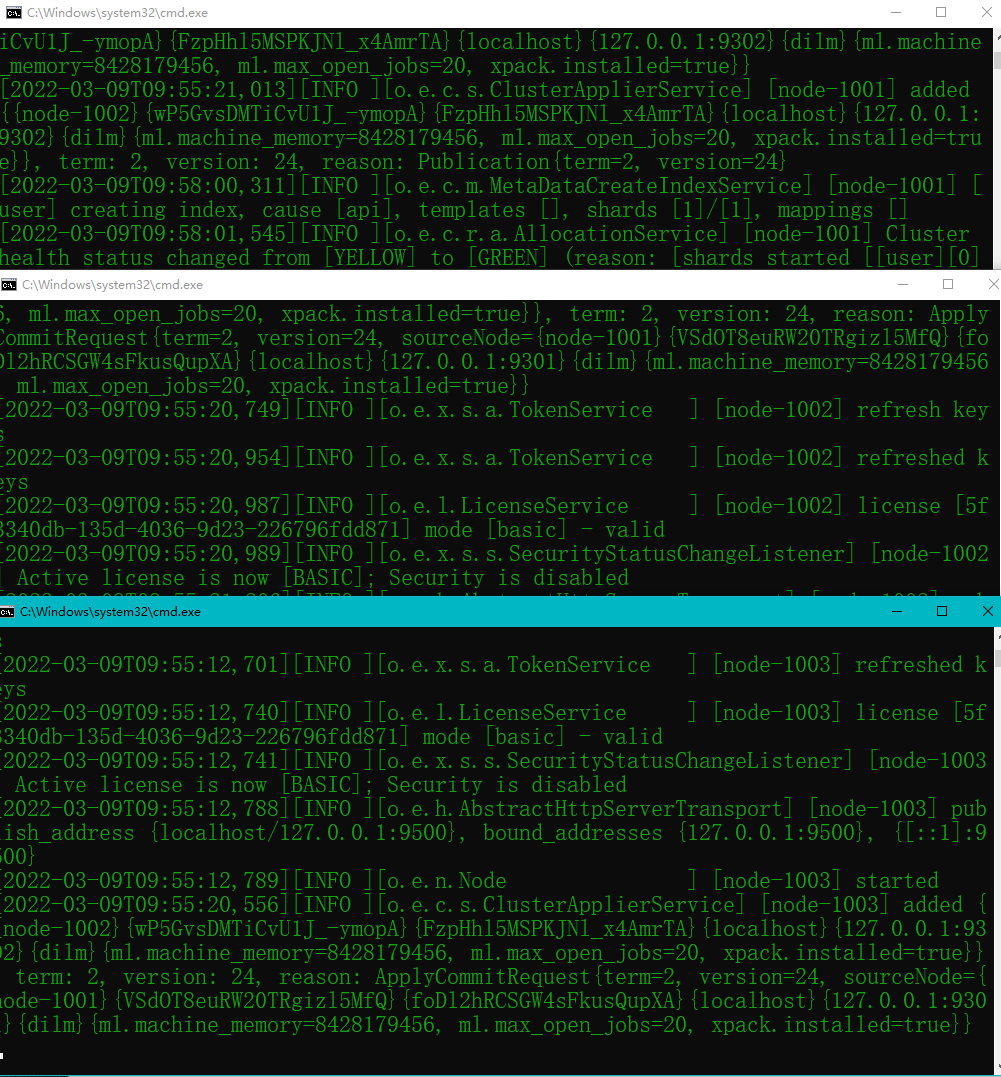
三、如果每个节点中有data文件夹,删除每个节点中的data文件夹,再依次启动三个ES服务
4、测试集群
一、用Postman,查看集群状态
1 2 3 | GET http://127.0.0.1:9300/_cluster/healthGET http://127.0.0.1:9400/_cluster/healthGET http://127.0.0.1:9500/_cluster/health |
返回结果皆如下所示:
1 2 3 4 5 6 7 8 9 10 11 12 13 14 15 16 17 | { "cluster_name": "my-elasticsearch", "status": "green", "timed_out": false, "number_of_nodes": 3, "number_of_data_nodes": 3, "active_primary_shards": 1, "active_shards": 2, "relocating_shards": 0, "initializing_shards": 0, "unassigned_shards": 0, "delayed_unassigned_shards": 0, "number_of_pending_tasks": 0, "number_of_in_flight_fetch": 0, "task_max_waiting_in_queue_millis": 0, "active_shards_percent_as_number": 100.0} |
status字段指示着当前集群在总体上是否工作正常。它的三种颜色含义如下:
- green:所有的主分片和副本分片都正常运行。
- yellow:所有的主分片都正常运行,但不是所有的副本分片都正常运行。
- red:有主分片没能正常运行。
二、用Postman,在一节点增加索引,另一节点获取索引
向集群中的node-1001节点增加索引:GET http://127.0.0.1:9300/user
返回结果如下:
1 2 3 4 5 | { "acknowledged": true, "shards_acknowledged": true, "index": "user"} |
三、测试在节点node-1002是否能够查看节点1添加的索引
GET http://127.0.0.1:9400/user
成功访问,返回结果如下:
1 2 3 4 5 6 7 8 9 10 11 12 13 14 15 16 17 18 | { "user": { "aliases": {}, "mappings": {}, "settings": { "index": { "creation_date": "1646791080296", "number_of_shards": "1", "number_of_replicas": "1", "uuid": "xTVbhg1CRbSvb0j6quaM8A", "version": { "created": "7060199" }, "provided_name": "user" } } }} |
3、Linux下单机部署
1、软件的下载
如果服务器有网络的话,使用wget命令下载还是特别快的: wget https://artifacts.elastic.co/downloads/elasticsearch/elasticsearch-7.8.0-linux-x86_64.tar.gz 
2、解压软件
1 2 3 4 | # 解压缩 -C表示要解压到指定目录tar -zxvf elasticsearch-7.8.0-linux-x86_64.tar.gz -C /usr/local# 改名mv elasticsearch-7.8.0 es |
3、创建用户
因为安全问题, Elasticsearch 不允许 root 用户直接运行,所以要创建新用户,在 root 用户中创建新用户。
1 2 3 4 | useradd es #新增 es 用户passwd es #为 es 用户设置密码userdel -r es #如果错了,可以删除再加chown -R es:es /opt/module/es #文件夹所有者 |
4、修改配置文件:
修改/usr/local/es/config/elasticsearch.yml文件。
1 2 3 4 5 6 | # 加入如下配置cluster.name: elasticsearchnode.name: node-1network.host: 0.0.0.0http.port: 9200cluster.initial_master_nodes: ["node-1"] |
修改/etc/security/limits.d/20-nproc.conf
1 2 3 4 5 6 7 | # 在文件末尾中增加下面内容# 每个进程可以打开的文件数的限制es soft nofile 65536es hard nofile 65536# 操作系统级别对每个用户创建的进程数的限制* hard nproc 4096# 注: * 带表 Linux 所有用户名称 |
修改/etc/security/limits.d/20-nproc.conf
1 2 3 4 5 6 7 | # 在文件末尾中增加下面内容# 每个进程可以打开的文件数的限制es soft nofile 65536es hard nofile 65536# 操作系统级别对每个用户创建的进程数的限制* hard nproc 4096# 注: * 带表 Linux 所有用户名称 |
修改/etc/sysctl.conf
1 2 3 | # 在文件中增加下面内容# 一个进程可以拥有的 VMA(虚拟内存区域)的数量,默认值为 65536vm.max_map_count=655360 |
重新加载
1 | sysctl -p |
4、启动软件:先切换到ES用户(su es)
1 2 3 4 5 | cd /opt/module/es/#启动bin/elasticsearch#后台启动bin/elasticsearch -d |
如果遇到启动ES出现错误:
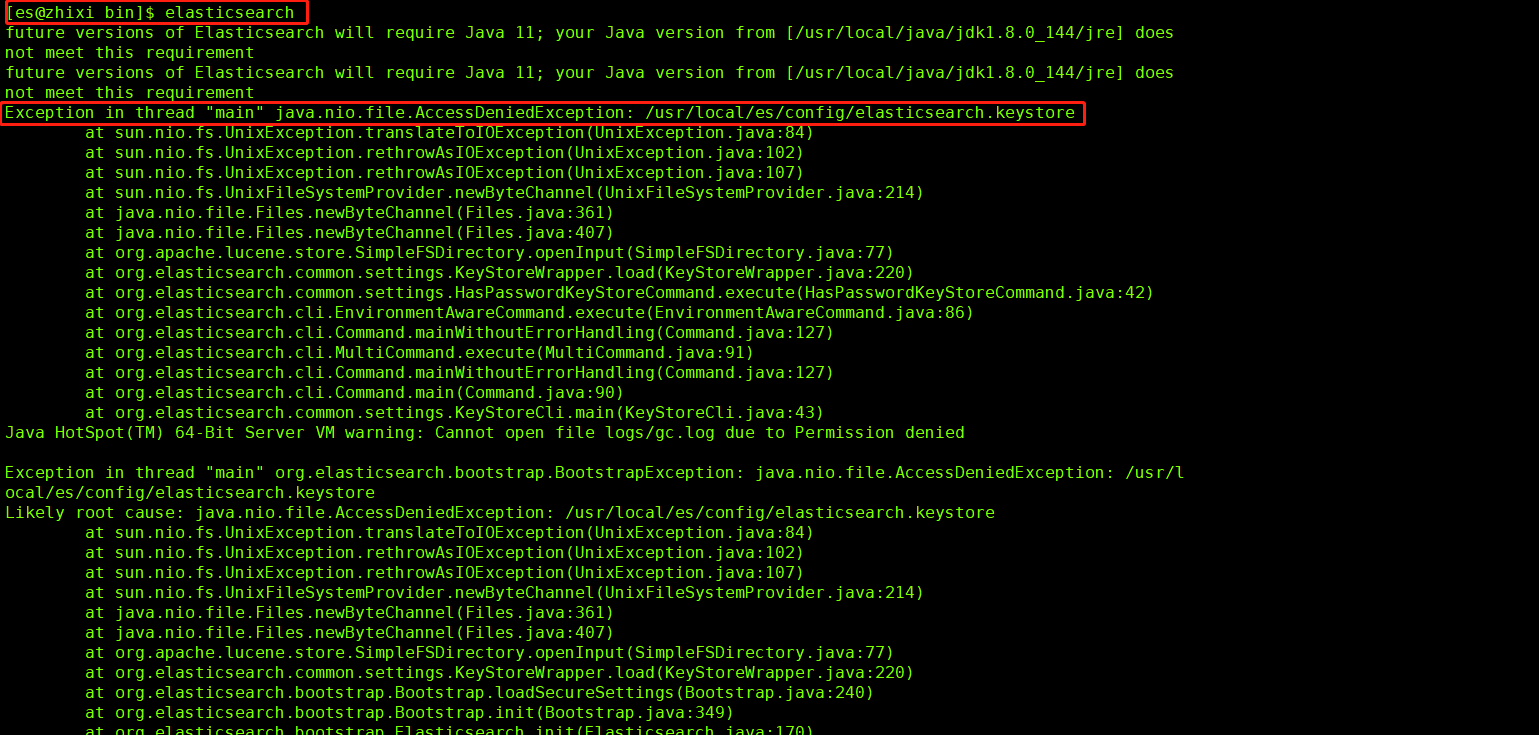
解决办法:
到root用户,重新执行一句: chown -R es:es /usr/local/es/
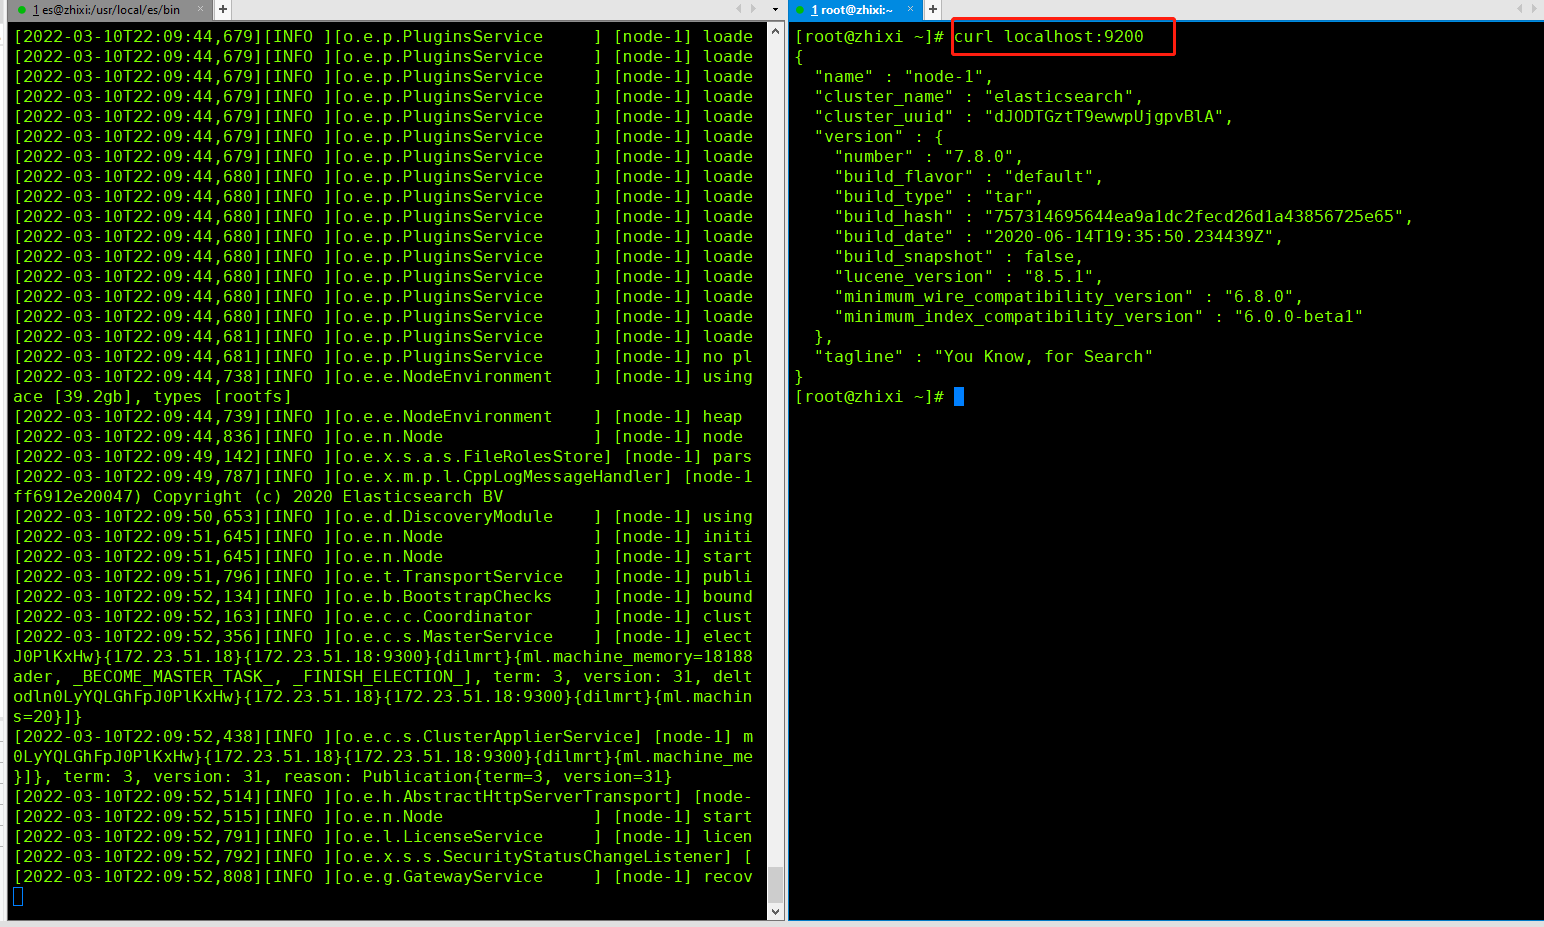
浏览器访问:IP:9200
四、ElasticSearch集成SpringData
Spring Data Elasticsearch基于Spring Data API简化 Elasticsearch 操作,将原始操作Elasticsearch 的客户端API进行封装。Spring Data为Elasticsearch 项目提供集成搜索引擎。Spring Data Elasticsearch POJO的关键功能区域为中心的模型与Elastichsearch交互文档和轻松地编写一个存储索引库数据访问层。
参考手册
演示项目GItHub地址:https://github.com/zhangzhixi0305/springboot-es.git
1、创建SpringBoot项目
2、添加pom依赖
1 2 3 4 5 6 7 8 9 10 11 12 13 14 15 16 17 18 19 20 21 22 23 24 25 26 27 28 29 30 31 32 33 34 35 36 37 38 39 40 41 42 43 44 45 46 | <dependencies> <!--整合ES的依赖--> <dependency> <groupId>org.springframework.boot</groupId> <artifactId>spring-boot-starter-data-elasticsearch</artifactId> </dependency> <!--springboot-web开发--> <dependency> <groupId>org.springframework.boot</groupId> <artifactId>spring-boot-starter-web</artifactId> </dependency> <dependency> <groupId>org.springframework.boot</groupId> <artifactId>spring-boot-devtools</artifactId> <scope>runtime</scope> <optional>true</optional> </dependency> <dependency> <groupId>com.taobao.arthas</groupId> <artifactId>arthas-spring-boot-starter</artifactId> <version>3.4.8</version> <scope>runtime</scope> </dependency> <dependency> <groupId>org.projectlombok</groupId> <artifactId>lombok</artifactId> <optional>true</optional> </dependency> <!--防止在配置类中出现上方的springboot红框提示--> <dependency> <groupId>org.springframework.boot</groupId> <artifactId>spring-boot-configuration-processor</artifactId> <optional>true</optional> </dependency> <dependency> <groupId>org.springframework.boot</groupId> <artifactId>spring-boot-starter-test</artifactId> <scope>test</scope> <exclusions> <exclusion> <groupId>org.junit.vintage</groupId> <artifactId>junit-vintage-engine</artifactId> </exclusion> </exclusions> </dependency></dependencies> |
3、修改application.properties配置文件
1 2 3 4 5 6 7 8 9 10 | # 应用名称spring.application.name=springboot-es# 应用服务 WEB 访问端口server.port=8080# es 服务地址elasticsearch.host=127.0.0.1# es 服务端口elasticsearch.port=9200# 配置日志级别,开启 debug 日志logging.level.com.atguigu.es=debug |
4、数据实体类:pojo/Product
1 2 3 4 5 6 7 8 9 10 11 12 13 14 15 16 17 18 19 20 21 22 23 24 25 26 27 28 29 30 31 32 33 34 35 36 37 38 39 40 41 42 43 44 45 46 47 | import lombok.AllArgsConstructor;import lombok.Data;import lombok.NoArgsConstructor;import lombok.ToString;import org.springframework.data.annotation.Id;import org.springframework.data.elasticsearch.annotations.Document;import org.springframework.data.elasticsearch.annotations.Field;import org.springframework.data.elasticsearch.annotations.FieldType;/** * @ClassName Product * @Author zhangzhixi * @Description 实体类 * @Date 2022-2-17 16:09 * @Version 1.0 */@Data@NoArgsConstructor@AllArgsConstructor@ToString@Document(indexName = "shopping", shards = 3, replicas = 1)public class Product { /** * 必须有 id,这里的 id 是全局唯一的标识,等同于 es 中的"_id" * 商品唯一标识 */ @Id private Long id; /** * type : 字段数据类型 * analyzer : 分词器类型 * index : 是否索引(默认:true) * Keyword : 短语,不进行分词 */ @Field(type = FieldType.Text, analyzer = "ik_max_word") private String title;//商品名称 @Field(type = FieldType.Keyword) private String category;//分类名称 @Field(type = FieldType.Double) private Double price;//商品价格 @Field(type = FieldType.Keyword, index = false) private String images;//图片地址} |
5、配置类:conf/ElasticsearchConfig
- ElasticsearchRestTemplate是spring-data-elasticsearch项目中的一个类,和其他spring项目中的 template类似。
- 在新版的spring-data-elasticsearch 中,ElasticsearchRestTemplate 代替了原来的ElasticsearchTemplate。
- 原因是ElasticsearchTemplate基于TransportClient,TransportClient即将在8.x 以后的版本中移除。所以,我们推荐使用ElasticsearchRestTemplate。
- ElasticsearchRestTemplate基于RestHighLevelClient客户端的。需要自定义配置类,继承AbstractElasticsearchConfiguration,并实现elasticsearchClient()抽象方法,创建RestHighLevelClient对象。
1 2 3 4 5 6 7 8 9 10 11 12 13 14 15 16 17 18 19 20 21 22 23 24 25 26 27 28 29 30 31 32 33 34 35 36 37 | import lombok.Data;import lombok.EqualsAndHashCode;import org.apache.http.HttpHost;import org.elasticsearch.client.RestClient;import org.elasticsearch.client.RestClientBuilder;import org.elasticsearch.client.RestHighLevelClient;import org.springframework.boot.context.properties.ConfigurationProperties;import org.springframework.context.annotation.Configuration;import org.springframework.data.elasticsearch.config.AbstractElasticsearchConfiguration;/** * @ClassName ElasticsearchConfig * @Author zhangzhixi * @Description * @Date 2022-2-17 16:13 * @Version 1.0 */@EqualsAndHashCode(callSuper = true)@ConfigurationProperties(prefix = "elasticsearch")@Configuration@Datapublic class ElasticsearchConfig extends AbstractElasticsearchConfiguration { private String host; private Integer port; /** * 重写父类方法 * @return es客户端对象 */ @Override public RestHighLevelClient elasticsearchClient() { RestClientBuilder builder = RestClient.builder(new HttpHost(host, port)); return new RestHighLevelClient(builder); }} |
6、dao层数据访问对象:dao/ProductDao
1 2 3 4 5 6 7 8 9 10 11 12 13 14 15 | import com.zhixi.pojo.Product;import org.springframework.data.elasticsearch.repository.ElasticsearchRepository;import org.springframework.stereotype.Repository;/** * @ClassName ProductDao * @Author zhangzhixi * @Description * @Date 2022-2-17 16:21 * @Version 1.0 */@Repositorypublic interface ProductDao extends ElasticsearchRepository<Product, Long> {} |
7、测试
1 2 3 4 5 6 7 8 9 10 11 12 13 14 15 16 17 18 19 20 21 22 23 24 25 26 27 28 29 30 31 32 33 34 35 36 37 38 39 40 41 42 43 44 45 46 47 48 49 50 51 52 53 54 55 56 57 58 59 60 61 62 63 64 65 66 67 68 69 70 71 72 73 74 75 76 77 78 79 80 81 82 83 84 85 86 87 88 89 90 91 92 93 94 95 96 97 98 99 100 101 102 103 104 105 106 107 108 109 110 111 112 113 114 115 116 117 118 119 120 121 122 123 124 125 126 127 128 129 130 131 132 133 134 135 136 137 138 139 140 141 142 143 144 145 146 147 148 149 150 151 152 153 | import com.zhixi.dao.ProductDao;import com.zhixi.pojo.Product;import org.elasticsearch.index.query.MatchQueryBuilder;import org.elasticsearch.index.query.QueryBuilders;import org.junit.jupiter.api.Test;import org.springframework.beans.factory.annotation.Autowired;import org.springframework.boot.test.context.SpringBootTest;import org.springframework.data.domain.Page;import org.springframework.data.domain.PageRequest;import org.springframework.data.domain.Sort;import org.springframework.data.elasticsearch.core.ElasticsearchRestTemplate;import java.util.ArrayList;import java.util.List;@SpringBootTestclass SpringbootEsApplicationTests { //注入 ElasticsearchRestTemplate @Autowired private ElasticsearchRestTemplate elasticsearchRestTemplate; /*注入dao层操作*/ @Autowired private ProductDao productDao; /** * 新增 */ @Test public void save() { Product product = new Product(); product.setId(2L); product.setTitle("华为手机"); product.setCategory("手机"); product.setPrice(2999.0); product.setImages("http://www.atguigu/hw.jpg"); productDao.save(product); } //POSTMAN, GET http://localhost:9200/product/_doc/2 /** * 修改 */ @Test public void update() { Product product = new Product(); product.setId(2L); product.setTitle("小米 2 手机"); product.setCategory("手机"); product.setPrice(9999.0); product.setImages("http://www.atguigu/xm.jpg"); productDao.save(product); } //POSTMAN, GET http://localhost:9200/product/_doc/2 /** * 根据 id 查询 */ @Test public void findById() { Product product = productDao.findById(2L).get(); System.out.println(product); } @Test public void findAll() { Iterable<Product> products = productDao.findAll(); for (Product product : products) { System.out.println(product); } } /** * 删除 */ @Test public void delete() { Product product = new Product(); product.setId(2L); productDao.delete(product); } //POSTMAN, GET http://localhost:9200/product/_doc/2 /** * 批量新增 */ @Test public void saveAll() { List<Product> productList = new ArrayList<>(); for (int i = 0; i < 10; i++) { Product product = new Product(); product.setId(Long.valueOf(i)); product.setTitle("[" + i + "]小米手机"); product.setCategory("手机"); product.setPrice(1999.0 + i); product.setImages("http://www.atguigu/xm.jpg"); productList.add(product); } productDao.saveAll(productList); } /** * 分页查询 */ @Test public void findByPageable() { //设置排序(排序方式,排序字段) Sort sort = Sort.by(Sort.Direction.DESC, "price"); int currentPage = 0;//当前页,第一页从 0 开始, 1 表示第二页 int pageSize = 5;//每页显示多少条 //设置查询分页 PageRequest pageRequest = PageRequest.of(currentPage, pageSize, sort); //分页查询 Page<Product> productPage = productDao.findAll(pageRequest); for (Product Product : productPage.getContent()) { System.out.println(Product); } } /** * term 查询 * search(termQueryBuilder) 调用搜索方法,参数查询构建器对象 */ @Test public void termQuery() { /* TermQueryBuilder精准匹配, MatchAllQueryBuilder全查询, MatchQueryBuilder可以模糊查询。 */ MatchQueryBuilder matchQueryBuilder = QueryBuilders.matchQuery("title", "小米"); Iterable<Product> products = productDao.search(matchQueryBuilder); for (Product product : products) { System.out.println(product); } } /** * term 查询加分页 */ @Test public void termQueryByPage() { int currentPage = 0; int pageSize = 5; //设置查询分页 PageRequest pageRequest = PageRequest.of(currentPage, pageSize); MatchQueryBuilder matchQueryBuilder = QueryBuilders.matchQuery("title", "小米"); Iterable<Product> products = productDao.search(matchQueryBuilder, pageRequest); for (Product product : products) { System.out.println(product); } }} |


【推荐】国内首个AI IDE,深度理解中文开发场景,立即下载体验Trae
【推荐】编程新体验,更懂你的AI,立即体验豆包MarsCode编程助手
【推荐】抖音旗下AI助手豆包,你的智能百科全书,全免费不限次数
【推荐】轻量又高性能的 SSH 工具 IShell:AI 加持,快人一步
· 被坑几百块钱后,我竟然真的恢复了删除的微信聊天记录!
· 没有Manus邀请码?试试免邀请码的MGX或者开源的OpenManus吧
· 【自荐】一款简洁、开源的在线白板工具 Drawnix
· 园子的第一款AI主题卫衣上架——"HELLO! HOW CAN I ASSIST YOU TODAY
· Docker 太简单,K8s 太复杂?w7panel 让容器管理更轻松!