


SpringBoot生成验证码
一、使用AWT
1、定义工具类(Util):CreateValidateCode

import java.awt.*;
import java.awt.image.BufferedImage;
import java.util.Random;

/**
 * @author zhangzhixi
 */
public class CreateValidateCode {

    private BufferedImage image;// 图像
    private String str;// 验证码
    // 字符串转char数组
    private static char code[] = "abcdefghijklmnopqrstuvwxyzABCDEFGHIJKLMNOPQRSTUVWXYZ123456789".toCharArray();

    public static final String SESSION_CODE_NAME = "code";

    public CreateValidateCode() {
        init();// 初始化属性
    }

    /*
     * 取得RandomNumUtil实例
     */
    public static CreateValidateCode Instance() {
        return new CreateValidateCode();
    }

    /*
     * 取得验证码图片
     */
    public BufferedImage getImage() {
        return this.image;
    }

    /*
     * 取得图片的验证码
     */
    public String getString() {
        return str.toLowerCase();
    }

    private void init() {
        // 在内存中创建图象
        int width = 60, height = 20;
        BufferedImage image = new BufferedImage(width, height, BufferedImage.TYPE_INT_RGB);
        // 获取图形上下文
        Graphics g = image.getGraphics();
        // 生成随机类
        Random random = new Random();
        // 设定背景色
        g.setColor(getRandColor(200, 250));
        g.fillRect(0, 0, width, height);
        // 设定字体
        g.setFont(new Font("Times New Roman", Font.PLAIN, 18));
        // 随机产生155条干扰线,使图象中的认证码不易被其它程序探测到
        g.setColor(getRandColor(160, 200));
        for (int i = 0; i < 155; i++) {
            int x = random.nextInt(width);
            int y = random.nextInt(height);
            int xl = random.nextInt(12);
            int yl = random.nextInt(12);
            g.drawLine(x, y, x + xl, y + yl);
        }
        // 取随机产生的认证码(4位数字)
        String sRand = "";
        for (int i = 0; i < 4; i++) {
            String rand = String.valueOf(code[random.nextInt(code.length)]);
            sRand += rand;
            // 将认证码显示到图象中
            g.setColor(new Color(20 + random.nextInt(110), 20 + random.nextInt(110), 20 + random.nextInt(110)));
            // 调用函数出来的颜色相同,可能是因为种子太接近,所以只能直接生成
            g.drawString(rand, 13 * i + 6, 16);
        }
        // 赋值验证码

        this.str = sRand;


        // 图象生效
        g.dispose();

        /* 赋值图像 */
        this.image = image;
    }

    /**
     * @param fc
     * @param bc
     * @return 给定范围获得随机颜色
     */
    private Color getRandColor(int fc, int bc) {
        Random random = new Random();
        if (fc > 255) {
            fc = 255;
        }
        if (bc > 255) {
            bc = 255;
        }
        int r = fc + random.nextInt(bc - fc);
        int g = fc + random.nextInt(bc - fc);
        int b = fc + random.nextInt(bc - fc);
        return new Color(r, g, b);
    }
}
2、Controller层
@Controller
public class MyController {

    //验证码
    @RequestMapping("/getCode")
    public void getValidateCode(HttpServletResponse response, HttpServletRequest request) throws IOException {
        //创建输出流
        OutputStream outputStream = response.getOutputStream();
        //获取session
        HttpSession session = request.getSession();
        //获取验证码
        CreateValidateCode createValidateCode = new CreateValidateCode();
        String generateVerifyCode = createValidateCode.getString();
        //将验证码存入session,做登录验证
        session.setAttribute("code", generateVerifyCode);
        System.out.println("验证码为:" + generateVerifyCode);
        //获取验证码图片
        BufferedImage image = createValidateCode.getImage();
        ImageIO.write(image, "png", outputStream);
        //关流
        outputStream.flush();
        outputStream.close();
    }
}

二、使用captcha-start
GitHub地址:https://github.com/aqiu202/captcha-spring-boot-starter
1.引入依赖
1 2 3 4 5 6 7 8 9 10 11 12 13 14 15 16 | <!--验证码--><dependency> <groupId>com.github.aqiu202</groupId> <artifactId>captcha-spring-boot-starter</artifactId> <version>0.0.3</version></dependency><!--模板引擎--><dependency> <groupId>org.springframework.boot</groupId> <artifactId>spring-boot-starter-thymeleaf</artifactId></dependency><!--SpringBootWeb开发依赖--><dependency> <groupId>org.springframework.boot</groupId> <artifactId>spring-boot-starter-web</artifactId></dependency> |
2.配置文件:application.yaml
1 2 3 4 5 6 7 8 9 10 | captcha: height: 40 #图片高度 width: 100 #图片宽度 has-border: true #设置图片为有边框 noise: #噪化方式先阴影,再添加曲线,再扭曲变形最后添加噪点 styles: - SHADOW - LINE - SHEAR - POINT |
3.controller:VerifyCodeController.java
1 2 3 4 5 6 7 8 9 10 11 12 13 14 15 16 17 18 19 20 21 22 23 24 25 26 27 28 29 30 31 32 33 34 35 36 37 38 39 40 41 42 43 44 45 46 47 48 49 50 51 52 53 54 55 56 57 58 59 60 61 62 63 64 65 66 67 68 69 | package com.zhixi.controller;import com.github.code.aqiu202.captcha.CaptchaProducer;import org.springframework.beans.factory.annotation.Autowired;import org.springframework.stereotype.Controller;import org.springframework.ui.Model;import org.springframework.validation.annotation.Validated;import org.springframework.web.bind.annotation.GetMapping;import org.springframework.web.bind.annotation.PostMapping;import org.springframework.web.bind.annotation.RequestParam;import org.springframework.web.bind.annotation.ResponseBody;import javax.servlet.http.HttpServletRequest;import javax.servlet.http.HttpServletResponse;import java.io.IOException;/** * @ClassName VerifyCodeController * @Author zhangzhixi * @Description * @Date 2022-1-13 10:18 * @Version 1.0 */@Validated@Controllerpublic class VerifyCodeController { @Autowired private CaptchaProducer producer; /*表单*/ @PostMapping("/userRegister") public String userRegister(HttpServletRequest request, HttpServletResponse response, Model model, @RequestParam("username") String userName, @RequestParam("password") String passwd, @RequestParam("yzmInput") String yzmInput, @RequestParam("userage") Integer age) { String code = (String) request.getSession().getAttribute("CODE"); System.out.println(yzmInput); if ("".equals(yzmInput)) { model.addAttribute("codeErr", "请输入验证码!"); return "index"; } /*判断验证码是否正确*/ if (yzmInput != null && code != null) { if (!code.equalsIgnoreCase(yzmInput)) { model.addAttribute("codeErr", "验证码错误!"); return "index"; } } return "sucess"; } /** * 获取验证码 **/ @ResponseBody @GetMapping("/verify-code/code") public void doGet(HttpServletRequest req, HttpServletResponse resp) throws IOException { /*随机生成验证码*/ String text = this.producer.createText(); /*将验证码放到session中*/ req.getSession().setAttribute("CODE", text); /*写入到浏览器中*/ this.producer.writeToResponse(text, resp); }} |
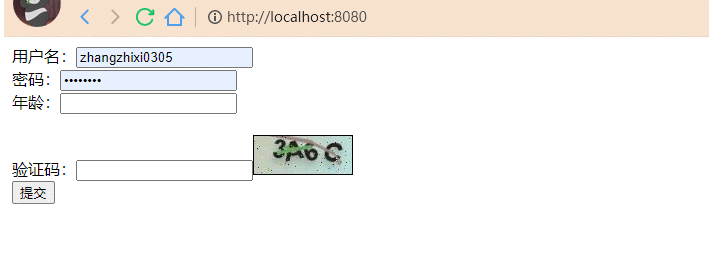
4.index.html
1 2 3 4 5 6 7 8 9 10 11 12 13 14 15 16 17 18 19 20 21 22 23 24 | <!DOCTYPE html><html lang="en" xmlns:th="http://www.thymeleaf.org"><head> <meta charset="UTF-8"> <title>Title</title></head><body><form action="/userRegister" method="post"> 用户名:<input type="text" id="name" name="username" /><br> 密码:<input type="password" id="password" name="password" /><br> 年龄:<input type="text" id="age" name="userage" /><br> <div th:text="${codeErr}" style="color: red"></div><br> 验证码:<input type="text" name="yzmInput"/><img onclick="changeCode(this)" id="codeJPG" name="yzm" src="/verify-code/code" style="cursor:pointer;" /> <br> <input type="submit" name="提交"/></form><div> <script> function changeCode(obj) { obj.src = "/verify-code/code?" + Math.random(); } </script></div></body></html> |
5.success.html
1 2 3 4 5 6 7 8 9 10 | <!DOCTYPE html><html lang="en" xmlns:th="http://www.thymeleaf.org"><head> <meta charset="UTF-8"> <title>Title</title></head><body>恭喜您注册成功</body></html> |
三、使用封装好的工具类
1.导入pom
1 2 3 4 5 6 7 8 9 10 | <!--验证码--><dependency> <groupId>com.github.whvcse</groupId> <artifactId>easy-captcha</artifactId> <version>1.6.2</version></dependency><dependency> <groupId>org.springframework.boot</groupId> <artifactId>spring-boot-starter-web</artifactId></dependency> |
2.controller层
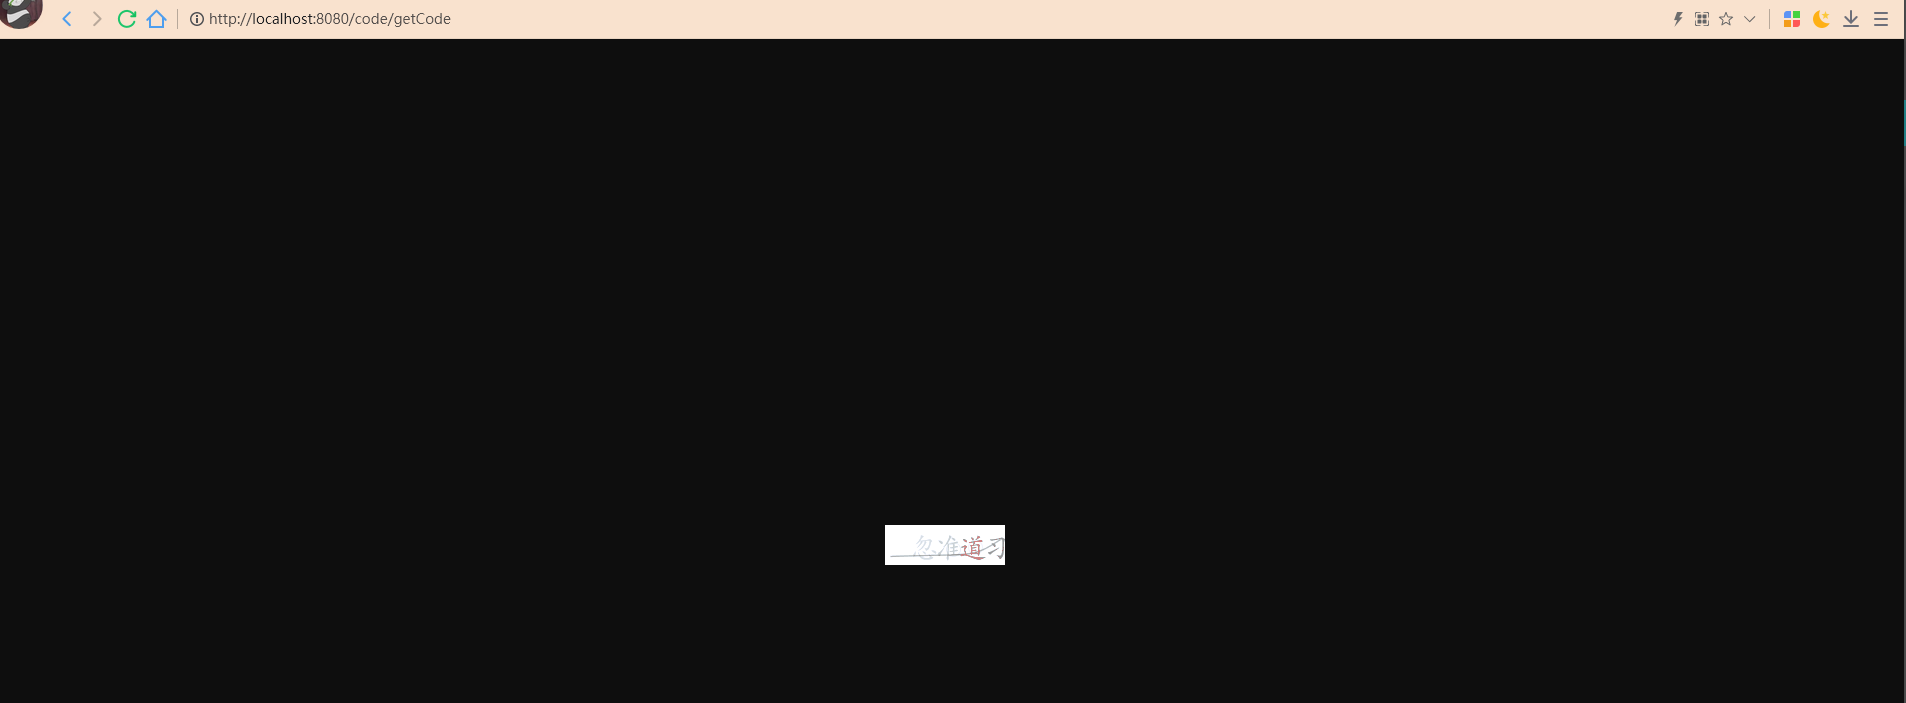
1 2 3 4 5 6 7 8 9 10 11 12 13 14 15 16 17 18 19 20 21 22 23 24 25 26 27 28 29 30 31 32 33 34 35 36 37 38 39 40 41 42 43 44 45 46 47 48 49 | package com.zhixi.controller;import com.wf.captcha.ChineseGifCaptcha;import org.springframework.web.bind.annotation.GetMapping;import org.springframework.web.bind.annotation.RequestMapping;import org.springframework.web.bind.annotation.RestController;import javax.servlet.ServletOutputStream;import javax.servlet.http.HttpServletResponse;@RestController@RequestMapping("/code")public class CodeController { /** * 生成验证码 * * @return * @throws Exception */ @GetMapping("/getCode") public void getCode(HttpServletResponse response) throws Exception { ServletOutputStream outputStream = response.getOutputStream(); //算术验证码 数字加减乘除. 建议2位运算就行:captcha.setLen(2);// ArithmeticCaptcha captcha = new ArithmeticCaptcha(120, 40); // 中文验证码// ChineseCaptcha captcha = new ChineseCaptcha(120, 40); // 英文与数字验证码// SpecCaptcha captcha = new SpecCaptcha(120, 40); //英文与数字动态验证码// GifCaptcha captcha = new GifCaptcha(120, 40); // 中文动态验证码 ChineseGifCaptcha captcha = new ChineseGifCaptcha(120, 40); // 生成验证码的长度 captcha.setLen(5); // 获取运算的结果s String result = captcha.text(); System.out.println(result); captcha.out(outputStream); }} |


【推荐】国内首个AI IDE,深度理解中文开发场景,立即下载体验Trae
【推荐】编程新体验,更懂你的AI,立即体验豆包MarsCode编程助手
【推荐】抖音旗下AI助手豆包,你的智能百科全书,全免费不限次数
【推荐】轻量又高性能的 SSH 工具 IShell:AI 加持,快人一步
· go语言实现终端里的倒计时
· 如何编写易于单元测试的代码
· 10年+ .NET Coder 心语,封装的思维:从隐藏、稳定开始理解其本质意义
· .NET Core 中如何实现缓存的预热?
· 从 HTTP 原因短语缺失研究 HTTP/2 和 HTTP/3 的设计差异
· 分享一个免费、快速、无限量使用的满血 DeepSeek R1 模型,支持深度思考和联网搜索!
· 基于 Docker 搭建 FRP 内网穿透开源项目(很简单哒)
· ollama系列01:轻松3步本地部署deepseek,普通电脑可用
· 按钮权限的设计及实现
· 25岁的心里话