
The Paravirtualization Interface setting in VirtualBox determines how the guest operating system interacts with the underlying host system for performance optimizations. It allows the guest to take advantage of certain features to speed up operations, especially in virtualized environments. This setting is particularly useful for improving performance in tasks such as I/O, memory access, and CPU processing.
In VirtualBox, the Paravirtualization Interface can be configured under the System > Acceleration tab, and it offers several options. Here's an explanation of each one:
Paravirtualization Interface Options in VirtualBox:
-
None:
- Meaning: No paravirtualization interface is used.
- Use Case: This is the default setting and is appropriate for most guest operating systems, especially when paravirtualization is not supported or needed. It does not provide any specific optimizations and leaves the virtual machine to operate in the traditional virtualized environment with full emulation.
- Performance Impact: This option may result in slower performance for certain workloads, as the guest OS has to rely entirely on hardware emulation, which can be less efficient.
-
Minimal:
- Meaning: Provides basic paravirtualization support.
- Use Case: This setting is used for Linux guests (especially older or lighter Linux distributions) that don’t require advanced paravirtualization support but could benefit from some optimizations. It provides minimal optimization for things like I/O performance and memory management.
- Performance Impact: There can be a small performance boost in I/O operations (disk and network), but it's not as powerful as the more advanced paravirtualization options.
-
KVM (Kernel-based Virtual Machine):
- Meaning: Optimizes performance for Linux guests running on a KVM-based hypervisor (specifically when running Linux with KVM on the host system).
- Use Case: This is the recommended setting for Linux guests that support KVM. It enables more advanced optimizations for Linux guests running on virtualized hardware, particularly when the host system uses KVM or supports paravirtualization.
- Performance Impact: This setting provides significant performance improvements, especially for I/O, memory, and CPU. It can result in better performance for Linux guests because it exposes paravirtualized devices to the guest, enabling faster operations than when running in full emulation mode.
-
Hyper-V:
- Meaning: Provides paravirtualization optimizations for Windows guests running in a Hyper-V environment.
- Use Case: This is useful when running Windows Server 2012 or later and Windows 10 or later as guest OSes. It uses the paravirtualization interface designed for use with Microsoft's Hyper-V hypervisor. It's especially beneficial for users who are running Windows on a host machine and want the guest to interact in a way that maximizes compatibility and performance within the Windows environment.
- Performance Impact: This can improve performance for Windows guests in terms of system calls, memory access, and I/O handling, as it provides optimized communication between the guest OS and the host.
-
VBoxSVGA (VirtualBox Graphics Adapter):
- Meaning: This setting is related to the graphics adapter used by VirtualBox and is designed to support 3D acceleration and optimize graphics performance. However, this is separate from paravirtualization related to CPU and memory.
- Use Case: This is relevant if you are using VirtualBox’s VBoxSVGA graphics adapter for modern GUI-based guests, such as Linux or Windows systems, and want better 3D graphics performance.
- Performance Impact: It does not directly affect CPU or memory performance, but it can improve the overall experience of running graphical user interfaces (GUIs) in VirtualBox.
Summary of Paravirtualization Options:
| Option | Description | Best Use Case | Performance Impact |
|---|---|---|---|
| None | No paravirtualization. Basic virtual machine operation. | Default for most guest OSes. | No optimizations; slower performance. |
| Minimal | Basic optimizations for Linux guests. | Lightweight Linux distributions. | Small performance boost, especially in I/O. |
| KVM | Paravirtualization interface for Linux guests running with KVM. | Linux guests using KVM. | Significant performance improvements in I/O, memory, CPU. |
| Hyper-V | Paravirtualization for Windows guests with Hyper-V. | Windows 10/Server 2012 or later. | Better CPU, memory, and I/O performance. |
| VBoxSVGA | Graphics adapter optimization for VirtualBox guests, enabling better 3D acceleration. | For guests that require GUI-based graphics. | Improves 3D performance, not CPU or memory. |
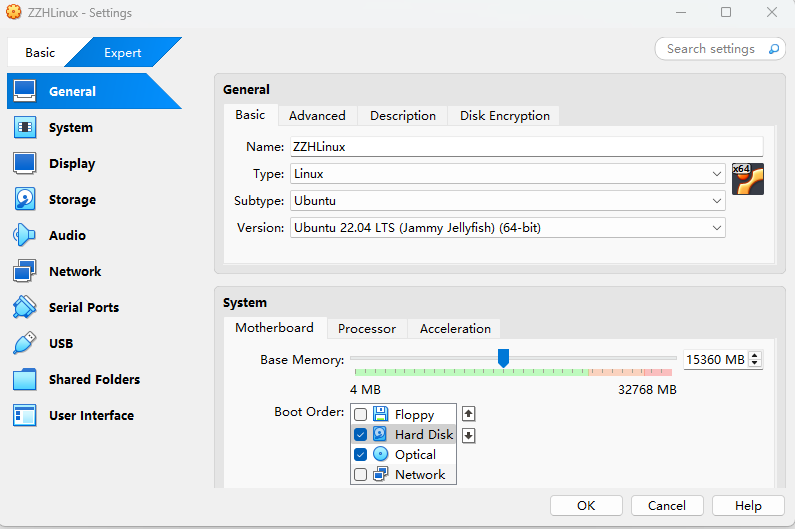
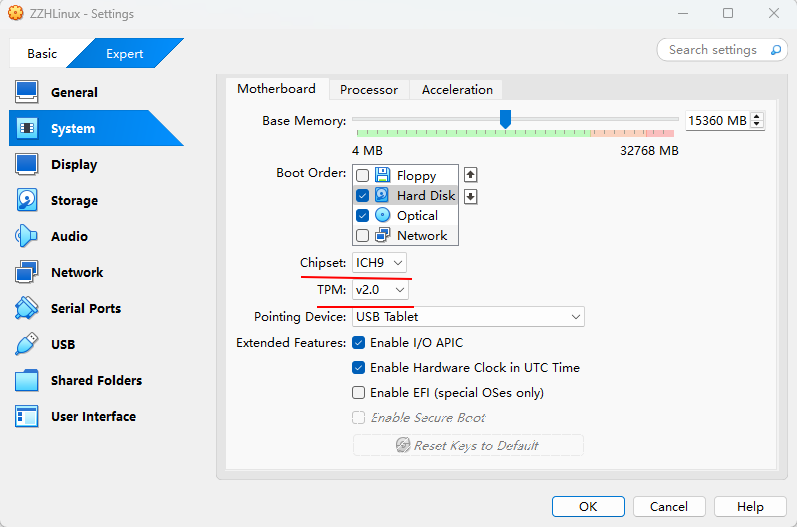
Motherboard Chipset Setting in VirtualBox:
The Motherboard Chipset setting can be found in the System tab under the Motherboard section of the VM’s settings in VirtualBox. The options for Motherboard Chipset are:
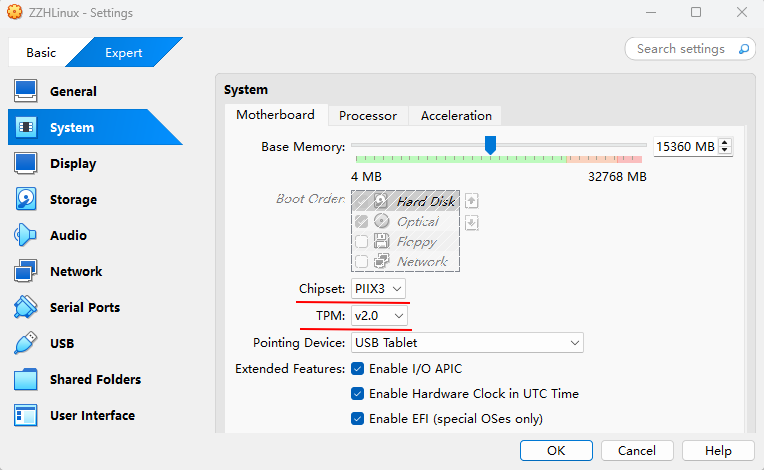
- PIIX3 (Intel): This is the default chipset for most virtual machines and is typically used for older operating systems or those that do not require advanced features like PCI Express or hardware virtualization.
- PIIX4 (Intel): This is an updated version of PIIX3 and provides some improvements in terms of compatibility and performance for virtual machines that require slightly newer hardware features.
- ICH9 (Intel): This is a more advanced chipset that offers better support for modern guest operating systems and includes more recent hardware features like PCI Express (PCIe) support, which is necessary for virtual machines that want to interact with modern hardware and devices (like certain graphics cards, network devices, etc.).
The available options for Motherboard TPM are:
- Disabled: The virtual machine does not have a TPM chip, and it cannot use TPM-based features or applications.
- Enable TPM (TPM 1.2): This option emulates a TPM 1.2 chip, which is an older version of TPM. TPM 1.2 is compatible with many older operating systems (e.g., Windows 7) and some applications that require TPM.
- Enable TPM (TPM 2.0): This option emulates a TPM 2.0 chip, which is the latest version of TPM and is required for modern operating systems like Windows 11 and some newer Linux distributions. TPM 2.0 offers improved security features and is the recommended choice for newer systems and applications.
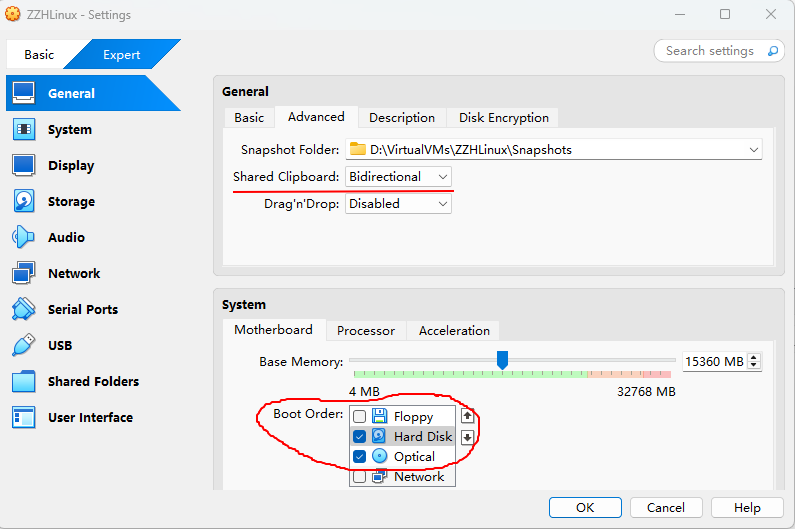
Chipset选ICH9,存在操作系统无法正常启动的问题。改回如下配置后就能正常启动:
The "Enable EFI (Extensible Firmware Interface)" setting in VirtualBox refers to enabling the EFI boot method for the virtual machine, which is a more modern replacement for the traditional BIOS (Basic Input/Output System). Here’s what it means and when you should use it:
What is EFI?
- EFI (Extensible Firmware Interface), also known as UEFI (Unified Extensible Firmware Interface), is the successor to the traditional BIOS system used in most computers. It provides a more flexible and secure boot process and has support for larger disk sizes, faster boot times, and better overall functionality.
- It’s the boot system used by newer operating systems, especially those with UEFI-based installations, such as Windows 8+ and modern Linux distributions.
What Does "Enable EFI" Do in VirtualBox?
When you enable EFI for a virtual machine in VirtualBox, it configures the VM to use UEFI as the boot mechanism instead of the default legacy BIOS system.
When Should You Enable EFI in VirtualBox?
-
Installing UEFI-based OS:
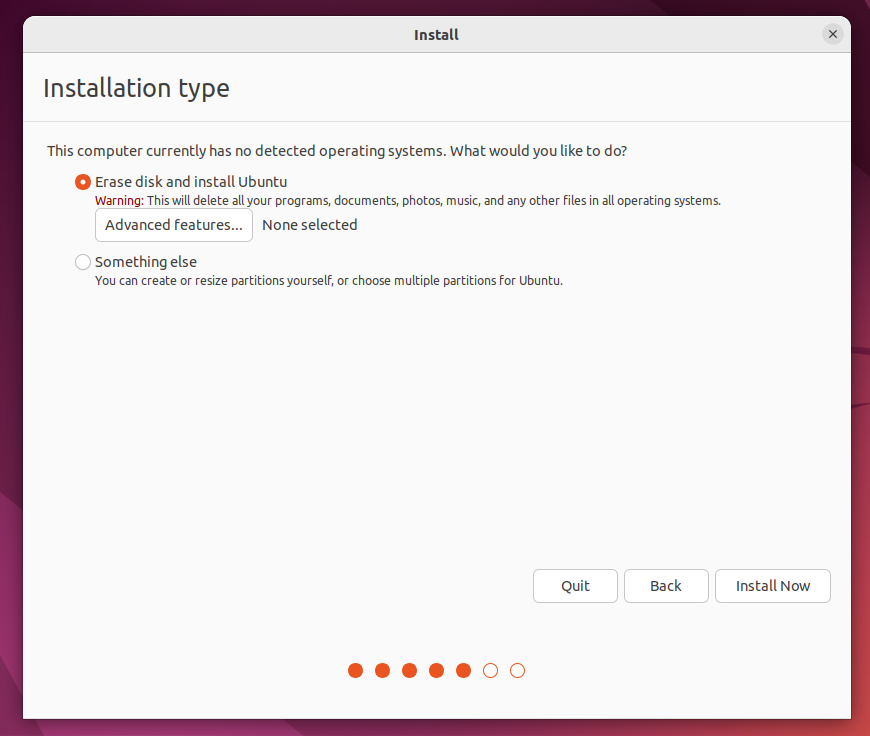
- If you are installing a modern operating system (like Windows 10, Windows 11, or certain Linux distributions) that requires UEFI, you need to enable EFI. This is particularly important for secure boot and if the OS installation requires UEFI (which might be the case for systems with disk partitions larger than 2TB or GPT-style partitions).
-
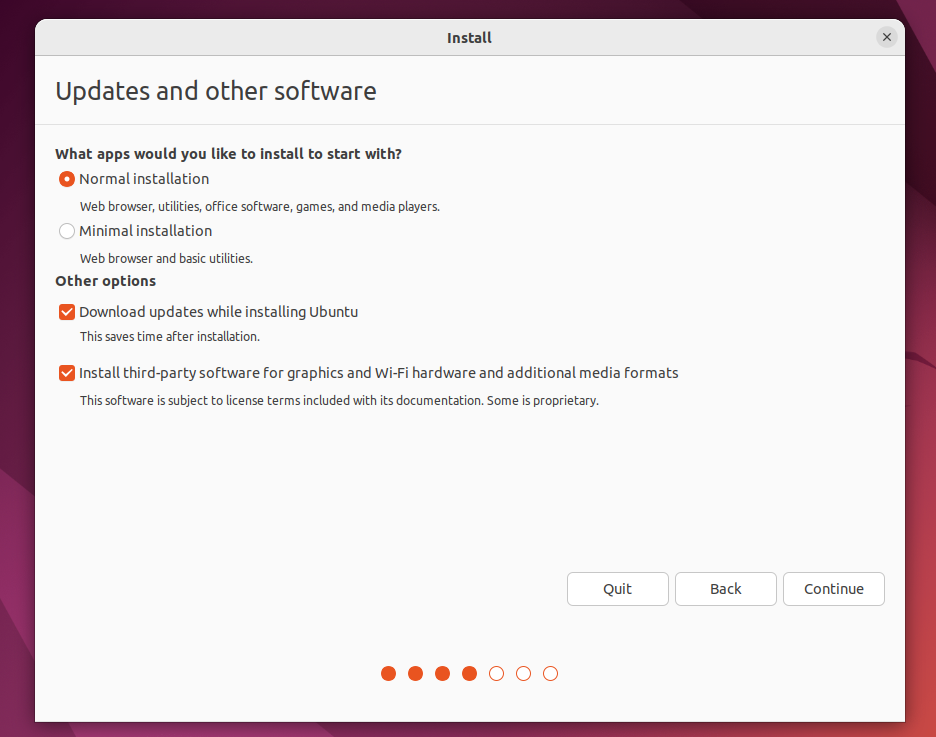
Booting from UEFI-supported images:
- Some operating systems, like newer versions of Windows, Ubuntu, or Fedora, come with UEFI boot images that are not compatible with the legacy BIOS boot method. Enabling EFI allows the VM to boot from these UEFI images.
-
Testing UEFI boot functionality:
- If you are experimenting with or developing for UEFI, you may want to enable this setting to see how an operating system behaves with UEFI, even if it's not strictly required for your installation.
Key Differences Between EFI and BIOS
- BIOS (Legacy Boot): This is the traditional method, which is simpler but has limitations (such as booting from drives larger than 2TB and the partition scheme being limited to MBR).
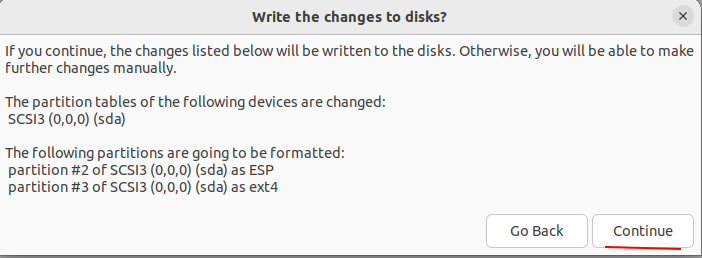
- EFI/UEFI: More modern, supports booting from GPT (GUID Partition Table) disks, and includes features like secure boot, faster booting, and support for newer hardware standards.
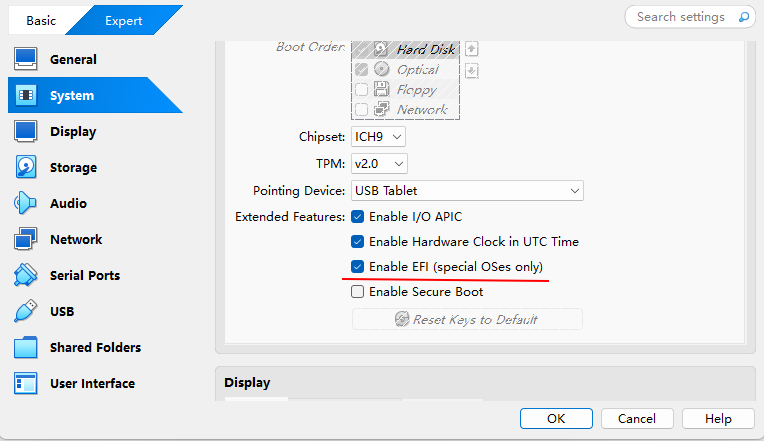
How to Enable EFI in VirtualBox:
- Open VirtualBox and select the VM you want to modify.
- Go to Settings → System → Motherboard tab.
- Check the box labeled Enable EFI (special OSes only).
- Save the settings and boot the VM.
Limitations:
- Enabling EFI may prevent you from installing or running older operating systems that only support legacy BIOS.
- Some operating systems (especially older ones) might not be compatible with UEFI boot, so you might need to disable EFI if you're working with legacy software.
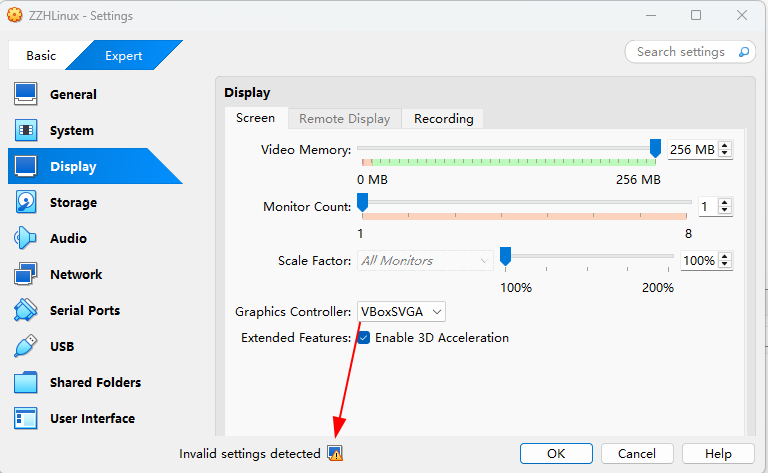
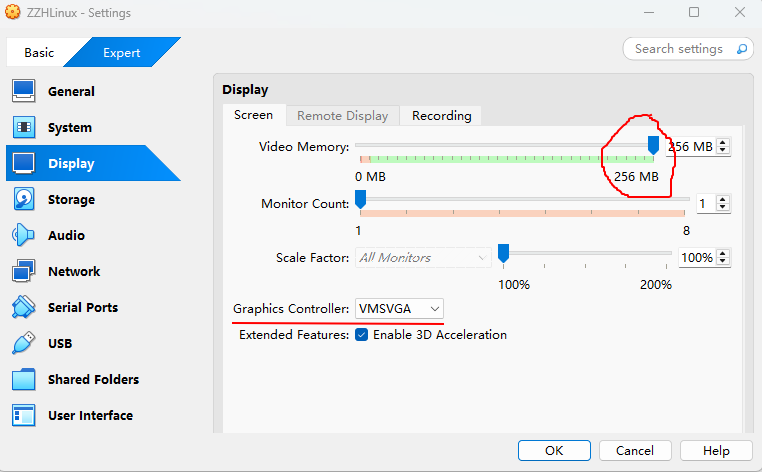
PS C:\Program Files\Oracle\VirtualBox> .\VBoxManage.exe modifyvm "ZZHLinux" --vram 256
Graphics Controller Options and Their Meanings:
a) VBoxVGA:
- Description: VBoxVGA is the original graphics controller used by VirtualBox. It emulates a VGA-compatible video card, which is compatible with older guest operating systems.
- Use Case: This controller is typically used for older operating systems or situations where compatibility with legacy OSes is required. It is best suited for Windows 95, Windows XP, or older Linux distributions.
- Features:
- Provides basic 2D graphics acceleration.
- Supports VGA-compatible resolutions.
- No 3D acceleration support by default, though it may work with very basic graphical applications.
- Limitations:
- Does not support modern graphics features like 3D acceleration or high-resolution displays (for modern OSes).
- Not ideal for running newer operating systems with modern graphical interfaces.
b) VBoxSVGA:
- Description: VBoxSVGA is an updated version of VBoxVGA, providing a better experience for modern operating systems. It emulates a VGA-compatible graphics controller with Super VGA (SVGA) support, offering higher resolutions and some improvements in 3D acceleration.
- Use Case: It is recommended for Windows 7 or newer guest OSes and modern Linux distributions. It is also useful when running applications that require better graphics performance or compatibility with higher screen resolutions.
- Features:
- Provides support for higher resolutions (up to 2048x1536 by default).
- Supports 2D acceleration.
- Supports 3D acceleration if enabled in the VM settings.
- Limitations:
- No full 3D acceleration for all use cases (depending on the guest OS and the specific hardware).
- May still face some compatibility issues with specific applications or OSes (compared to more modern graphics controllers).
c) VMSVGA:
- Description: VMSVGA (VMware SVGA) is a VMware-compatible graphics controller. It is commonly used for Linux-based guest OSes, particularly modern Linux distributions. It emulates a VMware SVGA II graphics card and is well-suited for Linux environments.
- Use Case: VMSVGA is the recommended graphics controller for Linux distributions (especially Ubuntu or other modern distros), and it can also work with Windows if needed. It is ideal for Linux guests with 3D acceleration or high-resolution displays.
- Features:
- Supports high-resolution screens (up to 2560x1600).
- Provides 2D and 3D acceleration for compatible guests.
- Works well with Linux guests using open-vm-tools for enhanced graphics support.
- Limitations:
- Some versions of Windows may not be fully compatible with this controller.
- Requires VMware Tools or Open VM Tools for full functionality (especially 3D acceleration).
Audio Controller Options and Their Meanings:
a) AC97:
- Description: The AC97 (Audio Codec '97) controller is an older, widely supported audio codec. It emulates an Intel 82801AA/AB AC97 Audio Controller, which was a common audio chip used in PCs around the early 2000s.
- Use Case: AC97 is a legacy audio controller and is still useful for older operating systems (e.g., Windows XP or older Linux distributions). It's the default choice for compatibility with many guest operating systems, particularly for systems that don't require modern sound features.
- Features:
- Supports basic stereo audio (2 channels).
- Provides hardware-accelerated sound for basic applications and games.
- Widely compatible with older guest operating systems.
- Limitations:
- Does not support advanced audio features like surround sound or higher-quality audio.
- Not suitable for modern high-fidelity audio needs.
- Limited driver support for newer operating systems.
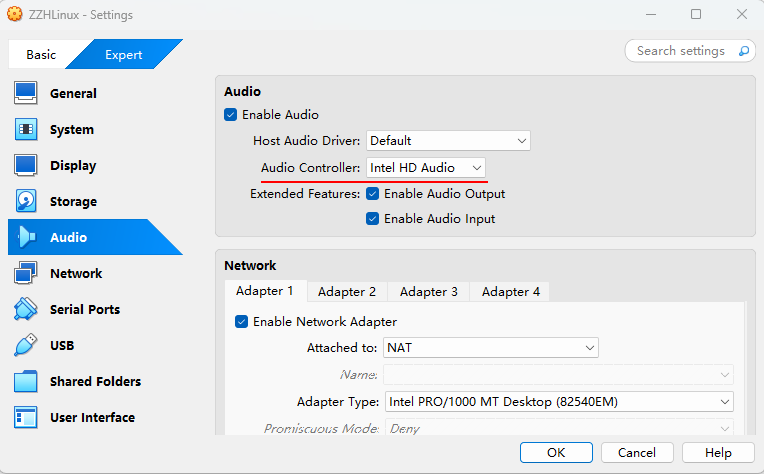
b) Intel HD Audio:
- Description: Intel HD Audio is the default modern audio controller emulated by VirtualBox. It emulates an Intel High Definition Audio (HDA) interface, which is used in modern computers.
- Use Case: This controller is ideal for modern operating systems, such as Windows 7 or newer, Linux distributions (e.g., Ubuntu 20.04+), and other modern guest OSes that need higher-quality audio, surround sound support, or other advanced audio features.
- Features:
- Supports high-definition audio with up to 8 channels (7.1 surround sound).
- Provides better audio quality compared to AC97, with support for multichannel audio.
- Full support for modern operating systems like Windows 10, Windows 11, and modern Linux distributions.
- Limitations:
- Requires newer operating systems that support Intel HD Audio drivers (Windows Vista and later).
- Older guest operating systems may not support this controller, and driver issues can arise in those cases.
Steps to Enable AVX, AVX2, and FMA in a VirtualBox VM:
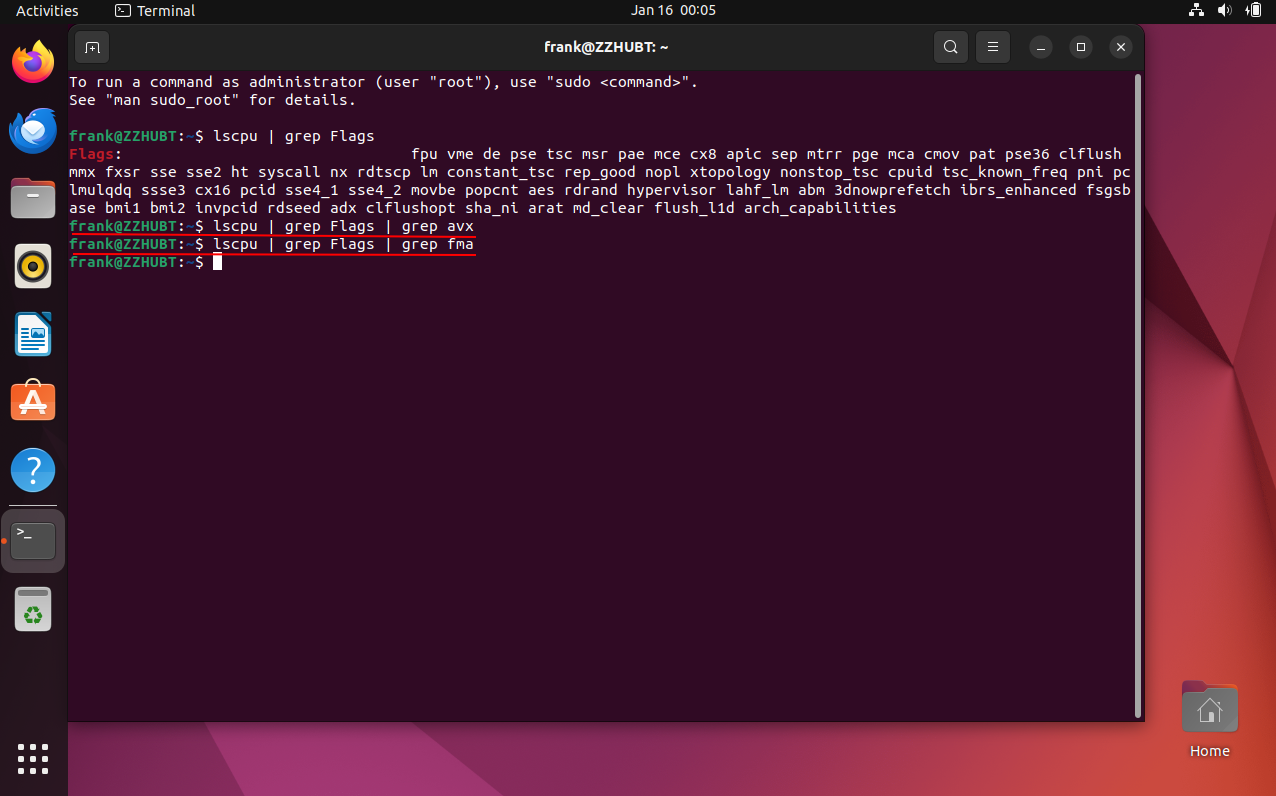
1. Ensure Your Host CPU Supports AVX/AVX2/FMA:
Since you've confirmed that your physical CPU supports these features, the next step is to ensure that VirtualBox is configured to pass those features to the guest VM.
2. Enable Virtualization Extensions in the BIOS/UEFI:
Before configuring VirtualBox, you need to make sure that Intel VT-x (for Intel CPUs) or AMD-V (for AMD CPUs) is enabled in your system’s BIOS/UEFI. This allows for hardware-assisted virtualization.
- Intel CPUs: Look for an option named something like Intel Virtualization Technology or Intel VT-x in the BIOS/UEFI settings and ensure it is enabled.
- AMD CPUs: Look for SVM Mode or AMD-V and enable it.
Restart your machine after changing these settings.
3. Ensure VirtualBox is Up-to-Date:
Make sure you're using the latest version of VirtualBox, as newer versions include improvements and bug fixes related to virtualization and hardware extensions.
- Visit the VirtualBox download page to get the latest version.
4. Configure VirtualBox to Enable AVX/AVX2/FMA in the VM:
To make sure the virtual machine can use the AVX, AVX2, and FMA instructions, follow these steps:
Step 1: Create or Modify the VM:
- Open VirtualBox and select your VM or create a new one.
- Click Settings for your VM.
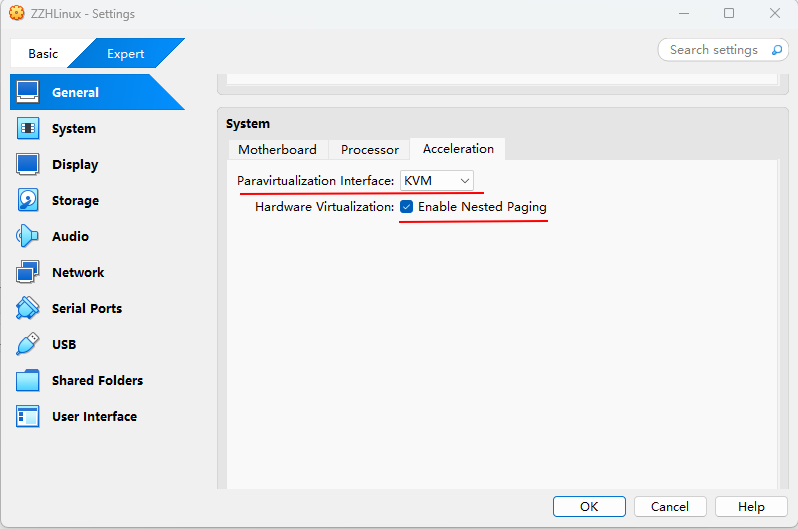
Step 2: Enable Hardware Virtualization:
- Go to the System tab.
- In the Acceleration tab, make sure that Enable VT-x/AMD-V is checked. This allows the guest to use the CPU extensions that your host supports.
- Enable Enable Nested Paging for better performance.
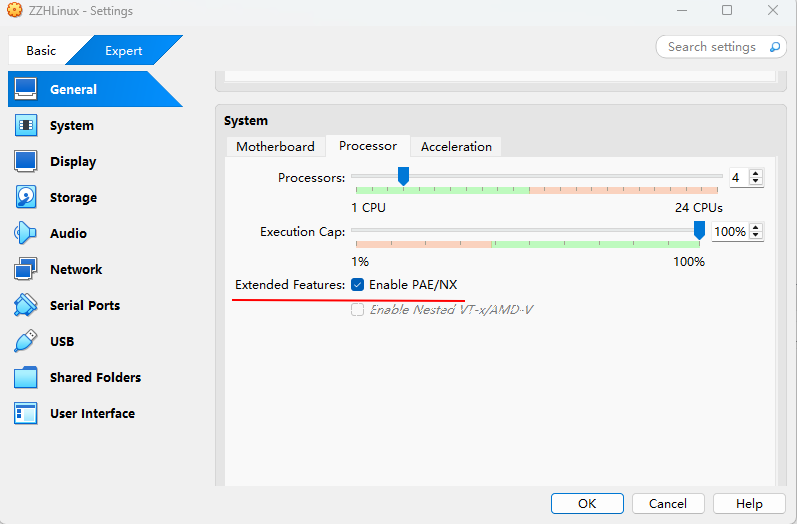
Step 3: Modify the VM’s CPU Settings:
- Go to the Processor tab under System > Processor.
- Set the Number of CPUs to at least 2 (or more, if your host supports it).
- Ensure Enable PAE/NX is checked. This is important for enabling modern CPU features.
Step 4: Enable CPU Extensions via VBoxManage (if needed):
To enable AVX, AVX2, and FMA specifically, you may need to use the VBoxManage command-line tool that comes with VirtualBox.
-
Shut down your VM if it’s running.
-
Open a Command Prompt (Windows) or Terminal (Linux/macOS) and navigate to the directory where VirtualBox is installed. On Windows, this is usually located in
C:\Program Files\Oracle\VirtualBox\. -
Run the following command (replace
YourVMNamewith the name of your VM):This command sets the virtual machine's CPU profile to match the host CPU, enabling support for AVX, AVX2, and FMA.
The
--cpu-profile "host"command makes the VM use the same CPU features as the host system, which should pass through AVX and other extensions to the VM. If this doesn’t work, you can manually try a more specific CPU profile, like--cpu-profile "Intel Core i7-6700K"or another specific CPU model that supports AVX2/FMA.
PS C:\Program Files\Oracle\VirtualBox> .\VBoxManage.exe modifyvm "ZZHLinux" --cpu-profile "host"


【推荐】国内首个AI IDE,深度理解中文开发场景,立即下载体验Trae
【推荐】编程新体验,更懂你的AI,立即体验豆包MarsCode编程助手
【推荐】抖音旗下AI助手豆包,你的智能百科全书,全免费不限次数
【推荐】轻量又高性能的 SSH 工具 IShell:AI 加持,快人一步
· 震惊!C++程序真的从main开始吗?99%的程序员都答错了
· 【硬核科普】Trae如何「偷看」你的代码?零基础破解AI编程运行原理
· 单元测试从入门到精通
· 上周热点回顾(3.3-3.9)
· winform 绘制太阳,地球,月球 运作规律