Maven安装与配置
版本:apache-maven-3.6.3
0 将Maven解压
配置环境变量: M2_HOME: maven安装目录 Path:%M2_HOME%/bin
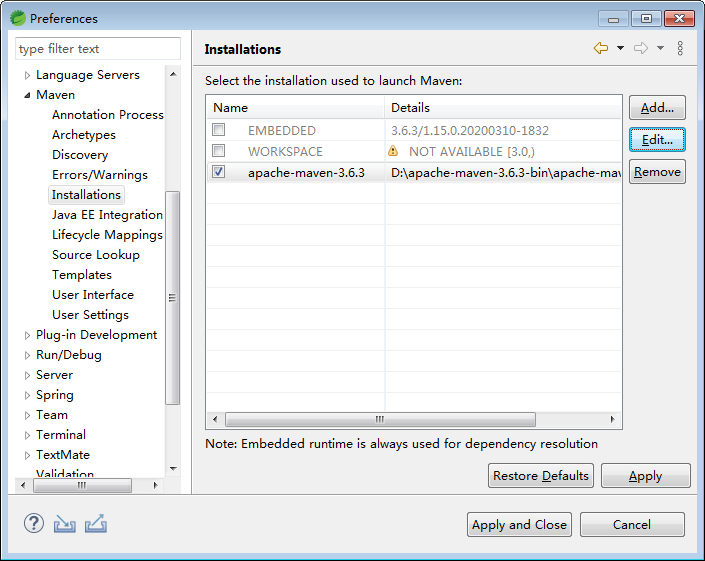
1 在STS中打开 Window -> Preferences -> Maven -> Installations。

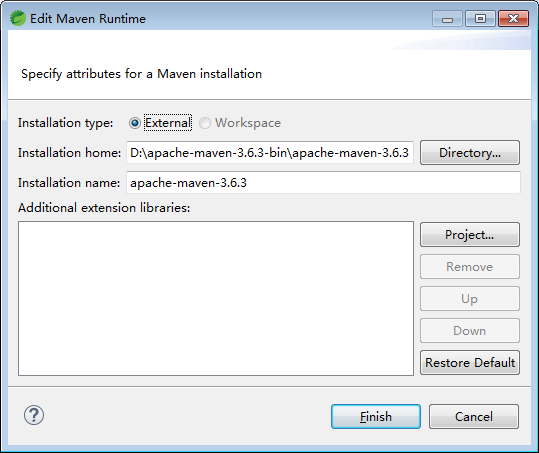
2 在 Installations 窗口中点击 “Add...” 按钮 ,选择 Maven 安装路径,然后点击 “Apply” 按钮。

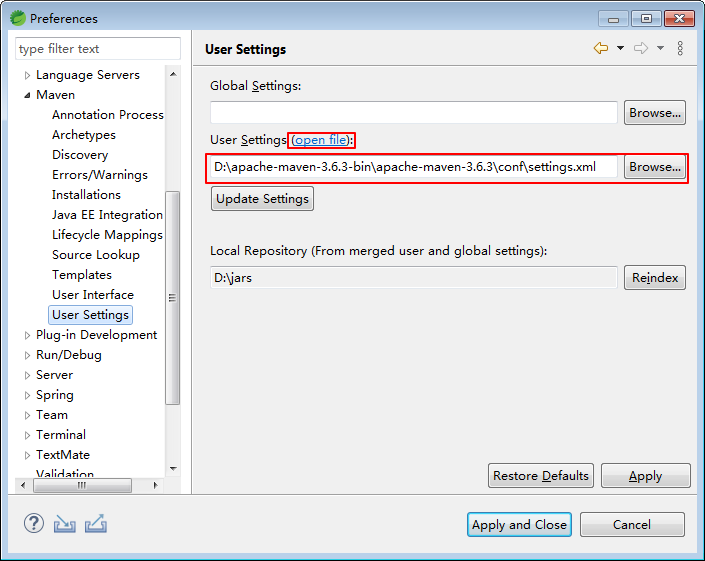
3 再次选择:Windows –> Prefrences –> Maven –> User Settings –> Browse。选择maven安装路径下conf文件夹中的settings.xml ,然后点击 “Apply” 按钮。

4 单击open file 开始修改配置文件
4.1

<!--   本地仓库 -->
  <localRepository>D:\jars</localRepository>
4.2 <mirrors>中

1      <mirror>
2           <id>aliyunmaven</id>
3           <mirrorOf>*</mirrorOf>
4           <name>阿里云公共仓库</name>
5          <url>https://maven.aliyun.com/repository/public</url>
6     </mirror>
4.3 <profiles> 中

 1 <!-- 配置jdk版本 -->
 2     <profile>
 3         <id>jdk-1.8</id>
 4         <activation>
 5             <activeByDefault>true</activeByDefault>
 6             <jdk>1.8</jdk>
 7         </activation>
 8         <properties>
 9             <maven.compiler.source>1.8</maven.compiler.source>
10             <maven.compiler.target>1.8</maven.compiler.target>
11             <maven.compiler.compilerVersion>1.8</maven.compiler.compilerVersion>
12         </properties>
13     </profile>
5. pom.xml中添加依赖
 1 <project xmlns="http://maven.apache.org/POM/4.0.0"
 2     xmlns:xsi="http://www.w3.org/2001/XMLSchema-instance"
 3     xsi:schemaLocation="http://maven.apache.org/POM/4.0.0 http://maven.apache.org/maven-v4_0_0.xsd">
 4     <modelVersion>4.0.0</modelVersion>
 5     <groupId>com.neusoft</groupId>
 6     <artifactId>MavenWebTest</artifactId>
 7     <packaging>war</packaging>
 8     <version>0.0.1-SNAPSHOT</version>
 9     <name>MavenWebTest Maven Webapp</name>
10     <url>http://maven.apache.org</url>
11     <dependencies>
12         <dependency>
13             <groupId>junit</groupId>
14             <artifactId>junit</artifactId>
15             <version>3.8.1</version>
16             <scope>test</scope>
17         </dependency>
18         <dependency>
19             <groupId>javax.servlet</groupId>
20             <artifactId>javax.servlet-api</artifactId>
21             <version>4.0.0</version>
22             <scope>provided</scope>
23         </dependency>
24     </dependencies>
25     <build>
26         <finalName>MavenWebTest</finalName>
27     </build>
28 </project>
本文来自博客园,作者:喵酱爱吃鱼,转载请注明原文链接:https://www.cnblogs.com/zhangyuanmingboke/p/15337847.html

