Idea 七步建立Spring Mvc 的web项目,极其简单
Idea 7步建立Spring Mvc 的web项目
1.新建项目

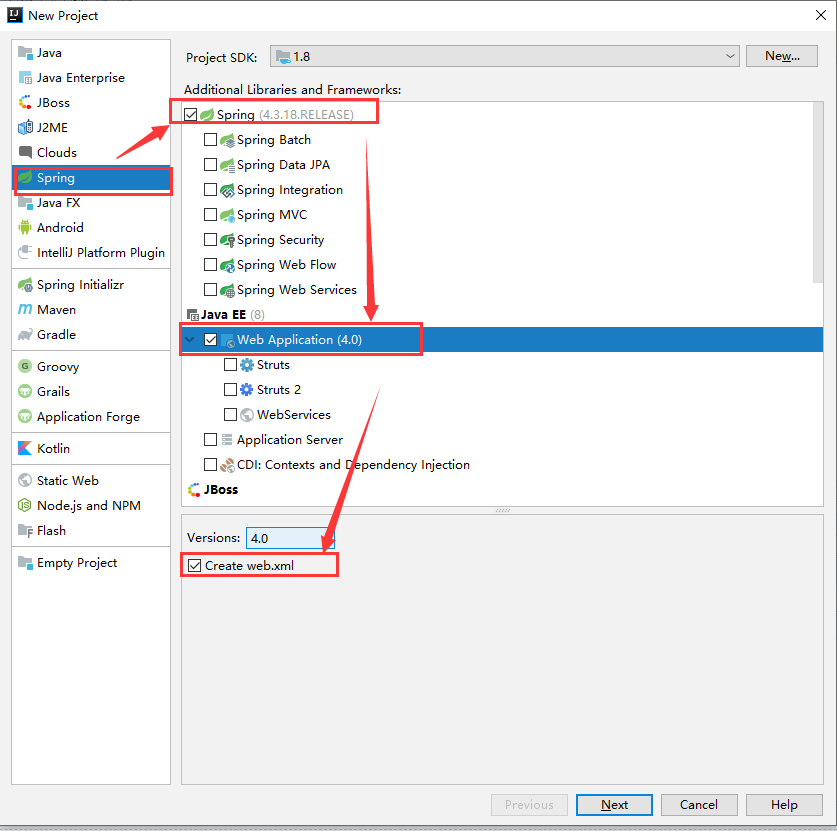
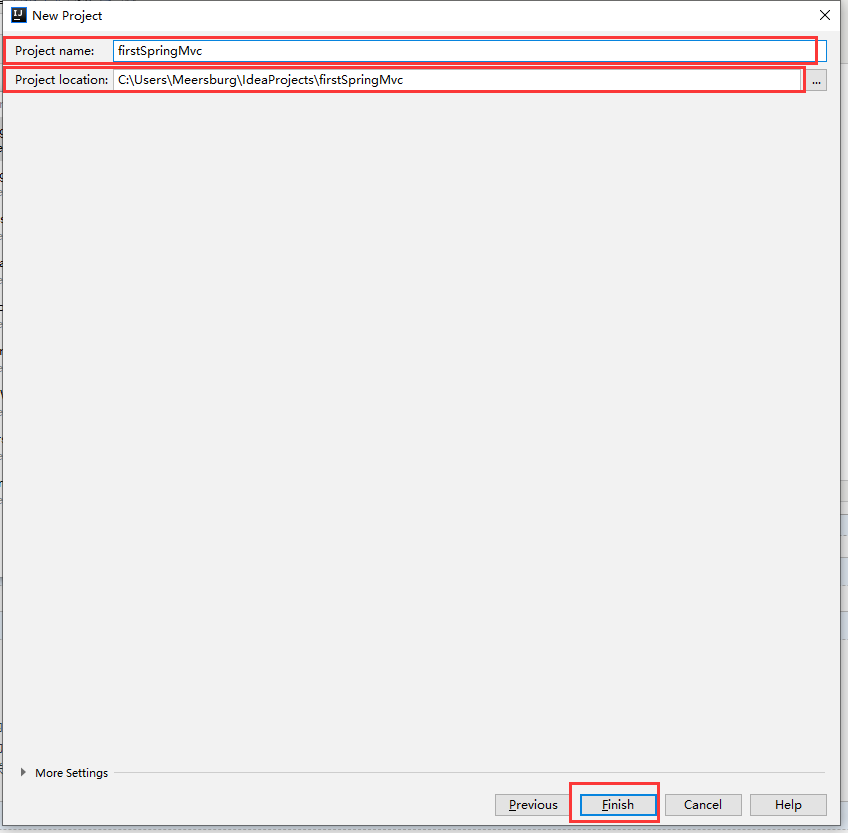
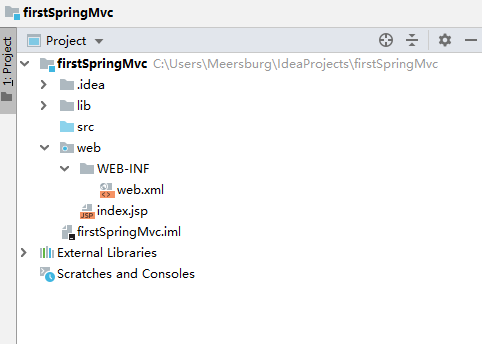
新建的结构是这样的
2. 添加controller的包、文件;添加jsp的文件夹和jsp文件
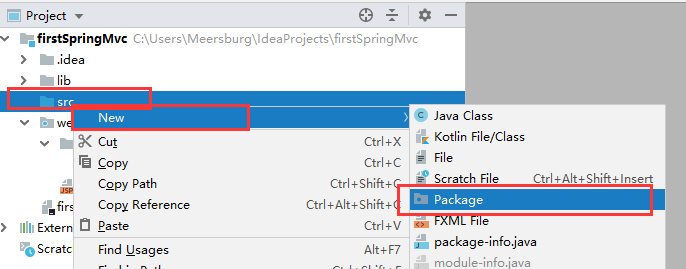
文件名为HelloWorldController ,代码在下方
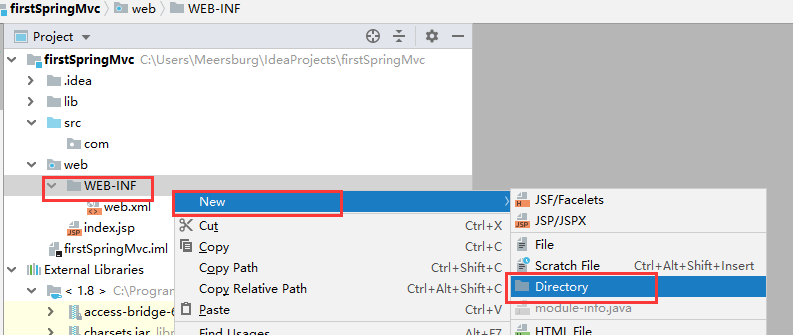
文件名为hello.jsp,代码在下方
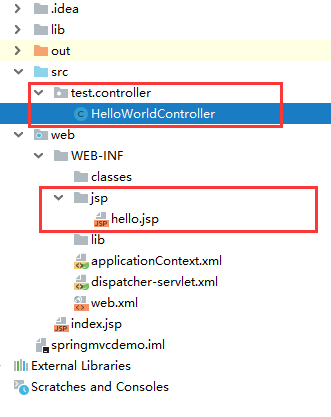
完整的目录结构如下:
代码
package test.controller;

import org.springframework.stereotype.Controller;
import org.springframework.web.bind.annotation.RequestMapping;

@Controller
@RequestMapping("/mvc")
public class HelloWorldController {
    @RequestMapping("/hello")
    public String hello(){
        return "hello";
    }
}
<%@ page contentType="text/html;charset=UTF-8" language="java" %>
<html>
<head>
    <title>Spring Mvc</title>
</head>
<body>
<h2>Hello World</h2>
</body>
</html>
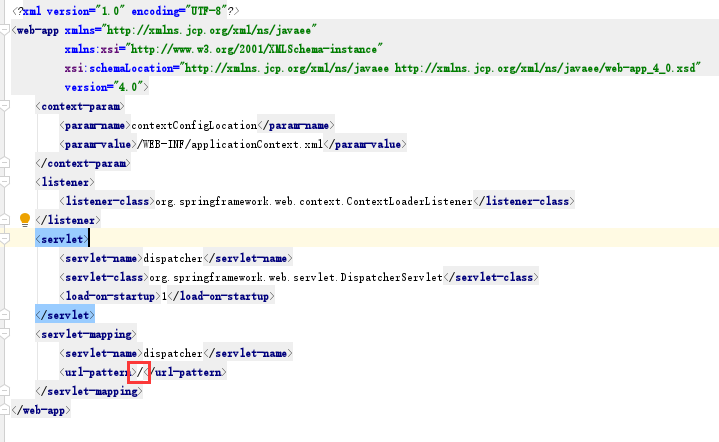
3.修改Web.xml配置文件中关于url-pattern的配置,为了能够截取所有类型
4.配置XXX-servlet.xml文件base-package是告诉controller在哪,bean里是告诉jsp所在的路径

<?xml version="1.0" encoding="UTF-8"?>
<beans xmlns="http://www.springframework.org/schema/beans"
       xmlns:xsi="http://www.w3.org/2001/XMLSchema-instance"
       xmlns:context="http://www.springframework.org/schema/context"
       xsi:schemaLocation="http://www.springframework.org/schema/beans http://www.springframework.org/schema/beans/spring-beans.xsd http://www.springframework.org/schema/context http://www.springframework.org/schema/context/spring-context.xsd">
<context:component-scan base-package="test.controller"/>
    <bean class="org.springframework.web.servlet.view.InternalResourceViewResolver">
        <!-- 视图的路径 -->
        <property name="prefix" value="/WEB-INF/jsp/"/>
        <!-- 视图名称后缀  -->
        <property name="suffix" value=".jsp"/>
    </bean>
</beans>
5.进行tomcat相关配置


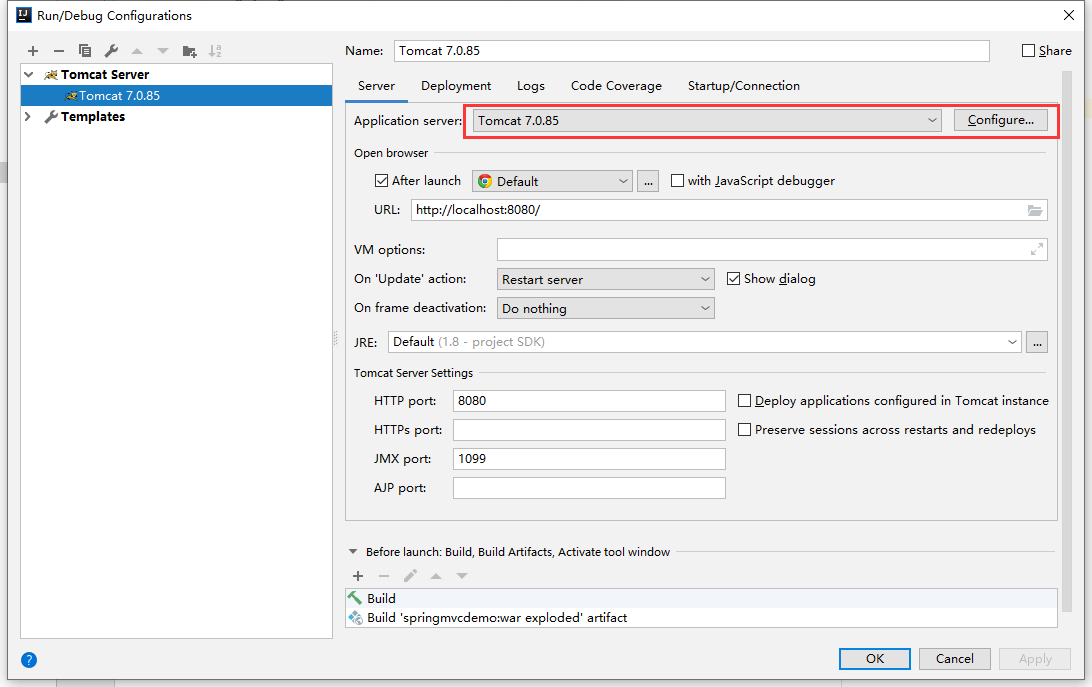

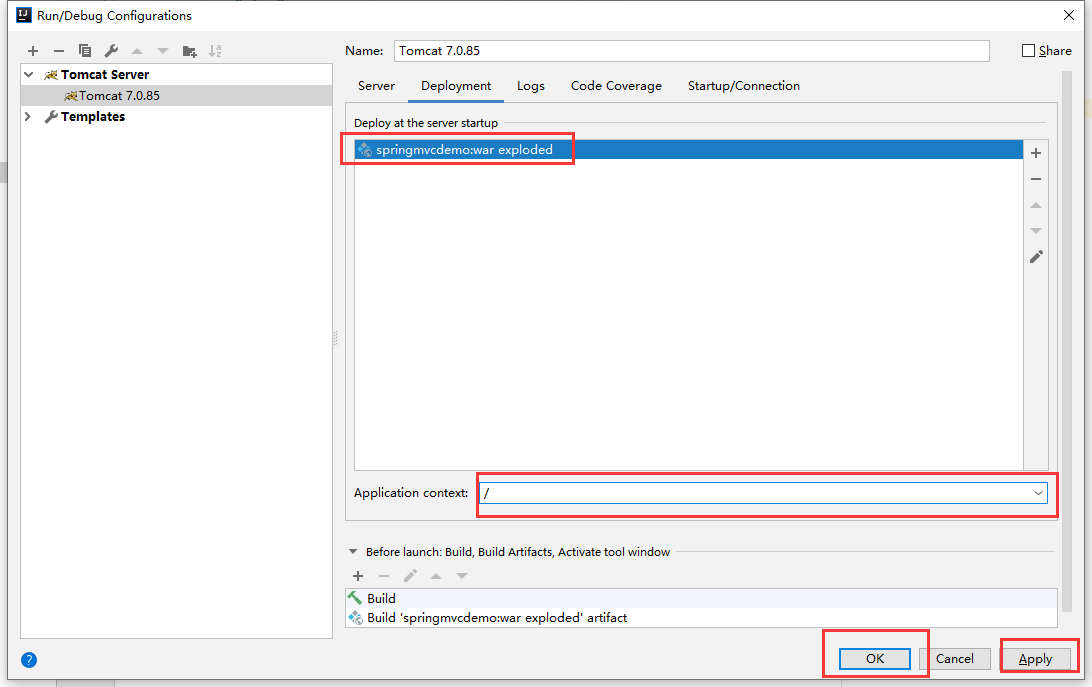
上图中Application context如果加了值,需要再端口号后加上该名字
6.看有没有problem
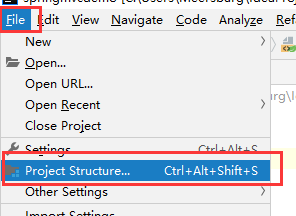
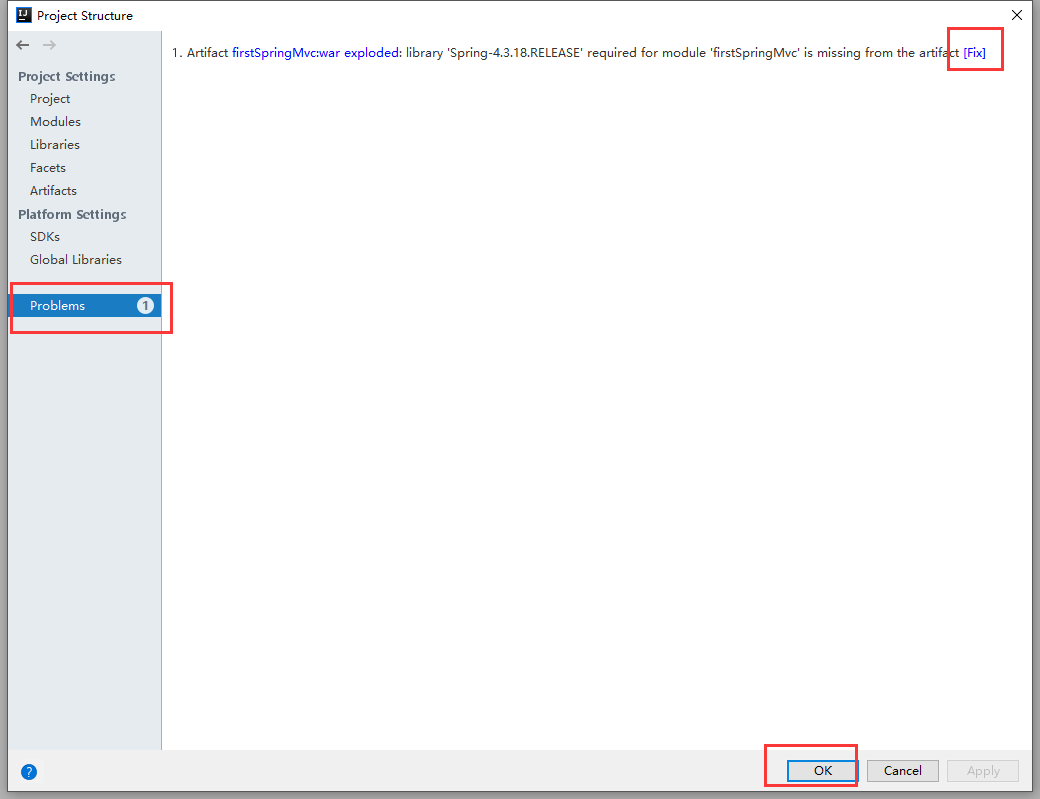
上图中fix后将需要的jar加入,如果多个选择加入所有的,add all……
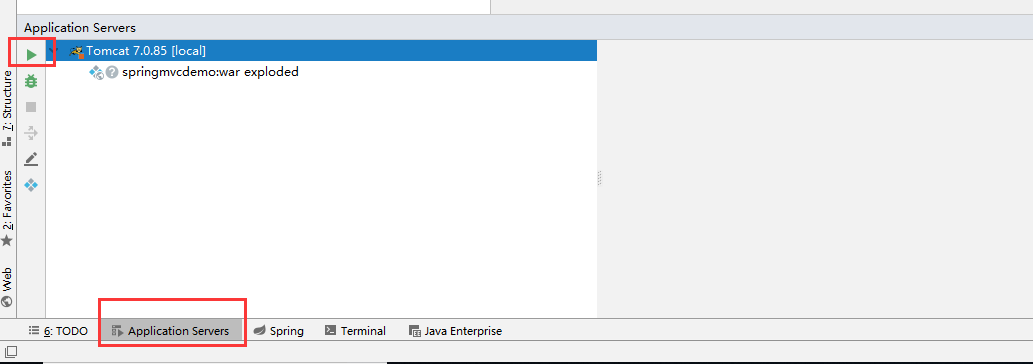
7.运行测试
