
Kubernetes3-kubectl管理Kubernetes容器平台-2
一、kubectl管理集群中deployment资源与service服务
1、相关参数
2、导入镜像
二、编辑创建nginx-deployment.yaml /nginx-svc.yaml
1、创建deployment.yaml

[root@master ~]# vim nginx-deployment.yaml

kind: Deployment
apiVersion: extensions/v1beta1
metadata:
  name: nginx
spec:
  replicas: 1
  template:
    metadata:
      labels:
        name: nginx
    spec:
      containers:
      - name: nginx
        image:  docker.io/nginx:latest
        imagePullPolicy: IfNotPresent
        ports:
        - containerPort: 80
          protocol: TCP
2、创建servcie
vim nginx-svc.yaml
[root@master ~]# vim nginx-svc.yaml

kind: Service
apiVersion: v1
metadata:
  name: nginx
  labels:
    name: nginx
spec:
  type: NodePort
  ports:
  - protocol: TCP
    nodePort: 31008
    targetPort: 80
    port: 80
  selector:
    name: nginx
3、几个端口说明
nodePort:31008 #---后期用户可以通过node节点上这个端口访问nginx,公网接口
targetPort:80 #---指定nginx docker容器的端口
port:80 #---pod端口
4、create deployment/service
1)创建
kubectl create -f nginx-deployment.yaml
kubectl create -f nginx-svc.yaml
2)查看deployment/service/pod详细信息
kubectl get deploy
kubectl get svc
kubectl get pod -o wide
[root@master ~]# kubectl create -f nginx-deployment.yaml
deployment "nginx" created
[root@master ~]# kubectl create -f nginx-svc.yaml
service "nginx" created
[root@master ~]# kubectl get deploy
NAME      DESIRED   CURRENT   UP-TO-DATE   AVAILABLE   AGE
mysql     1         1         1            1           1h
nginx     1         1         1            1           26s
[root@master ~]# kubectl get svc
NAME         CLUSTER-IP     EXTERNAL-IP   PORT(S)        AGE
kubernetes   10.254.0.1     <none>        443/TCP        5d
nginx        10.254.8.125   <nodes>       80:31008/TCP   24s
[root@master ~]#
[root@master ~]# kubectl get pod -o wide
NAME                     READY     STATUS    RESTARTS   AGE       IP            NODE
mysql-1971774246-2f905   1/1       Running   0          1h        10.255.36.2   node2
nginx-1011335894-9wd5h   1/1       Running   0          2m        10.255.41.2   node1
[root@master ~]#
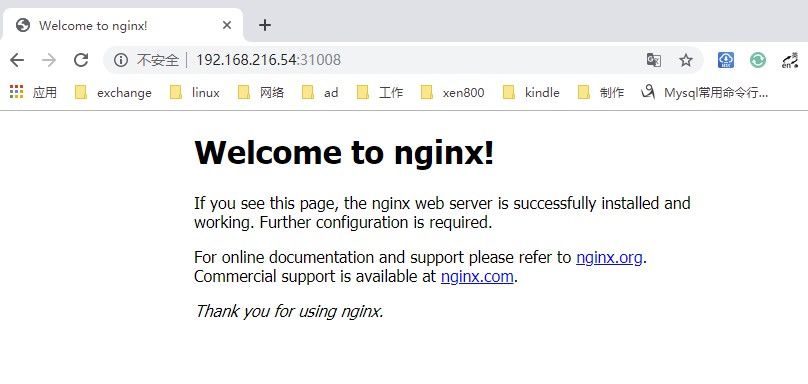
3)访问
上面已经知道pod运行在哪台节点及对外监听端口,接下来就是访问(上面标红字段)

4)通过其他节点访问nginx
虽然nginx是在node1上运行,但是通过其他节点也是可以访问,因为已经做负载均衡
三、kubectl edit命令
主要作用是修改service值
1、使用get -o参数指定输出消息为yaml类型
kubectl get service nginx -o yaml
[root@master ~]# kubectl get service nginx -o yaml
apiVersion: v1
kind: Service
metadata:
  creationTimestamp: 2019-11-03T20:45:43Z
  labels:
    name: nginx
  name: nginx
  namespace: default
  resourceVersion: "122656916"
  selfLink: /api/v1/namespaces/default/services/nginx
  uid: e7775727-fe7a-11e9-bc69-000c291c8b39
spec:
  clusterIP: 10.254.8.125
  ports:
  - nodePort: 31008
    port: 80
    protocol: TCP
    targetPort: 80
  selector:
    name: nginx
  sessionAffinity: None
  type: NodePort
status:
  loadBalancer: {}
2、修改对外端口为31009
kubectl edit service nginx
和vim类似的操作
[root@master ~]# kubectl edit service nginx

# Please edit the object below. Lines beginning with a '#' will be ignored,
# and an empty file will abort the edit. If an error occurs while saving this file will be
# reopened with the relevant failures.
#
apiVersion: v1
kind: Service
metadata:
  creationTimestamp: 2019-11-03T20:45:43Z
  labels:
    name: nginx
  name: nginx
  namespace: default
  resourceVersion: "122656916"
  selfLink: /api/v1/namespaces/default/services/nginx
  uid: e7775727-fe7a-11e9-bc69-000c291c8b39
spec:
  clusterIP: 10.254.8.125
  ports:
  - nodePort: 31009
    port: 80
    protocol: TCP
    targetPort: 80
  selector:
    name: nginx
  sessionAffinity: None
  type: NodePort
status:
  loadBalancer: {}
3、查看service,并验证
kubectl get service
[root@master ~]# kubectl get service
NAME         CLUSTER-IP     EXTERNAL-IP   PORT(S)        AGE
kubernetes   10.254.0.1     <none>        443/TCP        5d
nginx        10.254.8.125   <nodes>       80:31009/TCP   20m
访问web端

四、kubectl replace
replace 替换的意思
1、查看服务
kubectl get service
2、重定向一个nginx_replace的yaml文件
kubectl get service nginx -o yaml >nginx_replace.yaml
3、编辑,修改端口为31010
vim nginx_replace.yaml
4、执行替换
kubectl replace -f nginx_replace.yaml
5、检查service是否生效
kubectl get service
[root@master ~]# kubectl get service
NAME         CLUSTER-IP     EXTERNAL-IP   PORT(S)        AGE
kubernetes   10.254.0.1     <none>        443/TCP        5d
nginx        10.254.8.125   <nodes>       80:31009/TCP   20m
[root@master ~]# kubectl get service nginx -o yaml >nginx_replace.yaml
[root@master ~]# vim nginx_replace.yaml

apiVersion: v1
kind: Service
metadata:
  creationTimestamp: 2019-11-03T20:45:43Z
  labels:
    name: nginx
  name: nginx
  namespace: default
  resourceVersion: "123205401"
  selfLink: /api/v1/namespaces/default/services/nginx
  uid: e7775727-fe7a-11e9-bc69-000c291c8b39
spec:
  clusterIP: 10.254.8.125
  ports:
  - nodePort: 31010
    port: 80
    protocol: TCP
    targetPort: 80
  selector:
    name: nginx
  sessionAffinity: None
  type: NodePort
status:
  loadBalancer: {}
~
~
[root@master ~]# kubectl get service
NAME         CLUSTER-IP     EXTERNAL-IP   PORT(S)        AGE
kubernetes   10.254.0.1     <none>        443/TCP        6d
nginx        10.254.8.125   <nodes>       80:31010/TCP   17h
~
五、kubectl patch
当修改一部分配置时,使用patch会方便点,如pod换个image镜像
这里比如更换镜像使得nginx支持php
1、检查当前镜像是否支持php
kubectl exec -it nginx-1011335894-853ql bash
php
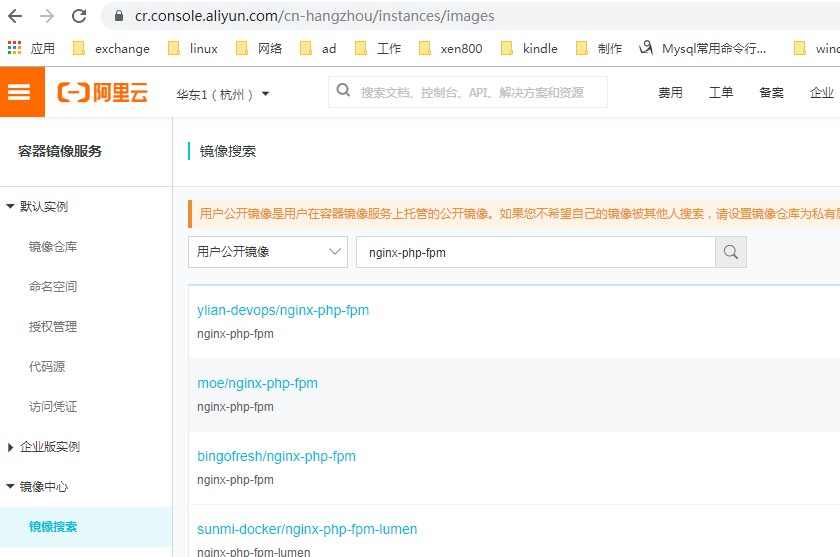
2、上传新镜像,并导入
这个可以在阿里云随便找一个
3、执行patch进行替换
kubectl patch pod nginx-1011335894-673bv -p '{"spec":{"containers":[{"name":"nginx","image":"docker.io/zxg/nginx-php-fpm56:latest"}]}}'
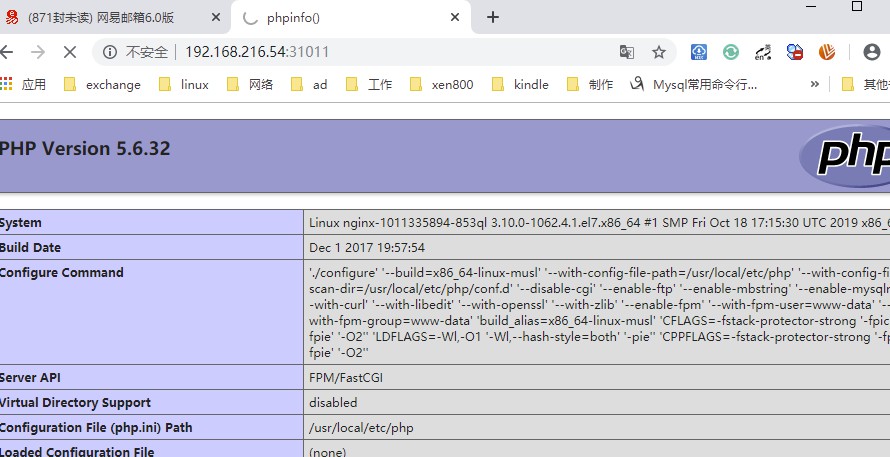
4、检查是否支持php
kubectl exec nginx-1011335894-853ql -it bash
[root@master ~]# kubectl get pod -o wide
NAME                     READY     STATUS    RESTARTS   AGE       IP            NODE
mysql-1971774246-jwrfc   1/1       Running   0          2h        10.255.41.5   node1
nginx-1011335894-853ql   1/1       Running   0          13s       10.255.36.2   node2
nginx-1011335894-pzgsj   1/1       Running   0          2h        10.255.41.2   node1
[root@master ~]# kubectl exec -it nginx-1011335894-853ql bash
root@nginx-1011335894-853ql:/# nginx -v
nginx version: nginx/1.13.7
root@nginx-1011335894-853ql:/# php
bash: php: command not found
root@nginx-1011335894-853ql:/# exit
exit
[root@master ~]# kubectl patch pod nginx-1011335894-853ql -p  '{"spec":{"containers":[{"name":"nginx","image":"docker.io/zxg/nginx-php-fpm56:latest"}]}}'
"nginx-1011335894-853ql" patched
[root@master ~]# kubectl get pod
NAME                     READY     STATUS    RESTARTS   AGE
mysql-1971774246-jwrfc   1/1       Running   0          2h
nginx-1011335894-853ql   1/1       Running   1          3m
nginx-1011335894-pzgsj   1/1       Running   0          2h
[root@master ~]# kubectl exec nginx-1011335894-853ql -it bash
bash-4.3# php -v
PHP 5.6.32 (cli) (built: Dec  1 2017 19:58:36)
Copyright (c) 1997-2016 The PHP Group
Zend Engine v2.6.0, Copyright (c) 1998-2016 Zend Technologies
    with Zend OPcache v7.0.6-dev, Copyright (c) 1999-2016, by Zend Technologies
六、kubectl apply
是用来使用文件或者标准输入来更改配置信息
1、编辑svc.yaml文件
vim nginx-svc.yaml
改:nodePort:31010
为:nodePort:31011
2、执行apply命令
kubectl apply -f nginx-svc.yaml
3、检查结果
kubectl get svc
[root@master ~]# vim nginx-svc.yaml
kind: Service
apiVersion: v1
metadata:
  name: nginx
  labels:
    name: nginx
spec:
  type: NodePort
  ports:
  - protocol: TCP
    nodePort: 31011
    targetPort: 80
    port: 80
  selector:
    name: nginx
[root@master ~]# kubectl apply -f nginx-svc.yaml
service "nginx" configured
[root@master ~]# kubectl get svc
NAME         CLUSTER-IP     EXTERNAL-IP   PORT(S)        AGE
kubernetes   10.254.0.1     <none>        443/TCP        6d
nginx        10.254.8.125   <nodes>       80:31011/TCP   23h
[root@master ~]#
七、kubectl scale (规模)
用于横向扩展、是k8s或swarm这类容器编辑平台的重要功能之一
如这里把replica副本改为3
1、查看nginx运行在哪个节点
kubectl get pod -o wide
2、执行scale命令
kubectl scale --current-replicas=1 --replicas=3 deployment/nginx
3、再次查看nginx运行在哪个节点
kubectl get pod -o wide
[root@master ~]# kubectl get pod -o wide
NAME                     READY     STATUS    RESTARTS   AGE       IP            NODE
mysql-1971774246-2f905   1/1       Running   0          1d        10.255.36.2   node2
nginx-1011335894-9wd5h   1/1       Running   0          23h       10.255.41.2   node1
[root@master ~]# kubectl scale --current-replicas=1 --replicas=3 deployment/nginx
deployment "nginx" scaled
[root@master ~]# kubectl get pod -o wide
NAME                     READY     STATUS    RESTARTS   AGE       IP            NODE
mysql-1971774246-2f905   1/1       Running   0          1d        10.255.36.2   node2
nginx-1011335894-9wd5h   1/1       Running   0          23h       10.255.41.2   node1
nginx-1011335894-scm64   1/1       Running   0          5s        10.255.36.3   node2
nginx-1011335894-xtkqd   1/1       Running   0          5s        10.255.41.3   node1
[root@master ~]#
八、kubectl autoscale
用于自动扩展确认,跟scale不同的是前者还是需要手动执行,而autoscale则会根据负载进行调解,而这条命令可以对Deployment/ReplicaSet/RC进行设定,通过最小值和最大值的指定进行设定
1、设置最小2,最大5的自动设置
kubectl autoscale deployment nginx --min=2 --max=5
2、查看结果
应该是没变化,因为之前手动scale设置的3在这个2-5的区间
kubectl get pod -o wide
3、设置最小2,最大2
kubectl autoscale deployment nginx --min=2 --max=2
这里就报错了因为之前设置的是3
[root@master ~]# kubectl autoscale deployment nginx --min=2 --max=5
deployment "nginx" autoscaled
[root@master ~]# kubectl get pod -o wide
NAME                     READY     STATUS    RESTARTS   AGE       IP            NODE
mysql-1971774246-2f905   1/1       Running   0          1d        10.255.36.2   node2
nginx-1011335894-9wd5h   1/1       Running   0          23h       10.255.41.2   node1
nginx-1011335894-scm64   1/1       Running   0          3m        10.255.36.3   node2
nginx-1011335894-xtkqd   1/1       Running   0          3m        10.255.41.3   node1
[root@master ~]# kubectl autoscale deployment nginx --min=2 --max=2
Error from server (AlreadyExists): horizontalpodautoscalers.autoscaling "nginx" already exists
[root@master ~]#
九、kubectl cordon 与uncordon
如果其中一台node坏掉或者维护,暂时不能让生成的pod在此node上运行,需要通知kubernetes让其不要创建过来,就用cordon命令,如果uncordon就是取消这个设定
1、在node2上运行cordon命令
kubectl cordon node2
2、查看pod详情,没有变化
kubectl get pod -o wide
3、查看node详情
kubectl get nodes -o wide
发现node2状态为Ready,SchedulingDisabled
3、增加relicas副本
kubectl scale --replicas=6 deployment/nginx
4、再次查看pod详情
kubectl get pod -o wide
发现都是node1建立,node2已经封锁成功
5、使用uncordon取消cordon设定
kubectl uncordon node2
[root@master ~]# kubectl cordon node2
node "node2" cordoned
[root@master ~]# kubectl get pod -o wide
NAME                     READY     STATUS    RESTARTS   AGE       IP            NODE
mysql-1971774246-2f905   1/1       Running   0          1d        10.255.36.2   node2
nginx-1011335894-9wd5h   1/1       Running   0          23h       10.255.41.2   node1
nginx-1011335894-scm64   1/1       Running   0          9m        10.255.36.3   node2
nginx-1011335894-xtkqd   1/1       Running   0          9m        10.255.41.3   node1
[root@master ~]# kubectl get nodes -o wide
NAME      STATUS                     AGE       EXTERNAL-IP
node1     Ready                      6d        <none>
node2     Ready,SchedulingDisabled   5d        <none>
[root@master ~]# kubectl scale --replicas=6 deployment/nginx
deployment "nginx" scaled
[root@master ~]# kubectl get pod -o wide
NAME                     READY     STATUS    RESTARTS   AGE       IP            NODE
mysql-1971774246-2f905   1/1       Running   0          1d        10.255.36.2   node2
nginx-1011335894-7jvp0   1/1       Running   0          5s        10.255.41.5   node1
nginx-1011335894-8nd1q   1/1       Running   0          5s        10.255.41.6   node1
nginx-1011335894-9wd5h   1/1       Running   0          23h       10.255.41.2   node1
nginx-1011335894-lhtkm   1/1       Running   0          5s        10.255.41.4   node1
nginx-1011335894-scm64   1/1       Running   0          11m       10.255.36.3   node2
nginx-1011335894-xtkqd   1/1       Running   0          11m       10.255.41.3   node1
[root@master ~]#
[root@master ~]# kubectl uncordon node2
node "node2" uncordoned
[root@master ~]# kubectl get node -o wide
NAME      STATUS    AGE       EXTERNAL-IP
node1     Ready     6d        <none>
node2     Ready     5d        <none>
[root@master ~]#
十、kubectl drain (驱逐)
用于对某个node结点进行维护
1、drain两个作用:
1、设定此node不可以使用(cordon)
2、evict驱逐pod到他正常的node节点上
2、先删之前的nginx
kubectl delete deploy nginx
3、创建pod
kubectl create -f nginx-deployment.yaml
4、查看pod详情
kubectl get pod -o wide
5、执行drain命令 drain node2
kubectl drain node2
6、查看pod
get pod -o wide
镜像已经漂移过来了
7、查看node
node2状态为Ready,SchedulingDisabled ,完成配置
[root@master ~]# kubectl create -f nginx-deployment.yaml
deployment "nginx" created
[root@master ~]# kubectl scale --replicas=4 deployment nginx
deployment "nginx" scaled
[root@master ~]# kubectl get pod -o wide
NAME                     READY     STATUS    RESTARTS   AGE       IP            NODE
mysql-1971774246-2f905   1/1       Running   0          1d        10.255.36.2   node2
nginx-1011335894-4tpj5   1/1       Running   0          8s        10.255.41.3   node1
nginx-1011335894-673bv   1/1       Running   0          8s        10.255.36.3   node2
nginx-1011335894-hw8ld   1/1       Running   0          8s        10.255.36.4   node2
nginx-1011335894-pzgsj   1/1       Running   0          28s       10.255.41.2   node1
[root@master ~]# kubectl drain node2
node "node2" cordoned
pod "nginx-1011335894-hw8ld" evicted
pod "nginx-1011335894-673bv" evicted
pod "mysql-1971774246-2f905" evicted
node "node2" drained
[root@master ~]# kubectl get pod -o wide
NAME                     READY     STATUS    RESTARTS   AGE       IP            NODE
mysql-1971774246-jwrfc   1/1       Running   0          7s        10.255.41.5   node1
nginx-1011335894-4tpj5   1/1       Running   0          1m        10.255.41.3   node1
nginx-1011335894-d683g   1/1       Running   0          7s        10.255.41.6   node1
nginx-1011335894-gs3lg   1/1       Running   0          7s        10.255.41.4   node1
nginx-1011335894-pzgsj   1/1       Running   0          1m        10.255.41.2   node1
[root@master ~]# get nodes -o wide

NAME STATUS AGE EXTERNAL-IP

node1     Ready                      6d        <none>

node2     Ready,SchedulingDisabled   5d        <none>
转载请注明出处:https://www.cnblogs.com/zhangxingeng/p/11807083.html

【推荐】国内首个AI IDE,深度理解中文开发场景,立即下载体验Trae
【推荐】编程新体验,更懂你的AI,立即体验豆包MarsCode编程助手
【推荐】抖音旗下AI助手豆包,你的智能百科全书,全免费不限次数
【推荐】轻量又高性能的 SSH 工具 IShell:AI 加持,快人一步