
iOS 转场动画探究(二)
这篇文章是接着第一篇写的,要是有同行刚看到的话建议从前面第一篇看,这是第一篇的地址:iOS 转场动画探究(一)
接着上一篇写的内容:
上一篇iOS 转场动画探究(一)我们说到了转场要素的第四点,把那个小实例解释完,这篇还有一点我们接着总结:
Demo的下载地址这里再发一次: 这里是Demo的下载地址
5、 转场协调器协议 UIViewControllerTransitionCoordinator
可以通过需要产生动画效果的视图控制器的transitionCoordinator属性来获取转场协调器,转场协调器只在转场动画的执行过程中存在。也正是因为有了UIViewControllerTransitionCoordinator ,我们才可在转场动画发生的同时并行执行其他的动画。比如像我们第三个小例子里面后面半透明背景动画,就是通过这个UIViewControllerTransitionCoordinator我们来做的,主要在 Modal 转场和交互转场取消时使用,其他时候很少用到,我们看看它里面的几个方法:
1 2 3 4 5 6 7 8 9 10 11 12 13 14 15 16 17 18 19 20 21 22 23 24 25 26 27 28 29 30 31 32 33 34 35 36 | // Any animations specified will be run in the same animation context as the// transition. If the animations are occurring in a view that is a not// descendent of the containerView, then an ancestor view in which all of the// animations are occuring should be specified. The completionBlock is invoked// after the transition completes. (Note that this may not be after all the// animations specified by to call complete if the duration is not inherited.)// It is perfectly legitimate to only specify a completion block. This method// returns YES if the animations are successfully queued to run. The completions// may be run even if the animations are not. Note that for transitioning// animators that are not implemented with UIView animations, the alongside// animations will be run just after their animateTransition: method returns.//- (BOOL)animateAlongsideTransition:(void (^ __nullable)(id <UIViewControllerTransitionCoordinatorContext>context))animation completion:(void (^ __nullable)(id <UIViewControllerTransitionCoordinatorContext>context))completion;// This alternative API is needed if the view is not a descendent of the container view AND you require this animation// to be driven by a UIPercentDrivenInteractiveTransition interaction controller.- (BOOL)animateAlongsideTransitionInView:(nullable UIView *)view animation:(void (^ __nullable)(id <UIViewControllerTransitionCoordinatorContext>context))animation completion:(void (^ __nullable)(id <UIViewControllerTransitionCoordinatorContext>context))completion;// When a transition changes from interactive to non-interactive then handler is// invoked. The handler will typically then do something depending on whether or// not the transition isCancelled. Note that only interactive transitions can// be cancelled and all interactive transitions complete as non-interactive// ones. In general, when a transition is cancelled the view controller that was// appearing will receive a viewWillDisappear: call, and the view controller// that was disappearing will receive a viewWillAppear: call. This handler is// invoked BEFORE the "will" method calls are made.- (void)notifyWhenInteractionEndsUsingBlock: (void (^)(id <UIViewControllerTransitionCoordinatorContext>context))handler NS_DEPRECATED_IOS(7_0, 10_0,"Use notifyWhenInteractionChangesUsingBlock");// This method behavior is identical to the method above. On 10.0, however, the behavior has// changed slightly to account for the fact that transitions can be interruptible. For interruptible transitions// The block may be called multiple times. It is called each time the transition moves from an interactive to a // non-interactive state and vice-versa. The block is now also retained until the transition has completed.- (void)notifyWhenInteractionChangesUsingBlock: (void (^)(id <UIViewControllerTransitionCoordinatorContext>context))handler NS_AVAILABLE_IOS(10_0); |
结合上面的英文注释看看这几个方法,在博客上看到关于这个协议的翻译,肯定翻译,再吧一些地方自己总结了一下,直接写出来,对照着上面的理解一下这个协议:
1、 你可以使用一个转场协调器对象执行一个与转场相关的任务,它将分离动画控制器正在做的事。在转场期间,动画控制器对象负责把视图控制器的内容呈现在屏幕上,但是可能也有一些其他的可视元素同样需要被展示。比如,一个显示控制器可能想执行显示或者使一些装饰视图消失从视图控制器内容里分离出的动画。这种情况下,可以使用转场协调器来执行这些动画。
2、转场协调器和动画控制器对象一块工作,确保任何额外动画被执行在同样的动画组中,就像转场动画一样。在一样的组拥有动画,意味着它们在同样的时间执行,并且可以响应一个动画控制器对象提出的任何时间改变。这些时间调整会自动发生,不需要写额外的代码在你的项目中。
3、使用转场协调器处理视图层次动画比在viewWillappear:方法中做出同样的改变,或者相同的方法在你的视图控制器中要好很多。你用这个协议中的方法所注册的block会确保执行一样的转场动画。更重要的是,转场协调器会提供重要的信息关于转场的状态,比如是否它会被取消,对于你的动画block而言,通过
UIViewControllerTransitionCoordinatorContext对象。
4、除了在转场期间执行注册动画,你可以调用notifyWhenInteractionChangesUsingBlock: 方法注册一个block来清理和用户交互的转场动画。清理非常重要,当用户取消转场交互时,当取消的时候,你需要返回一个原始的视图层次状态,就像之前转场存在的一样。
我们在协议的最上面会看到这样一句话:

翻译说明:一个采用UIViewControllerTransitionCoordinator协议的对象可以给控制器转场动画提供相关支持。一般情况下,你不需要采用这个协议在自己定义的类中。当presentation/dismissal一个视图控制器时,UIKit会自动创建一个转场协调器对象,并且给视图控制器的transitionCoordinator属性赋值(这一点在接下来的实例中,你会看的到的),这个转场协调器对象是短暂的,并且延续到转场动画的结束。
说第三个小例子之前我们还得熟悉一下这个:UIPresentationController,它提供了四个函数来定义present和dismiss动画开始前后的操作:
1、presentationTransitionWillBegin: present将要执行时
2、presentationTransitionDidEnd: present执行结束后
3、dismissalTransitionWillBegin: dismiss将要执行时
4、dismissalTransitionDidEnd: dismiss执行结束后
这四个方法在我们的实例中有用到,我们在下面代码里面还会说。
EXAMPLE-THREE:
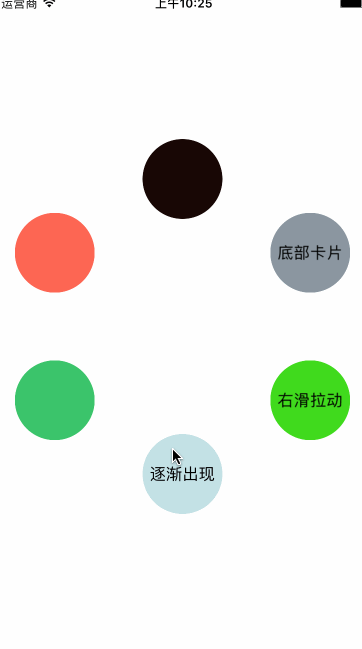
看上面效果图的第三个实例:
在第三个Demo中,也就是底部卡片的呈现形式中,我们把UIViewControllerTransitioningDelegate和UIViewControllerAnimatedTransitioning都写在了CustomPresentationController当中,这个CustomPresentationController就是集成与我们前面提到过的UIPresentationController,这个UIPresentationController前面提到的时候说的什么可以回忆一下,再在代码中去理解:
从初始化方法开始了解,说说我们需要注意的地方:
1、初始化
1 2 3 4 5 6 7 8 9 10 11 12 13 14 15 16 17 18 | /** 初始化 @param presentedViewController presentedViewController 跳转到这个控制器 @param presentingViewController presentingViewController 由这个控制器开始跳转 @return return value description */- (instancetype)initWithPresentedViewController:(UIViewController *)presentedViewController presentingViewController:(nullable UIViewController *)presentingViewController{ self =[super initWithPresentedViewController:presentedViewController presentingViewController:presentingViewController]; if (self) { // 自定义modalPresentationStyle presentedViewController.modalPresentationStyle= UIModalPresentationCustom; } return self;} |
这里主要的只有一点:presentedViewController.modalPresentationStyle= UIModalPresentationCustom
2、presentationTransitionWillBegin 这个方法
在这个方法里面背景图的动画就是在我们第五点强调的UIViewControllerTransitionCoordinator当中
1 2 3 4 5 6 7 8 9 10 11 12 13 14 15 16 17 18 19 20 21 22 23 24 25 26 27 28 29 30 31 32 33 34 35 36 37 38 39 40 41 42 43 44 45 46 47 48 49 50 51 52 53 54 55 | /* present将要执行时 */- (void)presentationTransitionWillBegin{ // 设置presentationWrappingView和dimmingView的UI效果 UIView * presentedViewControllerView = [super presentedView]; presentedViewControllerView.autoresizingMask = UIViewAutoresizingFlexibleWidth | UIViewAutoresizingFlexibleHeight; { // UIView *presentationWrapperView = [[UIView alloc] initWithFrame:self.frameOfPresentedViewInContainerView]; presentationWrapperView.layer.shadowOpacity = 0.44f; //设置阴影的透明度(0~1之间,0表示完全透明) presentationWrapperView.layer.shadowRadius = 13.f; //设置阴影的圆角 //设置阴影的偏移量,如果为正数,则代表为往右边偏移 presentationWrapperView.layer.shadowOffset = CGSizeMake(0, -6.f); self.presentationWrappingView = presentationWrapperView; // 圆角View UIView *presentationRoundedCornerView = [[UIView alloc] initWithFrame:UIEdgeInsetsInsetRect(presentationWrapperView.bounds, UIEdgeInsetsMake(0, 0, -CORNER_RADIUS, 0))]; // autoresizingMask 这个属性 自动调整与父视图之间的边界距离 presentationRoundedCornerView.autoresizingMask = UIViewAutoresizingFlexibleWidth | UIViewAutoresizingFlexibleHeight; presentationRoundedCornerView.layer.cornerRadius = CORNER_RADIUS; presentationRoundedCornerView.layer.masksToBounds = YES; [presentationRoundedCornerView addSubview:presentedViewControllerView]; //*** presentedViewControllerView presentedViewControllerView.frame = UIEdgeInsetsInsetRect(presentationRoundedCornerView.bounds, UIEdgeInsetsMake(0, 0, CORNER_RADIUS, 0)); // ****************** [presentationWrapperView addSubview:presentationRoundedCornerView]; } { // 背景图 UIView *dimmingView = [[UIView alloc] initWithFrame:self.containerView.bounds]; dimmingView.backgroundColor = [UIColor blackColor]; dimmingView.opaque = NO; dimmingView.autoresizingMask = UIViewAutoresizingFlexibleWidth | UIViewAutoresizingFlexibleHeight; [dimmingView addGestureRecognizer:[[UITapGestureRecognizer alloc] initWithTarget:self action:@selector(dimmingViewTapped:)]]; self.dimmingView = dimmingView; [self.containerView addSubview:dimmingView]; id<UIViewControllerTransitionCoordinator> transitionCoordinator = self.presentingViewController.transitionCoordinator; self.dimmingView.alpha = 0.f; [transitionCoordinator animateAlongsideTransition:^(id<UIViewControllerTransitionCoordinatorContext> context) { self.dimmingView.alpha = 0.5f; } completion:NULL]; }} |
剩下的UIViewControllerAnimatedTransitioning和UIViewControllerTransitioningDelegate里面的东西我们就不在重复去说。
我们多看几个例子:
EXAMPLE-FOUR
这个弹性POP的例子主要是根据 CGAffineTransform 这个属性来展开的,你要了解这个就比较好写了,主要的全都在代码注释里面,效果图就在下面:
这个例子我就强调下面这一个地方,下面这段代码:
1 2 3 4 5 6 7 8 9 10 11 12 13 14 15 16 17 18 19 | BOOL isPresent = (toViewController.presentingViewController == fromViewController); UIView *tempView = nil; if (isPresent) { tempView = [fromViewController.view snapshotViewAfterScreenUpdates:NO]; tempView.frame = fromViewController.view.frame; fromViewController.view.hidden = YES; [contextView addSubview:tempView]; [contextView addSubview:toViewController.view]; toViewController.view.frame = CGRectMake(0, contextView.frame.size.height, contextView.frame.size.width, 400); }else{ //参照present动画的逻辑,present成功后,containerView的最后一个子视图就是截图视图,我们将其取出准备动画 NSArray *subviewsArray = contextView.subviews; tempView = subviewsArray[MIN(subviewsArray.count, MAX(0, subviewsArray.count - 2))]; } |
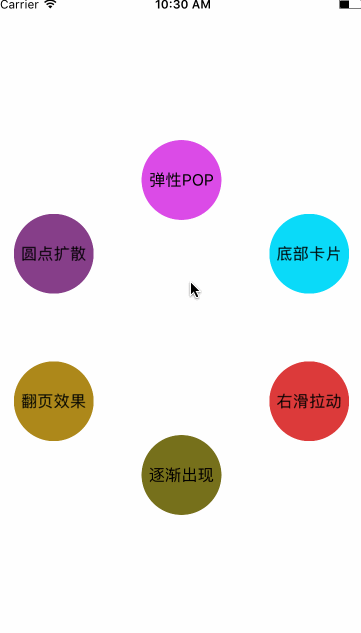
注意一下这个方法: snapshotViewAfterScreenUpdates: 剩下的看代码就OK了,这几个例子我感觉其实带的框架都是一样的,不一样的就是里面的动画具体的实现,先看看我们4、5、6说的这几个Demo的效果:
EXAMPLE-FIVE
圆点扩散这个Demo主要的就是灵活的使用了UIBezierPath 和 CABasicAnimation,其实还要掌握了转场的本质,感觉剩下的真的就看你能想到哪里了!哈哈.....
这个Demo所有的核心都在下面两个方法里面:
-(void)presentViewController:(id <UIViewControllerContextTransitioning>)transitionContext
-(void)dismissViewController:(id <UIViewControllerContextTransitioning>)transitionContext
具体的代码我就不再说了,代码上面的注释是足够了的,很详细.....还是看代码吧。
EXAMPLE-SIX
导航控制器的转场
最后的这个翻页效果的Demo,其实你看着它像3D的感觉,你想起了 CATransform3D 感觉就够了,通过下面这个方法来开始我们的导航转场:
1 2 3 4 5 6 7 8 | -(void)presentNextControllerClicked{ // 既然这里是导航控制器的转场,就要给导航设置代理。然后在第二个控制器遵守相应的协议之后,判断 // 是Push还是Pop,执行相应的动画 PageToViewController * pushVC = [PageToViewController new]; self.navigationController.delegate = pushVC; [self.navigationController pushViewController:pushVC animated:YES];} |
下面要注意的就是导航操作的判断,是Push还是Pop,我们就在导航代理的下面方法里面判断,重点应用的就是代理方法里面的operation参数:
1 2 3 4 5 6 7 | #pragma mark - UINavigationControllerDelegate- (id<UIViewControllerAnimatedTransitioning>)navigationController:(UINavigationController *)navigationController animationControllerForOperation:(UINavigationControllerOperation)operation fromViewController:(UIViewController *)fromVC toViewController:(UIViewController *)toVC{ //分pop和push两种情况分别返回动画过渡代理相应不同的动画操作 return [[PageAnimation alloc]initWith:operation == UINavigationControllerOperationPush ? Push_type : Pop_type];} |
注意到上面说的两点,剩下的又回到我们最开始的--动画了!动画部分的代码就不粘贴出来占用篇幅了,还是那句下载下来自己去看看!
你看着上面给的效果图,要有兴趣就去下载代码看看,源码当中还是有很多的细节的,我也加了注释,希望上面所有的东西以及源码里面的内容能帮助到大家!
最后:
这个上面的暂时就告一段落了,后面有新的动向我会在接着更新,下面是我学习的过程中,看过的相关的博客!感谢作者......
Demo的下载地址这里再发一次: 这里是Demo的下载地址
WWDC 2013 Session笔记 - iOS7中的ViewController切换


【推荐】国内首个AI IDE,深度理解中文开发场景,立即下载体验Trae
【推荐】编程新体验,更懂你的AI,立即体验豆包MarsCode编程助手
【推荐】抖音旗下AI助手豆包,你的智能百科全书,全免费不限次数
【推荐】轻量又高性能的 SSH 工具 IShell:AI 加持,快人一步
· go语言实现终端里的倒计时
· 如何编写易于单元测试的代码
· 10年+ .NET Coder 心语,封装的思维:从隐藏、稳定开始理解其本质意义
· .NET Core 中如何实现缓存的预热?
· 从 HTTP 原因短语缺失研究 HTTP/2 和 HTTP/3 的设计差异
· 分享一个免费、快速、无限量使用的满血 DeepSeek R1 模型,支持深度思考和联网搜索!
· 基于 Docker 搭建 FRP 内网穿透开源项目(很简单哒)
· ollama系列01:轻松3步本地部署deepseek,普通电脑可用
· 按钮权限的设计及实现
· 25岁的心里话