

spring-boot源码解析
0、SpringBoot源码编译
SpringBoot2.6.6源码地址:https://gitee.com/archguide/spring-boot-2.6.6
如果git clone过程中出现Filename too long的错误
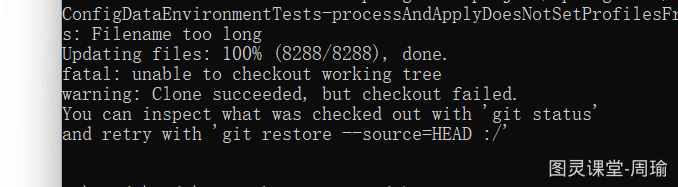
在电脑上执行: git config --system core.longpaths true
在build.gradle文件中repositories节点加入下面阿里云仓库配置:
点击查看代码
		// 阿里仓库
		maven { url 'https://maven.aliyun.com/repository/central/'}
		// 阿里-gradle插件
		maven{url 'https://maven.aliyun.com/repository/gradle-plugin'}
1、依赖
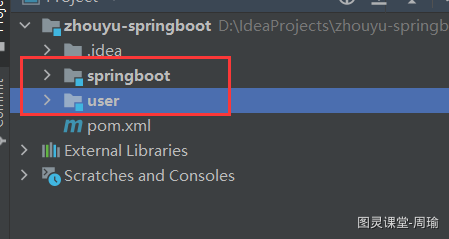
建一个工程,两个Module:
	1、springboot模块,表示springboot框架的源码实现
	2、user包,表示用户业务系统,用来写业务代码来测试我们所模拟出来的SpringBoot
首先,SpringBoot是基于的Spring,所以我们要依赖Spring,然后我希望我们模拟出来的SpringBoot也支持Spring MVC的那一套功能,所以也要依赖Spring MVC,包括Tomcat等,所以在SpringBoot模块中要添加以下依赖:
二、SpringBoot自动配置底层源码解析
课程内容
1、@EnableAutoConfiguration源码解析
2、各种条件注解源码解析
3、SpringBoot整合Tomcat底层源码解析
4、SpringBoot之AOP自动配置源码解析
5、Starter机制底层原理解析
SpringBoot2.6.6源码地址:https://gitee.com/archguide/spring-boot-2.6.6
1、自动配置到底配了什么?
对于一个Spring项目,主要就是有两种配置:
1.一种是类似端口号、数据库地址、用户名密码等
2.一种是各种Bean,比如整合Mybatis需要配置的MapperFactoryBean,比如整合事务需要配置DataSourceTransactionManager
SpringBoot中的自动配置,更多的是配置各种Bean,因为对于第一种配置,SpringBoot也无法去配置,比如数据库地址、密码之类的,SpringBoot肯定是无法知道的,但是对于端口号这些配置,SpringBoot也是会提供一种默认值的,也相当于一种自动配置。
那SpringBoot是如何自动的帮助我们来配置这些Bean的呢?并且如果某些Bean程序员自己也配置了,那SpringBoot是如何进行选择的呢?
2、自动配置类
SpringBoot要自动帮我们配置Bean,那要支持的就多了:
1.比如Spring整合各种Servlet容器(Tomcat、Jetty)的Bean
2.比如Spring整合各种消息队列的Bean
3.等等
所以SpringBoot中肯定不能把所有的Bean都定义在一个配置类中,需要分门别类,这样就针对不同的场景定义了不同的自动配置类,比如:
1.ServletWebServerFactoryAutoConfiguration:配置了Servlet Web场景中所需要的一些Bean
2.TransactionAutoConfiguration:配置了事务场景中所需要的一些Bean
3.AopAutoConfiguration:配置了AOP场景中所需要的一些Bean
4.RabbitAutoConfiguration:配置了Rabbitmq场景中所需要的一些Bean
5.等等
使用这种结构后,SpringBoot就能让程序员更为方便的来控制某个Bean或某些Bean要不要生效,如果某个自动配置类不生效,那该配置类中所定义的Bean则都不会生效。
3、Starter机制
那SpringBoot中的Starter和自动配置又有什么关系呢?
其实首先要明白一个Starter,就是一个Maven依赖,当我们在项目的pom.xml文件中添加某个Starter依赖时,其实就是简单的添加了很多其他的依赖,比如:
1.spring-boot-starter-web:引入了spring-boot-starter、spring-boot-starter-json、spring-boot-starter-tomcat等和Web开发相关的依赖包
2.spring-boot-starter-tomcat:引入了tomcat-embed-core、tomcat-embed-el、tomcat-embed-websocket等和Tomcat相关的依赖包
3....
如果硬要把Starter机制和自动配置联系起来,那就是通过@ConditionalOnClass这个条件注解,因为这个条件注解的作用就是用来判断当前应用的依赖中是否存在某个类或某些类,比如:
tomcat
	@Configuration(proxyBeanMethods = false)
	@ConditionalOnClass({ Servlet.class, Tomcat.class, UpgradeProtocol.class })
	@ConditionalOnMissingBean(value = ServletWebServerFactory.class, search = SearchStrategy.CURRENT)
	static class EmbeddedTomcat {

		@Bean
		TomcatServletWebServerFactory tomcatServletWebServerFactory(
				ObjectProvider<TomcatConnectorCustomizer> connectorCustomizers,
				ObjectProvider<TomcatContextCustomizer> contextCustomizers,
				ObjectProvider<TomcatProtocolHandlerCustomizer<?>> protocolHandlerCustomizers) {
			TomcatServletWebServerFactory factory = new TomcatServletWebServerFactory();

			// orderedStream()调用时会去Spring容器中找到TomcatConnectorCustomizer类型的Bean,默认是没有的,程序员可以自己定义
			factory.getTomcatConnectorCustomizers()
					.addAll(connectorCustomizers.orderedStream().collect(Collectors.toList()));
			factory.getTomcatContextCustomizers()
					.addAll(contextCustomizers.orderedStream().collect(Collectors.toList()));
			factory.getTomcatProtocolHandlerCustomizers()
					.addAll(protocolHandlerCustomizers.orderedStream().collect(Collectors.toList()));
			return factory;
		}
所以这就做到了,如果我们在项目中要用Tomcat,那就依赖spring-boot-starter-web就够了,因为它默认依赖了spring-boot-starter-tomcat,从而依赖了Tomcat,从而Tomcat相关的Bean能生效。
而如果不想用Tomcat,那就得这么写:
得把spring-boot-starter-tomcat给排除掉,再添加上spring-boot-starter-jetty的依赖,这样Tomcat的Bean就不会生效,Jetty的Bean就能生效,从而项目中用的就是Jetty。
jetty
        <dependency>
            <groupId>org.springframework.boot</groupId>
            <artifactId>spring-boot-starter-web</artifactId>
            <exclusions>
                <exclusion>
                    <groupId>org.springframework.boot</groupId>
                    <artifactId>spring-boot-starter-tomcat</artifactId>
                </exclusion>
            </exclusions>
        </dependency>
        <dependency>
            <groupId>org.springframework.boot</groupId>
            <artifactId>spring-boot-starter-jetty</artifactId>
        </dependency>
4、自动配置开启原理
我们在使用SpringBoot时,通常使用的是@SpringBootApplication这个注解,而这个注解的定义为:
@SpringBootApplication
@SpringBootConfiguration
@EnableAutoConfiguration
@ComponentScan(excludeFilters = { @Filter(type = FilterType.CUSTOM, classes = TypeExcludeFilter.class),
		@Filter(type = FilterType.CUSTOM, classes = AutoConfigurationExcludeFilter.class) })
// AutoConfigurationExcludeFilter的作用是扫描到的配置类名字如果在自动配置类名集合中,就不解析
public @interface SpringBootApplication {
可以发现这个注解上有另外三个注解:
	1.@SpringBootConfiguration
	2.@EnableAutoConfiguration
	3.@ComponentScan

所以我们可以认为@SpringBootApplication是一个三合一注解
如果我们这么用就能自己控制要不要用@EnableAutoConfiguration这个注解,如果用就表示开启自动配置,如果不用就表示不开启自动配置,那开启和不开启自动配置到底该怎么理解呢?
我们前面分析过,SpringBoot的自动配置就是SpringBoot帮助程序员配置一些Bean,从而让程序员在用SpringBoot时可以少去配置很多Bean,所以如果我们开启了自动配置,那最终Spring容器中就有SpringBoot帮我们配置的Bean,如果没有开启自动配置,那Spring容器中就没有这些Bean,就需要程序员去配置。
那我们来看看@EnableAutoConfiguration这个注解是如何工作的?先看源码定义:
@EnableAutoConfiguration
@AutoConfigurationPackage
@Import(AutoConfigurationImportSelector.class)
public @interface EnableAutoConfiguration {
而AutoConfigurationImportSelector实现了DeferredImportSelector这个接口,Spring容器在启动时,会在解析完其他所有程序员定义的配置类之后,来调用AutoConfigurationImportSelector中的selectImports方法,然后把该方法返回的类名对应的类作为配置类进行解析。
该方法会利用SpringFactoriesLoader找到所有的META-INF/spring.factories文件中key为EnableAutoConfiguration.class的value值,也就是众多自动配置类的类名。
拿到这些类名后会进行去重,去重的代码为:new ArrayList<>(new LinkedHashSet<>(list))
去重完之后,就会看是否存在某些自动配置类需要排除,我们可以通过@EnableAutoConfiguration注解的exclude属性,或者spring.autoconfigure.exclude配置来指定一些自动配置类的名字,然后把它们从自动配置类集合中排除掉。
然后会继续利用ConfigurationClassFilter对自动配置类进行进一步筛选,ConfigurationClassFilter会利用AutoConfigurationMetadata进行筛选,而AutoConfigurationMetadata对象对应的是"META-INF/spring-autoconfigure-metadata.properties"文件中的内容,这是一种加快SpringBoot启动速度的机制,默认是开启了的(不过要通过maven或gradle的方式引入springboot的依赖来使用才能看到效果,因为这个文件的内容是在SpringBoot源码工程编译的时候自动生成出来的,当然我们也可以手动创建这个文件,以及这个文件的内容),自动生成的这个文件内容样例:


内容格式为:自动配置类名.条件注解=条件
有了这个文件的内容,SpringBoot会在通过spring.facotries文件找到所有的自动配置类后,会把这个文件中的内容读出来,然后利用AutoConfigurationImportFilter对所有的自动配置类进行条件匹配,这里的条件判断,只会判断所需要的类是否存在,如果需要的类,或者需要的Bean对应的类,都不存在,那么肯定不符合条件了,对于像@ConditionalOnMissingBean这样的条件,在这一步是不会去判断的,最后条件匹配成功的自动配置类就会记录下来,并最终返回给Spring容器,继续进行其他条件的匹配。
所以通过这个机制,使得Spring并不需要解析所有的自动配置类,从而提高了效率。
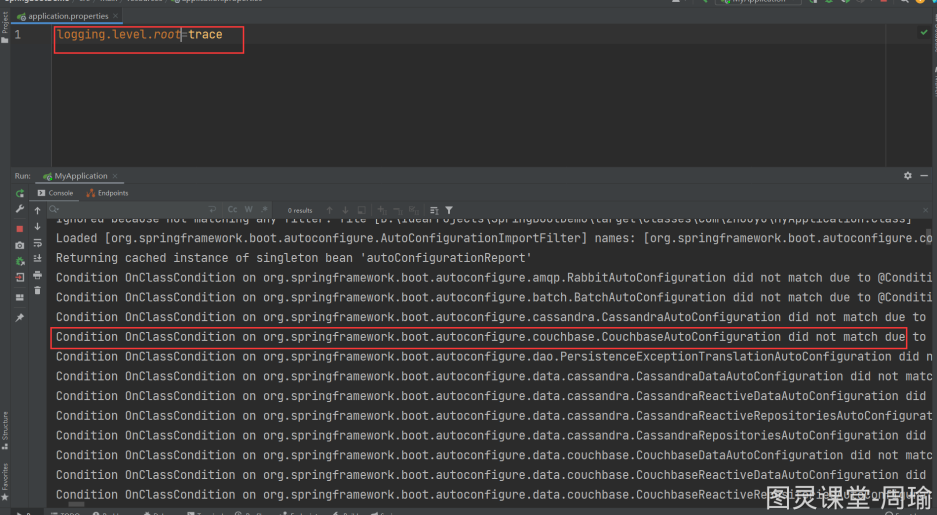
当然在这个过滤的过程中,如果日志级别等于trace级别,那么会把所有条件不匹配的自动配置类记录到日志中,如果日志框架配置了打印到控制台,那就会打印到控制台,比如:
在SpringBoot中,还有一个更加强大的统计自动配置类匹配结果的功能,就是可以配置debug=true,只要开启了这个配置,那么Spring在解析每一个自动配置类时,就会将是否匹配的结果进行记录,比如开启了debug=true,我们可以在控制台看到:
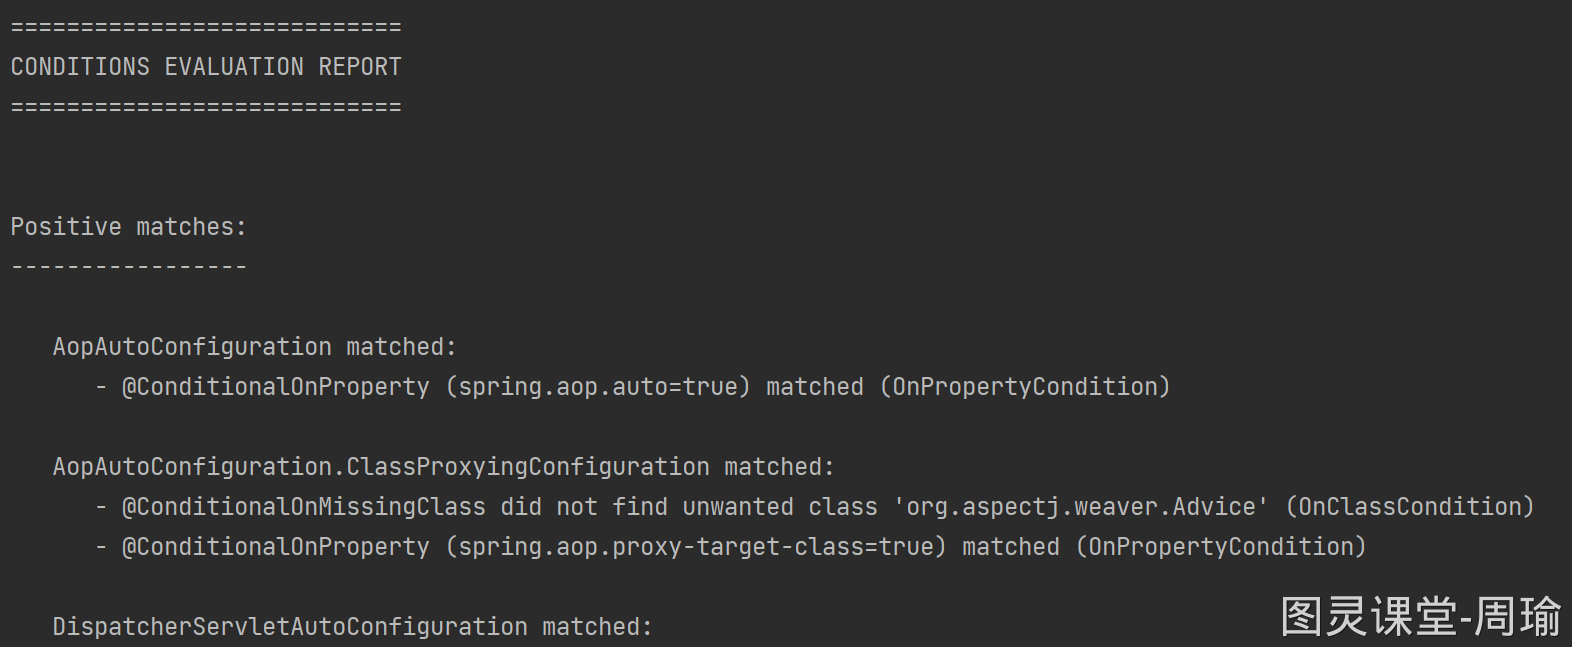
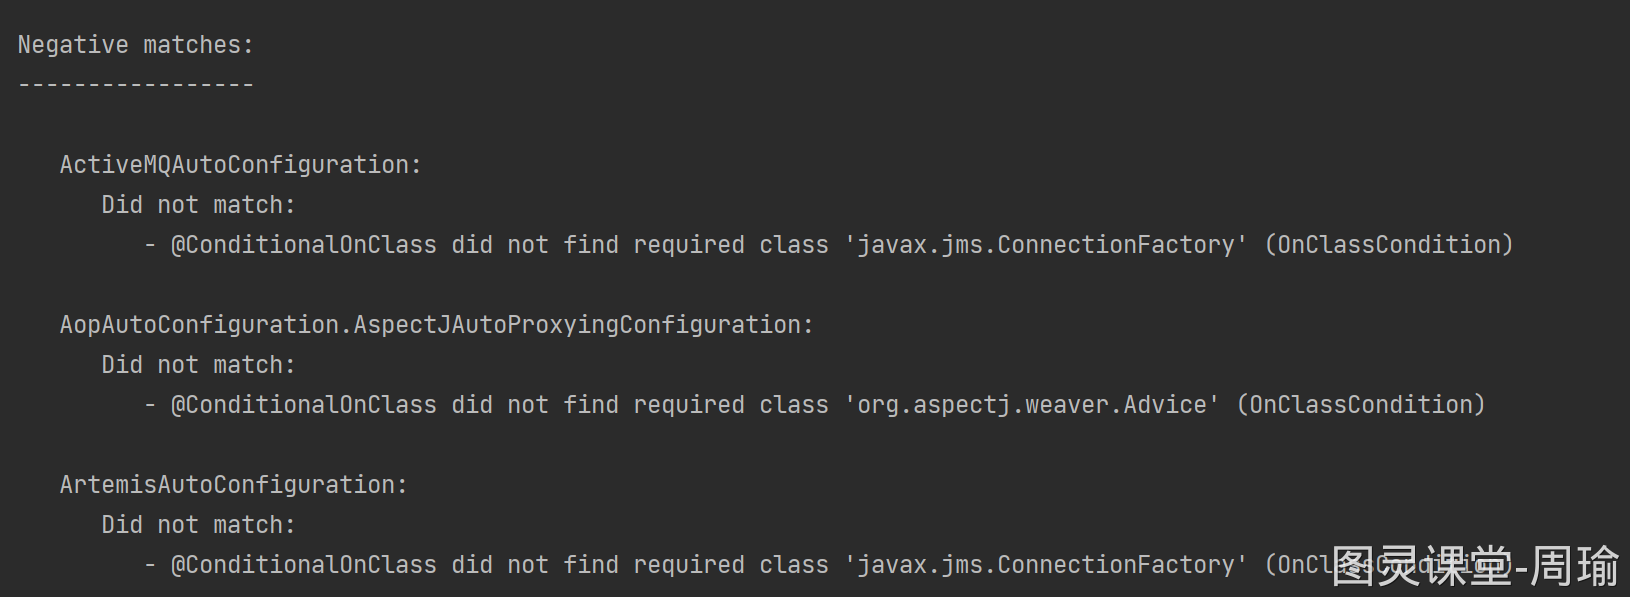
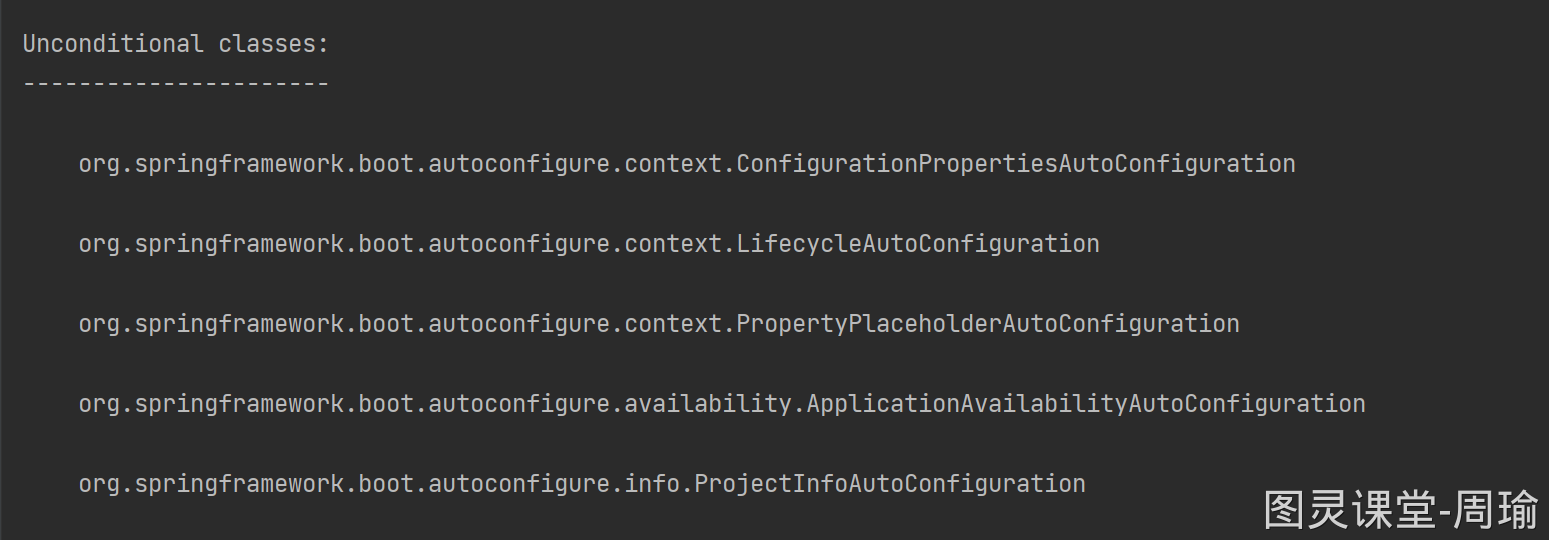
可以看到这个匹配结果分别记录了:
	1.哪些自动配置类的条件是匹配的
	2.哪些自动配置类的条件是不匹配的,并且具体原因也会打印出来,比如是哪个类不存在
	3.哪些自动配置类是无条件的
这个功能的实现,是Spring解析具体的自动配置类上的各种条件注解的时候统计的,每解析一个条件注解,就会把结果记录在ConditionEvaluationReport对象中,当Spring容器启动完成后,会发布一个ContextRefreshedEvent事件,而SpringBoot提供了一个ConditionEvaluationReportLoggingListener会处理这个事件,接收到这个事件后就会把统计结果进行打印。
自动配置类解析的大体流程为:
	1.读取spring.factories中的所有自动配置类
	2.看是否配置了需要排除的自动配置类,进行排除
	3.然后利用spring-autoconfigure-metadata.properties文件来过滤掉一些自动配置类(条件中指定的类不存在的自动配置类)
	4.解析过滤后自动配置类,判断自动配置类所有的条件注解,条件全部符合才会真正去解析自动配置类上的其他内容,比如@Bean(也会进行条件判断)
5、Spring Boot整合Tomcat底层原理
通过前面我们会SpringBoot的自动配置机制、Starter机制、启动过程的底层分析,我们拿一个实际的业务案例来串讲一下,那就是SpringBoot和Tomcat的整合。
我们知道,只要我们的项目添加的starter为:spring-boot-starter-web,那么我们启动项目时,SpringBoot就会自动启动一个Tomcat。
那么这是怎么做到的呢?
首先我们可以发现,在spring-boot-starter-web这个starter中,其实简介的引入了spring-boot-starter-tomcat这个starter,这个spring-boot-starter-tomcat又引入了tomcat-embed-core依赖,所以只要我们项目中依赖了spring-boot-starter-web就相当于依赖了Tomcat。
然后在SpringBoot众多的自动配置类中,有一个自动配置类叫做ServletWebServerFactoryAutoConfiguration,定义为:
ServletWebServerFactoryAutoConfiguration
@Configuration(proxyBeanMethods = false)
@AutoConfigureOrder(Ordered.HIGHEST_PRECEDENCE)
@ConditionalOnClass(ServletRequest.class)
@ConditionalOnWebApplication(type = Type.SERVLET)
@EnableConfigurationProperties(ServerProperties.class)
@Import({ ServletWebServerFactoryAutoConfiguration.BeanPostProcessorsRegistrar.class,
		ServletWebServerFactoryConfiguration.EmbeddedTomcat.class,
		ServletWebServerFactoryConfiguration.EmbeddedJetty.class,
		ServletWebServerFactoryConfiguration.EmbeddedUndertow.class })
public class ServletWebServerFactoryAutoConfiguration {
首先看这个自动配置类所需要的条件:
	1.@ConditionalOnClass(ServletRequest.class):表示项目依赖中要有ServletRequest类(server api)
	2.@ConditionalOnWebApplication(type = Type.SERVLET):表示项目应用类型得是SpringMVC(讲启动过程的时候就知道如何判断一个SpringBoot应用的类型了)
在上面提到的spring-boot-starter-web中,其实还间接的引入了spring-web、spring-webmvc等依赖,这就使得第二个条件满足,而对于第一个条件的ServletRequest类,虽然它是Servlet规范中的类,但是在我们所依赖的tomcat-embed-core这个jar包中是存在这个类的,这是因为Tomcat在自己的源码中把Servlet规范中的一些代码也包含进去了,比如:
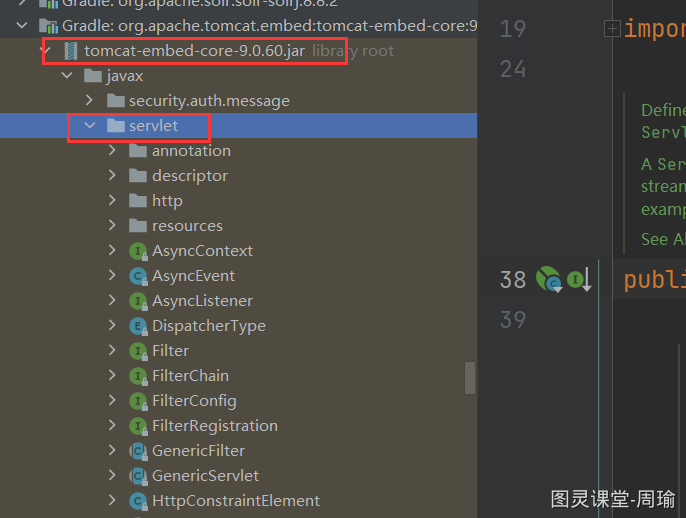
这就使得ServletWebServerFactoryAutoConfiguration这个自动配置的两个条件都符合,那么Spring就能去解析它,一解析它就发现这个自动配置类Import进来了三个类:
	1.ServletWebServerFactoryConfiguration.EmbeddedTomcat.class
	2.ServletWebServerFactoryConfiguration.EmbeddedJetty.class
	3.ServletWebServerFactoryConfiguration.EmbeddedUndertow.class
很明显,Import进来的这三个类应该是差不多,我们看EmbeddedTomcat这个类:
EmbeddedTomcat
	@Configuration(proxyBeanMethods = false)
	@ConditionalOnClass({ Servlet.class, Tomcat.class, UpgradeProtocol.class })
	@ConditionalOnMissingBean(value = ServletWebServerFactory.class, search = SearchStrategy.CURRENT)
	static class EmbeddedTomcat {

		@Bean
		TomcatServletWebServerFactory tomcatServletWebServerFactory(
				ObjectProvider<TomcatConnectorCustomizer> connectorCustomizers,
				ObjectProvider<TomcatContextCustomizer> contextCustomizers,
				ObjectProvider<TomcatProtocolHandlerCustomizer<?>> protocolHandlerCustomizers) {
			TomcatServletWebServerFactory factory = new TomcatServletWebServerFactory();

			// orderedStream()调用时会去Spring容器中找到TomcatConnectorCustomizer类型的Bean,默认是没有的,程序员可以自己定义
			factory.getTomcatConnectorCustomizers()
					.addAll(connectorCustomizers.orderedStream().collect(Collectors.toList()));
			factory.getTomcatContextCustomizers()
					.addAll(contextCustomizers.orderedStream().collect(Collectors.toList()));
			factory.getTomcatProtocolHandlerCustomizers()
					.addAll(protocolHandlerCustomizers.orderedStream().collect(Collectors.toList()));
			return factory;
		}
可以发现这个类是一个配置类,所以Spring也会来解析它,不过它也有两个条件:
1.@ConditionalOnClass({ Servlet.class, Tomcat.class, UpgradeProtocol.class }):项目依赖中要有Servlet.class、Tomcat.class、UpgradeProtocol.class这三个类,这个条件比较容易理解,项目依赖中有Tomcat的类,那这个条件就符合。
2.@ConditionalOnMissingBean(value = ServletWebServerFactory.class, search = SearchStrategy.CURRENT),项目中没有ServletWebServerFactory类型的Bean,因为这个配置类的内部就是定义了一个TomcatServletWebServerFactory类型的Bean,TomcatServletWebServerFactory实现了ServletWebServerFactory接口,所以这个条件注解的意思就是,如果程序员自己没有定义ServletWebServerFactory类型的Bean,那么就符合条件,不然,如果程序员自己定义了ServletWebServerFactory类型的Bean,那么条件就不符合,也就导致SpringBoot给我们定义的TomcatServletWebServerFactory这个Bean就不会生效,最终生效的就是程序员自己定义的。
所以,通常只要我们项目依赖中有Tomcat依赖,那就符合条件,那最终Spring容器中就会有TomcatServletWebServerFactory这个Bean。
对于另外的EmbeddedJetty和EmbeddedUndertow,也差不多,都是判断项目依赖中是否有Jetty和Undertow的依赖,如果有,那么对应在Spring容器中就会存在JettyServletWebServerFactory类型的Bean、或者存在UndertowServletWebServerFactory类型的Bean。
总结一下:
1.有Tomcat依赖,就有TomcatServletWebServerFactory这个Bean
2.有Jetty依赖,就有JettyServletWebServerFactory这个Bean
3.有Undertow依赖,就有UndertowServletWebServerFactory这个Bean
那么SpringBoot给我们配置的这几个Bean到底有什么用呢?
我们前面说到,TomcatServletWebServerFactory实现了ServletWebServerFactory这个接口,这个接口的定义为:
点击查看代码
@FunctionalInterface
public interface ServletWebServerFactory {
    WebServer getWebServer(ServletContextInitializer... initializers);
}

public interface WebServer {
    void start() throws WebServerException;

    void stop() throws WebServerException;

    int getPort();
}
我们发现ServletWebServerFactory其实就是用来获得WebServer对象的,而WebServer拥有启动、停止、获取端口等方法,那么很自然,我们就发现WebServer其实指的就是Tomcat、Jetty、Undertow,而TomcatServletWebServerFactory就是用来生成Tomcat所对应的WebServer对象,具体一点就是TomcatWebServer对象,并且在生成TomcatWebServer对象时会把Tomcat给启动起来,在源码中,调用TomcatServletWebServerFactory对象的getWebServer()方法时就会启动Tomcat。
我们再来看TomcatServletWebServerFactory这个Bean的定义:
要构造这个Bean,Spring会从Spring容器中获取到TomcatConnectorCustomizer、TomcatContextCustomizer、TomcatProtocolHandlerCustomizer这三个类型的Bean,然后把它们添加到TomcatServletWebServerFactory对象中去,很明显这三种Bean是用来配置Tomcat的,比如:
1.TomcatConnectorCustomizer:是用来配置Tomcat中的Connector组件的
2.TomcatContextCustomizer:是用来配置Tomcat中的Context组件的
3.TomcatProtocolHandlerCustomizer:是用来配置Tomcat中的ProtocolHandler组件的
也就是我们可以通过定义TomcatConnectorCustomizer类型的Bean,来对Tomcat进行配置,比如:
TomcatConnectorCustomizer
    @Bean
    public TomcatConnectorCustomizer tomcatConnectorCustomizer(){
        return new TomcatConnectorCustomizer() {
            @Override
            public void customize(Connector connector) {
                connector.setPort(888);
            }
        };
    }
这样Tomcat就会绑定8888这个端口。
有了TomcatServletWebServerFactory这个Bean之后,在SpringBoot的启动过程中,会执行ServletWebServerApplicationContext的onRefresh()方法,而这个方法会调用createWebServer()方法,而这个方法中最为重要的两行代码为:
点击查看代码
ServletWebServerFactory factory = this.getWebServerFactory();
this.webServer = factory.getWebServer(new ServletContextInitializer[]{this.getSelfInitializer()});
很明显,getWebServerFactory()负责获取具体的ServletWebServerFactory对象,要么是TomcatServletWebServerFactory对象,要么是JettyServletWebServerFactory对象,要么是UndertowServletWebServerFactory对象,注意只能获取到一个,然后调用该对象的getWebServer方法,启动对应的Tomcat、或者Jetty、或者Undertow。
getWebServerFactory方法中的逻辑比较简单,获取Spring容器中的ServletWebServerFactory类型的Bean对象,如果没有获取到则抛异常,如果找到多个也抛异常,也就是在Spring容器中只能有一个ServletWebServerFactory类型的Bean对象。
拿到TomcatServletWebServerFactory对象后,就调用它的getWebServer方法,而在这个方法中就会生成一个Tomcat对象,并且利用前面的TomcatConnectorCustomizer等等会Tomcat对象进行配置,最后启动Tomcat。
这样在启动应用时就完成了Tomcat的启动,到此我们通过这个案例也看到了具体的Starter机制、自动配置的具体使用。
不过额外有一点要提一下,我们前面提到了我们可以利用TomcatConnectorCustomizer对Tomca中的Connector组件进行配置,我们可能会想到默认情况下,SpringBoot是不是就是提供了一个TomcatConnectorCustomizer的Bean,然后给Connector配置了8080端口,或者从Environment对象中获取server.port配置,并设置到Connector中去呢?
并不是,因为如果SpringBoot这么实现,那么默认就得提供三个ConnectorCustomizer的Bean,一个TomcatConnectorCustomizer、一个JettyConnectorCustomizer、一个UndertowConnectorCustomizer,这是比较不恰当的,我们知道默认情况下,不管我们是用Tomcat,还是Jetty,还是Undertow,它们启动时绑定的都是8080端口,也就是说SpringBoot并不会根据不同的WebServer设置不同的端口,也就是说SpringBoot只会给WebServer设置端口,而不会区分WebServer的不同实现。
所以在自动配置类ServletWebServerFactoryAutoConfiguration中,会定义一个ServletWebServerFactoryCustomizer类型的Bean,定义为:
ServletWebServerFactoryCustomizer
	@Bean
	public ServletWebServerFactoryCustomizer servletWebServerFactoryCustomizer(ServerProperties serverProperties,
			ObjectProvider<WebListenerRegistrar> webListenerRegistrars,
			ObjectProvider<CookieSameSiteSupplier> cookieSameSiteSuppliers) {
		return new ServletWebServerFactoryCustomizer(serverProperties,
				webListenerRegistrars.orderedStream().collect(Collectors.toList()),
				cookieSameSiteSuppliers.orderedStream().collect(Collectors.toList()));
	}
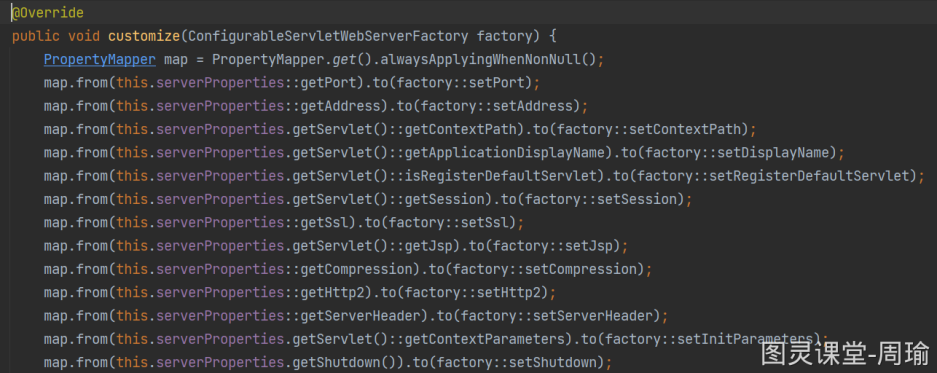
这个Bean会接收一个ServerProperties的Bean,ServerProperties的Bean对应的就是properties文件中前缀为server的配置,我们可以利用ServerProperties对象的getPort方法获取到我们所配置的server.port的值。
而ServletWebServerFactoryCustomizer是针对一个ServletWebServerFactory的自定义器,也就是用来配置TomcatServletWebServerFactory这个Bean的,到时候ServletWebServerFactoryCustomizer就会利用ServerProperties对象来对TomcatServletWebServerFactory对象进行设置。
在ServletWebServerFactoryAutoConfiguration这个自动配置上,除开Import了EmbeddedTomcat、EmbeddedJetty、EmbeddedUndertow这三个配置类,还Import了一个ServletWebServerFactoryAutoConfiguration.BeanPostProcessorsRegistrar.class,这个BeanPostProcessorsRegistrar会向Spring容器中注册一个WebServerFactoryCustomizerBeanPostProcessor类型的Bean。
WebServerFactoryCustomizerBeanPostProcessor是一个BeanPosrtProcessor,它专门用来处理类型为WebServerFactory的Bean对象,而我们的TomcatServletWebServerFactory、JettyServletWebServerFactory、UndertowServletWebServerFactory也都实现了这个接口,所以不管当前项目依赖的情况,只要在Spring在创建比如TomcatServletWebServerFactory这个Bean时,WebServerFactoryCustomizerBeanPostProcessor就会对它进行处理,处理的逻辑为:
1.从Spring容器中拿到WebServerFactoryCustomizer类型的Bean,也就是前面说的ServletWebServerFactoryCustomizer对象
2.然后调用ServletWebServerFactoryCustomizer对象的customize方法,把TomcatServletWebServerFactory对象传入进去
3.customize方法中就会从ServerProperties对象获取各种配置,然后设置给TomcatServletWebServerFactory对象
这样当TomcatServletWebServerFactory这个Bean对象创建完成后,它里面的很多属性,比如port,就已经是程序员所配置的值了,后续执行getWebServer方法时,就直接获取自己的属性,比如port属性,设置给Tomcat,然后再利用TomcatConnectorCustomizer等会下进行处理,最后启动Tomcat。
到此,SpringBoot整合Tomcat的核心原理就分析完了,主要涉及的东西有:
1.spring-boot-starter-web:会自动引入Tomcat、SpringMVC的依赖
2.ServletWebServerFactoryAutoConfiguration:自动配置类
3.ServletWebServerFactoryAutoConfiguration.BeanPostProcessorsRegistrar:用来注册WebServerFactoryCustomizerBeanPostProcessor
4.ServletWebServerFactoryConfiguration.EmbeddedTomcat:配置TomcatServletWebServerFactory
5.ServletWebServerFactoryConfiguration.EmbeddedJetty:配置JettyServletWebServerFactory
6.ServletWebServerFactoryConfiguration.EmbeddedUndertow:配置UndertowServletWebServerFactory
7.ServletWebServerFactoryCustomizer:用来配置ServletWebServerFactory
8.WebServerFactoryCustomizerBeanPostProcessor:是一个BeanPostProcessor,利用ServletWebServerFactoryCustomizer来配置ServletWebServerFactory
9.ServletWebServerApplicationContext中的onRefresh()方法:负责启动Tomcat
SpringBoot中的底层原理实现中,条件注解时非常重要的,因为条件注解直接决定了一个Bean在什么条件下才会生效,前面已经整理过了SpringBoot中有哪些条件注解,这里就不再重复,本节我们来看看非常核心的两个条件注解@ConditionalOnClass和@ConditionalOnBean的底层是如何实现的。
6、条件注解
SpringBoot中的条件注解有:
1.ConditionalOnBean:是否存在某个某类或某个名字的Bean
2.ConditionalOnMissingBean:是否缺失某个某类或某个名字的Bean
3.ConditionalOnSingleCandidate:是否符合指定类型的Bean只有一个
4.ConditionalOnClass:是否存在某个类
5.ConditionalOnMissingClass:是否缺失某个类
6.ConditionalOnExpression:指定的表达式返回的是true还是false
7.ConditionalOnJava:判断Java版本
8.ConditionalOnJndi:JNDI指定的资源是否存在
9.ConditionalOnWebApplication:当前应用是一个Web应用
10.ConditionalOnNotWebApplication:当前应用不是一个Web应用
11.ConditionalOnProperty:Environment中是否存在某个属性
12.ConditionalOnResource:指定的资源是否存在
13.ConditionalOnWarDeployment:当前项目是不是以War包部署的方式运行
14.ConditionalOnCloudPlatform:是不是在某个云平台上
当然我们也可以利用@Conditional来自定义条件注解。
条件注解是可以写在类上和方法上的,如果某个条件注解写在了自动配置类上,那该自动配置类会不会生效就要看当前条件能不能符合,或者条件注解写在某个@Bean修饰的方法上,那这个Bean生不生效就看当前条件符不符合。
具体原理是:
1.Spring在解析某个自动配置类时,会先检查该自动配置类上是否有条件注解,如果有,则进一步判断该条件注解所指定的条件当前能不能满足,如果满足了则继续解析该配置类,如果不满足则不进行解析了,也就是配置类所定义的Bean都得不到解析,也就是相当于没有这些Bean了。
2.同理,Spring在解析某个@Bean的方法时,也会先判断方法上是否有条件注解,然后进行解析,如果不满足条件,则该Bean不会生效
我们可以发现,SpringBoot的自动配置,实际上就是SpringBoot的源码中预先写好了一些配置类,预先定义好了一些Bean,我们在用SpringBoot时,这些配置类就已经在我们项目的依赖中了,而这些自动配置类或自动配置Bean到底生不生效,就看具体所指定的条件了。
6.1 自定义条件注解
SpringBoot中众多的条件注解,都是基于Spring中的@Conditional来实现的,所以我们先来用一下@Conditional注解。
根据定义我们在用@Conditional注解时,需要指定一个或多个Condition的实现类,所以我们先来提供一个实现类:
点击查看代码
public class ZhouyuCondition implements Condition {
    @Override
    public boolean matches(ConditionContext context, AnnotatedTypeMetadata metadata) {
        return false;
    }
}
很明显,我们可以在matches方法中来定义条件逻辑:
1.ConditionContext:表示条件上下文,可以通过ConditionContext获取到当前的类加载器、BeanFactory、Environment环境变量对象
2.AnnotatedTypeMetadata:表示当前正在进行条件判断的Bean所对应的类信息,或方法信息(比如@Bean定义的一个Bean),可以通过AnnotatedTypeMetadata获取到当前类或方法相关的信息,从而就可以拿到条件注解的信息,当然如果一个Bean上使用了多个条件注解,那么在解析过程中都可以获取到,同时也能获取Bean上定义的其他注解信息
了解这些,我们就来看看@ConditionalOnClass是如何工作的
6.2 condition底层工作原理
6.2.1 @ConditionalOnClass的底层工作原理
ZhouyuConfiguration
@Configuration
@ConditionalOnClass(name = "com.zhouyu.Jetty")
@ConditionalOnMissingClass(value = "com.zhouyu.Tomcat")
public class ZhouyuConfiguration  {
}
我们在ZhouyuConfiguration这个类上使用了两个条件注解:
1.@ConditionalOnClass(name = "com.zhouyu.Jetty"):条件是项目依赖中存在"com.zhouyu.Jetty"这个类,则表示符合条件
2.@ConditionalOnMissingClass(value = "com.zhouyu.Tomcat"):条件是项目依赖中不存在"com.zhouyu.Tomcat"这个类,则表示符合条件
这两个注解对应的都是@Conditional(OnClassCondition.class),那在OnClassCondition类中是如何对这两个注解进行区分的呢?
Spring在解析到ZhouyuConfiguration这个配置时,发现该类上用到了条件注解就会进行条件解析,相关源码如下:
点击查看代码
                var4 = conditions.iterator();

                Condition condition;
                ConfigurationCondition.ConfigurationPhase requiredPhase;
                do {
                    do {
                        if (!var4.hasNext()) {
                            return false;
                        }

                        condition = (Condition)var4.next();
                        requiredPhase = null;
                        if (condition instanceof ConfigurationCondition) {
                            requiredPhase = ((ConfigurationCondition)condition).getConfigurationPhase();
                        }
                    } while(requiredPhase != null && requiredPhase != phase);
                } while(condition.matches(this.context, metadata));
我们继续看OnClassCondition的matches()方法的实现。
OnClassCondition类继承了FilteringSpringBootCondition,FilteringSpringBootCondition类又继承了SpringBootCondition,而SpringBootCondition实现了Condition接口,matches()方法也是在SpringBootCondition这个类中实现的:
matches
	@Override
	public final boolean matches(ConditionContext context, AnnotatedTypeMetadata metadata) {
		// 针对每个条件注解进行条件判断

		// 条件注解写在了哪个类上,或哪个方法上
		String classOrMethodName = getClassOrMethodName(metadata);
		try {
			// 条件的判断结果
			ConditionOutcome outcome = getMatchOutcome(context, metadata);

			// 如果log的日志级别为trace,那就直接记录当前条件的判断结果
			logOutcome(classOrMethodName, outcome);

			// 将判断结果记录到ConditionEvaluationReport中
			//ConditionEvaluationReportLoggingListener会在收到ContextRefreshedEvent事件后把判断结果用日志的方式打印出来
			recordEvaluation(context, classOrMethodName, outcome);
			return outcome.isMatch();
		}
		catch (NoClassDefFoundError ex) {
			throw new IllegalStateException("Could not evaluate condition on " + classOrMethodName + " due to "
					+ ex.getMessage() + " not found. Make sure your own configuration does not rely on "
					+ "that class. This can also happen if you are "
					+ "@ComponentScanning a springframework package (e.g. if you "
					+ "put a @ComponentScan in the default package by mistake)", ex);
		}
		catch (RuntimeException ex) {
			throw new IllegalStateException("Error processing condition on " + getName(metadata), ex);
		}
	}
getMatchOutcome
	@Override
	public ConditionOutcome getMatchOutcome(ConditionContext context, AnnotatedTypeMetadata metadata) {
		ClassLoader classLoader = context.getClassLoader();
		ConditionMessage matchMessage = ConditionMessage.empty();

		// 拿到ConditionalOnClass注解中的value值,也就是要判断是否存在的类名
		List<String> onClasses = getCandidates(metadata, ConditionalOnClass.class);
		if (onClasses != null) {
			// 判断onClasses中不存在的类
			List<String> missing = filter(onClasses, ClassNameFilter.MISSING, classLoader);
			// 如果有缺失的类,那就表示不匹配
			if (!missing.isEmpty()) {
				return ConditionOutcome.noMatch(ConditionMessage.forCondition(ConditionalOnClass.class)
						.didNotFind("required class", "required classes").items(Style.QUOTE, missing));
			}
			// 否则就表示匹配
			matchMessage = matchMessage.andCondition(ConditionalOnClass.class)
					.found("required class", "required classes")
					.items(Style.QUOTE, filter(onClasses, ClassNameFilter.PRESENT, classLoader));
		}

		// 和上面类似,只不过是判断onMissingClasses是不是全部缺失,如果是则表示匹配
		List<String> onMissingClasses = getCandidates(metadata, ConditionalOnMissingClass.class);
		if (onMissingClasses != null) {
			List<String> present = filter(onMissingClasses, ClassNameFilter.PRESENT, classLoader);
			if (!present.isEmpty()) {
				return ConditionOutcome.noMatch(ConditionMessage.forCondition(ConditionalOnMissingClass.class)
						.found("unwanted class", "unwanted classes").items(Style.QUOTE, present));
			}
			matchMessage = matchMessage.andCondition(ConditionalOnMissingClass.class)
					.didNotFind("unwanted class", "unwanted classes")
					.items(Style.QUOTE, filter(onMissingClasses, ClassNameFilter.MISSING, classLoader));
		}
		return ConditionOutcome.match(matchMessage);
	}
因为ConditionalOnClass注解和ConditionalOnMissingClass注解的逻辑是比较类似的,所以在源码中都是在OnClassCondition这个类中实现的,假如一个类上即有@ConditionalOnClass,也有@ConditionalOnMissingClass
1.如果@ConditionalOnClass条件匹配、@ConditionalOnMissingClass条件也匹配,那么getMatchOutcome方法会执行两次
2.如果@ConditionalOnClass条件不匹配,那么getMatchOutcome方法会执行一次
3.如果@ConditionalOnClass条件匹配、@ConditionalOnMissingClass条件不匹配,那么getMatchOutcome方法也只会执行一次,因为在getMatchOutcome方法处理了这种情况
上面提到的ClassNameFilter.MISSING和ClassNameFilter.PRESENT也比较简单,代码如下:
ClassNameFilter
	//主要就是用类加载器,来判断类是否存在。
	protected static Class<?> resolve(String className, ClassLoader classLoader) throws ClassNotFoundException {
		if (classLoader != null) {
			return Class.forName(className, false, classLoader);
		}
		return Class.forName(className);
	}

	protected enum ClassNameFilter {

		PRESENT {

			@Override
			public boolean matches(String className, ClassLoader classLoader) {
				return isPresent(className, classLoader);
			}

		},

		MISSING {

			@Override
			public boolean matches(String className, ClassLoader classLoader) {
				return !isPresent(className, classLoader);
			}

		};

		abstract boolean matches(String className, ClassLoader classLoader);

		static boolean isPresent(String className, ClassLoader classLoader) {
			if (classLoader == null) {
				classLoader = ClassUtils.getDefaultClassLoader();
			}
			try {
				resolve(className, classLoader);
				return true;
			}
			catch (Throwable ex) {
				return false;
			}
		}

	}
6.2.2 @ConditionalOnBean的底层工作原理
@ConditionalOnBean和@ConditionalOnClass的底层实现应该是差不多的,一个是判断Bean存不存在,一个是判断类存不存在,事实上也确实差不多。
首先@ConditionalOnBean和@ConditionalOnMissingBean对应的都是OnBeanCondition类,OnBeanCondition类也是继承了SpringBootCondition,所以SpringBootCondition类中的getMatchOutcome方法才是匹配逻辑:
getMatchOutcome
	@Override
	public ConditionOutcome getMatchOutcome(ConditionContext context, AnnotatedTypeMetadata metadata) {
		ConditionMessage matchMessage = ConditionMessage.empty();
		MergedAnnotations annotations = metadata.getAnnotations();

		// 如果存在ConditionalOnBean注解
		if (annotations.isPresent(ConditionalOnBean.class)) {
			Spec<ConditionalOnBean> spec = new Spec<>(context, metadata, annotations, ConditionalOnBean.class);
			MatchResult matchResult = getMatchingBeans(context, spec);

			// 如果某个Bean不存在
			if (!matchResult.isAllMatched()) {
				String reason = createOnBeanNoMatchReason(matchResult);
				return ConditionOutcome.noMatch(spec.message().because(reason));
			}

			// 所有Bean都存在
			matchMessage = spec.message(matchMessage).found("bean", "beans").items(Style.QUOTE,
					matchResult.getNamesOfAllMatches());
		}

		// 如果存在ConditionalOnSingleCandidate注解
		if (metadata.isAnnotated(ConditionalOnSingleCandidate.class.getName())) {
			Spec<ConditionalOnSingleCandidate> spec = new SingleCandidateSpec(context, metadata, annotations);
			MatchResult matchResult = getMatchingBeans(context, spec);

			// Bean不存在
			if (!matchResult.isAllMatched()) {
				return ConditionOutcome.noMatch(spec.message().didNotFind("any beans").atAll());
			}

			// Bean存在
			Set<String> allBeans = matchResult.getNamesOfAllMatches();

			// 如果只有一个
			if (allBeans.size() == 1) {
				matchMessage = spec.message(matchMessage).found("a single bean").items(Style.QUOTE, allBeans);
			}
			else {
				// 如果有多个
				List<String> primaryBeans = getPrimaryBeans(context.getBeanFactory(), allBeans,
						spec.getStrategy() == SearchStrategy.ALL);

				// 没有主Bean,那就不匹配
				if (primaryBeans.isEmpty()) {
					return ConditionOutcome.noMatch(
							spec.message().didNotFind("a primary bean from beans").items(Style.QUOTE, allBeans));
				}
				// 有多个主Bean,那就不匹配
				if (primaryBeans.size() > 1) {
					return ConditionOutcome
							.noMatch(spec.message().found("multiple primary beans").items(Style.QUOTE, primaryBeans));
				}

				// 只有一个主Bean
				matchMessage = spec.message(matchMessage)
						.found("a single primary bean '" + primaryBeans.get(0) + "' from beans")
						.items(Style.QUOTE, allBeans);
			}
		}

		// 存在ConditionalOnMissingBean注解
		if (metadata.isAnnotated(ConditionalOnMissingBean.class.getName())) {
			Spec<ConditionalOnMissingBean> spec = new Spec<>(context, metadata, annotations,
					ConditionalOnMissingBean.class);
			MatchResult matchResult = getMatchingBeans(context, spec);

			//有任意一个Bean存在,那就条件不匹配
			if (matchResult.isAnyMatched()) {
				String reason = createOnMissingBeanNoMatchReason(matchResult);
				return ConditionOutcome.noMatch(spec.message().because(reason));
			}

			// 都不存在在,则匹配
			matchMessage = spec.message(matchMessage).didNotFind("any beans").atAll();
		}
		return ConditionOutcome.match(matchMessage);
	}
逻辑流程为:
1.当前在解析的类或方法上,是否有@ConditionalOnBean注解,如果有则生成对应的Spec对象,该对象中包含了用户指定的,要判断的是否存在的Bean的类型
2.调用getMatchingBeans方法进行条件判断,MatchResult为条件判断结果
3.只要判断出来某一个Bean不存在,则return,表示条件不匹配
4.只要所有Bean都存在,则继续执行下面代码
5.当前在解析的类或方法上,是否有@ConditionalOnSingleCandidate注解,如果有则生成对应的SingleCandidateSpec对象,该对象中包含了用户指定的,要判断的是否存在的Bean的类型(只能指定一个类型),并且该类型的Bean只能有一个
6.调用getMatchingBeans方法进行条件判断,MatchResult为条件判断结果
7.指定类型的Bean如果不存在,则return,表示条件不匹配
8.如果指定类型的Bean存在,但是存在多个,那就看是否存在主Bean(加了@primary注解的Bean),并且只能有一个主Bean,如果没有,则return,表示条件不匹配
9.如果只有一个主Bean,则表示条件匹配,继续执行下面代码
10.当前在解析的类或方法上,是否有@ConditionalOnMissingBean注解,如果有则生成对应的Spec对象,该对象中包含了用户指定的,要判断的是否缺失的Bean的类型
11.调用getMatchingBeans方法进行条件判断,MatchResult为条件判断结果
12.只要有任意一个Bean存在,则return,表示条件不匹配
13.都存在,则表示条件匹配
14.结束
getMatchingBeans方法中会利用BeanFactory去获取指定类型的Bean,如果没有指定类型的Bean,则会将该类型记录在MatchResult对象的unmatchedTypes集合中,如果有该类型的Bean,则会把该Bean的beanName记录在MatchResult对象的matchedNames集合中,所以MatchResult对象中记录了,哪些类没有对应的Bean,哪些类有对应的Bean。
@ConditionalOnClass和@ConditionalOnBean,这两个条件注解的工作原理就分析到这,总结以下流程就是:
1.Spring在解析某个配置类,或某个Bean定义时
2.如果发现它们上面用到了条件注解,就会取出所有的条件的条件注解,并生成对应的条件对象,比如OnBeanCondition对象、OnClassCondition对象
3.从而依次调用条件对象的matches方法,进行条件匹配,看是否符合条件
4.而条件匹配逻辑中,会拿到@ConditionalOnClass和@ConditionalOnBean等条件注解的信息,比如要判断哪些类存在、哪些Bean存在
5.然后利用ClassLaoder、BeanFactory来进行判断
6.最后只有所有条件注解的条件都匹配,那么当前配置类或Bean定义才算符合条件
三、SpringBoot启动过程源码解析
1、构造SpringApplication对象
1.1 推测web应用类型
1.如果项目依赖中存在org.springframework.web.reactive.DispatcherHandler,并且不存在org.springframework.web.servlet.DispatcherServlet,那么应用类型为WebApplicationType.REACTIVE
2.如果项目依赖中不存在org.springframework.web.reactive.DispatcherHandler,也不存在org.springframework.web.servlet.DispatcherServlet,那么应用类型为WebApplicationType.NONE
3.否则,应用类型为WebApplicationType.SERVLET
1.2 获取BootstrapRegistryInitializer对象
1.从"META-INF/spring.factories"中读取key为BootstrapRegistryInitializer类型的扩展点,并实例化出对应扩展点对象
2.BootstrapRegistryInitializer的作用是可以初始化BootstrapRegistry
3.上面的DefaultBootstrapContext对象就是一个BootstrapRegistry,可以用来注册一些对象,这些对象可以用在从SpringBoot启动到Spring容器初始化完成的过程中
4.我的理解:没有Spring容器之前就利用BootstrapRegistry来共享一些对象,有了Spring容器之后就利用Spring容器来共享一些对象
1.3 获取ApplicationContextInitializer对象
1.从"META-INF/spring.factories"中读取key为ApplicationContextInitializer类型的扩展点,并实例化出对应扩展点对象
2.顾名思义,ApplicationContextInitializer是用来初始化Spring容器ApplicationContext对象的,比如可以利用ApplicationContextInitializer来向Spring容器中添加ApplicationListener
1.4 获取ApplicationListener对象
1.从"META-INF/spring.factories"中读取key为ApplicationListener类型的扩展点,并实例化出对应扩展点对象
2.ApplicationListener是Spring中的监听器,并不是SpringBoot中的新概念,不多解释了
1.5 推测出Main类(main()方法所在的类)
没什么具体的作用,逻辑是根据当前线程的调用栈来判断main()方法在哪个类,哪个类就是Main类
2、run(String... args)方法
2.创建DefaultBootstrapContext对象
3.利用BootstrapRegistryInitializer初始化DefaultBootstrapContext对象
4.获取SpringApplicationRunListeners
这三个步骤没什么特殊的
2.1 触发SpringApplicationRunListener的starting()
默认情况下SpringBoot提供了一个EventPublishingRunListener,它实现了SpringApplicationRunListener接口,默认情况下会利用EventPublishingRunListener发布一个ApplicationContextInitializedEvent事件,程序员可以通过定义ApplicationListener来消费这个事件
2.2 创建Environment对象
Environment对象表示环境变量,该对象内部主要包含了:
1.当前操作系统的环境变量
2.JVM的一些配置信息
3.-D方式所配置的JVM环境变量
2.3 触发SpringApplicationRunListener的environmentPrepared()
默认情况下会利用EventPublishingRunListener发布一个ApplicationEnvironmentPreparedEvent事件,程序员可以通过定义ApplicationListener来消费这个事件,比如默认情况下会有一个EnvironmentPostProcessorApplicationListener来消费这个事件,而这个ApplicationListener接收到这个事件之后,就会解析application.properties、application.yml文件,并添加到Environment对象中去。
2.4 打印Banner
没什么特殊的
2.5 创建Spring容器对象(ApplicationContext)
会利用ApplicationContextFactory.DEFAULT,根据应用类型创建对应的Spring容器。
ApplicationContextFactory.DEFAULT为:
点击查看代码
	ApplicationContextFactory DEFAULT = (webApplicationType) -> {
		try {
			switch (webApplicationType) {
			case SERVLET:
				return new AnnotationConfigServletWebServerApplicationContext();
			case REACTIVE:
				return new AnnotationConfigReactiveWebServerApplicationContext();
			default:
				return new AnnotationConfigApplicationContext();
			}
		}
		catch (Exception ex) {
			throw new IllegalStateException("Unable create a default ApplicationContext instance, "
					+ "you may need a custom ApplicationContextFactory", ex);
		}
	};
在它的initialize()方法中会:
1.将Spring容器赋值给它的applicationContext属性
2.并且往Spring容器中添加一个ConditionEvaluationReportListener(ConditionEvaluationReportLoggingListener的内部类),它是一个ApplicationListener
3.并生成一个ConditionEvaluationReport对象赋值给它的report属性
ConditionEvaluationReportListener会负责接收ContextRefreshedEvent事件,也就是Spring容器一旦启动完毕就会触发ContextRefreshedEvent,ConditionEvaluationReportListener就会打印自动配置类的条件评估报告。
2.7 触发SpringApplicationRunListener的contextPrepared()
默认情况下会利用EventPublishingRunListener发布一个ApplicationContextInitializedEvent事件,默认情况下暂时没有ApplicationListener消费了这个事件
2.8 调用DefaultBootstrapContext对象的close()
没什么特殊的,忽略
2.9 将启动类作为配置类注册到Spring容器中(load()方法)
将SpringApplication.run(MyApplication.class);中传入进来的类,比如MyApplication.class,作为Spring容器的配置类
2.10 触发SpringApplicationRunListener的contextLoaded()
默认情况下会利用EventPublishingRunListener发布一个ApplicationPreparedEvent事件
2.11 刷新Spring容器
调用Spring容器的refresh()方法,结合第9、13步,相当于执行了这样一个流程:
1.AnnotationConfigApplicationContext applicationContext = new AnnotationConfigApplicationContext();
2.applicationContext .register(MyApplication.class)
3.applicationContext .refresh()
2.12 触发SpringApplicationRunListener的started()
发布ApplicationStartedEvent事件和AvailabilityChangeEvent事件,AvailabilityChangeEvent事件表示状态变更状态,变更后的状态为LivenessState.CORRECT
LivenessState枚举有两个值:
1.CORRECT:表示当前应用正常运行中
2.BROKEN:表示当前应用还在运行,但是内部出现问题,暂时还没发现哪里用到了
2.13 调用ApplicationRunner和CommandLineRunner
1.获取Spring容器中的ApplicationRunner类型的Bean
2.获取Spring容器中的CommandLineRunner类型的Bean
3.执行它们的run()
2.14 触发SpringApplicationRunListener的ready()
发布ApplicationReadyEvent事件和AvailabilityChangeEvent事件,AvailabilityChangeEvent事件表示状态变更状态,变更后的状态为ReadinessState.ACCEPTING_TRAFFIC
ReadinessState枚举有两个值:
1.ACCEPTING_TRAFFIC:表示当前应用准备接收请求
2.REFUSING_TRAFFIC:表示当前应用拒绝接收请求,比如Tomcat关闭时,就会发布AvailabilityChangeEvent事件,并且状态为REFUSING_TRAFFIC
2.15 上述过程抛异常了就触发SpringApplicationRunListener的failed()
发布ApplicationFailedEvent事件
3、配置文件解析
流程图:https://www.processon.com/view/link/62d399e71e08530a89222b23
SpringBoot完整的配置优先级
https://docs.spring.io/spring-boot/docs/current/reference/html/features.html#features.external-config
优先级由低到高(注意和我写的顺序是反的,我写的是由高到底)
1.Default properties (specified by setting SpringApplication.setDefaultProperties).
2.@PropertySource annotations on your @Configuration classes. Please note that such property sources are not added to the Environment until the application context is being refreshed. This is too late to configure certain properties such as logging.* and spring.main.* which are read before refresh begins.
3.Config data (such as application.properties files).
4.A RandomValuePropertySource that has properties only in random.*.
5.OS environment variables.
6.Java System properties (System.getProperties()).
7.JNDI attributes from java:comp/env. 不管它
8.ServletContext init parameters.
9.ServletConfig init parameters.
10.Properties from SPRING_APPLICATION_JSON (inline JSON embedded in an environment variable or system property).
11.Command line arguments.
12.properties attribute on your tests. Available on @SpringBootTest and the test annotations for testing a particular slice of your application.
13.@TestPropertySource annotations on your tests.
14.Devtools global settings properties in the $HOME/.config/spring-boot directory when devtools is active.

