使用kubeadm添加新节点到集群及相关问题解决
kubeadm join 使用 token 过期之后(24小时过期),重新生成token
一、重启生成新token
# 创建新token
kubeadm token create

# 查看是否存在有效的 token 值
kubeadm token list
二、获取CA证书 sha256 编码 hash 值
openssl x509 -pubkey -in /etc/kubernetes/pki/ca.crt | openssl rsa -pubin -outform der 2>/dev/null | openssl dgst -sha256 -hex | sed 's/^.* //'
三、新节点加入集群
kubeadm join 192.168.0.211:6443 --token ai3o14.d555o4992nyl3zgd  --discovery-token-ca-cert-hash  sha256:e4435c11751a06472a4971a2a5811a2e6b7f2ce0689e78201a58082fc3dfc3c7
###  token使用上面新生成的token
四、快捷方式、一步到位(可以直接在master节点使用步骤四)
1 2 3 | [root@k8s-master package]# kubeadm token create --print-join-commandW0701 13:21:47.900325 85831 configset.go:348] WARNING: kubeadm cannot validate component configs for API groups [kubelet.config.k8s.io kubeproxy.config.k8s.io]kubeadm join 192.168.130.136:6443 --token gs9y86.lhmu23t9kqfax09z --discovery-token-ca-cert-hash sha256:87408a5d81bd21c845d94630f4ff8fc9a2e206e9f88396d2d2966cec083d7f20 |
五、新节点加入到集群
在新加入节点执行如下命令:
1 | kubeadm join 192.168.130.136:6443 --token gs9y86.lhmu23t9kqfax09z --discovery-token-ca-cert-hash sha256:87408a5d81bd21c845d94630f4ff8fc9a2e206e9f88396d2d2966cec083d7f20 |
如果环境没有问题执行完此条命令就能成功加入到集群。
遇到问题:
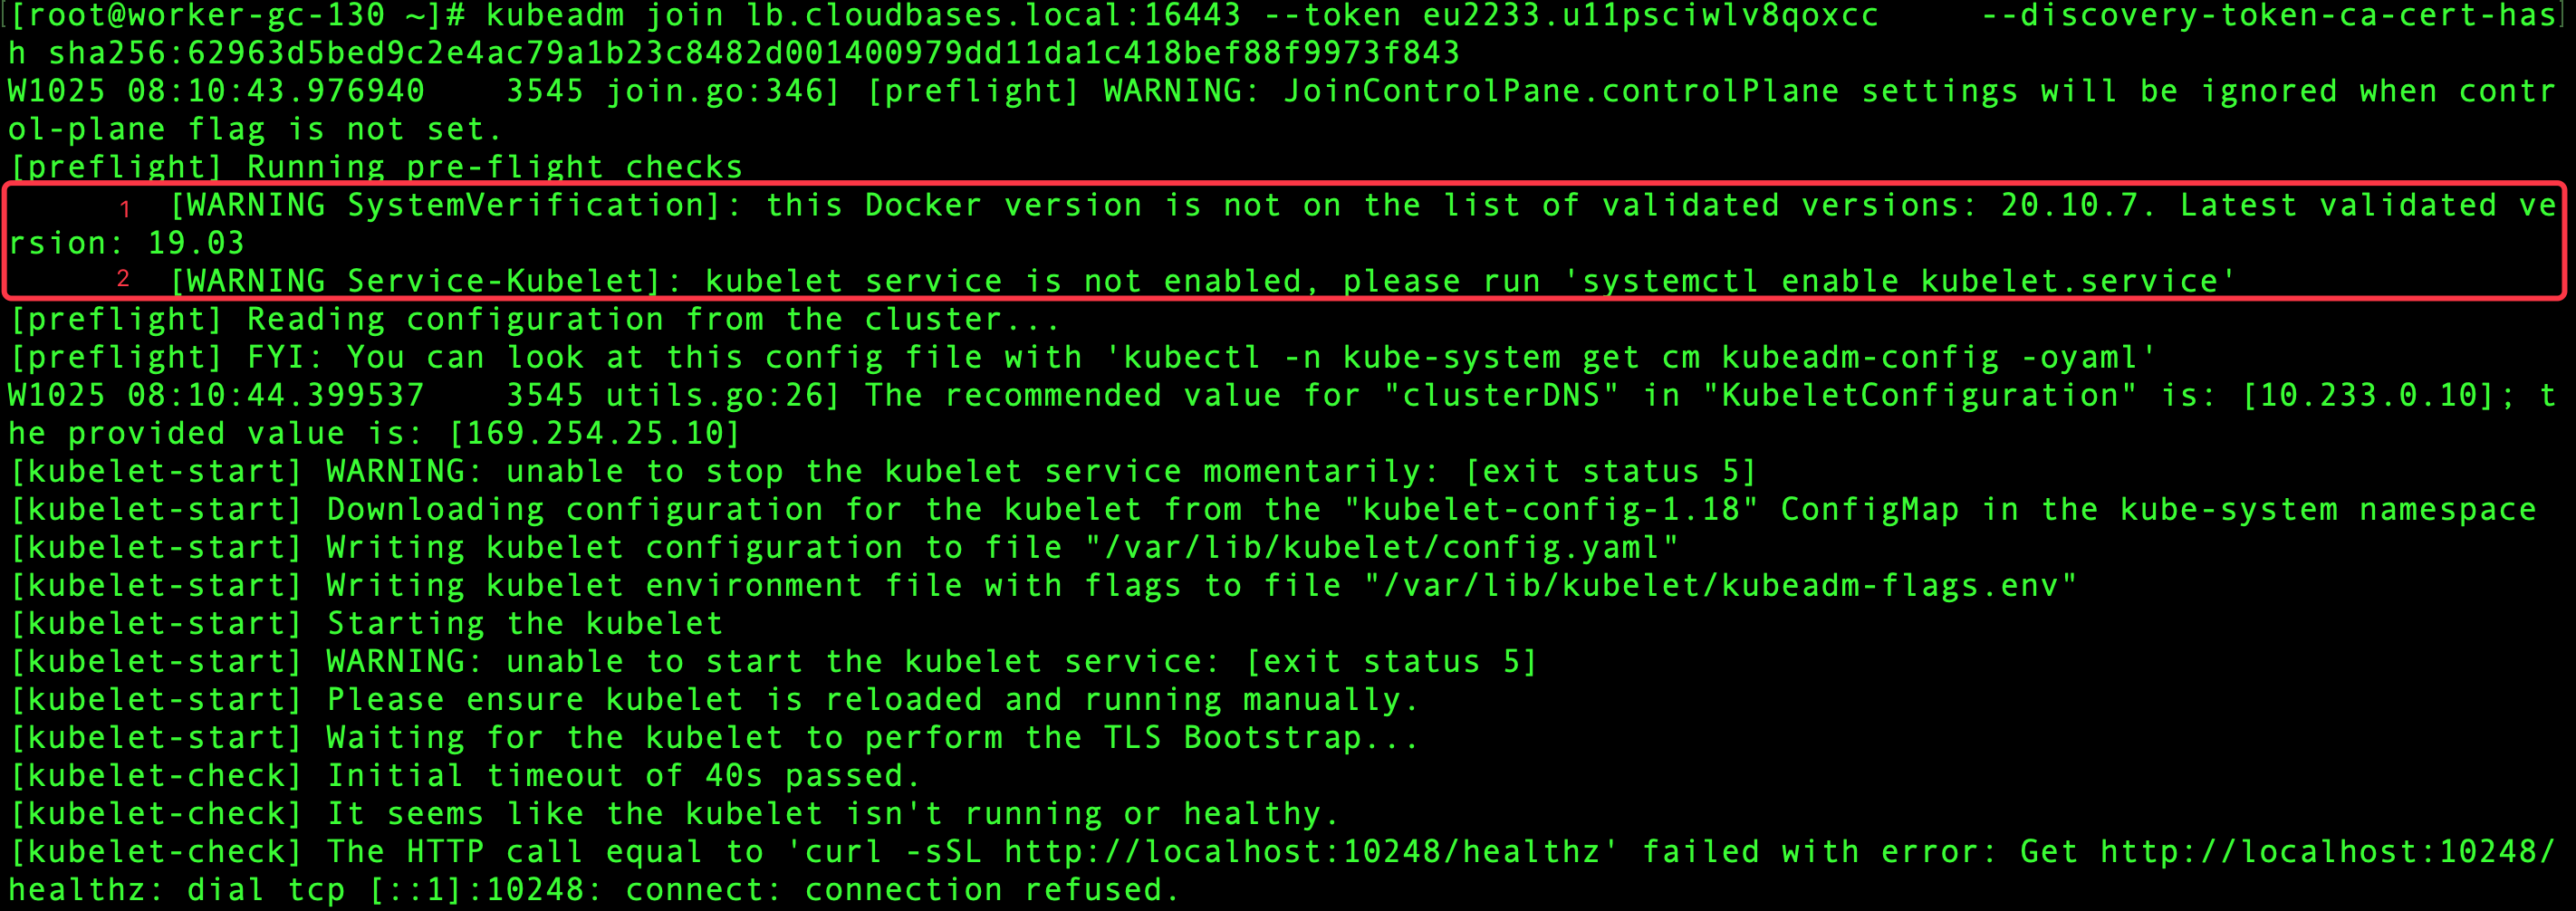
由于master节点到新节点的TCP 22端口不通,并且新节点不能连外网所以纳入过程中遇到了很多问题。
1、首先解决两个Waring。

1)、修改docker driver(这个可以不调整)
解决方法:
调整docker配置文件,添加以下内容
1 | "exec-opts": ["native.cgroupdriver=systemd"] |
2)、由于master节点到新节点的TCP 22端口不通,许多文件需要手扶。
vim /etc/systemd/system/kubelet.service
1 2 3 4 5 6 7 8 9 10 11 12 | [Unit]Description=kubelet: The Kubernetes Node AgentDocumentation=http://kubernetes.io/docs/[Service]ExecStart=/usr/local/bin/kubeletRestart=alwaysStartLimitInterval=0RestartSec=10[Install]WantedBy=multi-user.targetx |
2、修改完上面2个Warning后就能成功启动kubelet后台服务了,查看kubelet日志看到报如下错误

解决方案:
1)、同样需要手扶文件,将master节点/opt/cni/bin目录下的所有文件拷贝到新节点的/opt/cni/bin目录下

2)、vim /etc/cni/net.d/10-flannel.conflist
1 2 3 4 5 6 7 8 9 10 11 12 13 14 15 16 17 18 19 | { "name": "cbr0", "cniVersion": "0.3.1", "plugins": [ { "type": "flannel", "delegate": { "hairpinMode": true, "isDefaultGateway": true } }, { "type": "portmap", "capabilities": { "portMappings": true } } ]} |
3)、另外生成manifests目录,此目录下没有文件,mkdir /etc/kubernetes/manifests/ 即可。
3、如果过程中还有[kubelet-check] The HTTP call equal to 'curl -sSL http://localhost:10248/healthz' failed with error: Get http://localhost:10248/healthz: dial tcp [::1]:10248: connect: connection refused.这个错误,调整kubelet配置文件,加入如下配置即可。
1 2 3 4 5 | root@test2 ~]# vim /etc/systemd/system/kubelet.service.d/10-kubeadm.conf...Environment="KUBELET_SYSTEM_PODS_ARGS=--pod-manifest-path=/etc/kubernetes/manifests --allow-privileged=true --fail-swap-on=false"[root@test2 ~]# systemctl daemon-reload[root@test2 ~]# systemctl restart kubelet |
分类:
Mesos&Kubernetes


【推荐】国内首个AI IDE,深度理解中文开发场景,立即下载体验Trae
【推荐】编程新体验,更懂你的AI,立即体验豆包MarsCode编程助手
【推荐】抖音旗下AI助手豆包,你的智能百科全书,全免费不限次数
【推荐】轻量又高性能的 SSH 工具 IShell:AI 加持,快人一步
· .NET Core 中如何实现缓存的预热?
· 从 HTTP 原因短语缺失研究 HTTP/2 和 HTTP/3 的设计差异
· AI与.NET技术实操系列:向量存储与相似性搜索在 .NET 中的实现
· 基于Microsoft.Extensions.AI核心库实现RAG应用
· Linux系列:如何用heaptrack跟踪.NET程序的非托管内存泄露
· TypeScript + Deepseek 打造卜卦网站:技术与玄学的结合
· 阿里巴巴 QwQ-32B真的超越了 DeepSeek R-1吗?
· 【译】Visual Studio 中新的强大生产力特性
· 张高兴的大模型开发实战:(一)使用 Selenium 进行网页爬虫
· 【设计模式】告别冗长if-else语句:使用策略模式优化代码结构
2019-10-25 Loadrunner11压测过程问题总结
2016-10-25 在centos7上安装docker&&离线安装