(转)darknet 训练心得
1. 安装darknet
使用Git克隆源码
git clone https://github.com/pjreddie/darknet
我们可能需要修改Makefile,主要修改前三行,配置使用GPU(CUDA),CUDNN,OPENCV
GPU=1
CUDNN=1
OPENCV=1
之后运行
make -j8
wget https://pjreddie.com/media/files/yolov3.weights
./darknet detect cfg/yolov3.cfg yolov3.weights data/dog.jpg
安装成功!
2. 准备数据集
使用LabelImg工具对图片进行标注,LabelImg安装和使用方法请自行百度。标注完成后得到两个文件夹Annotations和JPEGImages,分别存放xml格式标注内容和图片。
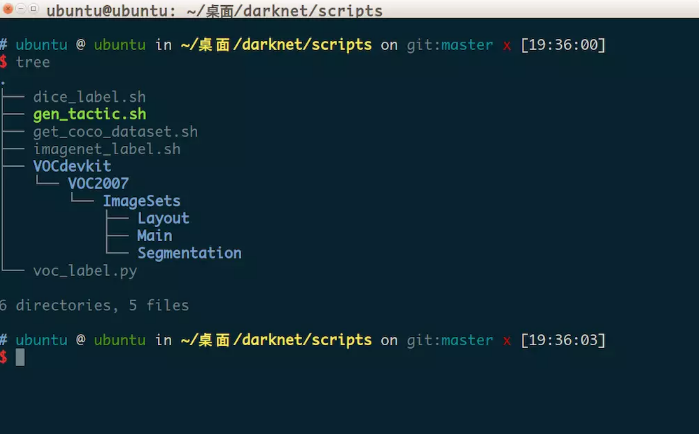
在scripts文件夹下构建目录树
mkdir -p scripts/VOCdevkit/VOC2007
cd scripts/VOCdevkit/VOC2007
mkdir ImageSets
cd ImageSets
mkdir Layout Main Segmentation
此时scripts文件夹下目录树应当为:
然后将Annotations和JPEGImages文件夹复制到VOC2007目录下
值得注意的是,VOC2007的年份2007应当和xml标注文件中的年份相同
接下来把traindata.py和trans.py拷贝到VOC2007目录下
其中traindata.py内容是:
#!/usr/bin/env python3
import os
import shutil

def rename_by_count(path): #按序号命名
    count = 1000
    filelist = os.listdir(path)  # 该文件夹下所有的文件(包括文件夹)
    for files in filelist:  # 遍历所有文件
        Olddir = os.path.join(path, files)  # 原来的文件路径
        if os.path.isdir(Olddir):  # 如果是文件夹则跳过
            continue
        filename = os.path.splitext(files)[0]  # 文件名
        filetype = os.path.splitext(files)[1]  # 文件扩展名
        Newdir = os.path.join(path, str(count) + filetype)  # 新的文件路径
        os.rename(Olddir, Newdir)  # 重命名
        count += 1

def listname(path,idtxtpath):
    filelist = os.listdir(path)  # 该文件夹下所有的文件(包括文件夹)
    f = open(idtxtpath, 'w')
    for files in filelist:  # 遍历所有文件
        Olddir = os.path.join(path, files)  # 原来的文件路径
        if os.path.isdir(Olddir):  # 如果是文件夹则跳过
            continue
        filename = os.path.splitext(files)[0]  # 文件名
        filetype = os.path.splitext(files)[1]  # 文件扩展名
        #Newdir = os.path.join(path, "1000" + filetype)  # 新的文件路径: path+filename+type
        f.write(filename)
        f.write('\n')
    f.close()


def imgid_list(imgpath, savepath, num):
    #rename_by_count(imgpath)
    path1 = savepath + "/validateImage"
    path2 = savepath + "/trainImage"
    if os.path.exists(path1)== False:
        os.mkdir(path1)
    if os.path.exists(path2) == False:
        os.mkdir(path2)
    xmlpath1 = savepath + "/validateImageXML"
    xmlpath2 = savepath + "/trainImageXML"
    if os.path.exists(xmlpath1)== False:
        os.mkdir(xmlpath1)
    if os.path.exists(xmlpath2) == False:
        os.mkdir(xmlpath2)
    filelist = os.listdir(imgpath)
    count = 0
    for files in filelist:
        olddir = os.path.join(imgpath, files)
        newdir1 = os.path.join(path1, files)
        newdir2 = os.path.join(path2, files)
        filename = os.path.splitext(files)[0]  # 文件名
        xmldir = savepath + "/xml"
        xmldir1 = savepath + "/validateImageXML"
        xmldir2 = savepath + "/trainImageXML"
        if count<num:
            shutil.copy(olddir, newdir1) #validate
            xmlolddir = os.path.join(xmldir, filename + ".xml")
            xmlnewdir = os.path.join(xmldir1,filename+".xml")
            shutil.copy(xmlolddir,xmlnewdir)
            shutil.copy(xmlolddir, newdir1)
        else:
            shutil.copy(olddir, newdir2)
            xmlolddir = os.path.join(xmldir, filename + ".xml")
            xmlnewdir = os.path.join(xmldir2, filename + ".xml")
            shutil.copy(xmlolddir, xmlnewdir)
            shutil.copy(xmlolddir, newdir2)
        count=count+1
    imgidtxtpath1 = savepath + "/validateImageId.txt"
    imgidtxtpath2 = savepath + "/trainImageId.txt"
    listname(path1, imgidtxtpath1)
    listname(path2, imgidtxtpath2)
#rename_by_count   # 给图片按序号给名字
savepath = os.getcwd()
imgpath = savepath+"/Image"
val_num=30   #验证集数量,可修改
imgid_list(imgpath,savepath,val_num)
trans.py内容是:
#!/usr/bin/env python3
import xml.etree.ElementTree as ET
import pickle
import string
import os
import shutil
from os import listdir, getcwd
from os.path import join

sets=[('2007', 'train'), ('2007', 'val')]

classes = ["railway_ticket", "vat_invoice"]

def convert(size, box):
    dw = 1./size[0]
    dh = 1./size[1]
    x = (box[0] + box[1])/2.0
    y = (box[2] + box[3])/2.0
    w = box[1] - box[0]
    h = box[3] - box[2]
    x = x*dw
    w = w*dw
    y = y*dh
    h = h*dh
    return (x,y,w,h)

def convert_annotation(image_id,flag,savepath):
    #s = '\xef\xbb\xbf'
    #nPos = image_id.index(s)
    #if nPos >= 0:
     #   image_id = image_id[3:]
    if flag == 0:
        in_file = open(savepath+'/trainImageXML/%s.xml' % (image_id))
        labeltxt = savepath+'/trainImageLabelTxt';
        if os.path.exists(labeltxt) == False:
            os.mkdir(labeltxt);
        out_file = open(savepath+'/trainImageLabelTxt/%s.txt' % (image_id), 'w')
        tree = ET.parse(in_file)
        root = tree.getroot()
        size = root.find('size')
        w = int(size.find('width').text)
        h = int(size.find('height').text)
    elif flag == 1:
        in_file = open(savepath+'/validateImageXML/%s.xml' % (image_id))
        labeltxt = savepath + '/validateImageLabelTxt';
        if os.path.exists(labeltxt) == False:
            os.mkdir(labeltxt);
        out_file = open(savepath+'/validateImageLabelTxt/%s.txt' % (image_id), 'w')
        tree = ET.parse(in_file)
        root = tree.getroot()
        size = root.find('size')
        w = int(size.find('width').text)
        h = int(size.find('height').text)

    for obj in root.iter('object'):
        difficult = obj.find('difficult').text
        cls = obj.find('name').text
        if cls not in classes or int(difficult) == 1:
            continue
        cls_id = classes.index(cls)
        xmlbox = obj.find('bndbox')
        b = (float(xmlbox.find('xmin').text), float(xmlbox.find('xmax').text), float(xmlbox.find('ymin').text), float(xmlbox.find('ymax').text))
        bb = convert((w,h), b)
        out_file.write(str(cls_id) + " " + " ".join([str(a) for a in bb]) + '\n')
wd = getcwd()

for year, image_set in sets:
    #savepath = "/home/wurui/CAR/wrz/pillar";
    savepath = os.getcwd();
    idtxt = savepath + "/validateImageId.txt";
    pathtxt = savepath + "/validateImagePath.txt";
    image_ids = open(idtxt).read().strip().split()
    list_file = open(pathtxt, 'w')
    s = '\xef\xbb\xbf'
    for image_id in image_ids:
        nPos = image_id.find(s)
        if nPos >= 0:
            image_id = image_id[3:]
        list_file.write('%s/validateImage/%s.jpg\n' % (wd, image_id))
        print(image_id)
        convert_annotation(image_id, 1, savepath)
    list_file.close()
    idtxt = savepath + "/trainImageId.txt";
    pathtxt = savepath + "/trainImagePath.txt" ;
    image_ids = open(idtxt).read().strip().split()
    list_file = open(pathtxt, 'w')
    s = '\xef\xbb\xbf'
    for image_id in image_ids:
        nPos = image_id.find(s)
        if nPos >= 0:
           image_id = image_id[3:]
        list_file.write('%s/trainImage/%s.jpg\n'%(wd,image_id))
        print(image_id)
        convert_annotation(image_id,0,savepath)
    list_file.close()
首先拷贝Annotations文件夹为xml,拷贝JPEGImages为Image
修改traindata.py中验证集数量val_num,推荐为总数据集的30%,修改trans.py中的sets和classes
执行
python3 traindata.py
python3 trans.py
将生成的trainImageID.txt和validateImageID.txt拷贝到ImageSets的Main目录下,并分别重命名为train.txt和val.txt,删除执行traindata.py和trans.py生成的所有文件和文件夹以及xml和Image文件夹
回到scripts文件夹
修改voc_label.py,修改sets和classes的值,
sets=[('2007', 'train'), ('2007', 'val')]
classes = ["railway_ticket", "vat_invoice"]
并将最后的两行
os.system("cat 2007_train.txt 2007_val.txt 2012_train.txt 2012_val.txt > train.txt")
os.system("cat 2007_train.txt 2007_val.txt 2007_test.txt 2012_train.txt 2012_val.txt > train.all.txt")
改成
os.system("cat 2007_train.txt 2007_val.txt > train.txt")
#os.system("cat 2007_train.txt 2007_val.txt 2007_test.txt 2012_train.txt 2012_val.txt > train.all.txt")
最后执行
python3 voc_label.py
至此,数据集准备完毕
3. 修改配置文件
回到darknet根目录下
3.1 data/
修改voc.names
修改为需要识别的类名称,每行一类
3.2 cfg/
修改yolov3.cfg
[net]
# Testing             初始batch参数要分为两类,分别为训练集和测试集,不同模式相应放开参数,#为注释符号
#batch=1
#subdivisions=1
# Training

batch=64             一批训练样本的样本数量,每batch个样本更新一次参数
subdivisions=8           batch/subdivisions作为一次性送入训练器的样本数量
                     如果内存不够大,将batch分割为subdivisions个子batch
                     (subdivisions相当于分组个数,相除结果作为一次送入训练器的样本数量)
    注意:上面这两个参数如果电脑内存小,则把batch改小一点,batch越大,训练效果越好
       Subdivisions越大,可以减轻显卡压力(分组数目越多,每组样本数量则会更少,显卡压力也会相应减少)

width=416
height=416
channels=3
                    以上三个参数为输入图像的参数信息 width和height影响网络对输入图像的分辨率,从而影响precision,只可以设置成32的倍数(为什么是32?由于使用了下采样参数是32,所以不同的尺寸大小也选择为32的倍数{320,352…..608},最小320*320,最大608*608,网络会自动改变尺寸,并继续训练的过程。)

momentum=0.9    DeepLearning1中最优化方法中的动量参数,这个值影响着梯度下降到最优值得速度 (注:SGD方法的一个缺点是其更新方向完全依赖于当前batch计算出的梯度,因而十分不稳定。Momentum算法借用了物理中的动量概念,它模拟的是物体运动时的惯性,即更新的时候在一定程度上保留之前更新的方向,同时利用当前batch的梯度微调最终的更新方向。这样一来,可以在一定程度上增加稳定性,从而学习地更快,并且还有一定摆脱局部最优的能力)

decay=0.0005                权重衰减正则项,防止过拟合,正则项往往有重要意义
//增加样本的数量,改变基础样本的状态,去增加样本整体的数量,增加样本量减少过拟合
angle=0                 通过旋转角度来生成更多训练样本
saturation = 1.5            通过调整饱和度来生成更多训练样本
exposure = 1.5              通过调整曝光量来生成更多训练样本
hue=.1                  通过调整色调来生成更多训练样本

learning_rate=0.001
学习率决定着权值更新的速度,设置得太大会使结果超过最优值,直接错过最优值,震荡回去,太小会使下降速度过慢,导致收敛过慢。如果仅靠人为干预调整参数,需要不断修改学习率。刚开始训练时可以将学习率设置的高一点,而一定轮数之后,将其减小。在训练过程中,一般根据训练轮数设置动态变化的学习率。
基本训练守则
刚开始训练时:学习率以 0.01 ~ 0.001 为宜。
一定轮数过后:逐渐减缓。
接近训练结束:学习速率的衰减应该在100倍以上。
提供参考资料学习率的调整参考https://blog.csdn.net/qq_33485434/article/details/80452941

burn_in=1000    在迭代次数小于burn_in时,其学习率的更新有一种方式,大于burn_in时,才采用policy的更新方式

max_batches = 500200      训练达到max_batches后停止学习,多个batches

policy=steps     这个是学习率调整的策略,有policy:constant, steps, exp, poly, step, sig, RANDOM,constant等方式
调整学习率的policy,有如下policy:constant, steps, exp, poly, step, sig, RANDOM
constant
保持学习率为常量,caffe里为fixed
steps
比较好理解,按照steps来改变学习率


Steps和scales相互一一对应
steps=40000,45000       下面这两个参数steps和scale是设置学习率的变化,比如迭代到40000次时,学习率衰减十倍。45000次迭代时,学习率又会在前一个学习率的基础上衰减十倍。根据batch_num调整学习率
scales=,.1,.1            学习率变化的比例,累计相乘

涉及几个参数(以后要学习的代码,具体参数可以调节)

exp
gamma=
返回base_lr*gamma^iter,iter为当前迭代次数,gamma设置为0.98

poly
power=4
max_batches=800000
对学习率进行多项式衰减。图中power为0.9

sig
学习率进行sigmod函数衰减
gamma= 0.05
step=200
根据电脑配置,主要是显卡能力调整参数
修改每一个[yolo]前面四行的filters和后面三行的classes,注意需要修改3处
[convolutional]
size=1
stride=1
pad=1
filters=255                      # 改成3*(classes + 5)
activation=linear


[yolo]
mask = 6,7,8
anchors = 10,13,  16,30,  33,23,  30,61,  62,45,  59,119,  116,90,  156,198,  373,326
classes=80                      # 修改为实际需要识别的类数量
num=9
jitter=.3
ignore_thresh = .7
truth_thresh = 1
random=1
修改voc.data为
classes= 8          # 实际需要识别的类
train  = /home/ubuntu/darknet/scripts/2007_train.txt      # 指向刚刚生成的文件2007_train.txt
valid  = /home/ubuntu/darknet/scripts/2007_val.txt        # 指向刚刚生成的文件2007_val.txt
names = data/voc.names
backup = backup
3.3 examples/
修改detector.c
void validate_detector_flip(char *datacfg, char *cfgfile, char *weightfile, char *outfile)
{
    int j;
    list *options = read_data_cfg(datacfg);
    char *valid_images = option_find_str(options, "valid", "data/train.list");
//    char *name_list = option_find_str(options, "names", "data/names.list");
    char *name_list = option_find_str(options, "names", "data/voc.names");
    char *prefix = option_find_str(options, "results", "results");
    char **names = get_labels(name_list);
    char *mapf = option_find_str(options, "map", 0);
    int *map = 0;
    if (mapf) map = read_map(mapf);
有几个函数中需要修改,建议直接搜索
修改darknet.c
  float thresh = find_float_arg(argc, argv, "-thresh", .5);
        char *filename = (argc > 4) ? argv[4]: 0;
        char *outfile = find_char_arg(argc, argv, "-out", 0);
        int fullscreen = find_arg(argc, argv, "-fullscreen");
//        test_detector("cfg/coco.data", argv[2], argv[3], filename, thresh, .5, outfile, fullscreen);
        test_detector("cfg/voc.data", argv[2], argv[3], filename, thresh, .5, outfile, fullscreen);
    } else if (0 == strcmp(argv[1], "cifar")){
        run_cifar(argc, argv);
这里也有几处需要修改
4 训练
执行
./darknet detector train cfg/voc.data cfg/yolov3.cfg
作者:我还在这里
链接:https://www.jianshu.com/p/7736e8d2ee6e
来源:简书
简书著作权归作者所有,任何形式的转载都请联系作者获得授权并注明出处。

 浙公网安备 33010602011771号