Flask和python web框架介绍
python web框架,本质都一样

	-django:大而全,内置的app多,第三方app也多
	-flaks:小而精,没有过多的内置组件,值完成web框架最基本的功能,需要借助于第三方,完成更丰富的功能
 	-web.py:是一个小巧灵活的python框架,它简单而且功能强大(国内几乎没有用的)
	-------异步web框架------
    -fastapi:python的异步web框架,不少公司再用,https://fastapi.tiangolo.com/zh/
    -sanic:python的异步web框架,供支持异步高并发请求的 web 服务
    -tornado:异步框架,用的比较少了

同步框架和异步框架的区别
	-django是同步框架还是异步框架,django3.x以后支持异步
	-同步框架的意思:一个线程只处理一个请求
 	-异步框架的意思:一个线程可以处理多个请求
	-异步框架可以很显著的提高并发量

flask介绍
Flask是一个基于Python开发并且依赖jinja2模板和Werkzeug WSGI服务的一个微型框架
-jinja2 模板语法,django的dtl,非常像
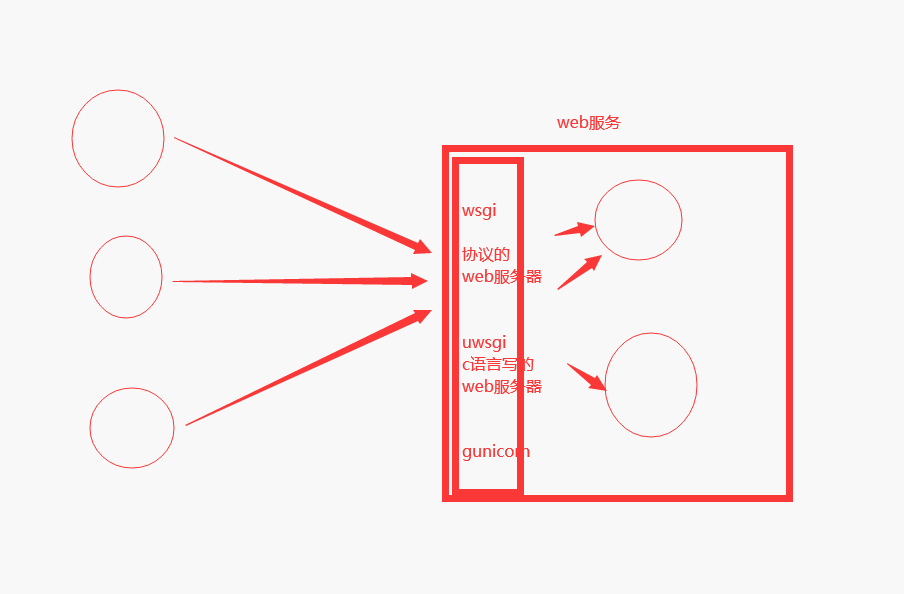
-Werkzeug WSGI 符合wsgi协议的web服务器,django使用的是wsgiref
from wsgiref.simple_server import make_server
def mya(environ, start_response):
print(environ)
start_response('200 OK', [('Content-Type', 'text/html')])
if environ.get('PATH_INFO') == '/index':
with open('index.html','rb') as f:
data=f.read()
elif environ.get('PATH_INFO') == '/login':
with open('login.html', 'rb') as f:
data = f.read()
else:
data=b'<h1>Hello, web!</h1>'
return [data]
if __name__ == '__main__':
myserver = make_server('', 8008, mya)
print('监听8010')
myserver.serve_forever()
from werkzeug.wrappers import Request, Response
@Request.application
def hello(request):
return Response('Hello World!')
if __name__ == '__main__':
from werkzeug.serving import run_simple
run_simple('localhost', 4000, hello)
Flask快速使用
安装:pip install flask 安装依赖:MarkupSafe, Werkzeug, Jinja2, flask

	-1.x 没有本质区别
    -2.x 没有本质区别,源码上动了,用起来一样
from flask import Flask
app = Flask(__name__)
@app.route('/')
def home():
return 'hello word'
if __name__ == '__main__':
app.run('127.0.0.1', 5000)
登录,显示用户信息小案例
from flask import Flask, request, render_template, redirect, session,jsonify
app = Flask(__name__)
app.secret_key = 'asdfasdfa33aef3aefads'
USERS = {
1:{'name':'张三','age':18,'gender':'男','text':"道路千万条"},
2:{'name':'李四','age':28,'gender':'男','text':"安全第一条"},
3:{'name':'王五','age':18,'gender':'女','text':"行车不规范"},
}
@app.route('/login', methods=['GET', 'POST'])
def index():
if request.method == 'GET':
return render_template('login.html')
else:
username = request.form.get('username')
password = request.form.get('password')
if username == 'lqz' and password == '123':
session['name'] = username
return redirect('/')
else:
return render_template('login.html', error='用户名或密码错误')
@app.route('/')
def home():
if session.get('name'):
return render_template('home.html',user_dict=USERS)
else:
return redirect('/login')
@app.route('/detail/<int:pk>')
def detail(pk):
if session.get('name'):
user_detail = USERS.get(pk)
return render_template('detail.html', user=user_detail)
else:
return redirect('/login')
@app.route('/test')
def test():
return jsonify([{'name':'lqz','age':19}])
if __name__ == '__main__':
app.run()
'''
# 学到的
1 注册路由 app.route(路径,methods=[请求方式get,post])
2 新手四件套:
-render_template 渲染模板 跟django有区别
-redirect 重定向
-return 字符串 返回字符串
-jsonify 返回json格式
3 请求的request对象,是全局的,直接导入使用即可,在不同视图函数中不会混乱
request.method 请求方式
request.form post请求的body体的内容转成了字典
4 session 全局的,直接导入使用即可,一定要指定秘钥app.secret_key = 'asdfasdfa33aef3aefads'
放值:session['name']='lqz'
取值:session.get('name')
5 模板的渲染
-兼容django的dtl
-更强大,可以加括号,字典可以.get .values() .items()
-{% for %}
6 转换器@app.route('/detail/<int:pk>')
'''
3.1 login.html
<!DOCTYPE html>
<html lang="en">
<head>
    <meta charset="UTF-8">
    <title>Title</title>
</head>
<body>

<form method="post">
    <p>用户名:<input type="text" name="username"></p>
    <p>密码:<input type="password" name="password"></p>
    <input type="submit" value="登录"> {{error}}
</form>
</body>
</html>
3.2 home.html
<!DOCTYPE html>
<html lang="en">
<head>
    <meta charset="UTF-8">
    <title>Title</title>
</head>
<body>
<h1>用户列表</h1>
<table>
    {% for k,v in user_dict.items() %}
    <tr>
        <td>{{k}}</td>
        <td>{{v.name}}</td>
        <td>{{v['name']}}</td>
        <td>{{v.get('name')}}</td>
        <td><a href="/detail/{{k}}">查看详细</a></td>
    </tr>
    {% endfor %}
</table>
</body>
</html>
3.3 detail.html
<!DOCTYPE html>
<html lang="en">
<head>
    <meta charset="UTF-8">
    <title>Title</title>
</head>
<body>
<p>名字是:{{user.name}}</p>
<p>年龄是:{{user['age']}}</p>
<p>性别是:{{user.get('gender')}}</p>
<p>{{user.text}}</p>


</body>
</html>
配置文件方式
-DEBUG
-SECRET_KEY
-SESSION_COOKIE_NAME
-PERMANENT_SESSION_LIFETIME
路由系统
路由本质
django中配置路由在urls.py中,写path,写在列表中
flask是基于装饰器的,大部分都用装饰器来做,少量可以抽取到一个urls.py中
@app.route('/login')
def index():
pass
-rule是路径
-其他参数都给了options
endpoint = options.pop("endpoint", None)
self.add_url_rule(rule, endpoint, f, **options)
return f
def route(self, rule: str, **options: t.Any) -> t.Callable[[T_route], T_route]:
def decorator(f: T_route) -> T_route:
endpoint = options.pop("endpoint", None)
self.add_url_rule(rule, endpoint, f, **options)
return f
return decorator
app.add_url_rule('/', endpoint=None, view_func=home, methods=['GET'])
路由参数add_url_rule
rule URL规则
view_func 视图函数名称
defaults=None 默认值,当URL中五参数,函数需要参数时,使用defaults = {'k': 'v'}为函数提供参数
endpoint=None 路径的别名,名称,用于反向解析URL,即: url_for('名称')
methods = None, 允许的请求方式,如:["GET", "POST"]
strict_slashes = None
'''
@app.route('/index', strict_slashes=False)
#访问http://www.xx.com/index/ 或http://www.xx.com/index均可
@app.route('/index', strict_slashes=True)
#仅访问http://www.xx.com/index
'''
redirect_to = None,
'''
@app.route('/index/<int:nid>', redirect_to='/home/<nid>')
'''
转换器
'default': UnicodeConverter,
'string': UnicodeConverter,
'any': AnyConverter,
'path': PathConverter,
'int': IntegerConverter,
'float': FloatConverter,
'uuid': UUIDConverter,
CBV分析
from flask import Flask,request
from flask.views import View, MethodView
app = Flask(__name__)
app.debug = True
class IndexView(MethodView):
def get(self):
print(request.method)
return 'get 请求'
def post(self):
print(request.method)
return 'post 请求'
app.add_url_rule('/index', endpoint='index', view_func=IndexView.as_view('index'))
if __name__ == '__main__':
app.run()
源码分析
1.首先路由匹配会执行as_view()这个函数,这个函数可以看到是绑定给类的方法,类在调用会将自身传入,那么我们写的视图类调用的时候会直接将我们写的视图类作为第一个参数传入,as_view执行结束会将闭包函数的内层函数view返回出去,也就是当路由匹配的时候view_func=view(),view执行返回的是执行dispatch_request
@classmethod
def as_view(cls, name, *class_args, **class_kwargs):
def view(*args, **kwargs):
self = view.view_class(*class_args, **class_kwargs)
return current_app.ensure_sync(self.dispatch_request)(*args, **kwargs)
return view
2.请求来了,执行view()---本质在执行self.dispatch_request---MethodView中的
def dispatch_request(self, **kwargs):
meth = getattr(self, request.method.lower(), None)
return current_app.ensure_sync(meth)(**kwargs)
3.总结:执行原因跟django一样,只是添加了异步操作
4.路径如果不传别名,别名就是函数名---分析源码
-@app.route('/index')--》没有传endpoint
-endpoint 就是None---》调用了app.add_url_rule,传入了None
if endpoint is None:
endpoint = _endpoint_from_view_func(view_func)
-_endpoint_from_view_func 就是返回函数的名字
5 as_view('index') 必须传参数,传进来的参数是,是【别名】
view.__name__ = name
简写成:app.add_url_rule('/index',view_func=view)
6.补充:flask的路由注册使用装饰器,如果写了一个登录认证装饰器,那么应该放在路由装饰器下面
-放在路由下面
-路由必须传endpoint,如果不传,就报错
7.视图类必须继承MethodView,如果继承View,它的dispatch_request方法没有具体实现,就必须重写dispatch_request方
8.视图类加装饰器,必须配置在类属性上【decorators】即可
decorators = [auth,]
if cls.decorators:
for decorator in cls.decorators:
view = decorator(view)
源码学到的:
1.as_view 执行流程跟django一样
2.路径如果不传别名,别名就是函数名(endpoint)
3.驶入函数加多个装饰器(上下顺序和必须传endpoint)
4.视图类必须继承MethodView,否则需要重写dispatch_request
5.视图类加装饰器,类属性decorators=[装饰器名字]
模板
py
from flask import Flask, render_template,Markup
app = Flask(__name__, template_folder='templates', static_folder='static')
app.debug=True
def add(a,b):
return a+b
@app.route('/')
def index():
a='<a href="http://www.baidu.com">点我看美女</a>'
a=Markup(a)
return render_template('index.html',name='lqz',a=a,add=add)
if __name__ == '__main__':
app.run()
html
<!DOCTYPE html>
<html lang="en">
<head>
    <meta charset="UTF-8">
    <title>Title</title>
</head>
<body>
<h1>模板语法,static</h1>
<img src="/static/1.jpg" alt="">

<h1>模板语法,if</h1>
{% if name %}
<h1>Hello {{ name }}!</h1>
{% else %}
<h1>Hello World!</h1>
{% endif %}

<h1>模板语法,标签渲染</h1>
{{a|safe}}
{{a}}

<h1>模板语法,执行函数</h1>
{{add(4,5)}}

</body>
</html>
请求与响应
请求:全局request对象
响应:四件套
from flask import Flask,request
app = Flask(__name__)
@app.route('/', methods=['POST', 'GET'])
def index():
print(request.method)
print(request.args)
print(request.form)
print(request.values)
print(request.cookies)
print(request.headers)
print(request.path)
print(request.full_path)
print(request.script_root)
print(request.url)
print(request.base_url)
print(request.url_root)
print(request.host_url)
print(request.host)
response = render_template('index.html')
res = make_response(response)
print(type(res))
res.headers['yy']='yy'
return res
if __name__ == '__main__':
app.run()
session及源码分析
from flask import Flask, request, session, render_template, redirect

app = Flask(__name__)
app.debug = True
app.secret_key = 'asdfas33asdfasf'


@app.route('/login', methods=['GET', 'POST'])
def login():
    if request.method == 'GET':
        return render_template('login.html')
    else:
        name = request.form.get('name')
        password = request.form.get('password')
        print(password)
        session['name'] = name
        return redirect('/index')


@app.route('/index', methods=['GET', 'POST'])
def index():
    return 'hello %s' % session.get('name', '匿名用户')

if __name__ == '__main__':
    app.run()
源码分析
cookie:存在于客户端浏览器的键值对
session:存在于服务端的键值对,
flask中,叫session,存在cookie中
-加密后:放到了cookir中,如果session发生了变化,我们的cookie也会跟着变
def open_session(self, app, request) :
val = request.cookies.get(self.get_cookie_name(app))
if not val:
return self.session_class()
max_age = int(app.permanent_session_lifetime.total_seconds())
try:
data = s.loads(val, max_age=max_age)
return self.session_class(data)
except BadSignature:
return self.session_class()
def save_session(self, app, session, response) :
name = self.get_cookie_name(app)
expires = self.get_expiration_time(app, session)
val = self.get_signing_serializer(app).dumps(dict(session))
response.set_cookie(
name,
val,
expires=expires,
)
扩展:想把session放到redis中,mysql中,已经有第三的
自己重写,需要写个类,重写open_session,save_session自己写
闪现
flash 翻译过来
-档次请求先把一些数据,放到某个位置
-下一次请求,把这些数据取出来,取完,就没了
作用:
1.可以跨请求,来保存数据
2.当次请求,访问出错,被重定向到其他地址,重定向到这个地址后,拿到当时的错误
用法:
-设置 闪现
-flash('%s,我错了'%name) ,可以设置多次,放到列表中
-flash('超时错误',category="debug") 分类存
-获取 闪现
-get_flashed_messages() ,取完就删除
-get_flashed_messages(category_filter=['debug'])分类取
本质:放在session中
请求扩展
请求扩展中:在请求来了,或请求走了,可以绑定一些函数,到这里就会执行这个函数,类似于django中间件

在flask中就用请求扩展,用来代替django的中间件

好几个请求扩展:
    -defore_request:请求来了会走,如果他返回了四件套,就结束了
    -after_request:请求走了会走,一定要返回response对象
    -before_first_request:第一次来了会走
    -teardown_request:无论是否出异常,会走
    -errorhandler:监听状态码:404,500
    -template_global:标签
    -template_filter:过滤器
from flask import Flask, request,render_template
app = Flask(__name__)
@app.template_global()
def add(a1, a2):
return a1 + a2
@app.template_filter()
def db(a1, a2, a3):
return a1 + a2 + a3
@app.route('/')
def index():
return render_template('index1.html')
if __name__ == '__main__':
app.run()


【推荐】国内首个AI IDE,深度理解中文开发场景,立即下载体验Trae
【推荐】编程新体验,更懂你的AI,立即体验豆包MarsCode编程助手
【推荐】抖音旗下AI助手豆包,你的智能百科全书,全免费不限次数
【推荐】轻量又高性能的 SSH 工具 IShell:AI 加持,快人一步
· 震惊!C++程序真的从main开始吗?99%的程序员都答错了
· 别再用vector<bool>了!Google高级工程师:这可能是STL最大的设计失误
· 单元测试从入门到精通
· 【硬核科普】Trae如何「偷看」你的代码?零基础破解AI编程运行原理
· 上周热点回顾(3.3-3.9)