张高兴的 Windows 10 IoT 开发笔记:使用 Lightning 中的软件 PWM 驱动 RGB LED
感觉又帮 Windows 10 IoT 开荒了,所以呢,正儿八经的写篇博客吧。其实大概半年前就想写的,那时候想做个基于 Windows 10 IoT 的小车,但树莓派原生不支持 PWM 啊。百度也搜不到,上 GitHub 转了一圈,在 @ms-iot 那发现了 Lightning ,再看最后的更新时间,还是2016中旬……Windows 10 IoT 在国内真惨,这么长时间都没人写个教程……不说废话了……
本文示例地址:https://github.com/ZhangGaoxing/windows-iot-demo/tree/master/RgbLed
Lightning 项目地址:https://github.com/ms-iot/lightning
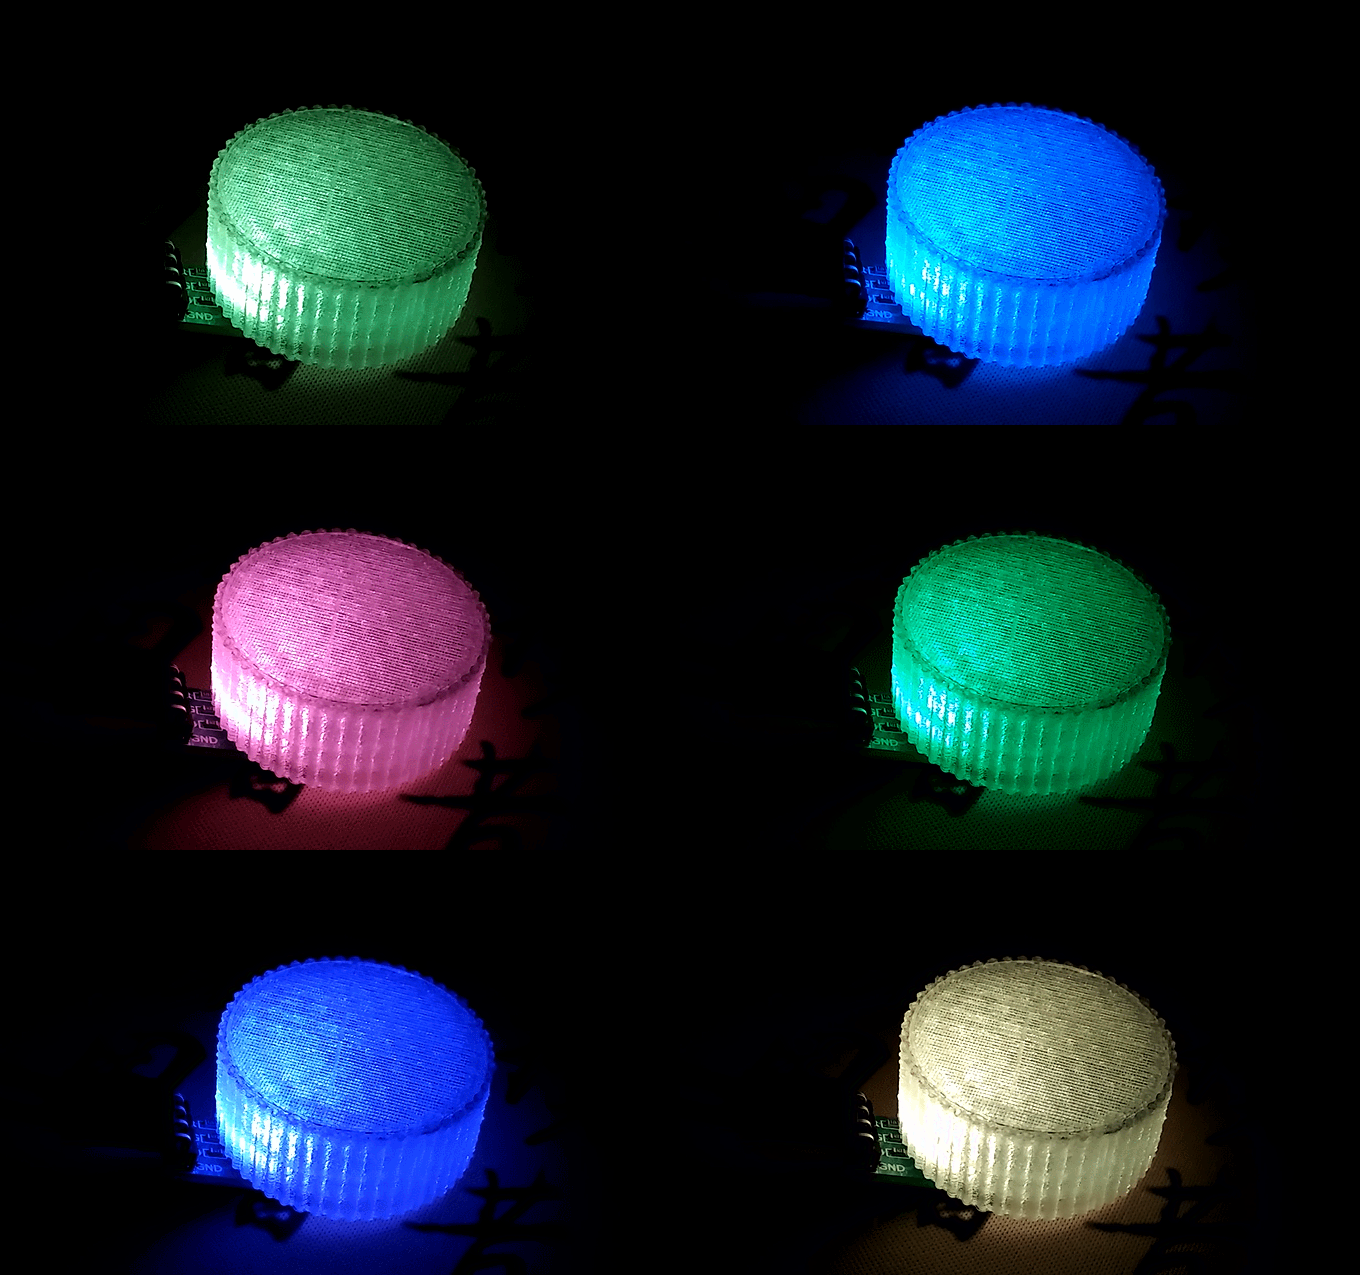
效果图:

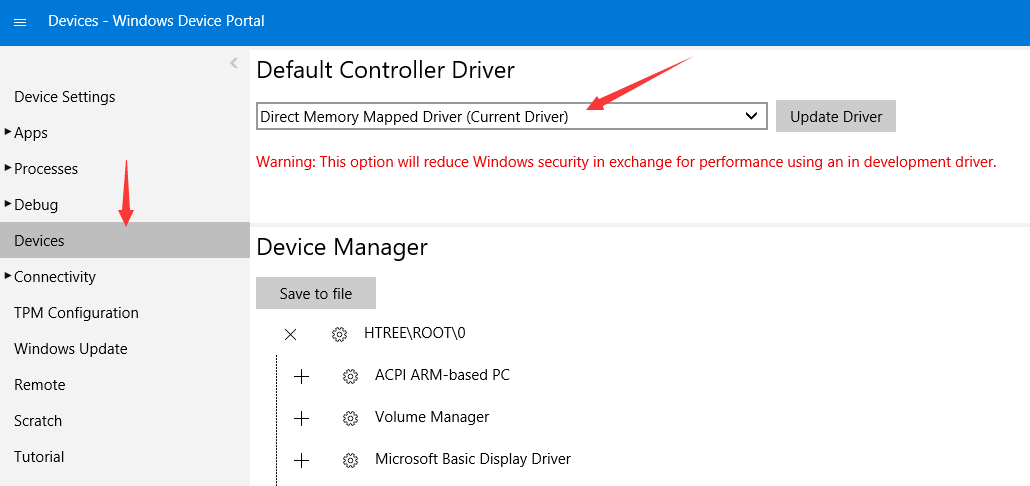
一、 更改默认控制器驱动
打开树莓派的 Windows Device Portal ,在 Devices 菜单中的 Default Controller Driver 选项,将默认的 Inbox Driver 更改为 Direct Memory Mapped Driver ,重启。

二、更改 Package.appxmanifest 配置
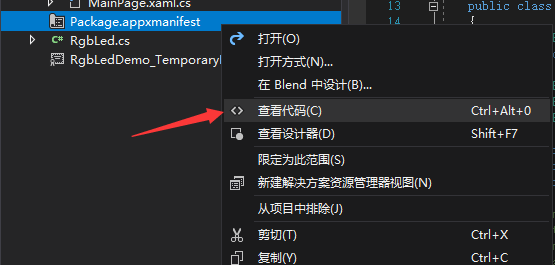
新建一个 UWP 项目,本文这里叫“RgbLedDemo”。以“查看代码”的形式打开 Package.appxmanifest 。

在 Package 标签下添加一个命名空间,并更改 IgnorableNamespaces 属性。
xmlns:iot="http://schemas.microsoft.com/appx/manifest/iot/windows10"
IgnorableNamespaces="uap mp iot"
在 Capabilities 添加如下内容
<iot:Capability Name="lowLevelDevices" />
<DeviceCapability Name="109b86ad-f53d-4b76-aa5f-821e2ddf2141"/>
三、引用 Microsoft.Iot.Lightning
在 NuGet 包管理器下搜索 Lightning 即可。

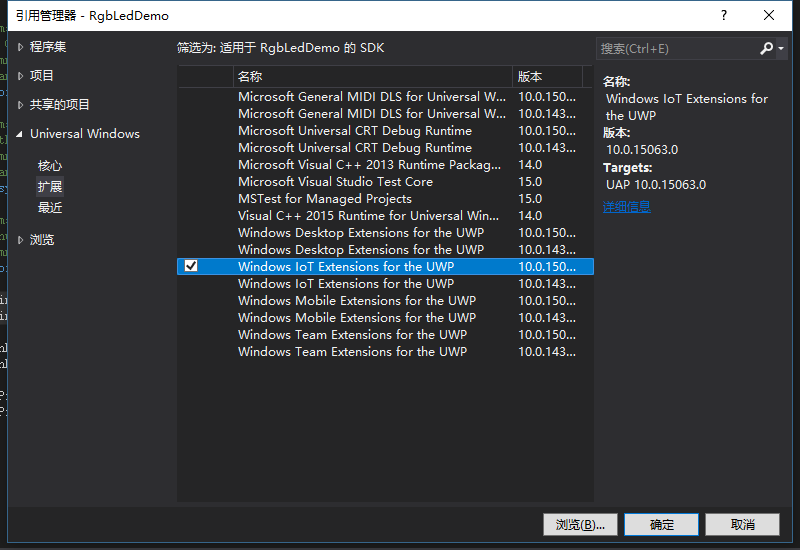
还有 Windows IoT Extensions for the UWP

四、使用 Lightning
注意引用
using Windows.Devices.Pwm;
using Microsoft.IoT.Lightning.Providers;
1. 判断 Lightning 的启用
这一步是必要的,因为使用 Lightning 必须关闭系统默认的控制器驱动,没启用的话抛出个异常就好了。
if (!LightningProvider.IsLightningEnabled)
{
    throw new NullReferenceException("Lightning isn't enabled !");
}
2. 获取软件 PWM 控制器
一切正常的情况下就该获取 Lightning 中的软件 PWM 控制器了。Lightning 中也集成了其他硬件 PWM 的控制器,因此在调用 PwmController.GetControllersAsync() 时返回的是一个集合,其中第二项是我们需要的软件 PWM 控制器。得到控制器后还需要设置 PWM 的频率,这个软件 PWM 控制器的频率范围在 40 - 1000 Hz 之间(低的可怜……),不在这个范围内的数字会抛出异常。
PwmController controller = (await PwmController.GetControllersAsync(LightningPwmProvider.GetPwmProvider()))[1];
controller.SetDesiredFrequency(1000);
3. 设置 PWM 引脚
以 Red 引脚为例。首先通过控制器来打开引脚,这里为 GPIO 17 位置的引脚。然后需要设置 Duty Cycle Percentage ,通俗点就是电压的占比,0 - 1 之间的小数。
PwmPin redPin = controller.OpenPin(17);
redPin.SetActiveDutyCyclePercentage(0);
redPin.Start();
之后要改变 LED 的亮度还是要改变 SetActiveDutyCyclePercentage(value) 的 value 值。
释放的话要先关闭 PWM。
redPin.Stop();
redPin.Dispose();
五、注意
使用 Lightning 后,之前基于默认控制器驱动编写的I2C,SPI代码会报错。但 Lightning 中集成了 I2C、SPI、GPIO 等的控制器,将其替换一下即可。
本文的项目解析部分就结束了。下面给一个呼吸灯的测试代码,我用的是共阴极 RGB LED 。代码在 GitHub 的项目中有。
/// <summary>
/// Breathing LED
/// </summary>
/// <param name="delay">Delay Time</param>
public async Task BreathingAsync(int delay)
{
    double red = 255;
    double green = 0;
    double blue = 0;

    while (red != 0 && green != 255)
    {
        redPin.SetActiveDutyCyclePercentage(red / 255.0);
        greenPin.SetActiveDutyCyclePercentage(green / 255.0);

        red--;
        green++;
        await Task.Delay(delay);
    }

    while (green != 0 && blue != 255)
    {
        greenPin.SetActiveDutyCyclePercentage(green / 255.0);
        bluePin.SetActiveDutyCyclePercentage(blue / 255.0);

        green--;
        blue++;
        await Task.Delay(delay);
    }

    while (blue != 0 && red != 255)
    {
        bluePin.SetActiveDutyCyclePercentage(blue / 255.0);
        redPin.SetActiveDutyCyclePercentage(red / 255.0);

        blue--;
        red++;
        await Task.Delay(delay);
    }
}


